Peaches & Lace Bra (Again!)

Peaches & Lace Lingerie | Cloth Habit

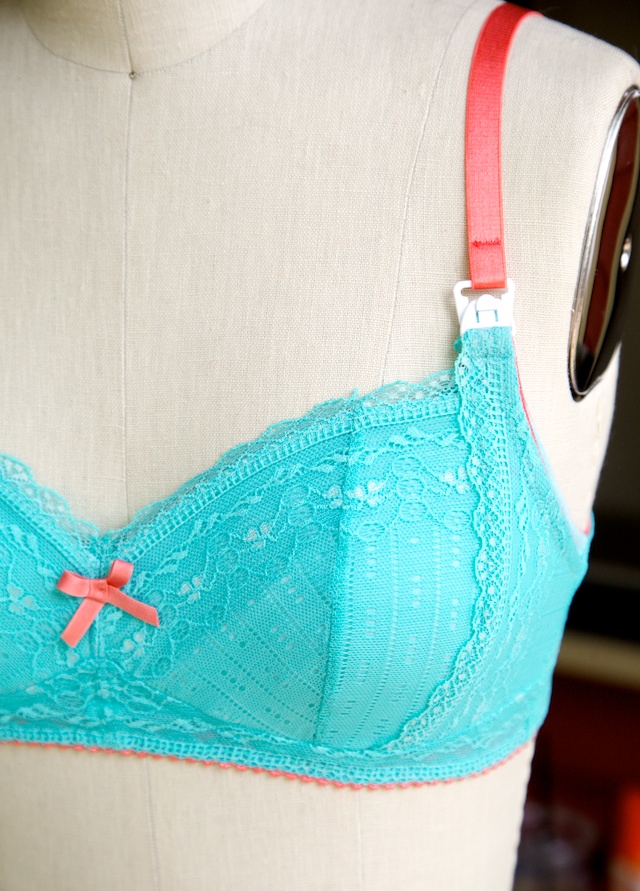
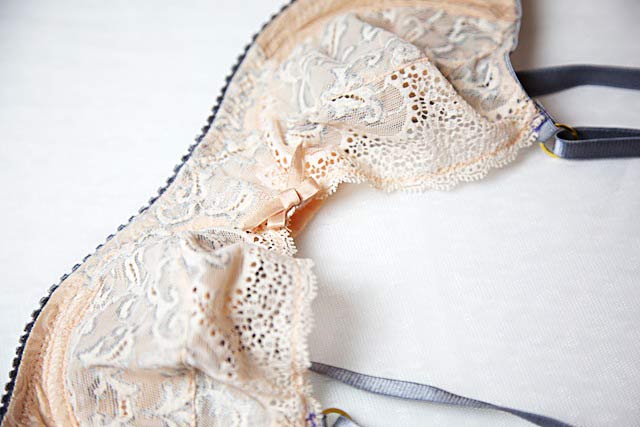
It’s been months since I made a bra just for me, so I decided to revisit one of my favorites. Ever since making my first couple of bras, I’ve rarely made the same pattern twice for myself. I count my experiments as a journey to becoming a better lingerie patternmaker–I’ve tried different underwires, cup styles, band styles, fabrics, and pattern drafting methods, and sometimes at the expense of whatever might be my dream fit.

Just like my new pair of jeans that I can’t seem to take off, I do have a couple of favorites and and one of them was the fourth one I ever made. It was messy in that I was still figuring a lot of stuff out, like how to properly get the strap elastic stitched to the cup without tearing the lace. And the band was way too big. Still, any time I wanted an “invisible bra” that felt like nothing next to my skin, this was the one I reached for, and I kept wearing it way past its expiration date. It took me two weeks to get up the nerve to cut out the underwire! It was pretty bent out of shape, but I knew it had been part of the magic fit and I wanted to trace off what I could of its shape and length so I could cut others like it.

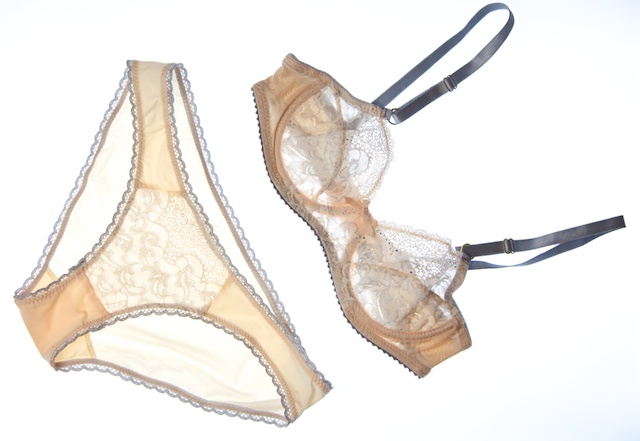
Then I went about trying to remake my original. Luckily I had just enough lace, lycra and tricot lining from my original Merckwaerdigh kit to cut the cups and add a little lace panel to the bikini.
Peaches & Lace Lingerie | Cloth Habit

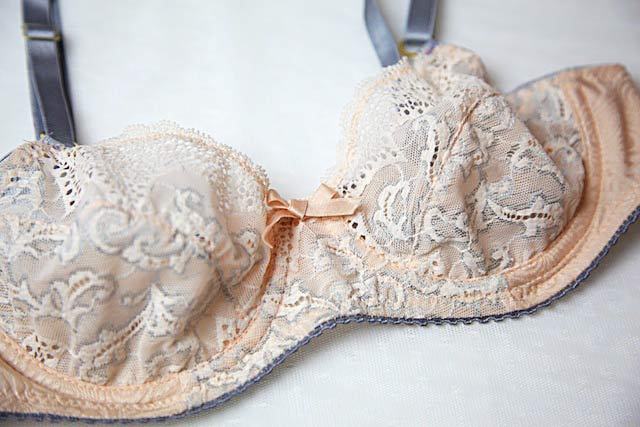
This time I removed the side seam from my original pattern, and added a seam under the cup. This let me cut the entire band from lycra and use lace and lining in the center.
Peaches & Lace Lingerie | Cloth Habit

That also meant I needed to shorten the band to remove some stretch because I no longer had a lined (and stabilized) cradle going around the entre cup. Other than that, I had to do a some tweaking to the pattern for fit. I’ve gone up in cup size… or maybe I haven’t and just noticed some things that were off in my original fit.

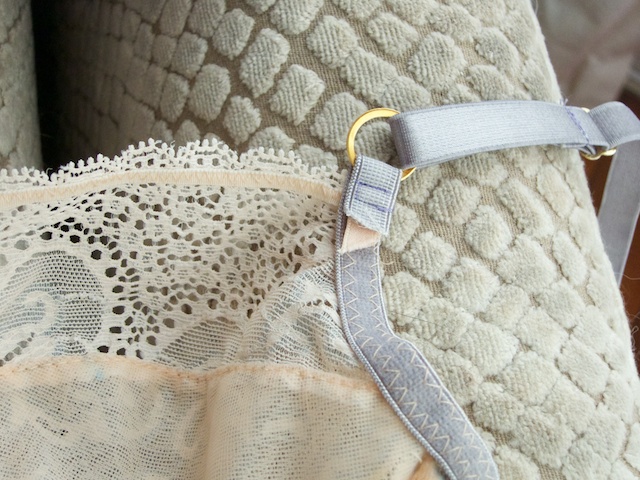
I normally prefer my strap adjusters in front, and have been playing around with different methods of making a loop at the top of the cup for the strap ring. One method involves making extending the underarm elastic past the top of the cup, and looping it over the ring, securing the elastic back on itself. With narrow or lightweight elastics, however, it’s easy for that loop to get stressed, or to stress the top of the cup. Norma Loehr’s book has a good tip on using some kind of tape to stabilize the loop. I always have a little bit of silk ribbon left over from my trims, so lately I have been using it as a “loop stabilizer”! I take a little strip of the ribbon, lay it underneath the elastic and loop the two together as one. I’m going to trim this down so the ribbon is hidden, but I left a bit hanging out so you can see what I mean:
Peaches & Lace Lingerie | Cloth Habit

If you don’t have ribbon lying around, I’m sure other things would work–twill tape, tricot tape or any stable tape narrow enough to get hidden behind the elastic.
Peaches & Lace Lingerie | Cloth Habit

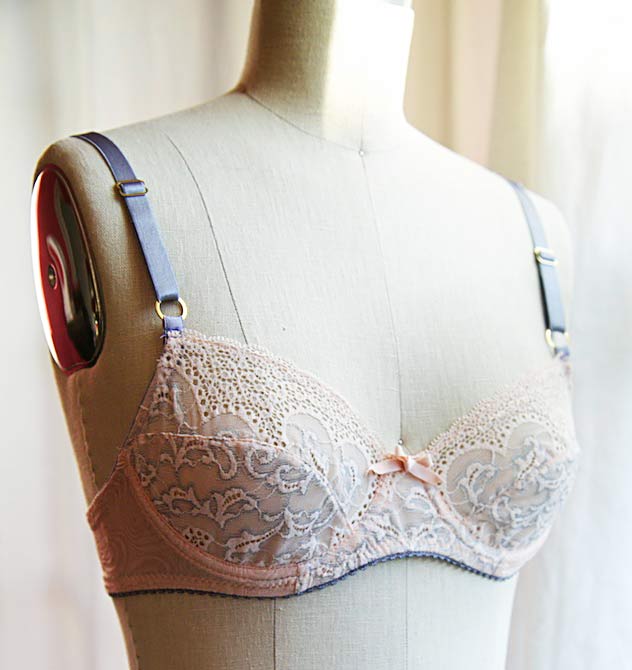
My favorite bra, back in action!

Details:

Bra pattern: Pin-up Girls Classic
Bikini: self drafted
Fabrics: Lace, tricot lining and lycra leftover from bra kit
Elastic & notions: stash and dyed to match
Dyes: Dharma Acid Dyes Silver Grey and Peach Blush
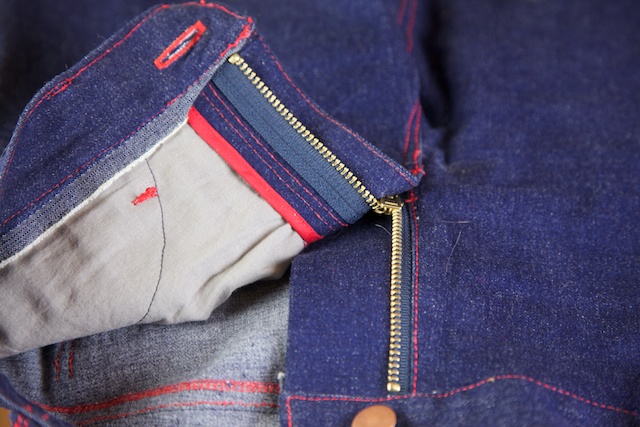
The Jeans that Broke the Machine

Handmade Skinny Jeans | Cloth Habit

Ahoy! Long time, no talk, and I have so much to share. This past month was full of sewing shenanigans. My Juki had a tantrum and is still sitting in her box awaiting someone (anyone) who can fix her, I started on a new lingerie dyeing project, and the biggest news of all–I have a new dedicated sewing space! It’s very exciting but means I have to be more organized and intentional with my sewing time because this space is outside our home.

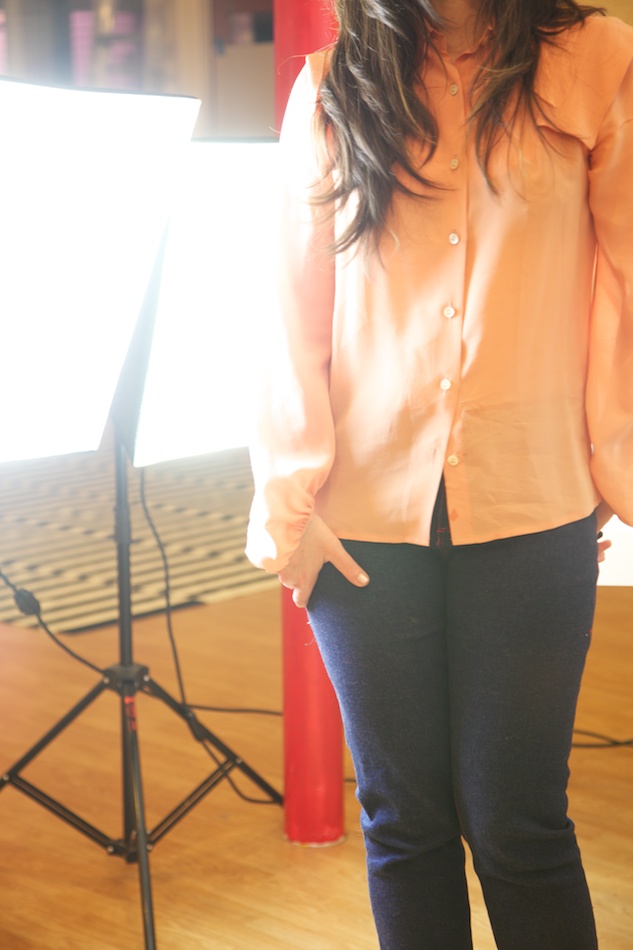
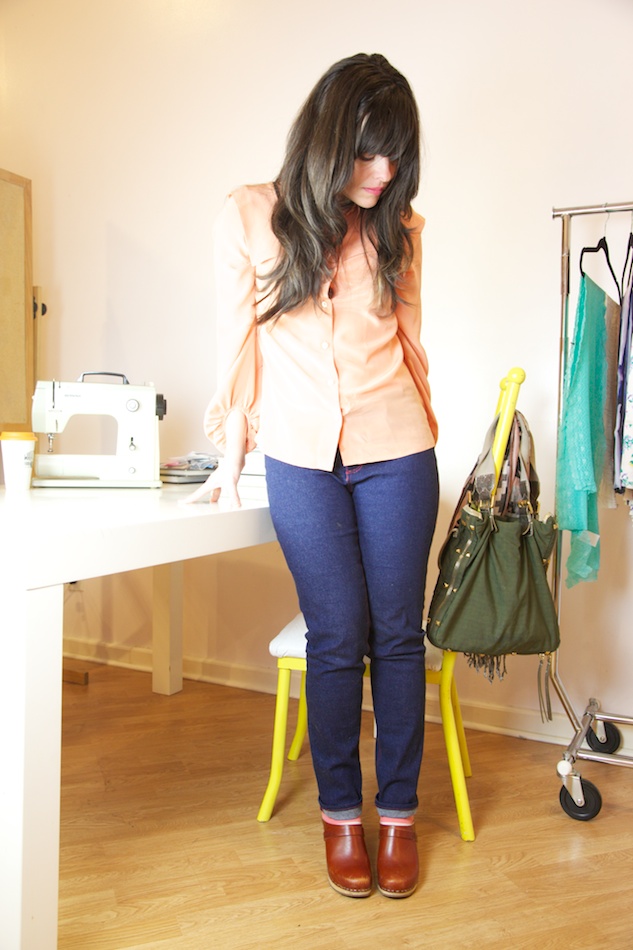
Before I run over myself and you with newsy news, I’ll share my new pair of jeans, and I apologize in advance for my sheepish photographs. I’m out of practice (I didn’t take a single photo for over a month and it was awesome!). I even put on Prince’s Sign O The Times, one of my great loves in high school, and brought out some big lights to make it feel a little more fun but as you can see I’m feeling a bit shy!

Handmade Skinny Jeans | Cloth Habit

While we were traveling over Christmas I went on a bit of a pants-drafting extravaganza. I refined my jeans pattern, drafted some trousers for myself, then even started in on a couple of pairs for my man. I couldn’t wait to get home and sew up my new and improved jeans but what do you know, just as I was topstitching over a particularly chunky seam, I suddenly heard a snap… then CAAAHRUNCH. After carefully disassembling the housing around my machine, I discovered that the one plastic part in the timing mechanism, a little gear, had snapped in half. Apparently my beloved Juki is not the infallible creature I thought she was. I should probably mention I was trying the “go fast and it will go over the hump” technique rather than cranking the handwheel. So other machines had to get involved.

Handmade Skinny Jeans | Cloth Habit

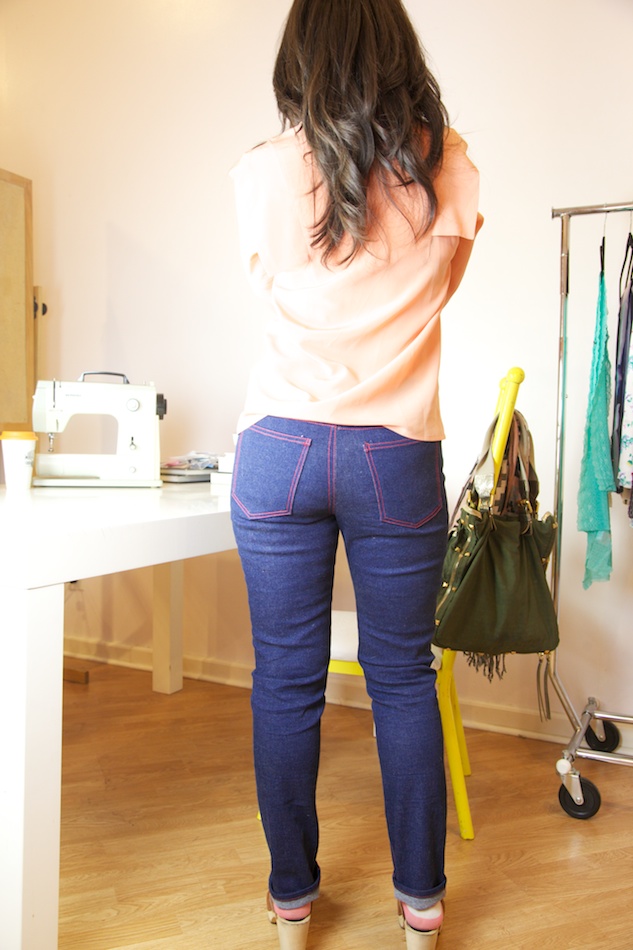
For this pair I decided to go skinny. I only had 1 5/8 yards of this denim, which contributed to the decision to cut them narrower, and thankfully I was able to scrape all the pieces down to the belt loops. I think I could have made them even skinnier especially around the knees because the denim really started to loosen up in wearing.

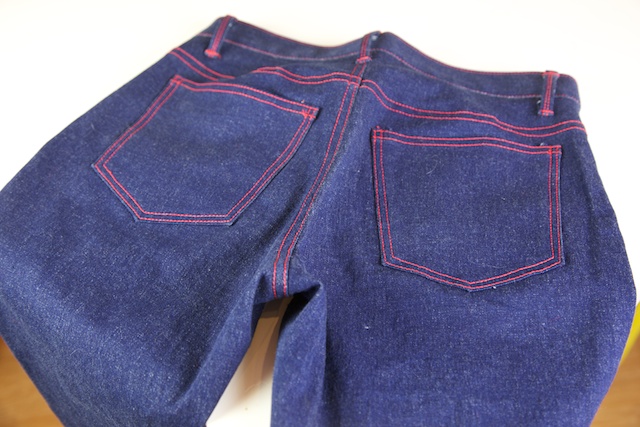
With my recent pants & jeans projects I’ve been taking the time to baste up the pattern without details to make sure it fits in the fabric, then unpick and re-cut the pattern with all the alterations. It’s a bit like making a muslin, except I plan on using the muslin to make the final jeans. It’s also been a good way to visualize where I want the back pockets, how much of a “V” I want the yoke to make in the back, and how deep the front pockets should be. It’s amazing how the placement of these little details can change the look.

When I basted these up I also noticed just a slight amount of leg twisting. I’ve had this trouble before with twill fabrics and realized that this particular denim had a very strong skew to its weave which is really hard to cut around. I’ve learned that there is an art to cutting out twill fabrics. If you fold your denim in half you can usually see how skewed it is–no amount of pulling on the bias or artful folding will get the fabric perfectly square across and down the grain. That is just a consequence of twill weaves. When cutting on a fold, at least one of the pieces will end up off grain, which I have learned the hard way! Now I cut them in a single layer, and line up the pattern grainline with the selvages. It takes extra time but it’s worth it.

I decided against rivets on these and just went with the red topstitching. I went through about 20 rivets trying to insert them on my last pair, and I thought I’d bought the good kind. I probably just need some practice.

Handmade Skinny Jeans | Cloth Habit

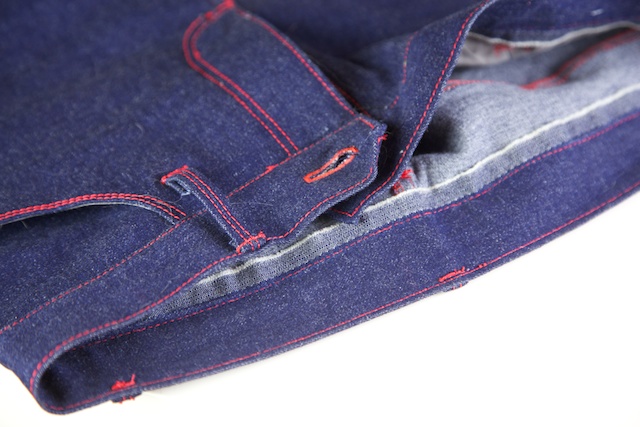
I had so little fabric left for the waistband that I decided to cut it down the selvage and use the selvage as a finish on the inside.

Handmade Skinny Jeans | Cloth Habit

Handmade Skinny Jeans | Cloth Habit

Overall I’m very pleased with these–at the very least they have been keeping my legs warm in what has turned out to be a verrry cold Texas winter!

Happy sewing, all!

Details:
Stretch Denim: Hotpatterns (aging in my stash)
Pattern: self-drafted

Goodbye 2013 & Looking Forward

Hello all and Happy New Year! I know, I am late but it’s still January right?

Goodbye 2013 | Cloth Habit

This was actually a double rainbow but the rest disappeared in camera!

This year Derek and I whisked away to a very special Christmas with some friends in Portugal. We’re fond of spending the holidays in Europe but this was our first time visiting this beautiful country. The Algarve is reminiscent of our fair Texas climate, with a bit more rain and streets lined with orange groves in season. And the Atlantic smashing against cliffs.

We spent most of the holidays indoors storytelling, catching up on summer blockbuster movies and eating. Boy did I eat. Our friends and their children are marvelous cooks. Clams and mussels (the size of those mussels–gorgeous) drowned in broth… homemade pizza… lots of dairy… pork with plums on Christmas day, with a little bit of Port to finish of course. Yum!

Since coming home, I got ambushed by a nasty strain of flu so it has taken me forever to catch up with myself. But I love doing year-end reviews, so here we go…

Looking Back

The year started off with a bang when I hosted the Bra-making Sew Along. This was a huge challenge for me, both in time and in organization, but Im so glad I pushed myself to try something like it, and it is still the most-visited section of my site. I really love teaching and I want to improve my skills in this area–helping others become better at sewing and fitting.

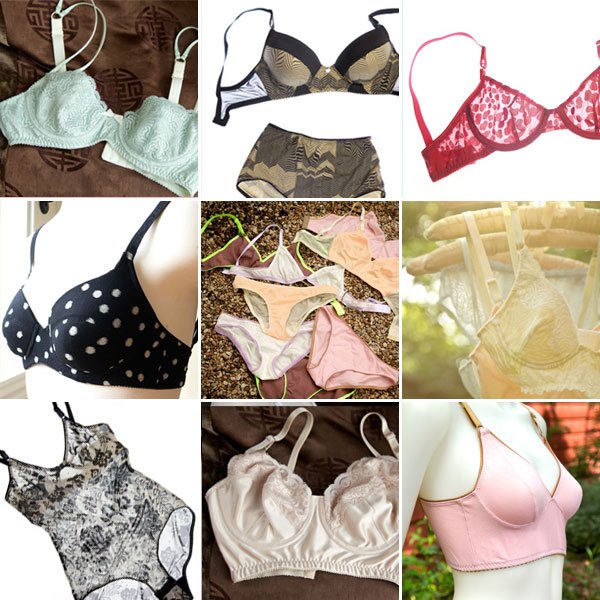
Most of my year after that was completely lingerie obsessed. I drafted at least ten different lingerie patterns, taught myself several patternmaking approaches, proper grading techniques, and thought way more about the physics of elastic than I care to admit. These were some of my favorite personal projects:

Goodbye 2013 | Cloth Habit

Over the summer I also explored starting a business making custom lingerie. It’s still a work in progress, but I’ve been able to fit and design bras for a few friends. Here’s a sneak peak at one of them, my own nursing bra design:

Nursing Bra | Cloth Habit

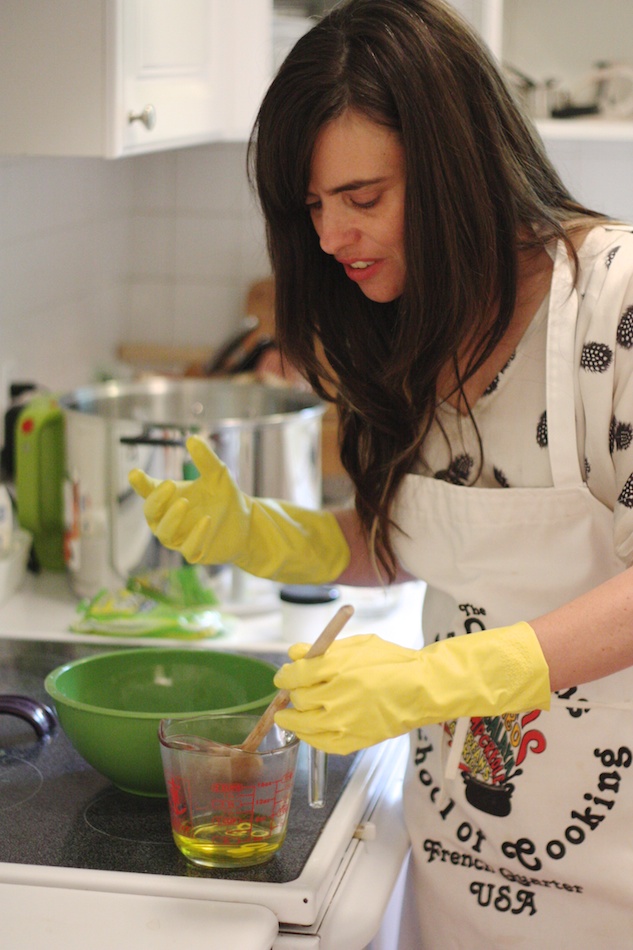
This and many of my bras were hand-dyed in some way, and my experiments in dyeing lingerie fabrics opened up a new world of creativity with dyes and color mixing. During a few trips to Dharma Trading in San Rafael this year I loaded up on enough dye supplies to warrant a need for a separate dyeing studio!

Dyeing in 2013 | Cloth Habit

My top five of everything else:

Favorites of 2013 | Cloth Habit

1. My most-worn item was my Cascade skirt. I couldn’t have asked for a more perfect hot Texas weather piece.
2. My 2nd most worn were both pairs of my Maritime shorts. I probably should’ve made 5 pairs.
3. I ended the year a little obsessed with pants which gave me the confidence to conquer the Clover pattern. Look out guys, I’m going on pants-making foray this year.
4. I drafted and made my first pair of jeans! After years of swearing them off…
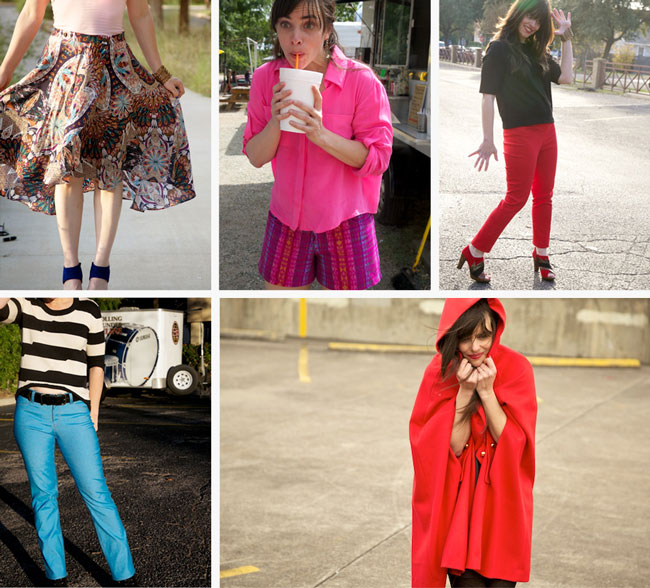
5. My first project of last year, a wool and cashmere red cape, was definitely my most labor-intensive project, and even now a year later I wish I would’ve gotten more detailed shots. I spent hours handstitching and testing out every bound buttonhole method known to dressmakers. It’s so pretty that I wish I had more opportunities to wear it!

Looking Forward

My continuing goals for this year include going deeper into the study of patternmaking and the fundamentals of fit. I still like working with home patterns but these days tend to buy them more for style ideas than for their techniques. Sewing techniques in themselves don’t challenge me enough anymore, but drafting really tickles my brain! That will probably mean that I’ll be sharing more in-process posts since my projects will go a bit more slowly. I love to share what I’m learning about patterns and fitting.

On the blogging front, I don’t have any major plans other than Stay True to Thyself. I have to admit that by the end of the year I started to suffer a bit from internet burnout. My internet/blog-reading habits were overtaking my ability to keep in touch with my closest friends, and that’s never a good thing. This year I”m going to work at keeping a healthy balance with my online life…

I hope you all had a fantastic New Year, and that 2014 brings more sewing pleasure and beautiful fabrics!

Black & Red & Winter All Over

Winter Clovers | Cloth Habit

Well hello, winter. What happened to fall? Texas did not get one. It went from t-shirt weather to freezing overnight. Not just frost but ice freezing. Sad ice freezing that hit my tropical plants (my poor dear frangipane) before I had time to rescue.

And I can’t believe the holidays are here already. Time feels especially blurry because I seemed to have missed November entirely. Between the death of our dog, which also happened the same night the freeze storm came in, and the sudden cold, my immune system got shot to bits. I spent the better part of last week indoors, shlepping around in my bathrobe, barely making appearances in public, and subsisting on a diet of chicken soup and Nyquil. It was Icky. But I’m finally feeling good enough to take some photos of my latest projects. It’s so nice to have color back in my cheeks!

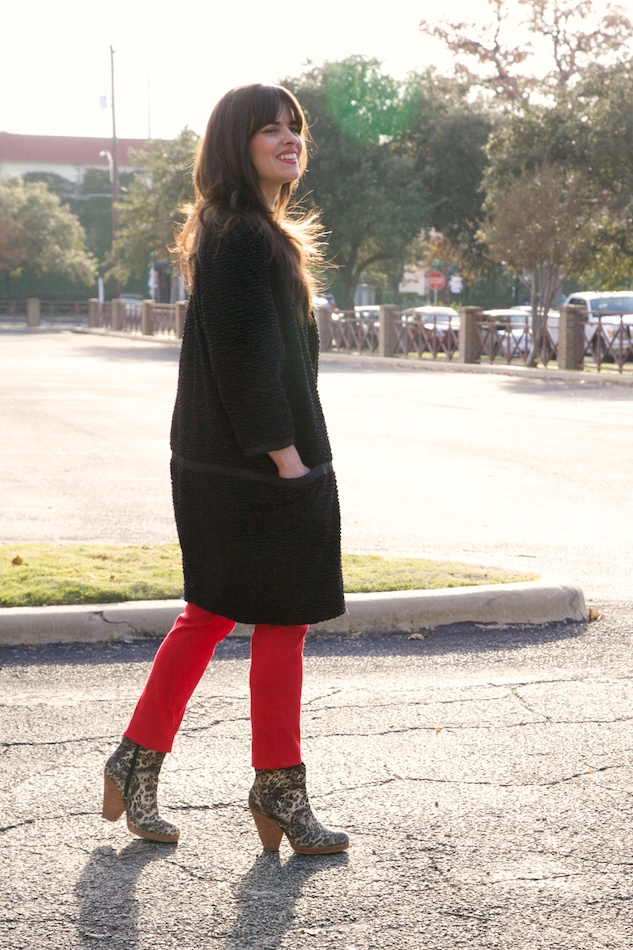
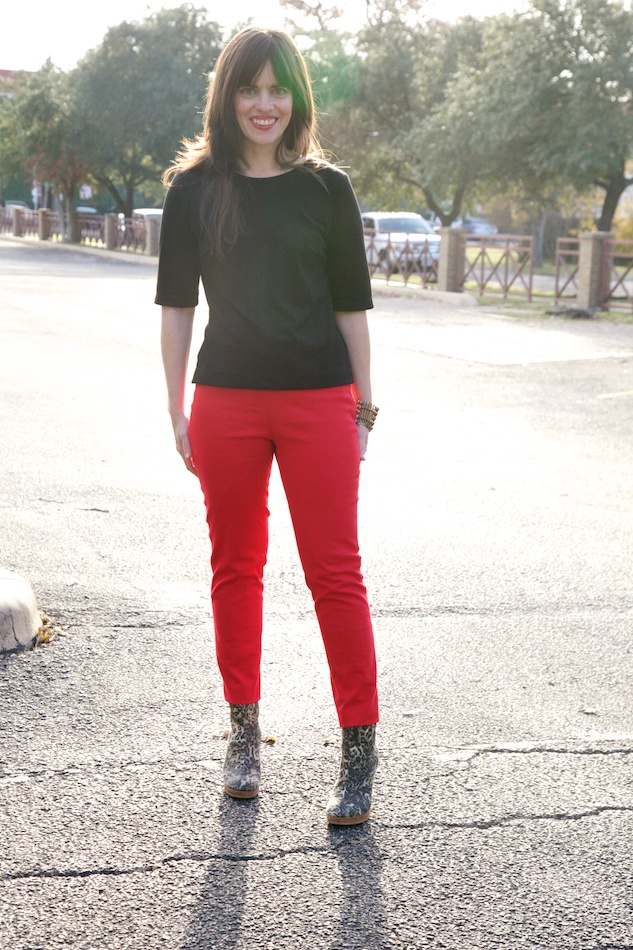
So while I was stuck in my bathrobe, I got itchy to take on some challenge I wouldn’t have time to work on otherwise. I’d already made this top and had begun to fit a jacket, but on a whim decided I must have some red pants. I felt inspired to dig out Colette Pattern’s Clover, that pattern that has gained somewhat of a reputation of being the Mount Everest of pants-fitting.

Winter Clovers | Cloth Habit

And I think I got pretty darn close to what I wanted. Firstly, I have really been wanting more streamlined and simple pieces in my wardrobe, including a lot more black. I’ve been tempted to wear black almost every day since October. Or red, another winter color I adore. I love pulling out the red-red lipstick in winter.

I almost made the pants in black because I happen to have some great black twill trouser fabric, but I thought that might’ve been overkill or at the very least hard to photograph. So I dug through my stash and was happy to find some long-forgotten red stretch poplin with the right weight and stretch.

Both of these projects–actually most of my projects as of late–have become an excuse to work out more complex sewing matters. I like to keep my mind engaged, so the last few months I’ve been getting into deeper study of fitting concepts and how they apply to human anatomy. I think this is going to be the year I pad out a dress form…

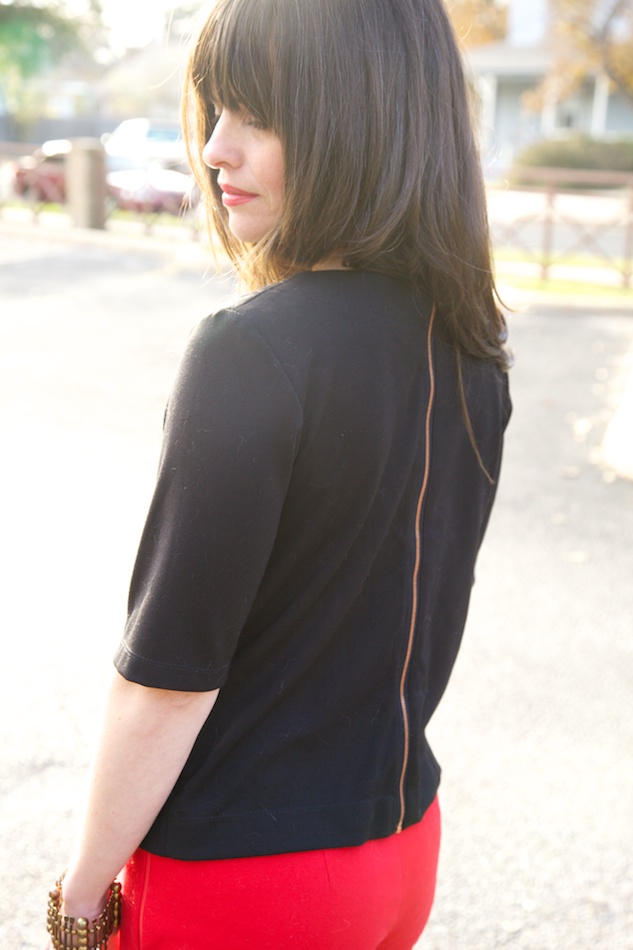
The top is based on Kristin’s Style Arc dress, which I have made a few times before. I went on a bit of a muslin-fest for this one–not for style, but to try out different ways of removing excess back length. I think that my problems in the back fit of garments have mostly to do with the slope of my shoulders and the neckline. Maybe a little bit of swayback in there, but I have tried every swayback alteration known to mankind and they do not solve the whole problem. So I’m keeping at it. Aside from all that I cut it down to a hip length, added a semi-exposed zipper to the back, et voila–simple little boxy top that goes with everything.

Winter Clovers | Cloth Habit

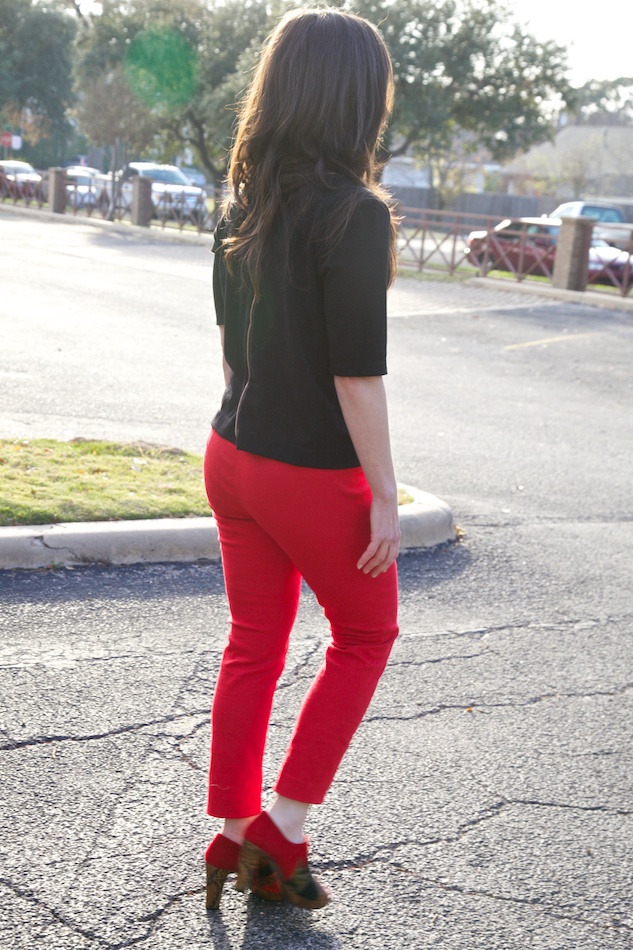
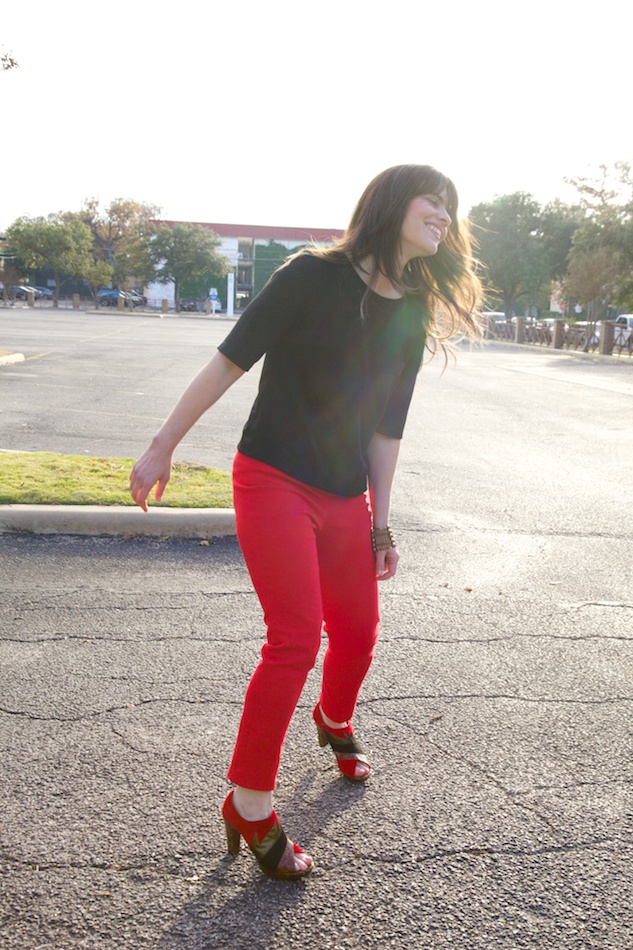
Then there are the Clovers. I have a love/hate relationship with any pants with a slim taper all the way to the ankle. I don’t think like wearing them with flats because I feel like a big ice cream cone, so I fitted them around heels. Let me make a little wardrobe change…

Winter Clovers | Cloth Habit

Winter Clovers | Cloth Habit

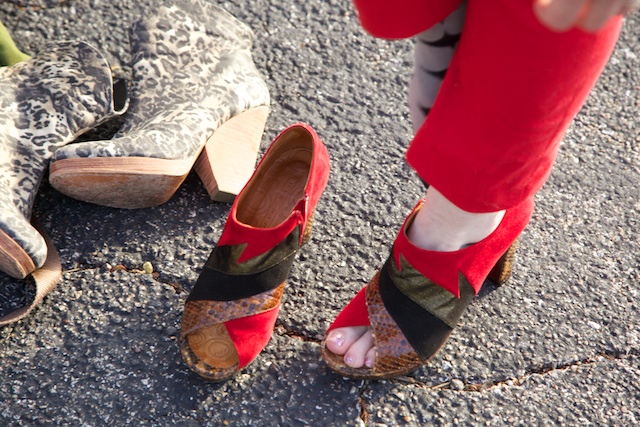
I couldn’t decide which shoes I liked best. My favorites are the shazaam shoes with a bit of ankle flash, but it’s just too cold for them now.

With a style like cigarette-y pants, there can be a wide interpretation of how they should fit–skinny or just skimming the body? And it’s open to either, since this pattern is drafted with zero ease. (I measured.) They do need be taken in further if one wanted skinny. For me, the style of fit depends on the fabric, particularly the drape. Cotton stretch fabric has no drape, and if it’s not super skinny it can get “crunchy-looking” so quickly–they end up looking like chinos with skinny pants delusions. I made these with about 12% negative ease but they still got a big saggy. Pretty typical for cotton or stretch denim, I guess.

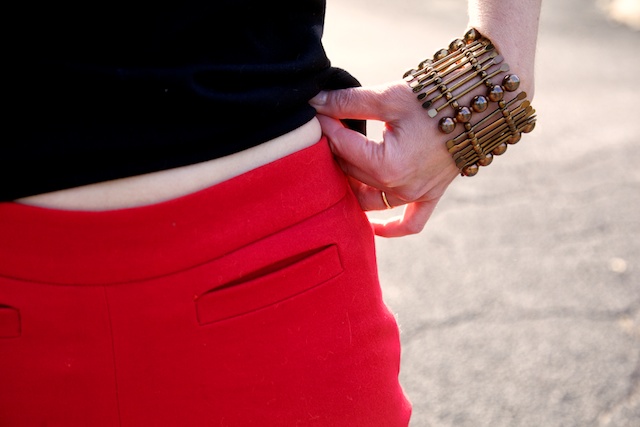
In addition to fit alterations, I made several style changes to the pattern, like making the waistband a bit wider which I think looks better on me, and adding welts to the front for some detail to break things up.

Winter Clovers | Cloth Habit

Fitting these was an entirely strange ball of wax. I honestly don’t think I could have tackled this pattern unless I had the experience of fitting my jeans. Between that and viewing a lot of finished Clovers online, I got a fairly good idea of what to tackle. There was a consistency to the fitting problems which pointed to some issues with the back shaping and length, which also had an incidental effect on the front. I feel a post coming on about fitting stretch pants and differences in trouser pattern shapes. Would you like to hear some pant-shaping theory?

Phew, that was a long post. That’s what happens when I’ve been in a sick cave for two weeks. I burst with thoughts!

Winter Clovers | Cloth Habit

Details
Top: Style Arc Kristin as a base
Pants: Colette Clover
Fur coat (at top): BurdaStyle, written about here
Fabric: Cotton stretch poplin and rayon doubleknit from stash
Zipper: Pacific Trimming

Burda, Meet Burda

Burda Style Magazine | Cloth Habit

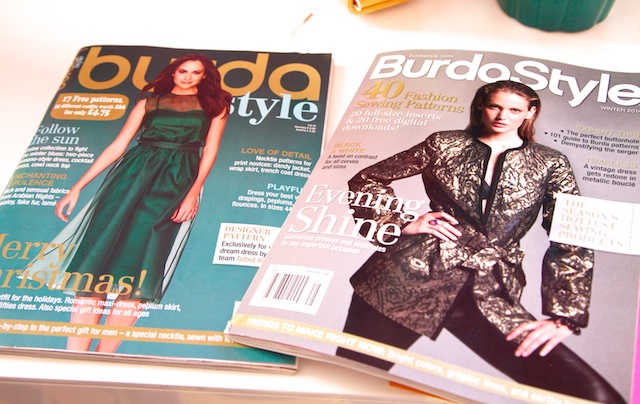
{Burda Style December 2013 and U.S. premiere edition}

I credit Burda magazine for being one of the resources that got me excited about sewing again. For most of my twenties, any time I’d pick up sewing, I’d quickly get very restless and bored with patterns. I had these images in my head but no idea how to turn them into reality. Adding to this mix was a long dusty period where American sewing patterns were so out of tune with style, and local sewing stores turned into craft and quilt emporiums but I wanted… fashion! So I turned to patternmaking classes. I figured I might as well learn to do it myself. Discovering Burda became a cup in the desert. Their style was better in tune with fashion, European, and lookee, a ton of patterns in all one magazine!

After five years of subscribing, it no longer seems like a novelty. Their fashions might seem “normal” now, but there was a time when one could still make a distinction between European and American style. I call it the Pre-Zara era. Now we have global street style (global hipsters…), you know? So much has changed, as the craft of garment sewing flourishes, and with it a flourishing of independent pattern companies and their designers.

And honestly, sometimes I wonder if I need this many sewing patterns. Anything I could want to sew has already been published in Burda and I probably have it somewhere in the stash. But I was more than a little curious about the new American edition. So I picked up a copy from Joann’s last week to compare to my monthly magazines. Here’s a quick lowdown on the differences:

  • US edition has four pattern sheets with 20 patterns. It also includes 20 free downloads of the patterns not included on the sheets. (40 patterns in total.) Seven plus-size patterns.
  • The Europe issue has two sheets with 17 patterns (and two or three variations on each of those). Six of these are plus-size.
  • All of the patterns in the current American Burda were published last winter (between the November and December 2012 issues). So they are running a year behind (for the moment?).

The US edition feels like a Burda re-boot. Since it is the premier edition the first few sections offer an introduction to using and tracing the patterns, and a beginner’s guide to using a serger.

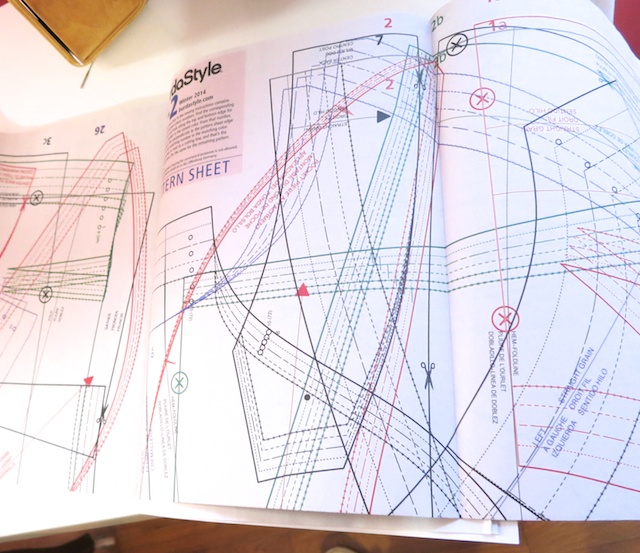
I’m not quite ready to give up on my European subscription but the new magazine has merit. I like the friendlier format with the ability to trace off some patterns and download others. The digital option keeps the pattern sheets less crowded and confusing.

Much easier on the eyes:

Burda Style Magazine | Cloth Habit

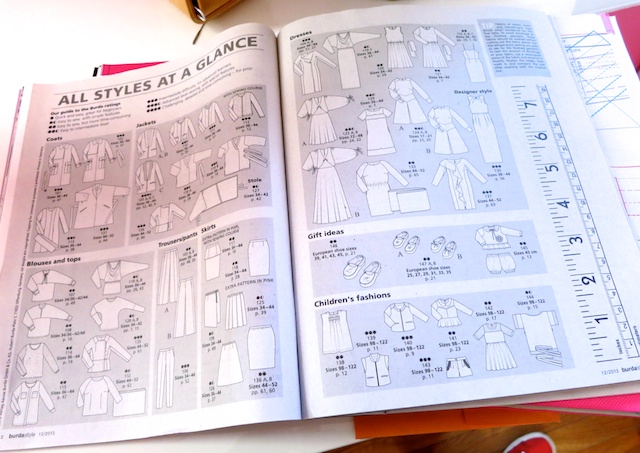
The US version doesn’t have all the line drawings on one page, as the European issues do. I wish they’d include this as that is the only way I find stuff in the vast Burda-verse:

Burda Style Magazine | Cloth Habit

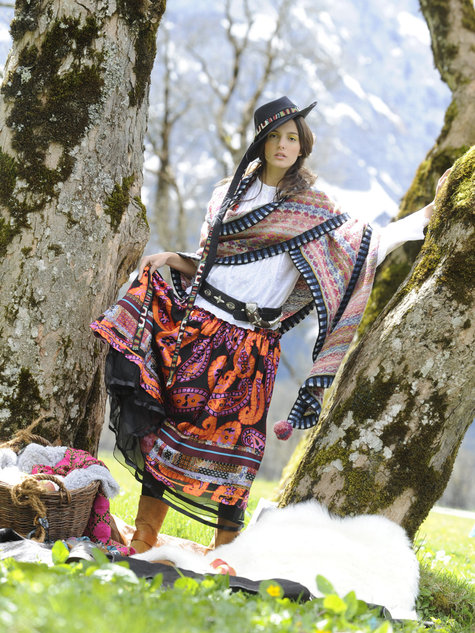
Overall, both editions are still incredibly cost-effective. Where else can you get 20-30 patterns for less than the price most independents are charging for single patterns? Of course it’s only valuable if you enjoy Burda patterns in the first place. It’s true that Burda repeats its styles over and over, sometimes with really minor variations. I don’t particularly like their “ethnic/folklore/hippie chic/gypsy” patterns they seem to publish every two months. But hey, those styles must have a following…

Burda Style Magazine | Cloth Habit

I know that Burda puts off beginners, especially North American sewists who didn’t grow up learning from it, who don’t have the same “pattern magazine” tradition that other countries have. I don’t mind tracing off patterns as that’s part of its value–more patterns, less paper cost. In many ways, I really have to thank Burda for making me a better sewist and helping me develop an eye for a good pattern. For example, I don’t mind that I have to add seam allowances. In fact I prefer doing so, because with Burda I know exactly where the seamlines are, and have more control over how much allowance I add. I like small allowances in waistbands, facings and pocket openings, and learning to do that has improved my sewing immensely. And I rarely have to check the accuracy of the drafts–the seams match, they meet at 90 degrees important places, etc.–like I do with some patterns. I love trying new styles from independent companies but some really do suffer from poor pattern engineering.

There are two things Burda does very well and frequently: jackets and trousers. In my collection of issues, they’ve published every style of jacket imaginable: trench coats, duffel coats, anoraks, blazers, and in many variations. Same with trousers and jeans. If I’m looking for a pattern or a particularly classic style, even if it’s just to research changes to another company’s pattern, I shop my Burda “library” first.

Burda Style Magazine | Cloth Habit

Burda Style Magazine | Cloth Habit

Some day I’m going to tackle that Lagerfeld pattern (white jacket on the right). That issue been sitting out on my coffee table for two years!