I wanted to say how thankful I am for such lovely readers, and for all your kind and beautiful sympathies on our loss. It’s been a tough ride but your comments meant so much to me. So many of you are fellow pet parents and understand…
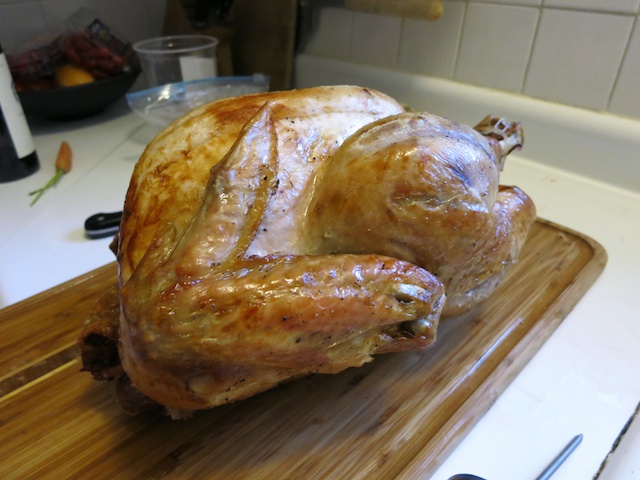
Thanksgiving is one of my favorite holidays, and it couldn’t have come at a better time. There’s nothing richer than being around a bit table with family and friends! I’m thankful for so many things, not the least of which is turkey. Every year we do something different for Thanksgiving but I always find a way to be the one who brings the turkey.
So pretty… (and so gone by now!)
I love filling my house with those big roasty smells. I wrote down my own recipe years ago and called it “Turkey So Good”. There are a million ways to get a good roast but my “secrets” involve first soaking the turkey in a brine over night, which is usually just a simple soak with kosher salt and lemon. Sometimes I get more involved and add all sorts of herbs and loads of garlic. Then I begin roasting the turkey breast side down till it is nearly done. For the last 30 minutes I flip the bird over and turn the heat up–that way I still get all the nice crispy skin on the breast side. Flipping a hot turkey is a two-person job but worth the moist meat!
Now because food is on my brain, I’d love to your about your favorite holiday treats. Do you have a specialty you like to cook or bake?
{p.s. I promise I’ll get back to sewing posts soon. I just finished making a muslin of a jacket, which I’ve been meaning to sew for oh, about a year? I wish winter lasted longer here because I love, love, love making jackets.}
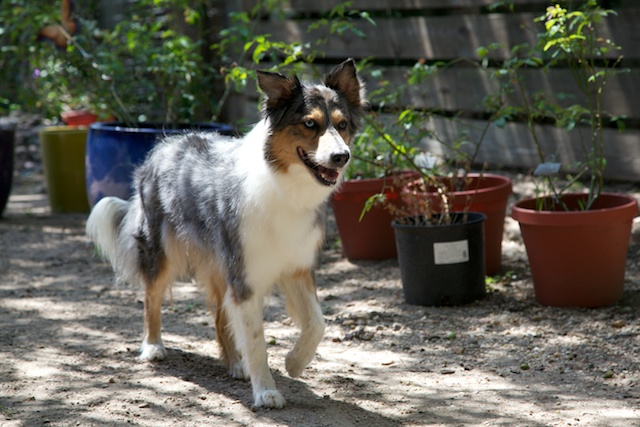
Gosh, the last two weeks have been full of highs and lows. I know I don’t write much about my personal life here but I want to tell you about our friend Freda.
It seemed like just a month ago when I was taking pictures of our pets after making my kitty-puppy dress, and thinking about the best way to shoot her. Shortly after that, Freda suddenly fell ill with a serious illness that the vet thought was lymphoma. We thought it might be something like kennel cough that goes away in a couple of days–nothing like a death sentence. We kept hoping for the best, and hoping she would improve enough to have some proper tests.
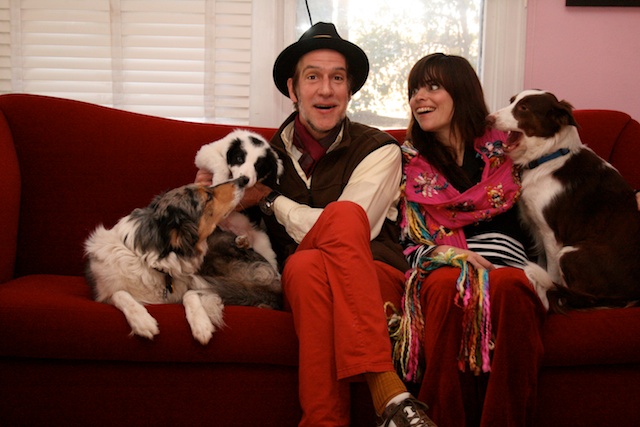
Freda has been our companion since 2004, since our first apartment in Austin. We travelled a lot back then and took her with us everywhere we went. She got to visit Belgium, Germany, New Mexico, North Carolina, most of it when she was young–it was so hard to leave home without our first kid!
She was a very special border collie, bred from working stock dogs, and had all the sought-after qualities in herding collies. Even from eight weeks old she was already herding leaves in the yard. But Freda was so much more than that–I have never loved an animal so much. She was our friend, our favorite “child”, a free spirit and one of the most intelligent dogs I’ve ever known.
She loved fetching and hunting for frisbees, balls and even socks, but nothing held a candle to a plain ole stick.
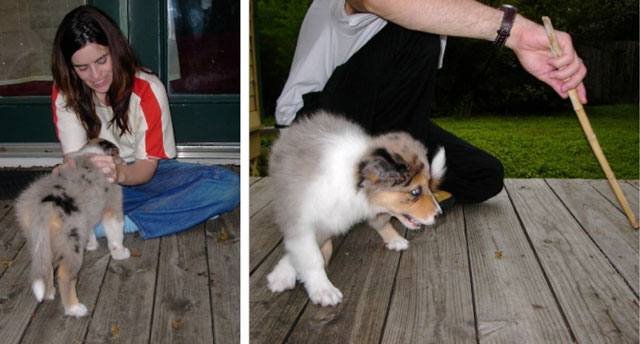
I’ve had many pets throughout my life but after Freda, there was no greater dog than a border collie! (Okay, Aussie Shepherds are pretty cool, too.) She took care of her baby sister Pearl (they came from the same dame)…
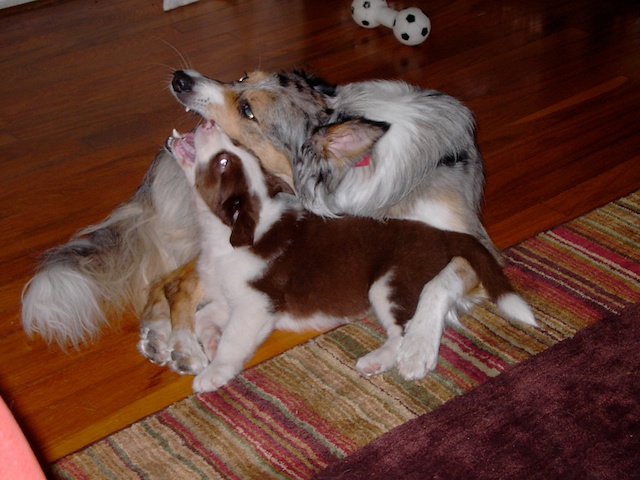
They were BFFs until we got our third dog Jakey, a wild energetic guy keeps everyone busy. This was one of our “family Christmas photos”–the only time we were able to get all three of them to sit still. Jake was still a puppy so he was easy to grab!
After our initial vet visit she improved for a week, thanks to steroids, and we were able to have a few more fun days of playing all kinds of stick, ball, frisbee with her… but sadly, last week she took a sudden turn for the worse. We were in and out of the vet with infections and all sorts of worries. By the weekend, she just couldn’t hang on.
I’m sure those of you who have lost pets know how difficult it is… I’ve been trying to keep my hands busy but everything is a trigger right now. Freda “talked back” to all the neighbor dogs and every time there’s a barkfest in our neighborhood I’m a mess… Freda brought so much joy to us. So much love. We are thankful she didn’t suffer long but it was very shocking to lose our companion so suddenly. She was only nine. Life is so short… so short.
Hello, hello! Hello, November and goodbye to my favorite month of the year. Am I in the minority in that I love autumn? I can finally spend blissful hours in my garden without sweating or getting attacked by mosquitoes. But it’s more than the weather; I love the transitions, slowness and more contemplative emotions of fall. It’s also the time of my birthday, so I was born for it.
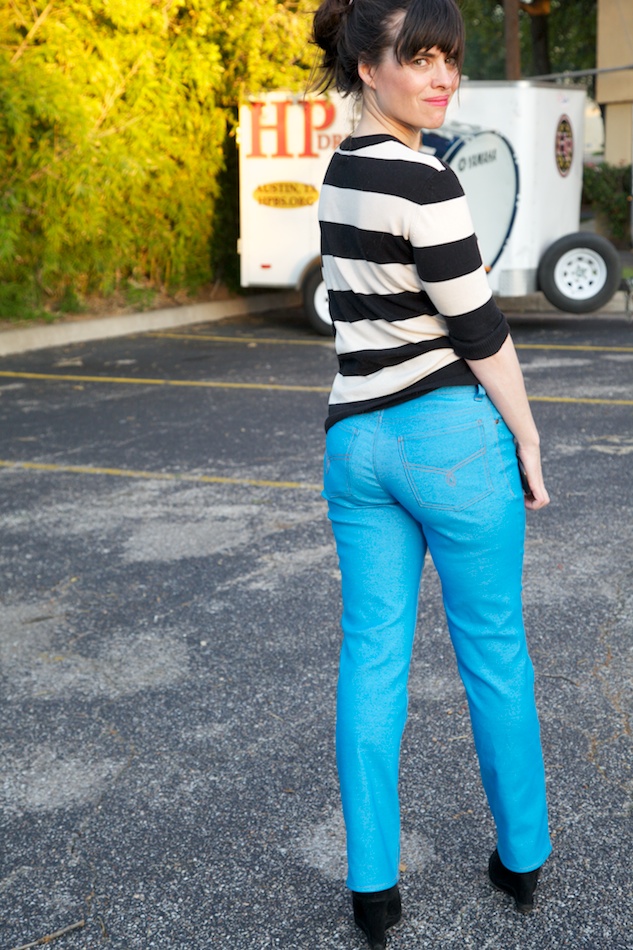
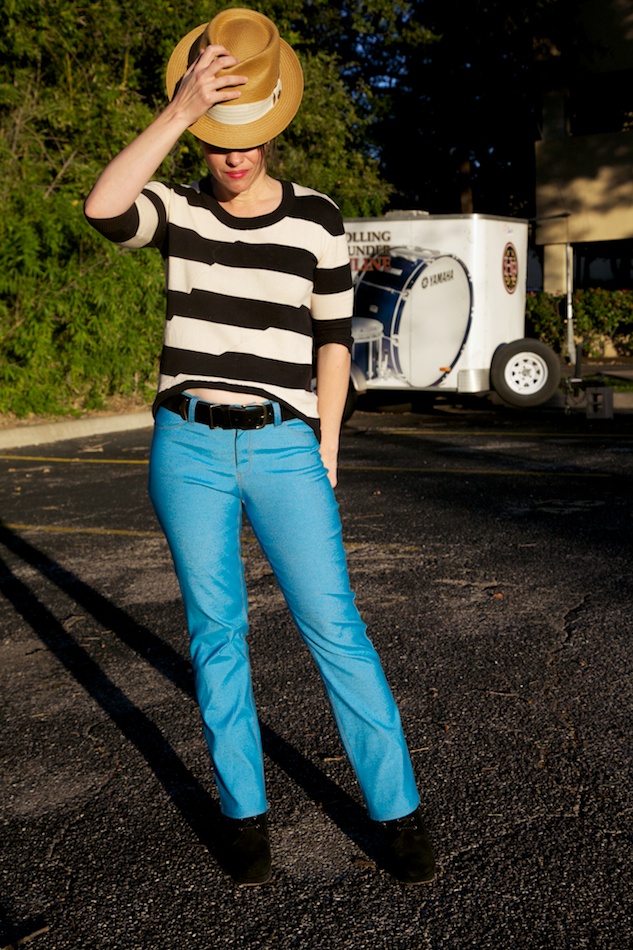
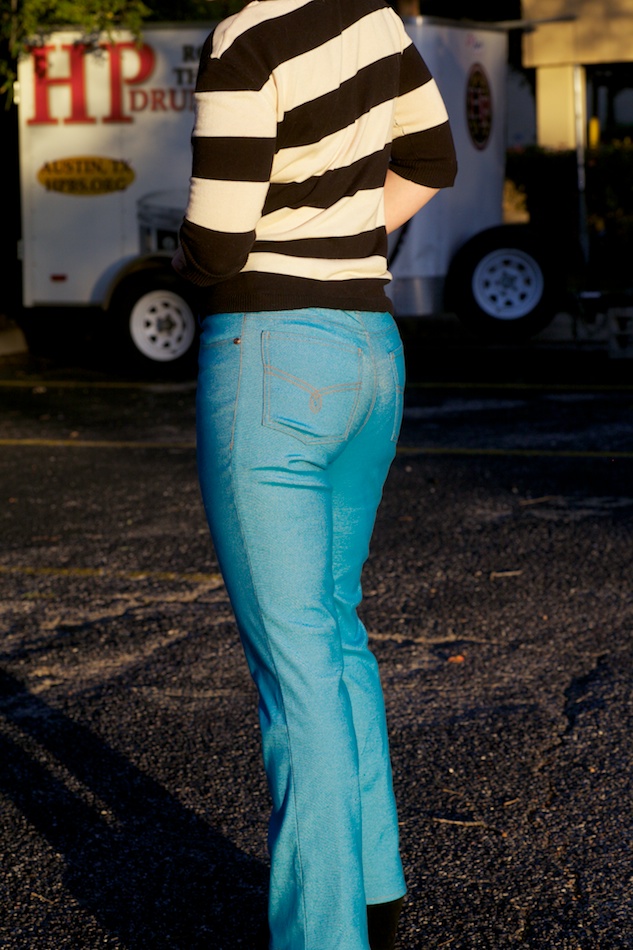
So this is what became of my jeans project. Since my last post about these, I took a long & scenic route to fitting. I’d take them apart, re-cut and stitch them back together, preen in front of the mirror, pin out here and there, take them apart again, then take a few days off and distract myself with a fun dyeing project so I didn’t get overwhelmed. Wash, rinse, repeat.
I’ll be honest, I’m not sure what’s going on with this outfit. I have had one of those months where I feel like throwing my clothes out and starting all over. It doesn’t help that most of my winter clothes are in our attic, stored from our move this spring. What I really wanted to do was roll up the jeans and wear a long tunic–a favorite style of mine–but then you wouldn’t get the all-important booty shot!
This month I’ve been working on a lot of pattern drafting projects. These kinds of projects are slow and full of learning, and really excite me, because they involve learning the fundamentals of fit and not just fixing symptoms. So while fitting these jeans, I went down some very fascinating rabbit holes reading about pant design. I read online and off, including stuff from arcane men’s drafting journals.
One of my very scenic side roads involved watching the videos in my long-ago purchased Craftsy Jeanius course, and then spending an evening making a pattern from one of my favorite pairs of wide-legged jeans. They are a totally different style than what I’m working on but the resulting pattern was very educational! (The front leg of this pattern was so much narrower than the back, for instance, while almost every draft I’ve seen makes front and back nearly equal.) I still plan to make up the pattern I got from my jeans, but that will have to wait for another rainy day. If you have been frustrated with jeans patterns, but already have a pair that you love, I’d recommend trying this class as one way to start.
So I left this project with a head full of fitting ideas, but for now this is how far I got. I love some things and am bothered by others, which I will fix the next go-around. Because of all my unpicking, recutting and re-stitching until I had just a shred of a seam allowance left in some parts. The waistband and fly are attached by something like 1/8″, and I couldn’t fit a fly that covers the zipper. Don’t tell the jeans that, because they seem to be holding up just fine! Unfortunately, I also had no length left for hemming so had to settle on an odd ankle length.
The scenic route was totally worth it! Drafting my own was worth it. I’m not sure I had a clear idea of the style I was after, hence the scenic route, but the process got me a lot closer to learning about my fit, and I ended up with a couple of potential patterns which won’t require starting a major fit process all over again. Win win!
Alrighty, who hasn’t tried jeans yet?
Details: Pattern: self-drafted (starting with Bunka Pants & Skirts, with details like the yoke and pockets copied from other jeans) Stretch denim: Gorgeous Fabrics, but at least five years old! Pocketing: B. Black & Sons Rivets & Button: Cast Bullet
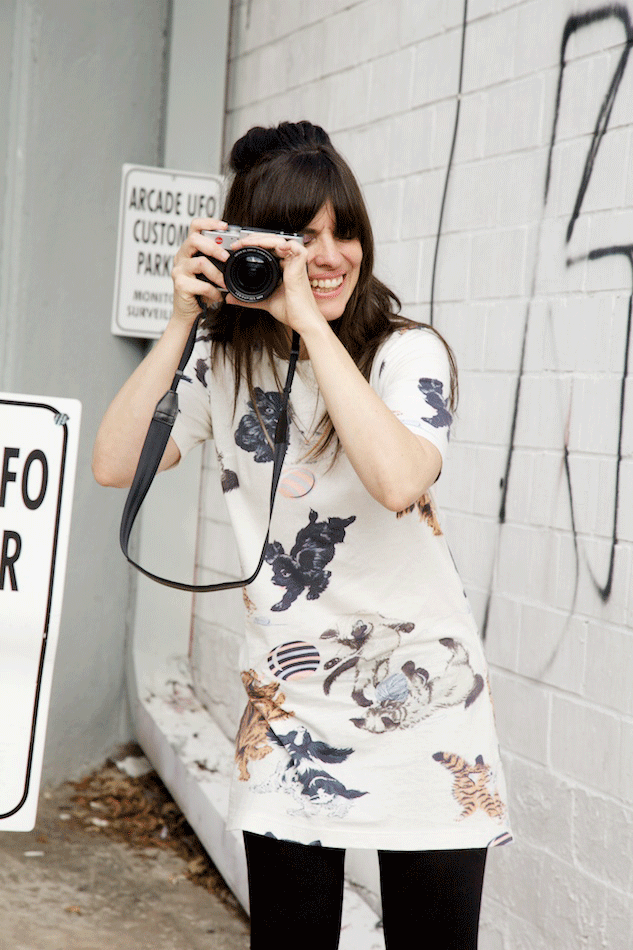
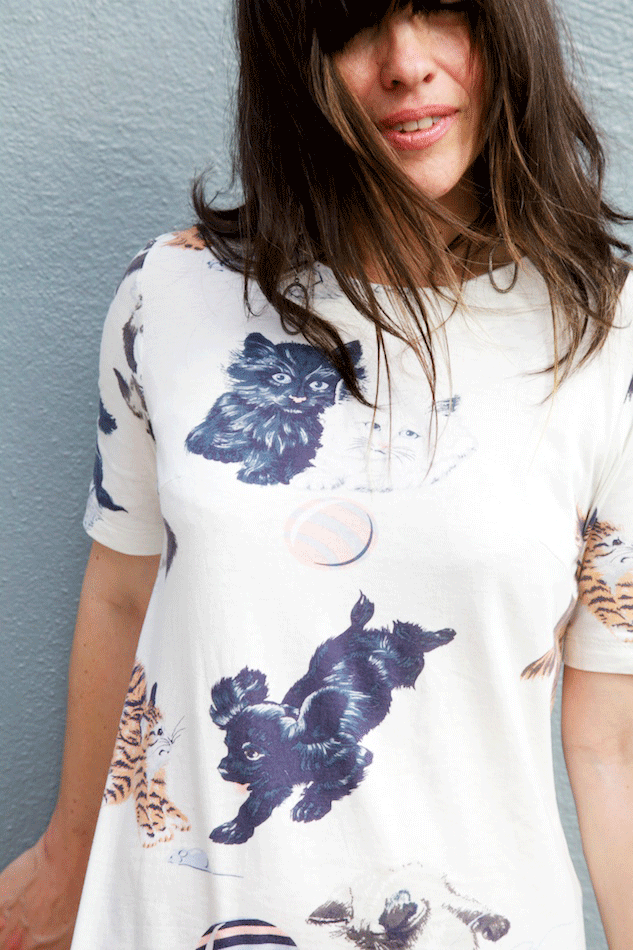
These days I rarely buy fabric unless I have at least some inkling of what I’ll be making with it. And I’m particularly cautious with prints. Without a clear vision they end up lonely souls in my stash for years and eventually start feeling really dated. Stripes are totally excepted. And apparently so is a cat and dog print that looks straight out of a 1960s French children’s book.
It might look better as a wall hanging than an actual garment, but that happens to the best of us, right? This is definitely one of those things that could border on twee pretty quickly, and I’m not sure I can pull of twee even ironically. I tried. Kittens and puppies are my weakness. We have a lot of animal companions–three very energetic border collies and a herd of rescue cats. Perhaps some day I will introduce the dogs if they actually sit still, but I warn you that this will move me far out of the category of “sewing blogger with cute cat” into something much more like a zookeeper. Somehow we manage it, city folk on a small farm.
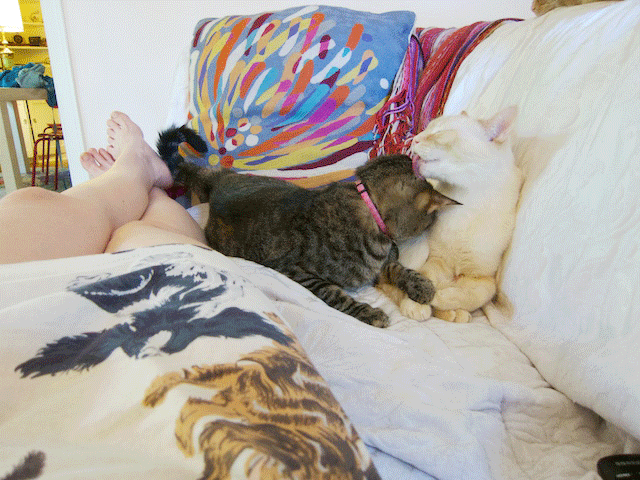
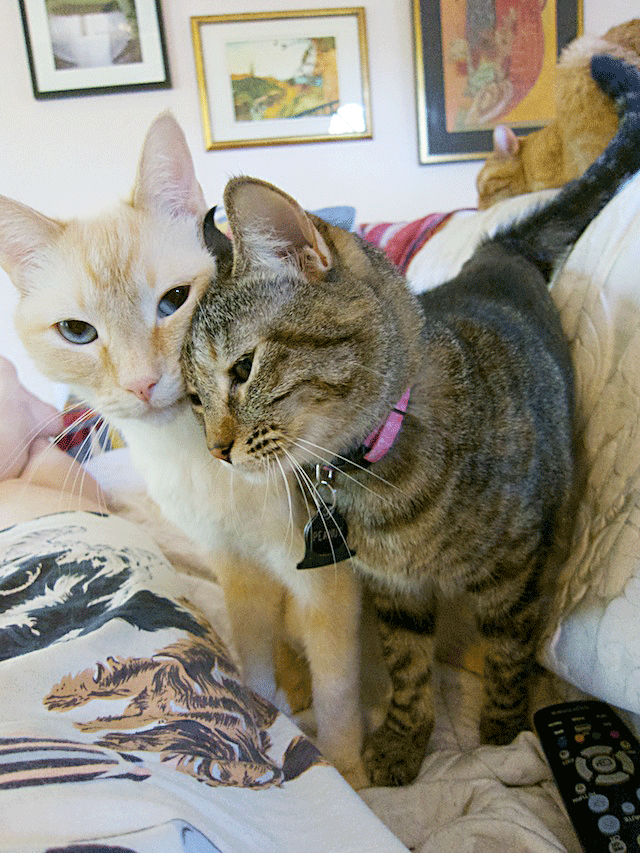
And when my clothes aren’t covered in animal hair, they should be covered in animals! Snow and Peanut are the cuddlers in the family.
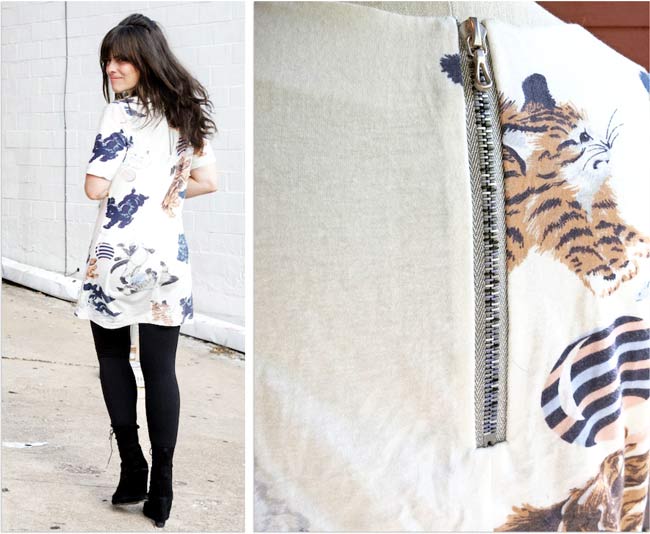
So the fabric. It was billed as a Japanese cotton knit with a price to match. And I bought a yard with no clue what it would be. My first instinct was a flirty mini skirt. Then I remembered I’m not 16. Definitely not a t-shirt, because that seemed a little meh, but I finally decided on something like a glorified t-shirt dress, but a little boxy and with actual dress details like darts and such. This was my inspiration and pattern:
Shift dress patterns are pretty simple designs and easy to come by. Vintage 60s patterns are full of them! Once you have one that fits it can really become a base for so many other design details. (Which Colette really banked on with their Laurel pattern.) I’m a sucker for Style Arc patterns so I went with their Kristin dress, which I have made a few times and have a feeling I will use it for a bunch more ideas. I posted one of my earlier versions in a grey doubleknit, mostly hidden under my red cape. Each time I’ve made it I’ve changed something simple to come closer to the fit I like. Style changes like lengthening sleeves and hem length, changing the bust darts, adjusting for a small bust adjustment. Style Arc is just a little bit busty on me, but not too bad. The shoulder and sleeve fit is fantastic. I’m already working on another version, a hip length top from the pattern with a long back opening. On this one, I did a semi-exposed zip using this crazy multi-colored teeth zipper I’ve had in my stash forever.
The pattern is really designed for a woven or a ponte/doubleknit, and as I expected, the fit in a thin cotton knit turned out a bit bigger than my previous makes, and after a few wears the lack of spandex or rebound made it grow even more. It’s also not the best thing to wear with tights. It sticks!
Still despite the dubious print and fit, this was one of my most worn summer dresses, and what you’re seeing here is my first without bare legs and sandals. My friend Steph came over and helped me do a bit of winterizing with a 60s restyle (including some good ole hair teasing, which I really have to try more often!). I think the dress will go back to the closet till the warm weather returns!
And I’ll leave you with this cuteness. Love it when they ham it up…
Details: Pattern: Style Arc Kristin Fabric: cotton jersey, Tessuti Zipper: stash Hair & (non-cat) photos: Stephanie at Hold Vintage
[disclaim]Update: Since writing this post, I’ve had a few occasions where the Plasti-dip coating peels off while inserting it into wire channeling. (The same with Household Goop.) Lately I have been trying heat shrink tubing as suggested in the comments below. I don’t file the edge of the wire, since the tubing seems to form enough of a smooth edge. You can find heat shrink tubing at hardware stores. I purchased mine on Amazon.com. The 3/32″ size seems to work with most wires.[/disclaim]
When I first started making bras, I was surprised by the discovery that no two underwires are the same. I simply thought I’d buy a wire in my current size and presto!–I’d have one that fit just like my store-bought bras. But when I started taking apart my old bras I discovered that they were different in widths/diameters, curve shapes, lengths, and wire gauges. Some were really lightweight steel, others quite thick.
Underwires are the foundation of modern bra drafting. They determine breast diameter, circumference, and depth, and lingerie companies don’t go around picking wires out of a pile. There are a lot of specs and sizing research that go into wire manufacturing. What brands design depends on the style, their target demographic, costs and fit profiles. I’ve been on the phone with a few manufacturers and the choices are mind-blowing if I wanted to make them to order. So are the costs for a small independent retailer. I mention all this because it puts my attempts to find the “perfect” wire into perspective! It also makes me thankful for the independent shops that continue to source them.
And even though many shops now carry a variety of different wire sizes and shapes from plunge to strapless, I’ve been wanting to just cut my own. One of my favorite handmade bras recently bit the dust, so I pulled out the wire and found it rather out of shape…
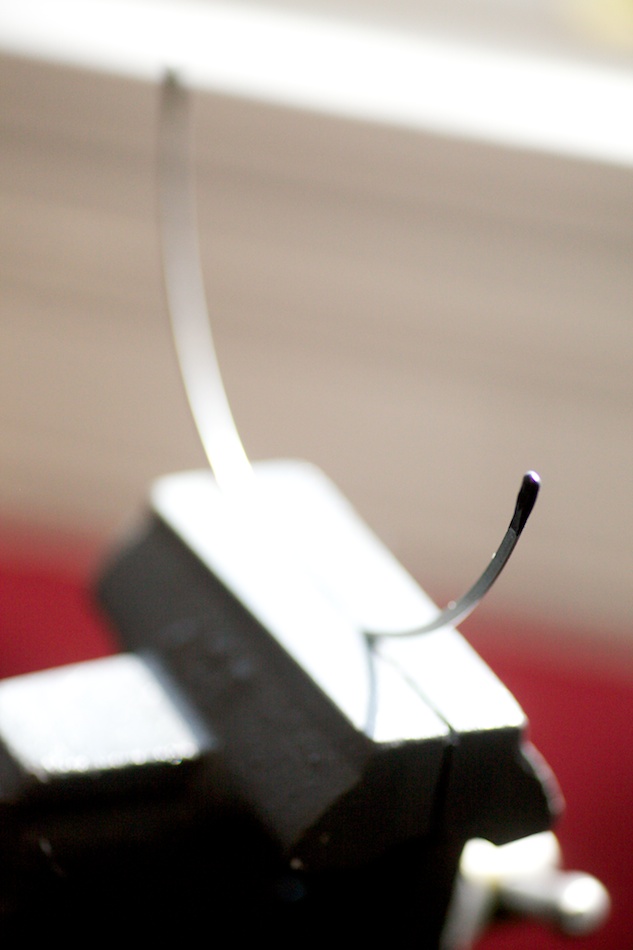
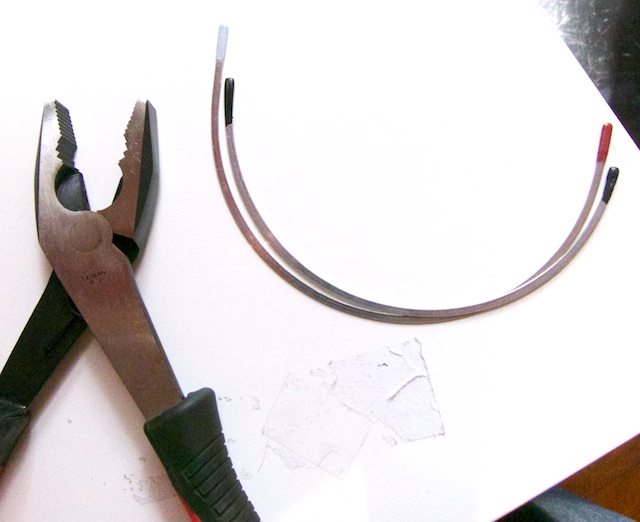
I cut it out because I really wanted to trace it off, before it got too late to discern any possible shape. The builders at my local hardware store directed me to copper wire cutters which would be great for picture-hanging wire but not the wires I’m cutting. I already talk about lingerie far more than is publicly acceptable so I had to make up something about “really thick steel jewelry!” to tell them why I needed a vise and plumber’s cutters!
The vice and cutters cost me about $15 total. I needed the cutters anyway, because I do cut jewelry chains occasionally.
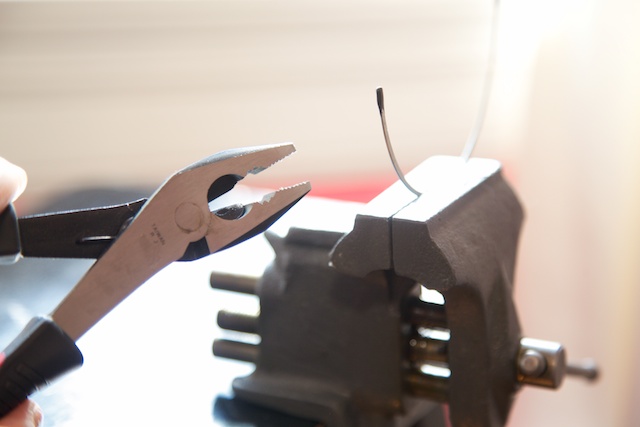
It’s very easy to cut existing wires. If the wires you bought are too long, even just a smidge in the front or sides, you feel it, right? Why not have a totally customized wire? Just mark off the spot you want the wire to end and snip. Definitely wear glasses for this–the snipped part will fly across the room! Here’s a set of wires, one before cutting and after (black tips). I took off about 3/8″ on each side.
To coat the wire ends, I used Plasti-Dip. Plasti-whaa, you say?
It’s basically a liquid rubber tool dip, and makes a perfect soft coating for the end of cut wires. It first became popular as a colored rubber coating for tool handles and auto wheel rims. A design-savvy friend informs me that dip-painting silverware was all the rage last summer, right next to overdyed Oriental rugs. Plasti-dip latched onto this trend and has a Pinterest board devoted to crafty dipping ideas. Chairs, jewelry, toothbrushes, kitchen appliances, shoes (great if you wanted some Comic-Con boots). Stopping short of small pets, it seems everything was getting dip-dyed. Or dip-rubbered, that is.
I also tried Household Goop, which I’d read about on a few corset-maker sites (it’s often used to tip bones), but I found it a little difficult not to “goop” a big messy blob on the end of the wire. If you make a mistake, both the Goop and Plasti-Dip are easy to peel off after a few picks with a utility knife.
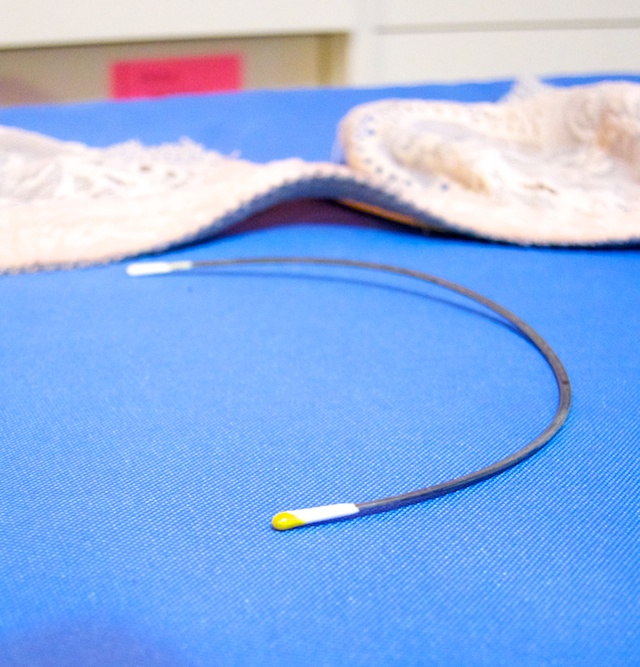
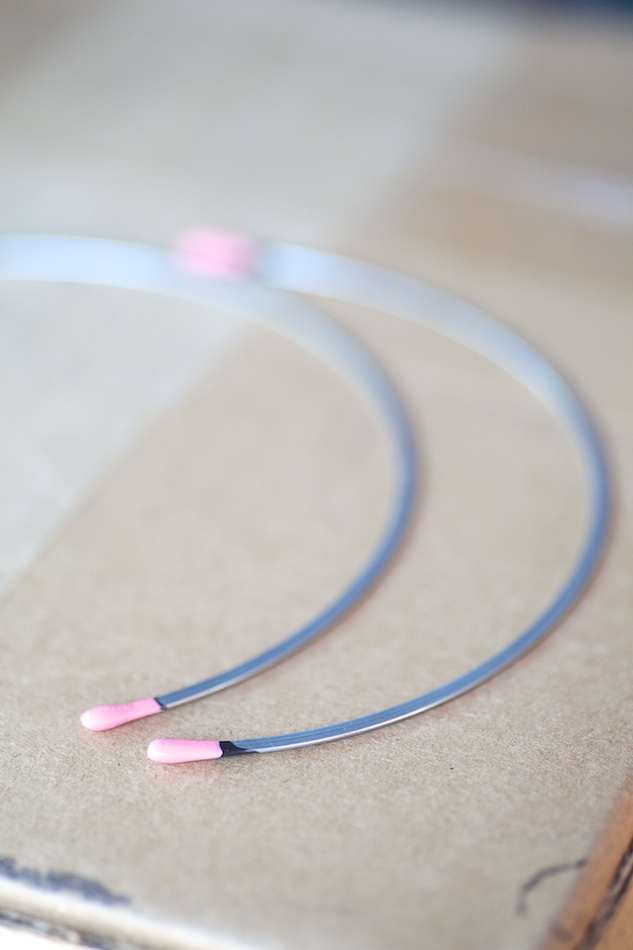
Even though wires are invisible, I’m kind of a color fanatic. I like the idea of dipping my wires in a fun color, and Plasti-dip has a color mixing kit, which I bought because I think I’m going on a silverware dipping binge at some point! It took two or three dips to get a nice smooth end that properly covered the raw metal:
Presto–my perfect wire!
One more tip for using Plasti-dip: Once you dip your wires, it starts to dry rather quickly but takes about an hour for the dip to fully settle and dry. Find a way to hang your wires upside down, so that the dip forms a nice rounded edge at the tips.