Studio Peeks: On Teaching + My New Pattern

My honey and I are enjoying a breezy holiday in our favoritest city in the U.S. I’m feeling super chilled out and getting what seems like a personal living room concert from Beyonce & Jay Z, who are live for two nights at Giants Stadium. Her voice is just incredible, no? Especially when blasting across an entire city.

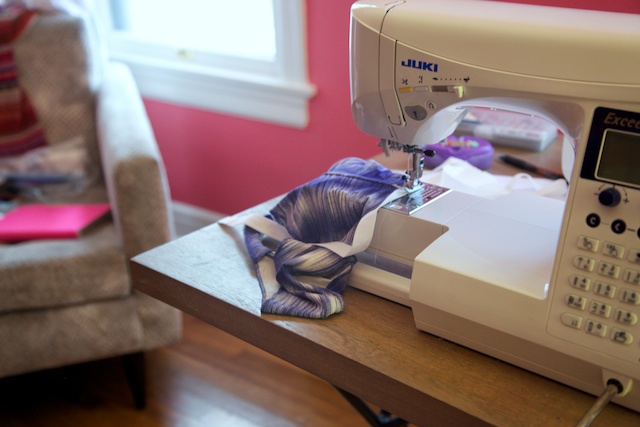
But it took me a few days to get chilled. When we left Austin I was smack in the middle of finishing one of the most labor-intensive creative projects I’ve taken on in a long time, and it was so hard to stop. I can almost smell the finish line…

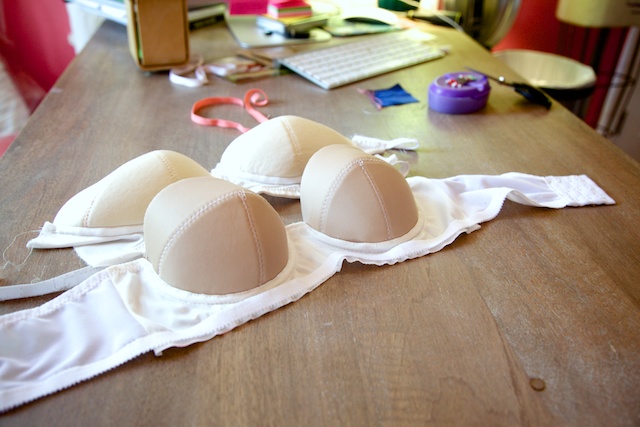
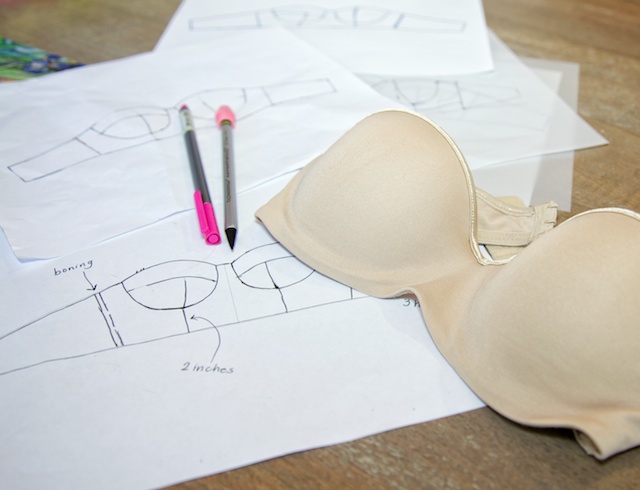
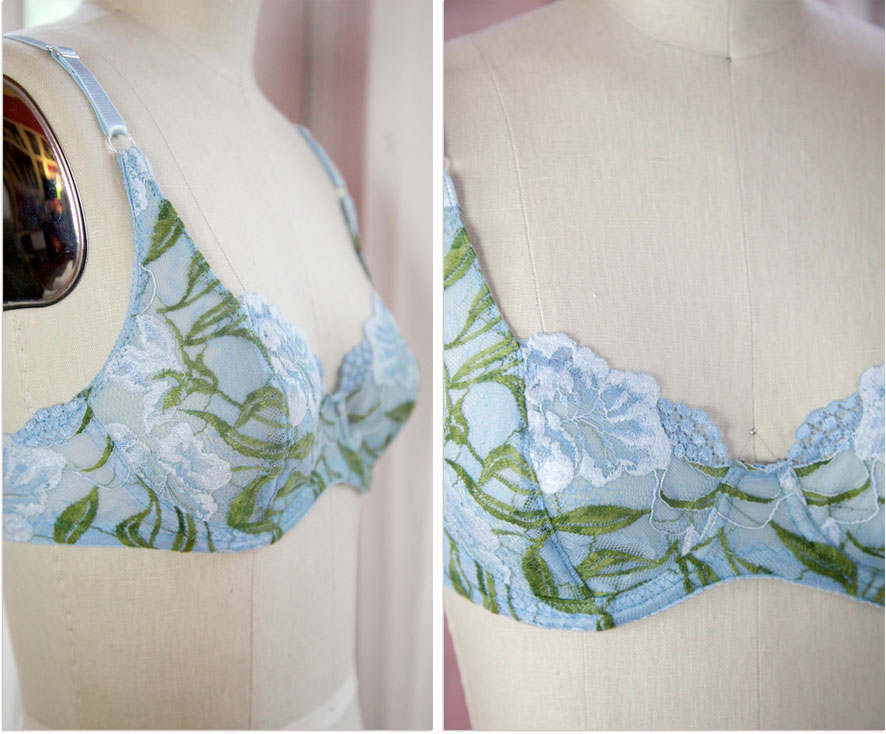
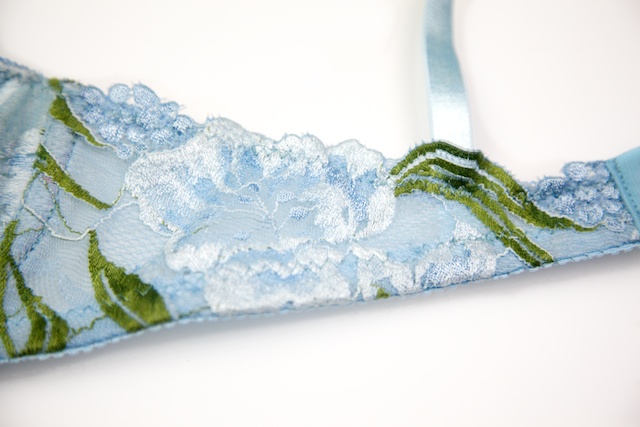
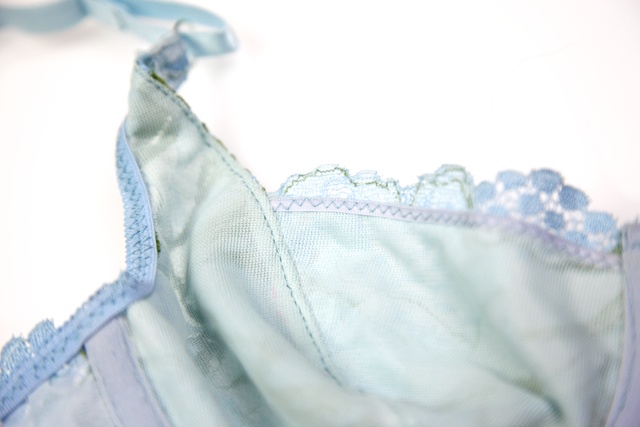
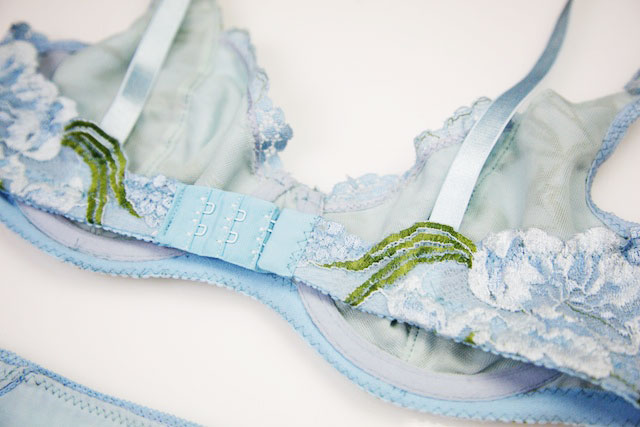
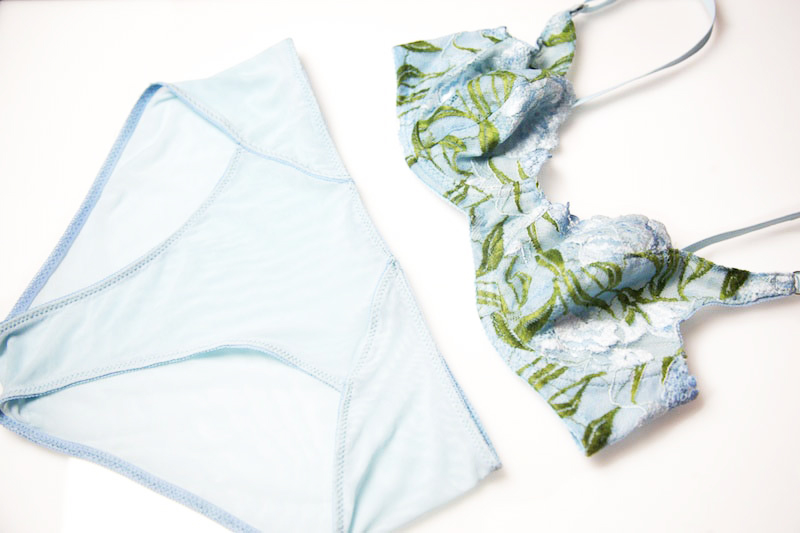
My new lingerie pattern…

Cloth Habit | new lingerie pattern

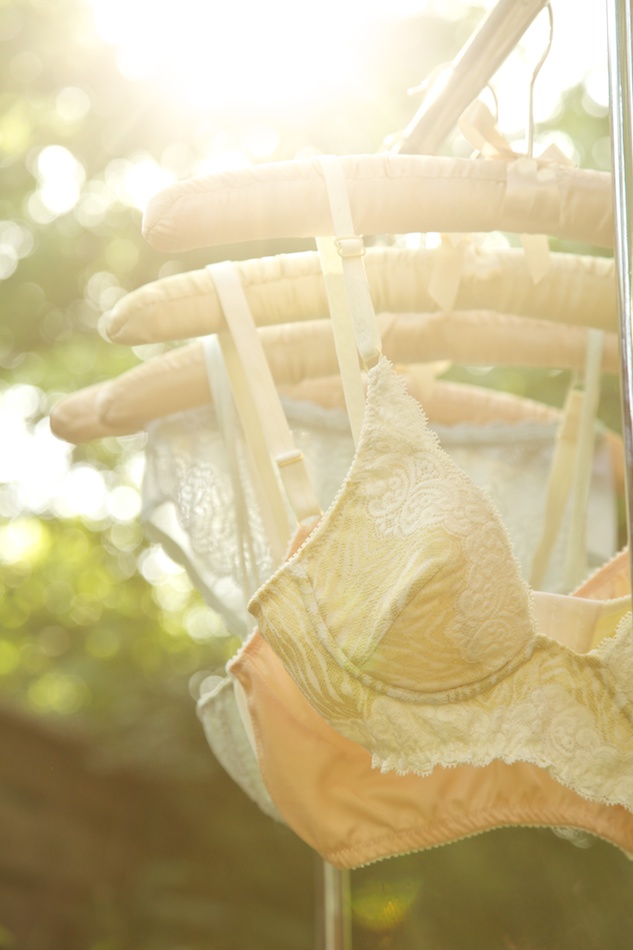
Behind that yellow bra you can see what became the beginnings of this pattern. This is as close as I have to a picture right now! I took this photo last summer and at the time I was experimenting with all sorts of design ideas.

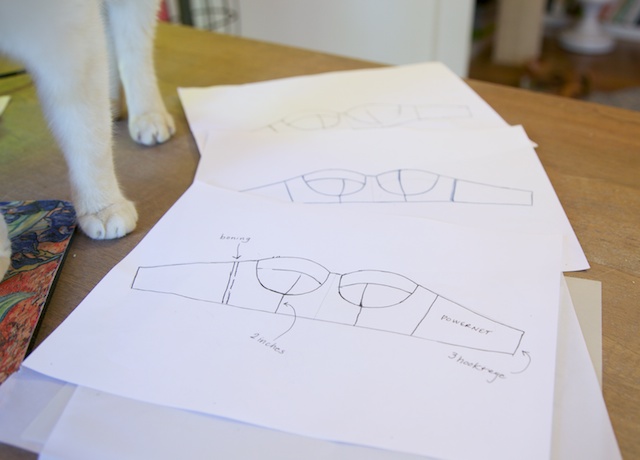
It’s taken me over a year to develop this pattern! Patternmaking [well] and grading is hard work. Selling stuff is work, too. My Ladyshorts took me a month of solid concentration but I wanted to improve many things for my next pattern. I went back to the drawing board and did some hard research on sizing and even developed my own drafting and grading system. All the while I had a lot of doubts and reassessments. Did I really want to make a product from my ideas? Do I want to do all this stuff myself or hire others to do parts of it for me? Or am I interested in creating my own handmade line of lingerie with no sewing patterns at all? Do I want to have a business? Or am I just happy to make lingerie for myself, and occasionally blogging about it?

I’m glad I wrestled with these questions and took my time because it got me thinking harder about what I loved doing, what I was actually good at, what I wanted to learn more about and what I’d rather leave to others. And all the while I was wrestling with how to take my design and sewing further.

Perhaps you are someone who, like me, started out doing a craft or an art form as a hobby or pleasurable release in your free time but it evolved beyond that. You may have started blogging about it, and I believe blogging is a unique hobby, craft and time-skill in its own right. But what if those weren’t enough? I knew I didn’t want to be a professional blogger. My sewing and designing inhabits this strange world in between “hobby” and “profession”, and lately I’ve taken to calling it my “practice”. Visual artists use this term and I rather like it what it connotes–it helps make sense of what I’m doing almost every day.

Once I began working on my pattern in earnest, one thing became very clear for me. I love to teach and share what I learn. My friends would argue that I seek out new learning experiences just so that I can turn around and teach them. Patterns are one avenue through which to teach skills. Whenever I began to have doubts about whether the world needed one more indie pattern company–and I’m pretty sure I’m not alone in those self-flagellating doubts about entrepreneurialship–I reminded myself about my passion to teach. I reminded myself how much I love patterns as tangible teaching tools. I love instructional design.

Whenever I’m learning something new, I appreciate sewing patterns that are designed to get your feet wet by introducing some basic skills and design elements but happily produce a good result from the first or second try. Some pattern designers are especially good at introducing simple basics–Colette’s Hazel, Sewaholic Renfrew and Grainline Scout come to mind–that are really helpful with basic skill-building and easy variation. Eventually, many sewists reach a point where they want to take a lot of creative liberties with a pattern, draft their own design elements, change up techniques and order or sewing, refine their fitting skills, etc. It’s very natural to progress to point of needing and wanting to deviate from a “follow this to get that result” and perceive patterns as mere jumping off templates.

Cloth Habit | On Teaching

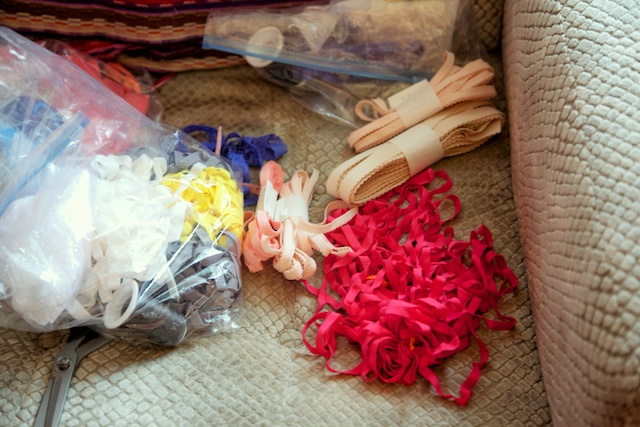
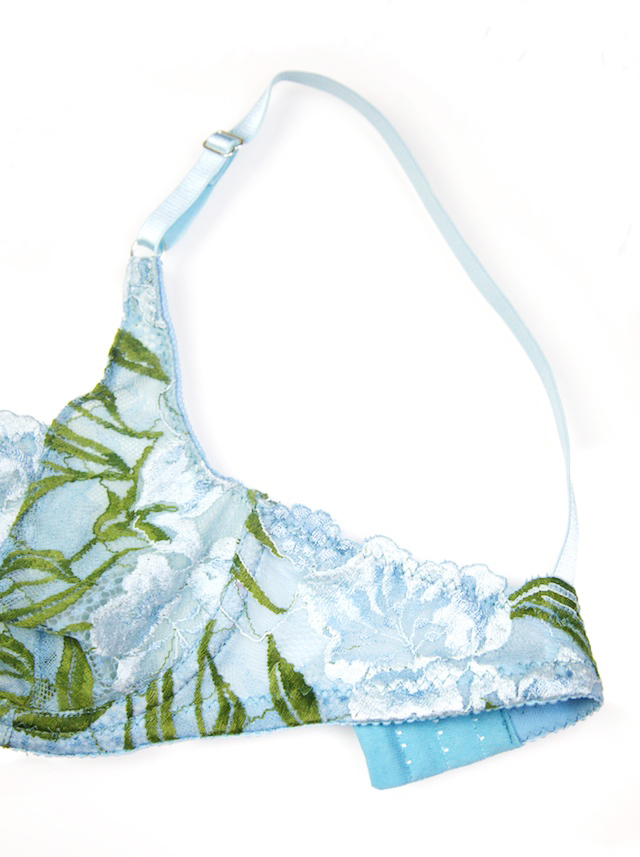
Bras present a particularly unique learning challenge in that there are lots of little bits of materials and notions, and the fitting itself can fill an entire book. (And has.) I liken them to making something more like a handbag with all its unique notions and potential materials, except one doesn’t have to fit the handbag to a body. What I love about my new pattern is that it takes a little bit of the fitting frustrations out of the process, since it is not an underwired bra, and introduces basic sewing techniques and fabrics used in bras, but allows for a little bit of design fun. Plus it’s just hands-down my favorite bra to wear. I’ve made it many times for myself and feel a bit old world in it.

Now I’d love to hear from you: Did you have a favorite pattern for teaching you new skills? Did you feel happy about your finished project and did it leave you hungry for more in a good way?

p.s. My pattern launches in September!

Bra Making: Fitting a Strapless Bra

Fitting Strapless Bra | Cloth Habit

A few weeks ago I reunited with my Juki, the machine I busted sewing in belt loops five months ago! It turns out there is one person in the whole country that can fix the gear I broke and he’s a very busy guy. I have an older Bernina on which I can sew lingerie and all its requisite zig-zags but the Juki is still my love, probably because it is the machine with which I’ve had the most daily relationship. We talk shorthand with each other, ya know? I missed it so much that I brought it home instead of the studio and have been on an elastic sewing marathon ever since.

Fitting Strapless Bra | Cloth Habit

I’ve been finishing up some lingerie sets this week but in the midst had a chance to work on my strapless pattern. I’m taking my time with it because I want it to be right. Which meant sewing up a few tester bras…

Fitting Strapless Bra | Cloth Habit

Truthfully, I’ve grown quite fond of sewing up bra muslins. It’s kind of an excuse to relax a little bit, and even practice a few techniques without worrying about things going wrong. And as you can see, a bra muslin doesn’t have to be all that jazz. I use scraps, and make sure to use the same band fabric I plan to use in the bra. I used to leave out the elastic but these days I always put it in because it changes the fit. Here I stitched it in the spot I want it to be, but without folding it under, and that is all you need for a quick test:

Fitting Strapless Bra | Cloth Habit

Anyway, after three fittings I’m feeling very happy with how it all fits and stays up. I drafted this from the bottom up, since I have gone up a cup size and it was time to do some refitting. I’m also testing my own method for drafting and grading bras, so anything that gives me an excuse to practice is a good thing.

The 3-piece cups are a pretty typical pattern for strapless and bustier-type bras and very similar to the bra I made in my foam cup tutorial. They have a top piece and a split lower cup. At first my cup was quite tall, as I was playing around with a longer wire. In the end I felt much more comfortable with a wire that had a bit of a regular length in front. The band is a little bit longer than a typical bra band and this is what took a couple of fittings to get right. I might share more about band adjustments in another post; perhaps they’d be useful for others wanting to adapt a regular band to a strapless one!

So that’s all for today. I’m off to collect materials–the fun part! I’ve got boning and some great satin lycra and want to dye a few things so it will all pull together, including a little bit of this lovely lace.

Fitting Strapless Bra | Cloth Habit

Happy weekend!

Bra Making: Designing a Strapless Bra

Hello all! So I have been a little quiet here on the blog and elsewhere online, but I’m working on some really fun projects, which include lingerie patterns and even a mini collection of handmade pieces. I have a hard time stopping mid-process to write about it, but promise I’ll give a sneak peak soon. First let’s dive into my obsession du jour:

planning a design for a strapless bra | Cloth Habit

As you have probably picked up from my previous hints and attempts at a bustier, I’ve been working my way towards fitting a strapless bra this summer. I needed one like yesterday! They aren’t just for formal occasions but super functional in my climate–under summer tops with narrow straps or bare shoulders, which I’m wearing almost daily now. I’ve never found one that fits me properly, but in all fairness they harder to fit. I knew this would be a fun project to engineer. I’m not going to write any tutorials for this but thought y’all might like to follow along as I design one for myself!

First I made a list of what I don’t like about the ones I’ve owned:

  • The wires often poke too much under my arms. (RTW strapless wires are usually higher and often stronger than regular wires, and don’t splay as much.)
  • If the cup fits, the wires are often too narrow, resulting in more poking.
  • The bottom of the cup often collapses because the band won’t stay up where it needs to be. I looked inside every one of my strapless bras and they all had this little flat folded spot in the foam at the bottom of the cup. This could be the result of the wires being too narrow for me, but the most likely culprit is the band not holding the bra up enough.

To get some strapless ideas, I had a look through some of my favorite online shops. And I’d basically boil them all down to two types: the no-holds-barred structured torsolette with boning, corset-type seams, and firm powernet fabrics (examples: one, two, three). Or 2. The seamless “everyday” kind with molded cups and one piece of fabric that covers the entire outside of the bra for a smooth look (examples: the popular Fantasie Smoothing bra). There is a rare breed in between, with cut-and-sew cups and retro-inspired design. These tend to be my favorites! I’ve pinned a few of these to my Lingerie Design board if you want some ideas.

Next I drew out some ideas on my handy-dandy bra template. I drew this up so I could think quickly through bra designs and future patterns.

Planning design for a strapless bra | Cloth Habit

Kitty bomb!

I think I am going to go with a 3-piece cup. A two-piece vertically-seamed cup could work but it is harder to fit in a taller cup with more coverage. The taller the cup the more contouring it needs along the neckline, especially if it is strapless. Perhaps in a future post I’ll explain how that works!

Planning design for a Strapless Bra | Cloth Habit

Then I need to figure out the band. This is really the crucial part. A lot of strapless bras have such narrow bands of lightweight fabric, and rely too much on gripper elastic to hold it in place, like the bra in the above photo. (My current and very ill-fitting strapless.)

Finally, I need to do some overall re-fitting due to size changes, and try different wire lengths. Normally I cut my wires down to something much shorter than a full cup wire. I like them short in front and at the sides, but I’m not sure my usual short cups will work so well in a strapless. I’ll get to work on the fitting this weekend and report back on what I came up with. Stay tuned!

Still Life With Lingerie

Blue lace lingerie set | Cloth Habit

I love coming up with unique ways of shooting my lingerie sets, probably as much as the sewing itself! Sometimes I shoot them on a lightbox (basically like shooting on top of one big light), sometimes in a window, or on my favorite throw. At times I still feel like a baby with a big camera and have so much to learn, but really enjoy composition and thinking about proportions within a frame. Before my sewing blog days, one of my weekly hobbies was floral photography, which inspired me to take some photo courses and upgrade my camera. I not only loved taking photos of my garden but then bringing picked flowers inside and assembling all sorts of still lifes in front of a big back light. It seems like shooting lingerie has replaced my still life hobby.

And I also particularly love trying to capture the textured and often gossamer nature of laces and lingerie fabrics. Feels like peering into the deep throat of an iris. I saved this particular lace for over a year and probably pulled it out 15 times just to roll it through my fingers. I do that a lot–it’s kind of dorky but I’m so tactile!

Blue Lace Lingerie | Cloth Habit

The lace and all notions came from a Merckwaerdigh kit, and while I was at it decided to have a whirl at a different bra pattern, Merckwaerdigh Mix30. I’ve had this pattern in my collection for ages but never got around to the bra, in part because I already have two personal bra patterns with vertically seamed cups. But sometimes it’s fun to veer off and try something new. I need some reason to justify my crazy lingerie pattern collection!

I started with a 75C (US 34C) cup, which I arrived at by comparing with one of my best fitting cup patterns, so I got very close to a perfect fit. All the band sizes in this pattern are a 75/34 so you have to remove or add length to arrive at your particular band size. My preferred band length is somewhere between a 30 and 32 but whatever length I use depends on fabric choice. Since I already have a few tried-and-true band patterns, I used my own frame (bridge, cradle, band), and simply added the same design details, such as the scalloped back band with camisole-style straps.

Blue Lace Lingerie | Cloth Habit

The pattern’s design uses lycra on the outer cup and bridge, and lace on the inner cup and band, which lends itself to a pattern blocking look. I really didn’t want to this to get that busy looking so I went all lace, and lined the entire cup with sheer tricot.

Blue Lace Lingerie | Cloth Habit

Blue Lace Lingerie | Cloth Habit

When I use these kind of lightweight fabrics and sheer linings, the cups end up very soft with just a slight amount of give and lend a natural shape, which I like. I have a lot more of these sorts of bras than those with stand-up-on-their-own cup fabrics. The particularly good aspect about this bra’s design is the long strap extension which is not only very comfortable but helps keep the top part of the bra from sagging.

Speaking of lace and softness, many readers have asked me how seamed or lacey bras look under clothes. Oddly I had never stopped to think about all this–I was blissfully unaware of “show through” until people asked. I bought my first lacey seamed bra when I lived in Europe, in a place where seamless bras were few and far in between. So maybe it is a cultural preference for suggestion? But now that you asked, I don’t really notice the seams–it just depends on the weight of the top I’m wearing. What I do notice is color and so I like to have a lot of pale neutrals. This bra is definitely something for dark clothes.

However, I do like playing with seamlessness in undies.

Blue Lace Lingerie | Cloth Habit

These are a hipster style and were an experiment in making a pair that were cut entirely from one piece folded over and seamed at the front. Tulip bikini–that’s what I’m calling this!

Details:
Bra: Merckwaerdigh MIX30 (using my own band)
Bikini: Self-drafted
Lace & most notions: Merckwaerdigh bra kit
Fine stretch mesh: (band lining and underwear fabric) Fabric Depot Co.
Dye: Washfast acid dye, National Blue (strap elastic and mesh)

Wardrobe: Denim Bustier

Denim Bustier | Cloth Habit

Another day of taking photographs in the Texas wind!

So this summer I actually came up with a sewing plan. I’ve never been that great at sticking to one as I prefer rabbit trails and new learning experiences over sticking hard with sewing goals. But the Wardrobe Architect series lit a fire in me! I want to have a more organized wardrobe.

The whole concept of a capsule wardrobe is really new to me, but it makes great sense for me right now. Building outfits I know I’ll wear! Multiplying pieces for the silhouettes I tend to wear the most. Instead of thinking I should stop wearing my handmade skinnies four times a week (okay okay, it’s sometimes more than that), maybe I need to multiply the skinnies.

One of the silhouettes I really want to wear this summer is something like very fitted/bodycon top + wide leg pants or billowy skirt + cloggy sandals. (I love chunky wood-heeled anything.) Like this outfit with the Nettie bodysuit. Or a bustier with some wide legs. I tossed almost all of the trousers in my closet so I’ve yet to figure that part out but really wanted to get started on the bustier!

Denim Bustier | Cloth Habit

Actually, I’ve had bustiers on the brain for about three summers in a row. Two years ago I even crazy-splurged on a Valentino silk from Britex for my dream project. I have three fabrics in my stash that I’m rightfully precious about cutting and that is one of them, so I want to get it right. That bustier will be a full-on fitting and sewing project with lining, boning, fitted cups and underwires. In the meantime I just wanted to kick something out pronto for summer, using my existing stash.

I basically draped this from a frankenpattern that combined the bodice of Sewaholic’s Cambie dress and my skirt sloper for the waist to hip portion. The Cambie has vertical darts in front and back and I just extended them into princess seams that went all the way up and down the bodice. It took me one evening to draft and fit and another to sew–princess seams make everything so easy!

Denim Bustier | Cloth Habit

Once things were fitted, the next stop was figuring out how to add some holding power. Who wants to end up in an embarrassing wardrobe malfunction!? I’m not sure I got it stabilized all the way but I learned some things for future projects. I fitted this to point where it has no ease but as you can see in my back view, fabric relaxes in the wearing!

Straps would’ve been the easiest route and I may still add removable ones. Boning is the ultimate solution, but as for this project I didn’t want to bother with it. Then I remembered reading about waist stays from several bloggers much more versed in couture than I am. If you’re wondering what they are, or why you’d use them, I’ve added some extra credit reading at bottom. Waist stays are super easy to add!

Denim Bustier | Cloth Habit

Denim Bustier | Cloth Habit

I added a small facing at the neckline going all the way around and used topstitching thread on the hem to give it that denim cool. I could’ve gone the whole lining route but really wanted this to be as simple and light as possible.

Overall I’m pretty happy with how it turned out. I’m not completely sold on the sweetheart neckline; while it certainly blossoms my upper half I feel too much like Sophia Loren for my personal taste. But it was a great excuse to dive in! One thing I like about bustiers is that they don’t have to be all fancy, uptown or vintage movie star. Nor do they need to go with other fitted styles. For my personal style, I like a contrast with the casual, loose and no-nonsense. What do you think? Would you wear one, and how?

Details:
Bustier: my frankenpattern
Fabric: Lightweight denim, Emma One Sock
Petersham ribbon: Britex
Pants: my Clovers

More on Waist Stays & Petersham Ribbon