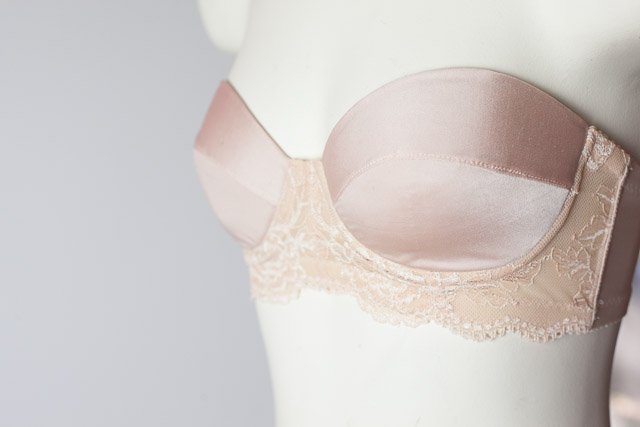
Made: Strapless Bra & Knickers

Strapless Bra | Cloth Habit

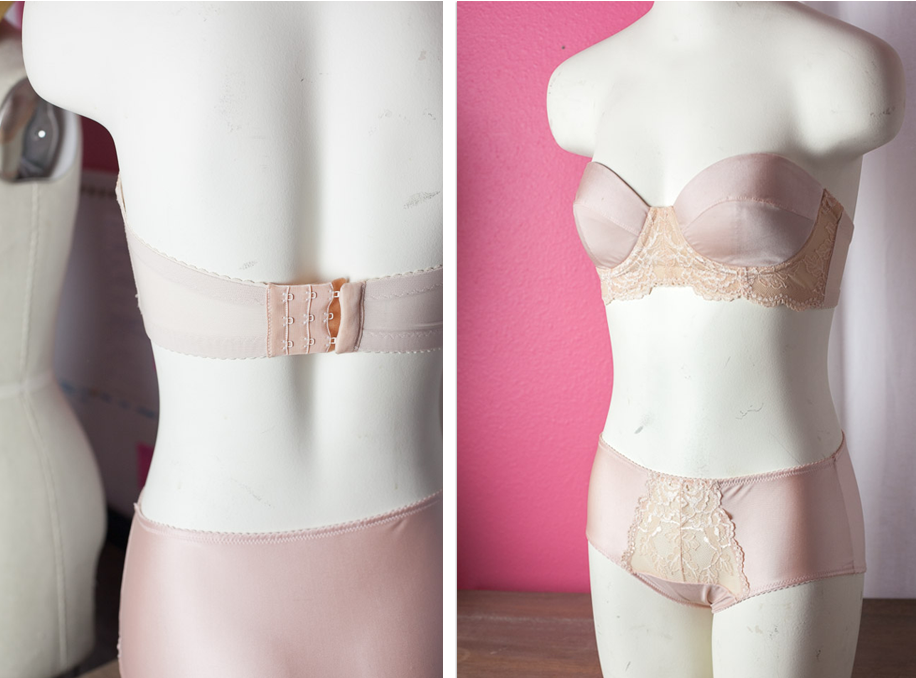
Happy October y’all! My favorite month of the year. Unfortunately, unlike the pumpkin patch, apple-dunking hayride-loving October I grew up with, Austin is still experiencing some seriously hot summer weather. So I have some days left to squeeze in my new tank dress and this strapless set.

And if you followed along with my progress, it must have seemed like this took all summer to make. It did, with a lot of breaks in between. I laid it aside a few times to make about 12 other lingerie sets. I never thought I’d hear myself say this, but I’m going to take a small break from making lingerie. Maybe a week, ha. I just love this set and am so glad I put the time getting the fit just so. I feel a little bit like a 40s starlet when I’m wearing it!

Strapless Bra | Cloth Habit

You all asked some great questions about making this kind of bra and one of them was: is a 3-piece cup better for strapless bras?

In my experience, yes. A three-piece is the most common type of cup in RTW strapless bras and probably for a good reason. A single horizontal or vertical seam is more difficult to contour closely at the neckline especially as the cup gets higher over the breast as a strapless bra does. Think of cup seams like darts. The more seams you have the more “dart” possibilities. The more darts, the more a pattern can fit smoothly around a very curved area without distortion. (This is a basic principle in patternmaking, not just for bra cups.)

When I made my muslins I had to try on my cups in foam pin out little darts along the upper piece to get a smooth, non-gaping neckline shape. Then I took these adjustments back to my pattern.

So let’s talk about the bra!
Strapless Bra | Cloth Habit

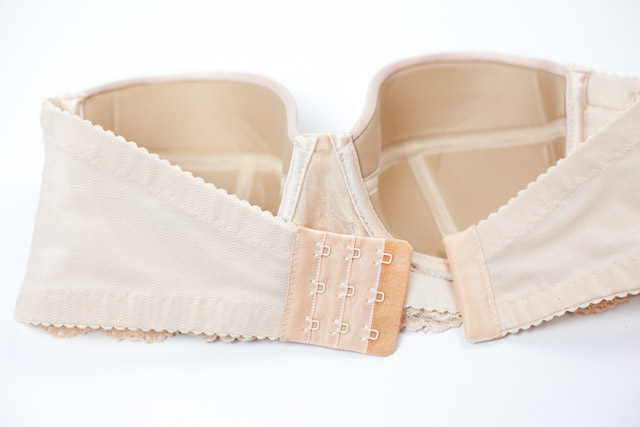
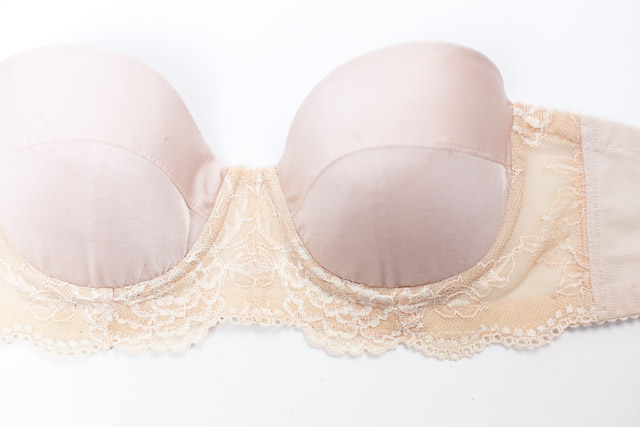
strapless-bra-inside

There are a lot of different fabrics going on here but thankfully I had most of them in my stash, like the lace, lining, and powernet. I listed my sources at the bottom in case you are curious.

As per my usual bra-making routine, I dyed many parts to match. Thankfully, I lucked out and was able to find some wonderful 5/8” plush elastic that matched perfectly! (I did did a total nerdy happy dance when I opened the packages and saw the color.) And it is a nice, firm elastic which is great for a strapless band. I used the same elastic on top and bottom of the band, which ended up being a good call for support but it also feels super comfortable.
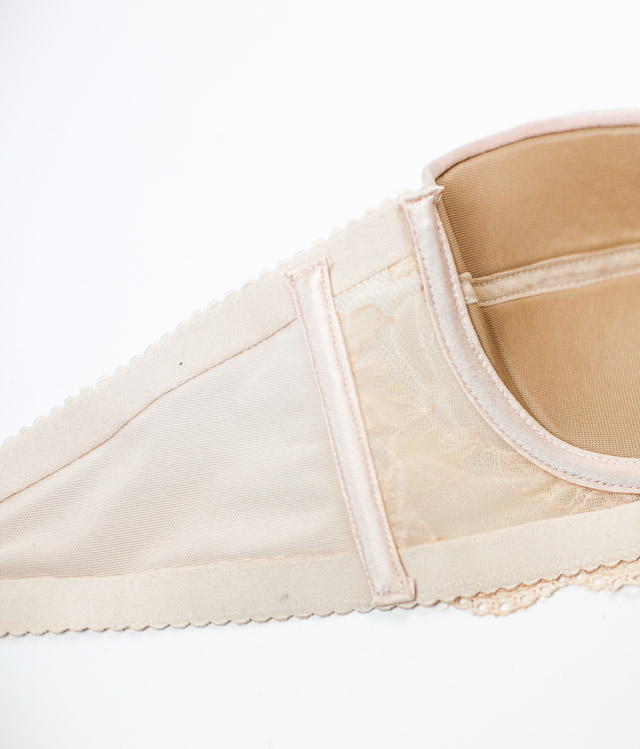
Strapless Bra | Cloth Habit

Unfortunately the very day I finished this my cups got a bit crushed when one of my kitties decided it made a good afternoon nap cushion. I usually have to hide all my sewing projects from them in a drawer somewhere but sometimes I just forget…

The matching knickers were a fun addition. They are slightly higher waisted with a lace inset. I have about 20 underwear styles at this point I’ve been playing with. Some have been winners and others a bit meh, but this one is definitely a winner for a future Cloth Habit pattern!
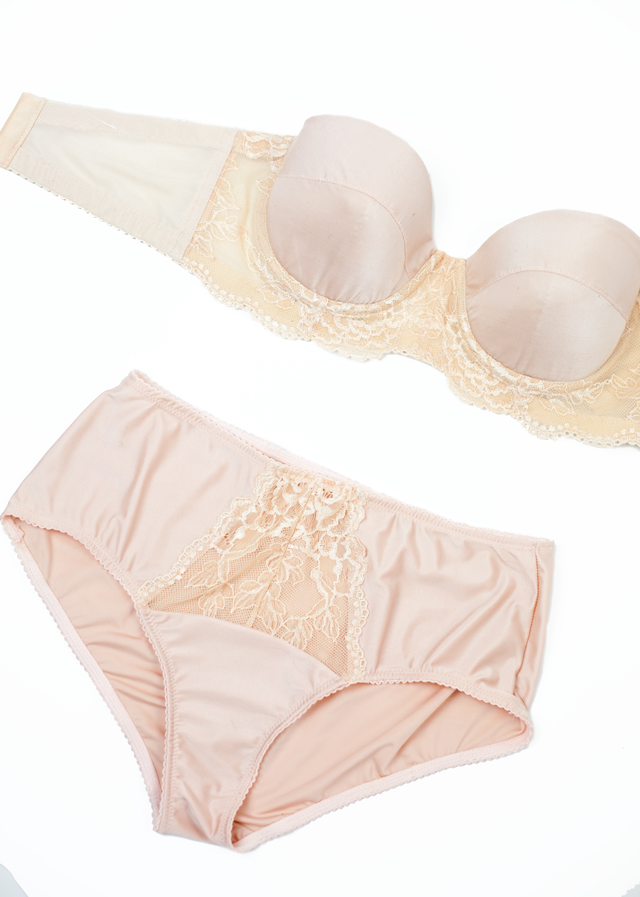
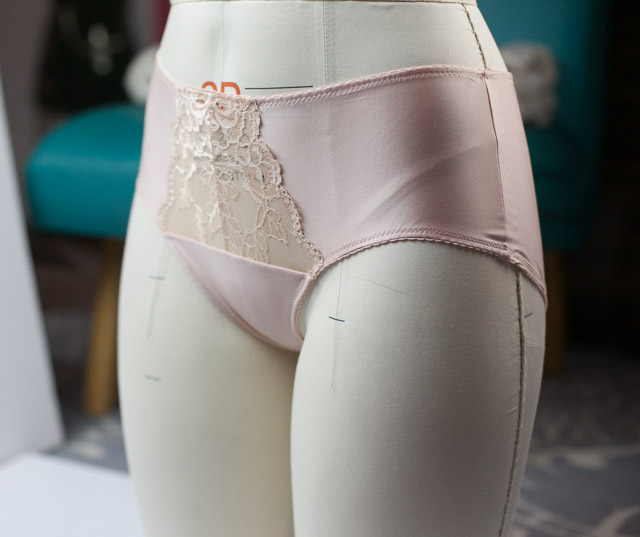
Strapless Bra | Cloth Habit

lace inset knickers | Cloth Habit

Overall, I’m supremely happy with how this all turned out!

Details:
Bra & knicker patterns: self drafted
Cup & knicker lycra: Girl Charlee
Cup foam and sheer lining: Bra-makers Supply
Powernet: Fabric Depot Co.
Galloon lace: LaceAndTrims
Bra & knicker elastic: Lace Heaven
Wires & other notions: from my collection
Lace, lining and powernet were all dyed to match with Dharma Acid Dye
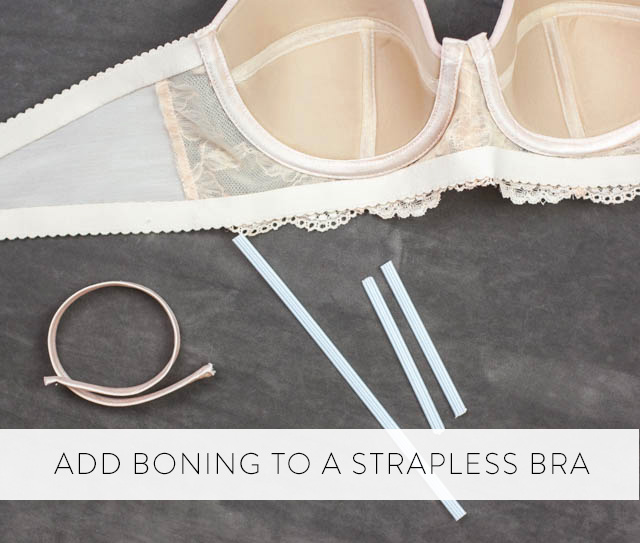
Bra Making: Add Boning to a Strapless Bra

Oh hey, remember my strapless bra project? This week I had a little “me sewing time” after over a month away, and finally worked on finishing it up!

Have you ever used boning in a strapless dress or bra? It’s is one of those little extra things that can add shape and staying up power. A couple of readers have asked me if boning is absolutely necessary and I guess my answer would be—it depends on how serious you are about your bra staying up!

Without bones, a bra slips a bit into “bandeau territory”… the battle of constant pulling up throughout the day. A longer line band helps, as does gripper elastic, but boning is the key to keeping those sides up.

So let’s add some bones…

How to add boning to a strapless bra at Cloth Habit

Here’s what you need:

  • Plastic bones. I bought plastic boning by the roll at Vogue Fabrics for use in various projects. Corsetmaking Supplies sells smaller sections by the dozen. Google “plastic boning’ and you’ll probably come up with more options, but make sure the boning is 1/4″/6mm. If it’s wider than that you’ll have a hard time fitting it into the channeling.
  • Extra underwire casing
    I am using my own homemade channeling but any wire casing will do as long as it is wide enough to contain the boning after stitching down the edge of each side.

You’ll notice my bra is almost finished. I still have to add the hook & eyes but I wanted to add the boning at the very end so that the bones extended over the elastic and covered most of the side seam.

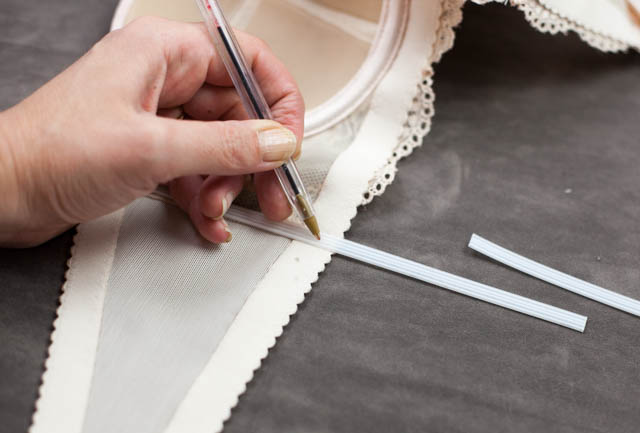
1. Lay your boning on your the side seams and mark off the length you want. Make sure to leave some room above and below the boning to close the channeling. Then cut.

How to add boning to a strapless bra at Cloth Habit

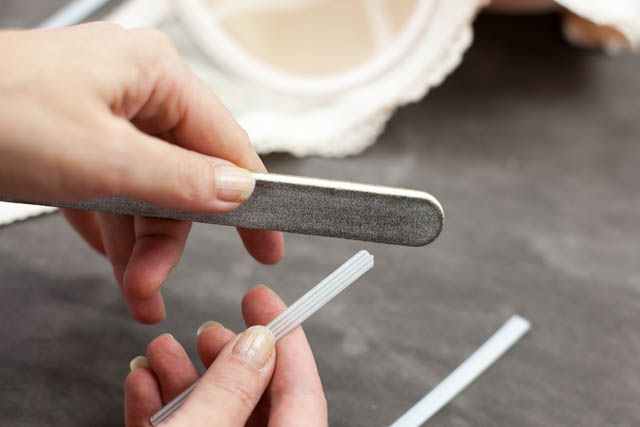
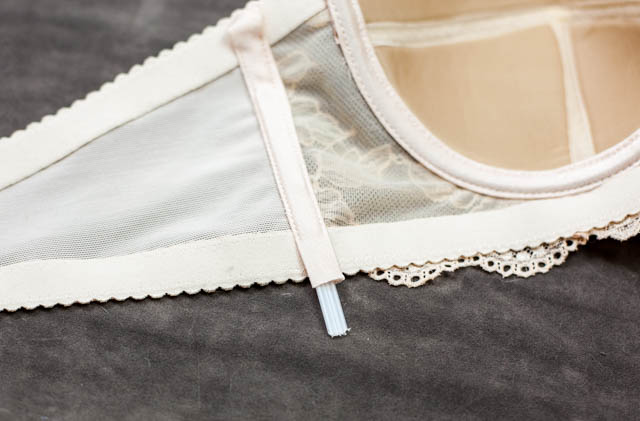
2. Round off the ends of the boning with a nail file. This prevents sharp corners from poking through. You can also use your scissors to created rounded ends on the plastic—easy!

How to add boning to a strapless bra at Cloth Habit

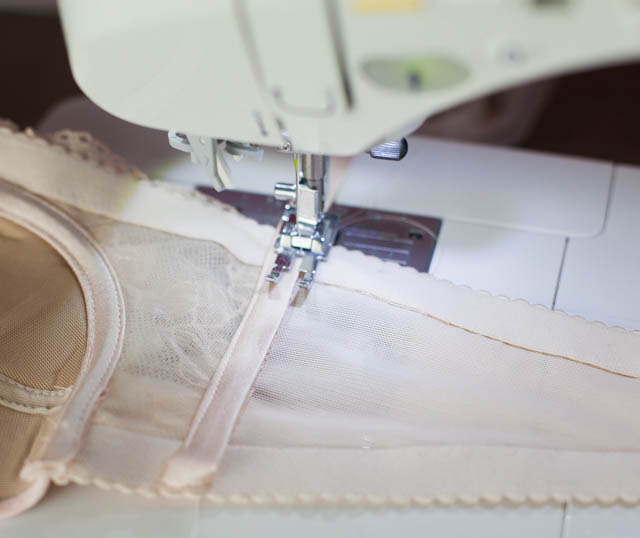
3. Now it’s time to add your channeling. Line up the channeling so that it is centered over your side seam and stitch down each side, leaving the ends open.

How to add boning to a strapless bra at Cloth Habit

You’ll notice I left a part of the ends unstitched. I did that so I’d have some room to fold under the channeling before closing it off. My homemade channeling is thin enough to do that but most channeling isn’t, so go ahead and stitch all the way down!

4. Insert your bones and test the length. Do you have enough room to close off the channeling with your machinef foot? If not file or cut a bit more off the ends.

How to add boning to a strapless bra at Cloth Habit

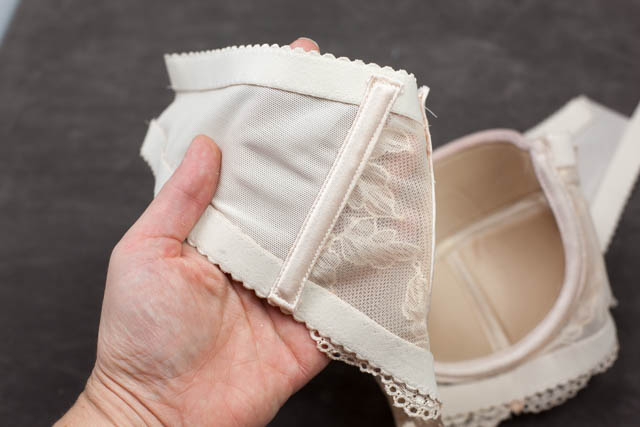
5. Close off the ends. I stitch forward and backward with a small-length straight stitch (between 1 and 1.5). Here’s a close-up…

How to add boning to a strapless bra at Cloth Habit

On a side note, I used to try a narrow zig-zag or bartack stitch to close off wire channeling but it is really difficult to do neatly over that many layers with my machine. The straight stitch works just fine.

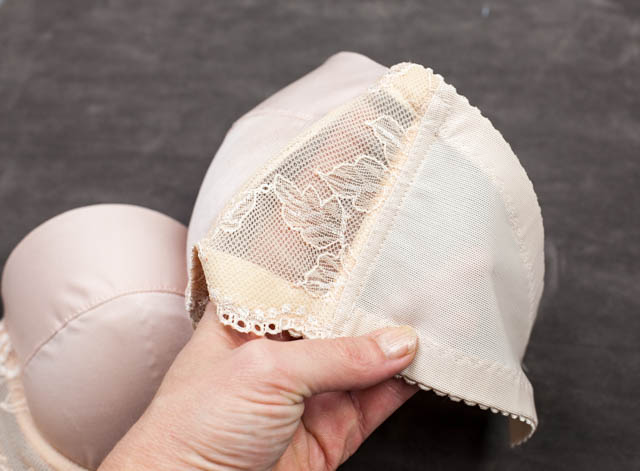
And from the outside…

How to add boning to a strapless bra at Cloth Habit

That’s it! I promise I’ll be back with some details on the finished bra. I had to make a pair of undies to go with it, of course!

Bra Making: What is Sister Sizing?

Sister sizes can help you use a bra pattern that may not have your exact size | Cloth Habit

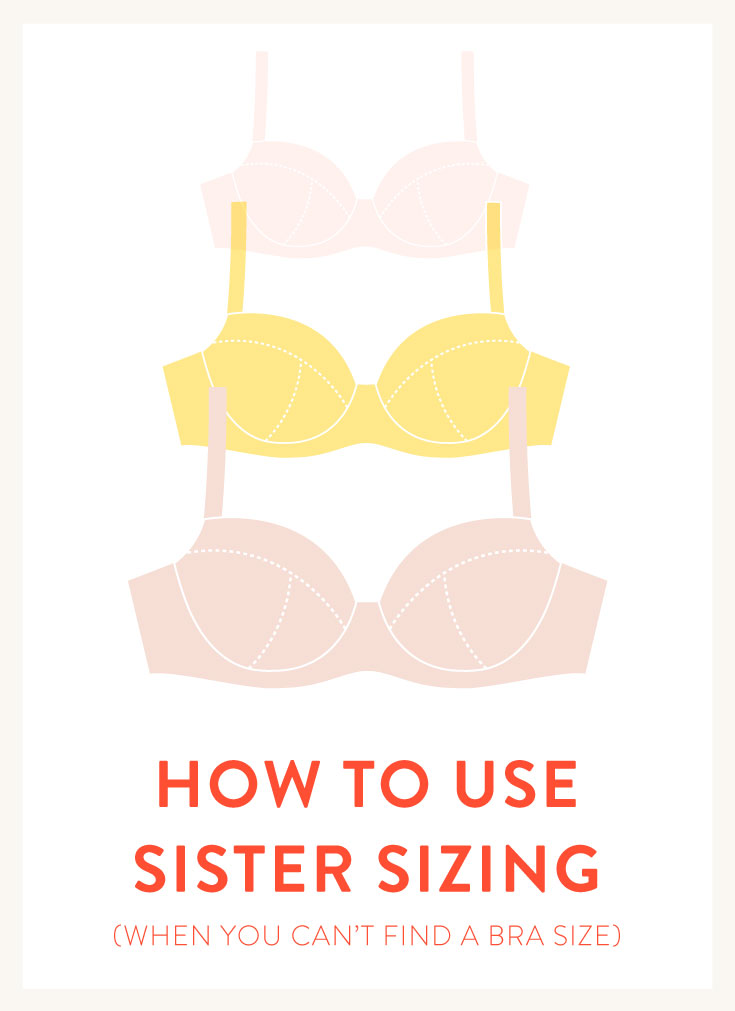
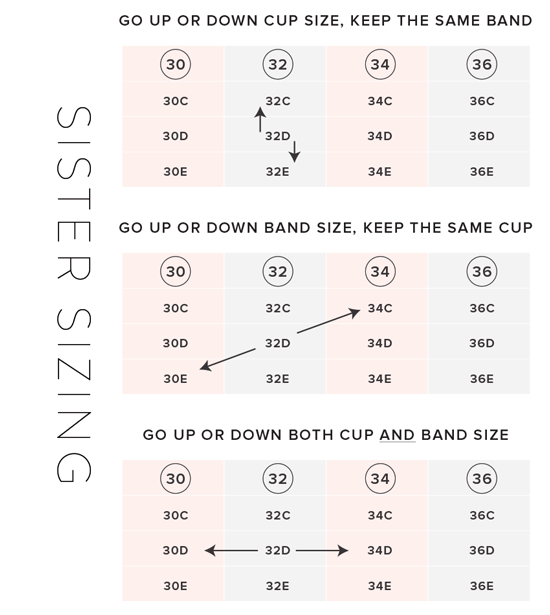
Have you heard the term “sister sizing”? It’s a great term for explaining how bra sizes shift in band and cups. The basic idea is this: Sister sizing refers to the same cup but on a different size band. As a bra band size gets smaller, the same cup volume will have a bigger letter, and vice versa.

In other words, a B is not a B is not a B. A 36B is a full cup size larger than a 34B. So I’m not just “basically a C cup”. Nor is someone else “an F”.

The use of cup size in non-bra sewing patterns like blouses or dresses can make this a bit more confusing for sewists. Your cup size in dress patterns (like Simplicity’s Amazing Fit series, for instance) might be completely different from what you need in a bra. Dress patterns use the difference between the upper chest and full bust measurements to determine cup size, but bras are more dynamic in their sizing.

How to make sister sizing work for you

If you can’t find your size in a bra pattern, there’s a good chance the pattern has a “sister size”, and you can find the equivalent cup on another band, and simply alter the band to your preferred fit (a very easy adjustment!). For example a 28F on a 32 band would be a 32DD or 32E.

Choosing bra pattern sizes with the help of sister sizing | Cloth Habit

(Note: in the U.S. and UK “DD” is usually the cup size above “D”. There are other double letters, too, but most bra patterns use the normal alphabet. I personally find the normal alphabet less confusing!)

Obviously I didn’t fill out the chart with all the possible bra sizes and cup letters, but hopefully you get the idea!

——

There are some exceptions to the sister sizing “rules”, both in lingerie brands and in home sewing patterns. These exceptions do what I call “jump grading”, where the cups on the same band size will jump by two cup sizes after D cups. There are a few upscale brands that use this kind of size grading (Empreinte, Prima Donna) and Pin-up Girls sewing patterns use this method. I won’t go into details of how it works because it can get confusing unless you’re really into the nerdy ins and outs of bra grading.

Regardless of what size you start out with, there will always be a good chance that a bra pattern doesn’t fit the same way as your size in your favorite brand. That’s just the nature of the beast. There are many measurements that go into bra drafting, not just the full bust and ribcage measurement, and no measuring method is going to capture them perfectly.

Before you try online bra calculators remember that you are making a bra, which is a bit different than buying one. Find a starting size by using the pattern’s measuring suggestions, and then go from there to make a “you size”! Learning to fit is an essential part of bra making, period.

Some tips for fitting a bra pattern:

1. Fit a wire before you do anything else. A good-fitting wire solves other fitting problems further down the road.

2. Try to stick with the same band pattern (regardless of what size it is), tweaking it until it is firm enough for you, in the fabric you want to use.

3. You may end up needing to try different cup sizes. Sewing has a way of tuning our eye to fit issues we never noticed before and bras are no different. Nearly everyone I’ve fit has had to go up at least one cup sizes, usually two, from their “usual” size. And my top tip: it is better to start large in the cup and take in adjustments, than starting too small and trying to figure out where the room needs to be.

Have you had trouble fitting a bra pattern? I’ve got more pattern fitting posts in the pipeline so I’d love to hear what ails you.

Book Shelf: Sew Lovely

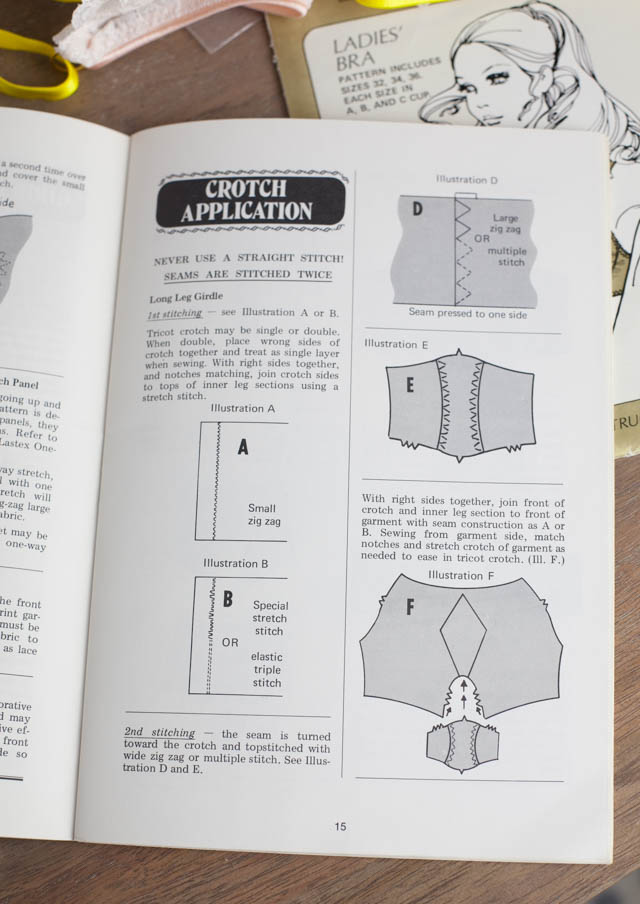
Sew Lovely vintage lingerie sewing books | Cloth Habit

I’ve got a small shelf devoted to books about lingerie design and sewing. And I mean small, since lingerie sewing is a niche craft and not nearly as well-explored as, say, tailoring jackets, hand quilting or fitting pants.

That doesn’t stop me from collecting whatever I can find, if just for the inspiration, funky illustrations and that little bit of lingerie history.

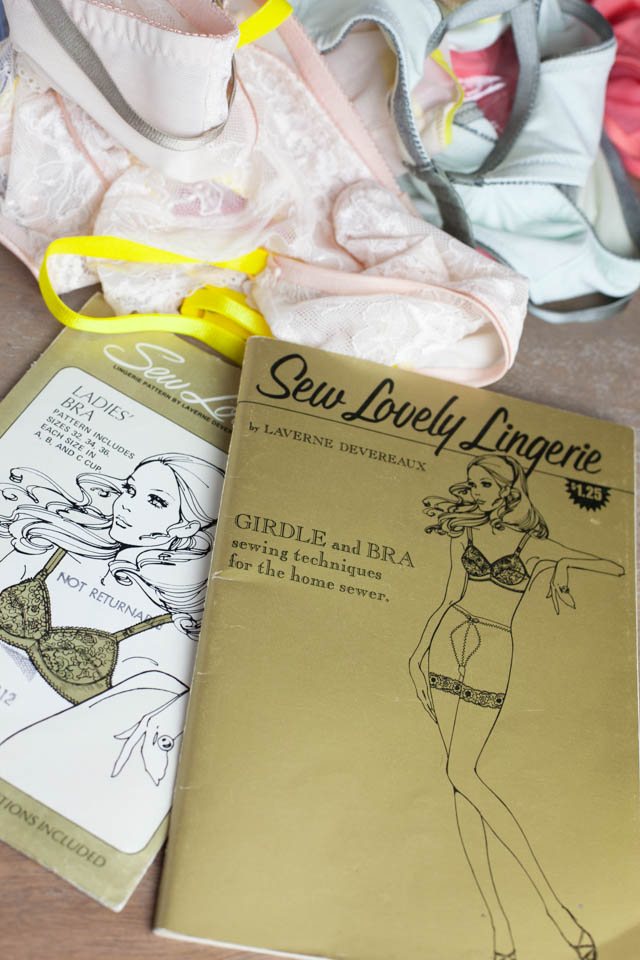
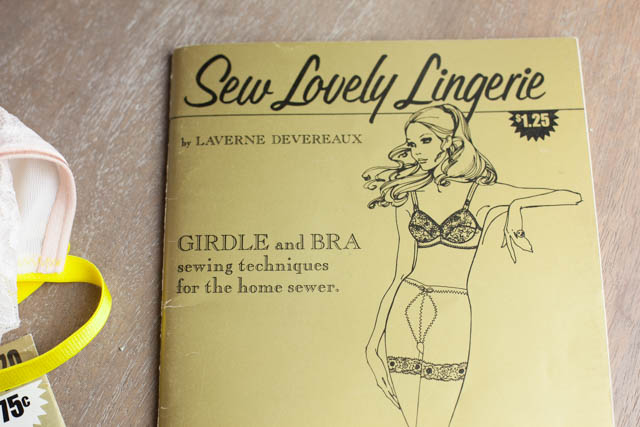
Sew Lovely was an independent line of patterns for intimates, nightgowns and lingerie in the 60s and 70s, designed by Laverne Devereaux. Her booklets and patterns were some of the early entries into sewing lingerie or patterns with stretch. There are two booklets: Girdle and Bra and Slips and Panties. They’re small things, the weight of some patterns, but surprisingly there is a lot of technical information packed within each.

Have I mentioned how much I love the 70s? The best period in fashion illustration, ever. EVER.

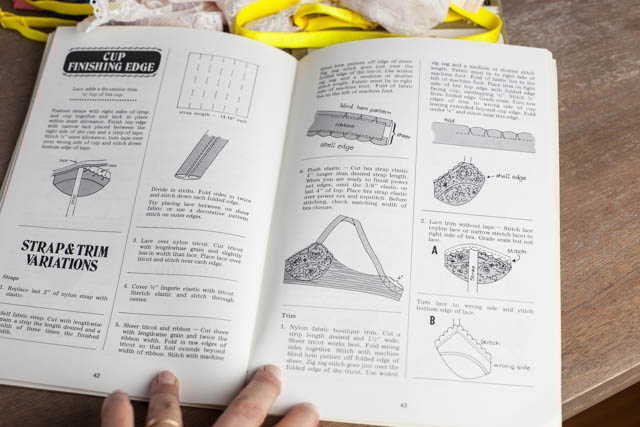
Sew Lovely vintage lingerie sewing books | Cloth Habit

In older books you come across some unfamiliar fabric terms, and that is especially true of technical fabrics made with nylon or spandex. Some fibers became so popular or so heavily marketed by Dupont, the original nylon manufacturer, that the fiber name itself became synonymous with a certain type of knit. Back then Antron was a popular nylon fiber for apparel; today it is Tactel and Supplex. Lycra was still new and Lycra® with a capital “L”, and not the catch-all term for any fabric with spandex. “Lastex” (yarn-wrapped latex) was still popular in swimsuit fabrics.

One of the more interesting fabrics the book lists for bra-making is “nylon marquisette”. Marquisette is a sheer net fabric with a leno weave. It was common in vintage clothing as a sheer overlay material, and stiffer nylon marquisettes may have been used as lining materials in bras. While bra fabrics haven’t changed very much–my vintage 60s bras contain materials nearly identical to what manufacturers use today–the fabrics tend to be much softer than they used to be. Most bra linings are warp knits (tricot), made on machines that can knit sheer and soft but very strong materials.

This book has a nice, balanced mix of construction methods and light patternmaking. Now that I’m thinking about it, many of my vintage sewing books mix “how to stitch” equally with patternmaking. The skills of altering existing patterns, using them as tools to create new styles, seemed much more integrated into sewing than they are now.

I particularly liked the section on girdles. Yes, girdles! Think Spanx if that makes it sound better.

Sew Lovely vintage lingerie sewing books | Cloth Habit

There are some basic illustrations to adjusting a pattern for a gusset, which I haven’t seen in many other lingerie or patternmaking books. I often call the piece that connects the front to back of underwear a “gusset” but a real gusset is much more than that lining piece. A gusset is a rhombus-shaped piece added for movement. It can create a better fit in leggings or any kind of underwear whose leg line reaches the thigh. (Look at your yoga pants!)

This book would make a lovely addition to a sewing collection, especially if you love vintage treasures or lingerie. You never know when you might find some tricks hidden in pages somewhere. There are a many ways to finish a bra cup neckline and this book has a couple of methods that are still in use!

Sew Lovely vintage lingerie sewing books | Cloth Habit

Of course there are many areas of bra-making that can be refined and I would use it in conjunction with a more modern book—or tutorial on the internet!

——

Book Details
Title: Sew Lovely Girdle and Bra
Author: Laverne Devereaux
Published: 1971
Garments covered: Bras (non-wired), Slip Panty, Body Shirt, Basic Panties, Girdle.
Patterns included: none
Patternmaking/Fitting/Sewing Techniques: Mostly sewing techniques in a step-by-step construction order. Some easy pattern adjustments for different styles. No fitting.
Where to find: You can find copies on Ebay, Amazon, AbeBooks, Etsy, etc. for pretty cheap.

Favorite Tools: Scissors I Couldn’t Live Without

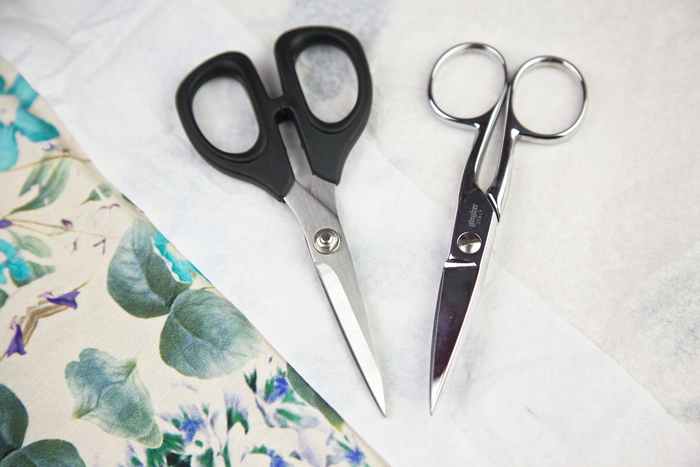
two favorite scissors | Cloth Habit

In my younger sewing years, I hated cutting. All those chores from ironing a tissue pattern to laying out the fabric were the boring tasks I had to do before getting to the fun job of actual sewing, sitting down at the machine and stitching. Then something shifted over the last few years and, dare I say it, I might love cutting more than the sewing!

The whole cutting/fitting/tracing process goes down a lot smoother if you actually like the materials and tools you are using. I discovered I didn’t like tissue paper, or Swedish tracing paper, or pinning tissue to fabric. I didn’t like using wax paper and wheels to transfer markings. So I went looking for better methods and tools, or ones I’d enjoy using. At the very least, a good pair of scissors went a long way toward pleasurable cutting.

I have quite a stash of cutting tools, including a few truly out-there scissors–like a ginormous pair designed for cutting oak tag pattern paper but feels more like hedge trimmers–but these are the two I use and love the most:

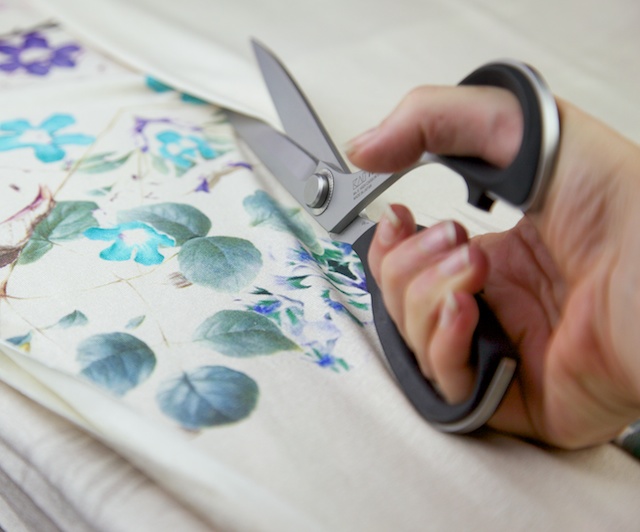
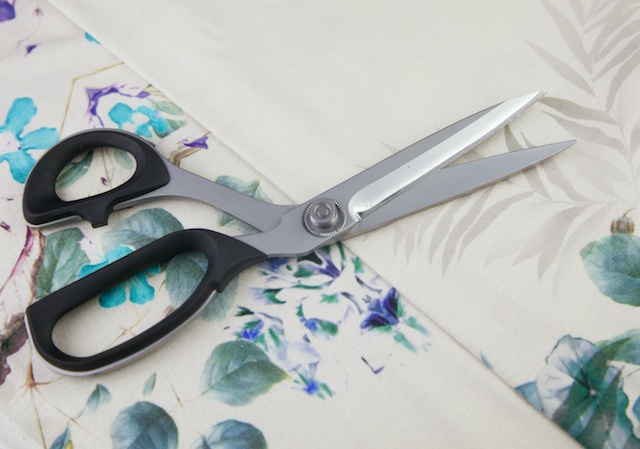
Kai 9” professional shears

Kai Scissors | Cloth Habit

For 20 years I’d been using the same pair of Gingher dressmaker shears which my sister bought me as a college gift. They’re great scissors, but after 30 minutes of cutting with them my wrists got very fatigued.

These fit my hand perfectly. I love the angle of the handles, the material grip around them, the weight. They come in different blade lengths and I almost could have gone with the 8″ because I can’t open these all the way with my small hands. (Good things to think about before you buy those ginormous length tailor shears!)

Tailor point scissors

tailor point scissors | Cloth Habit

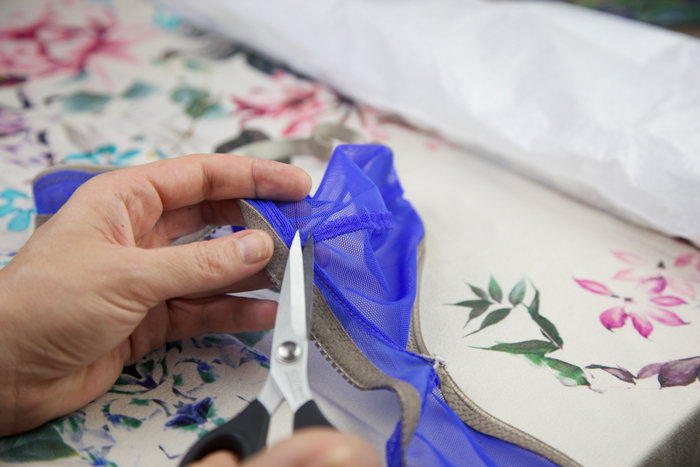
These kind of scissors have a sharp point ending which makes them very useful for snipping into tiny areas (bra seams!). I keep these by my machine or on my cutting area to snip notches, cut loose threads, and trim or grade seam allowances.

The Ginghers are more common in shops but Kai makes a very similar pair called “rag quilt scissors”. I recently added the Kais because I’m often misplacing my other pair, and I’m glad I tried these out. They have the same blade length and style but are a bit lighter and less slippery in my hands.

clipping threads | Cloth Habit

Y’all probably know this but even the best cutting tools make for frustrating cutting when the blades are dull. I was cutting with my original Ginghers for years before I thought to sharpen them and what a difference it made! It doesn’t matter if you cut paper with one pair and fabric with another, your fabric scissors are going to dull eventually. Do you remember what it was like when you bought your first *real* kitchen knife and cut down a tomato? Like cutting through soft butter. I really need to sharpen my knives more often, too…

Have you found a favorite pair of shears, and did it make your cutting a lovelier experience?