Liebster Love

Last week I had the honor of being nominated by three lovely bloggers for the Liebster Award. Thank you Amy (Sew Well), Lavender (Threadsquare) and Christine (Daughter Fish) for bestowing your blog love. Shucks, I feel a little sheepish. Some days I feel as if I’m blogging my own private Idaho, so thank you for reminding me otherwise!

The Liebster is for blogs with followers of 200 or less and I admit I’ve never actually looked at my numbers so I went digging around in my Feedburner account. It didn’t help much with follower numbers, which seems to change from week to week (Feedburner averages how many times blog is viewed per day in readers) but I was totally geeking out looking at all the statistics. Apparently I have nothing on the geekdom that seems to land on this site. Namely Battlestar and Tricia Heifer fans. Over 90% of the hits on this site relate to my Number 6 Dress. I’m sure by linking that in here yet again I’m in danger of attracting even more of these hits, and if you are here because of that, Go Battlestar!

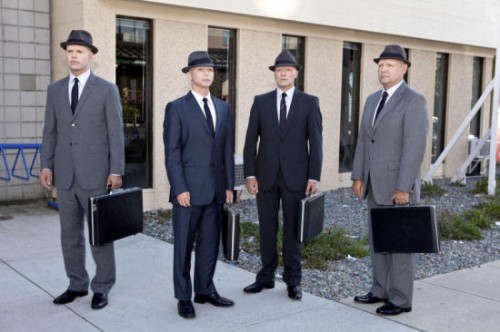
Although these days I’m more of a Fringe fan, and I’m praying they get one more season because this show is just warming up. Instead of Cylons, we get three versions of each character, who cross alternate universes to talk to themselves. Self, meet self. Fun. It’s not much to talk about in the clothes department but I do like The Observers’ hat style.

And now part of the game is to pass the award on to five more bloggers. I think I’ll make it six. I kinda like finding rarefied corners of the interwebs, don’t you?

The Thinks. Well, this might be cheating, but this is a blog by my dearest friend Han Stoney. She’s a lovely illustrator and rabid book reader and I appreciate her observations on art and life.

Pattern Vault. Sarah does elegant research into fashion history and the media behind Vogue Designer patterns. I confess I was the first in line to buy a few from her collection of Alexander McQueen for Givenchy patterns.

Blooms Fabric Obsession. It always helps me to follow stylish Aussie sewists… they teach me how to be funky yet relaxed in a hot climate. And remind me that I need to be living near a beach.

Fool For Fabric. I kinda stalk this blog. I want to be her when I grow up. And in 10 years if I’m not living near a beach, I should be living in Northern California. (Near a beach.)

Sallieoh. All around lovely blog on color and sewing and fashion and food. I think I felt better about my Rachel Comey shoe collection after discovering her!

A Good Wardrobe. Liz is designing, patternmaking and crafting her own wardrobe. And she lives in my favorite city in North America. (Near an ocean… am I sensing a theme here?)
Finally, a Fur Coat!

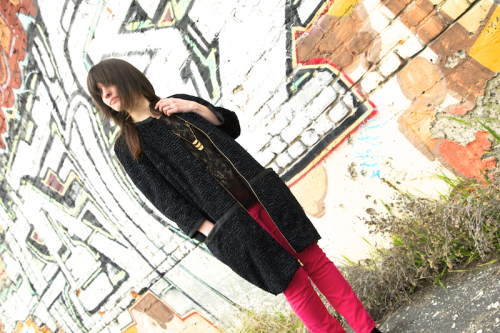
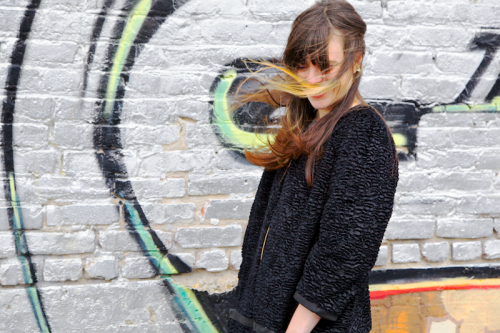
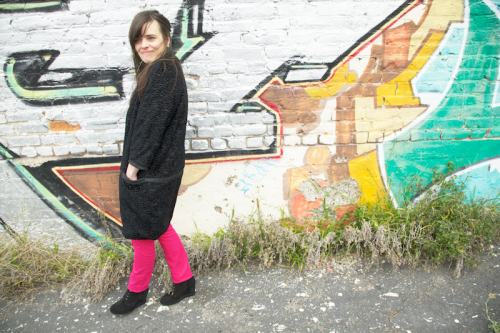
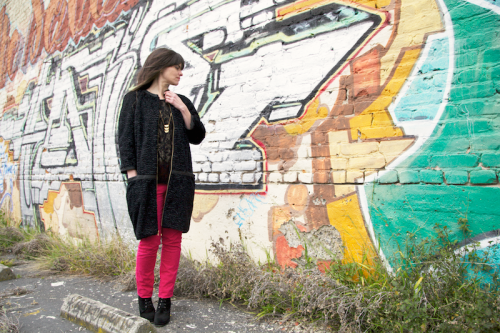
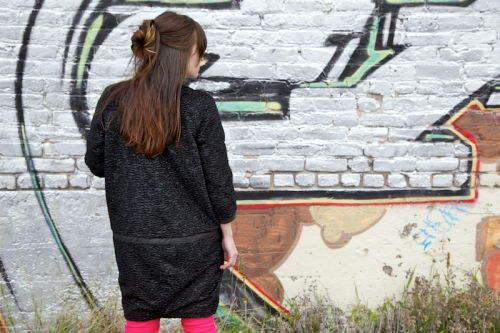
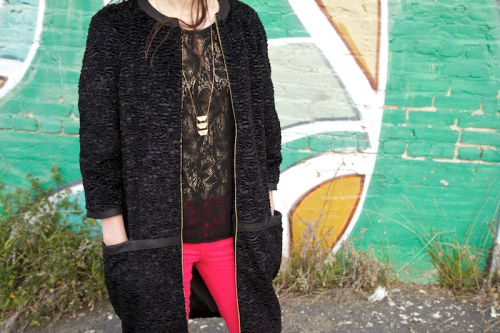
My husband and I are pretty much exact opposites when it comes to photographs. I like still, very non-moving and exacting perspectives and can spend hours fiddling with the camera controls. He often just sets things to auto at all times of day and thinks mostly about composition. He’s kind enough to remember that I want photos that give at least some level perspective of the physical plane because hey, this is also a sewing blog and I want the zipper in focus and folks like details. And I need at least a few where I’m not vortexing into that graffiti.

But I’m definitely not complaining. Derek is enthusiastic about most of what I make and wear and likes making art out of it. It took us a few days to figure out which setting would be best and on top of that we’ve been traveling (which meant that I was totally sewing my coat until the 11th hour before getting on a plane).

We finally found a fun location earlier this week and the sun was kind enough to be lingering behind some light cloud cover. Still, black is hard to get. And the wind was nuts!

The beautiful hair knot I’d managed kept tumbling down left and right and so I just gave up on the hair. I am in desperate need of a haircut anyway. (If pictures could speak, you’d be hearing me saying “my bangs are driving me nuts!” over and over.)

No matter the weather difficulties or the hair anxieties, he encourages me to come out of my shell and show my face to the camera.

But yes! Le coat is done. And it feels good. And I adore it! I’ve already worn it four times because the weather got cold enough. It’s a great feeling to want to wear this and not to abandon it out of sheer boredom from familiarity. I’m still feeling a bit sad that my Lady Grey and white silk blazer, two other labored jacket projects from the last year or so, aren’t getting the wear they deserve. In defense, the Lady Grey was an experiment and I still haven’t figured out how to make its silhouette work with the rest of my clothes.

Speaking of which, although I feared the cocoon silhouette might be a bit much, it works amazingly with some of my basic every day clothes. I tried a few different outfits underneath and most of what worked were shapes that stuck toward the streamlined and narrow, especially from the hem down. If it was a top and jeans they had to be narrow and the top hitting somewhere near my hips. A dress with lots of pleats and drapes looked overdone, but another one with stripes and a columnar look was perfect.

View from the back:

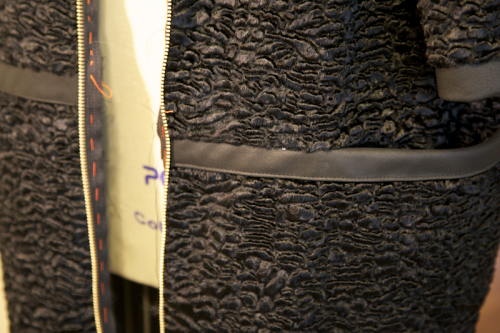
If you’ve been following along my coat process, you might remember I planned to shorten the sleeves, which I did by about an inch and a half. On the muslin they were just a smidge above the wrist but I think it’s better at this “hip” length. I’d also originally intended to use leather strips down the each side of the front zipper. This proved to be more than I wanted to do. It took some careful sewing to enclose the zipper in the leather facings and I didn’t want to push my luck by adding one more leather seam. Anyway, I kinda like that the front closure is just a hint of gold teeth shining through. Simple.

The coat is fully lined in a stretch polyester lining that actually ended up giving it some needed weight and structure, so in the end it’s quite warm and not as drapey as I thought it’d be. I think I’m getting the hang of this lining thing. After learning to draft one for Sherry’s RTW Sew-along, I went back over my notes and adapted it for raglan sleeves.

This was such a fun project to throw myself into and I’m so glad y’all have followed along! (Here’s a link to all my previous entries about the coat, if you’re interested.) The leather adventures may not be over, either. I’ve got some ideas for all those leftover scraps but that is for another day!

Just a Few Smashes Left

Oh my, is it March already? On my leap year day, I played a bit of hooky and spent a long day sewing, basting, hammering, sewing. The coat is so close and soon, I promise, I will be showing up in it in person!

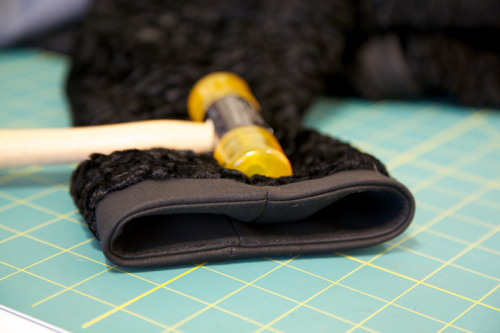
What’s that, hammering? This might be a good time to introduce you to my friend, the mallet. I highly recommend whacking seams with a hard (preferably non-metal) object at some point in your sewing career–it’s therapeutic.

Whacking, smashing, the Jamie Oliver method of sewing. It’s also just about the only way to flatten intersecting leather seams.

In the end, the leather only occupied such a small fraction of the coat, but made for some very careful and slow sewing. I think I was stitching at snail speed on my machine. The most difficult part was inserting my leather trim neatly around the hip seam.

It’s basically one strip of leather that I pieced together and folded in half. Then I sandwiched it into the hip seam like one would sew piping. The result is a bit bulky especially around the inseam pocket. There was no way I was going to get that folded edge topstitched down neatly without first gluing or tacking it in some way to the fur. Yeah, I had to tape leather to fur. My other newfound friend: Wonder Tape.

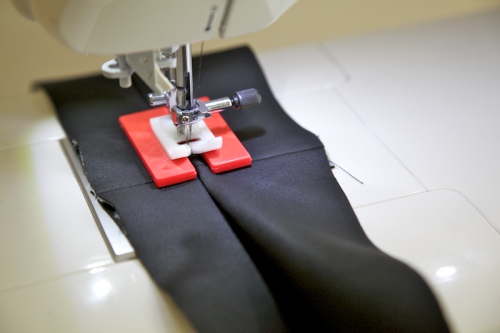
For most of the leather seams, I used a teflon foot, which is the white foot you see below. My machine came with this and I’ve occasionally used it on other fabrics that seem to get pushed a lot by a regular foot. (A roller foot is an alternative.)

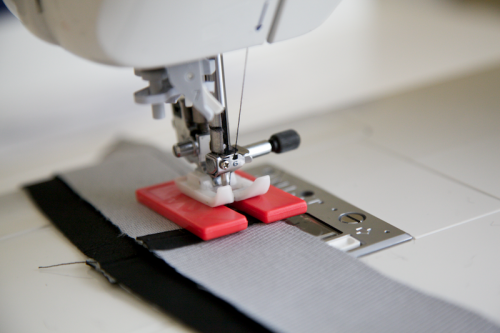
And there’s the jean-a-ma-jig tool in action. It’s sort of like a fork you stick under your foot. Understitching intersecting seams was much easier with this! (Another way of doing something like this is to slip a folded piece of cardboard under your foot about a half-inch away from the beginning of the bulky part, and sew “off” the cardboard.)

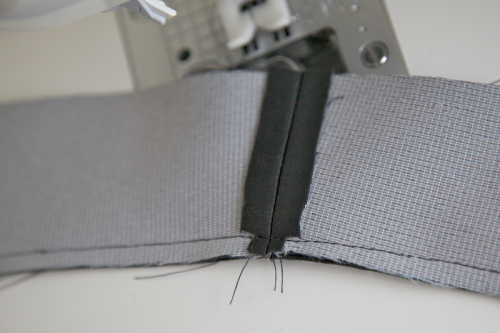
I understitched quite a bit, especially the seams that were going to be edges. On the leather seams that needed to be pressed open, I used double sided fuse tape to permanently hold them down. (Some like to use glue or edge-stitch the SAs down.) These seam allowances are fused-taped and then trimmed near the edges, where there will be an intersecting seam:

On the needle front, I used both leather and microtex needles in size 9, which I had from a previous project. (I found both of these in 20-packs on ebay awhile back.) Both are very sharp and seemed to work well on the lambskin and the fur. Little binder clips are also good to have around, to hold seams together in lieu of pins! I confess I abandoned these because they just kept getting in my way. There were places where I couldn’t baste or pin and I had to hold the layers tight and just pray the fabric didn’t move around too much.

Now back to whacking… just one more hammering session and I’ll be happy enough to sew the lining shut.

Shopping, To Cure What Ails Ya…

For some reason I’m weirdly thrifty about thread. There are gadgets and patterns and buttons overflowing my drawers but when it comes to thread I always buy exactly the color I need and usually just one spool of it. Why I thought a half-spool was going to last me through my coat, who knows. And since driving twenty minutes to the store just for black thread in my semi-feverish state seemed so pointless, I figured I might as well poke around for a few toys.

This is how I end up with all kinds of odd sewing tools. Go for last-minute thread, walk out with gadgets. Every time I walk through Joann’s, past the fake flowers and reams of paper-craft aisles, I discover some new sticky tape or loop-turner that needs trying. This time it was the jean-a-ma-jig:

Have you tried this? I love it! You can see here how I already used it to sew over bulky seams on my leather. I’ll write more about that later…

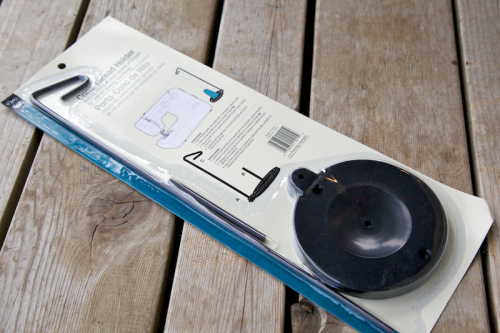
And then, ooh, there was this cone-spool holder:

I’m sure I could’ve gotten this cheaper on Amazon but ah well. I have a couple of industrial-size spools of white thread (my one thread backstock) I bought last year that don’t fit on my machine. I’m not sure what I was thinking when I got them, but this kind of spool holder might inspire me to buy bigger cones of the basic colors I’ll always need.

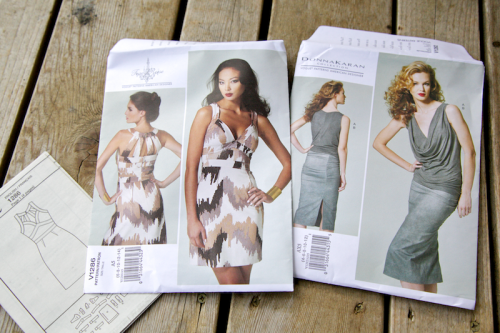
And then of course there were patterns. It just so happened that they were having a sale on Vogues so I bought two. It’s been awhile since I’ve bought new Vogue designer patterns. Way back in the day before ebay and etsy, I used to stalk the pattern sales with my mom. And when the designer ones went on sale for $3.99, it was a pretty sweet deal. It still is.

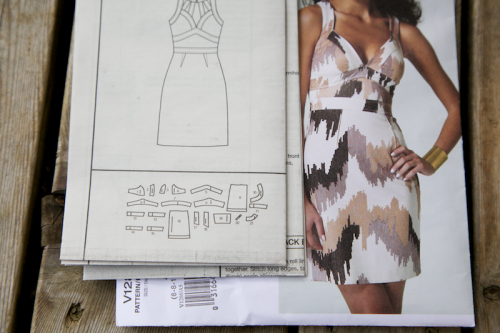
I don’t wear many fitted dresses, but you never know. Plus I just wanted something to look at while laying in bed. Actually, I’d go for the draped top in the Donna Karan pattern… very Helmut Lang-ish and right up my alley. The Tracey Reese pattern has 21 pieces! And would need a serious muslin to get a proper fit with all the straps and bust shape, but can you imagine a 21-piece muslin?!

And last but not least, Amy’s enthusiasm for Craftsy courses inspired me to sign up for Susan Khalje’s Couture Dress course. I’ve been really curious about the class format, probably more than the dress. The whole presentation is so elegant–great videos, really nice graphic interface, well organized. A nice way to spend a sick day, browsing through videos!

I don’t find myself gravitating to the couture process much but I like picking up ideas from all kinds of processes. And I like her teaching personality–she’s very jolly and easy to follow. So if you are interested in couture-ing, paying $39 (thanks to Marina’s sweet offer!) for like eight hours of video instruction can’t be beat. If you’re interested in this particular course, Susan recommends several other patterns if you don’t like the course’s free pattern. The wide square neckline is my least favorite, so I’ve been hunting through my Burdas for a suitable alternative.

And thanks for the well wishes! I’m feeling much better today… (although I had to go back and make sure I didn’t post anything strange last night out of delirium.)

Cocoon Coat: Sewing the Fur!

This was the week to get my coat done. I had lots of extra time for sewing and then a little-turned-big winter cold decided to take over. People, it was 90 degrees here yesterday. Having a fever in this kind of weather in February is so disorienting. But with a little seam here, a seam there the coat is slowly but surely coming together. The lining is done and the rest of the coat getting close.

Each new material brings a different challenge and learning how to “feel” it as it sews. Last year I worked so much with silk and similarly drape-like rayon that I abandoned pins altogether. I got used to the feel of it in my hands, under the machine, how it feeds, how to control ease and sew around curves. Gaining this kind of tactile knowledge, of both machine and material, is a real pleasure. I love letting fabric intuitively do what it wants to do.

I don’t have much experience quilting but it must be like this experience of this persian lamb fabric. It’s so lofty and cushy and the layers slide around on each other. Just sewing two layers about five inches long results in the top layer creeping a half inch longer. I pulled out my machine’s walking foot but there was still a lot of creepage. In the end I basted all the fur seams before sewing and still used the walking foot for control.

Back when I was sewing clothes in college I’d use like 50 pins just to put in a sleeve and elsewhere did a lot of basting–and still get mightily frustrated when things didn’t line up. Maybe sometimes the pattern was at fault (I wouldn’t have known anything about walking patterns or even thought that patterns could have problems). But I didn’t know much about material handling either, like how to use the feed dogs to ease bottom layers. It was more like trust the pins over trusting or getting to know the fabric.

One interesting tip I picked up from Fehr Trade was to sew fur seams down the nap. Which means sewing all seams from top to bottom. So when sewing the sleeves, rather than going around the entire circle in one pass, or going from the underarm up as some often do in setting sleeves, I sewed each side from the top down.

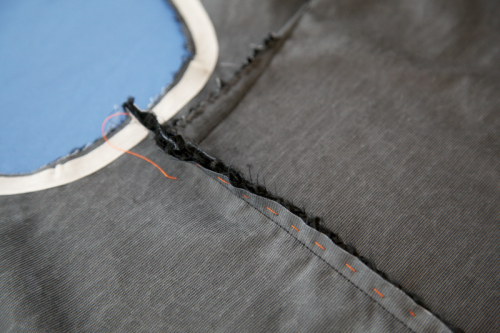
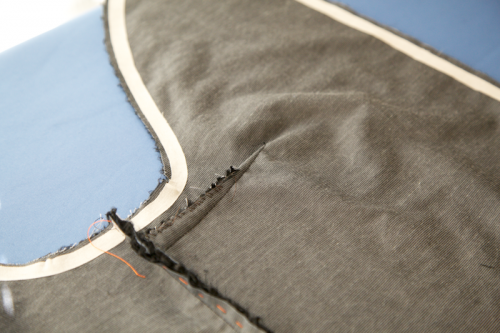
I wasn’t quite sure how to go about the bust darts. They seemed a little bulky after sewing them shut, so I tried clipping one of them open. This made a bit of a fur mess so I slipstitched the dart together and then tacked it down to the fabric. I left the other one unclipped since it didn’t seem to make much difference from the outside.

For some reinforcement, I used a bit of fusible tape around the armholes and areas where the pockets and zippers would be. I practiced on scrap to make sure it wouldn’t crush the pile.

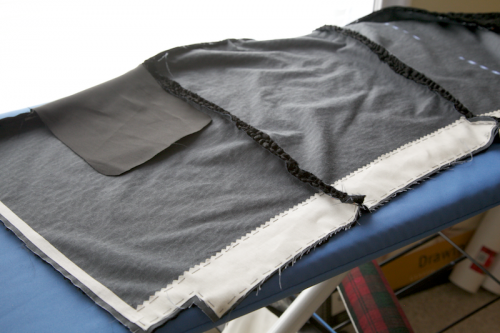
For larger areas like the hem and front facing I basted in some woven interfacing.

i’ve got a few more pictures of the leather sewing but I’ll save that for later. Now back to my queue of b-list netflix movies and shlepping around in the bathrobe…