Ask the Expert: Questions for Norma!

Orange Lingerie, cream lace bra

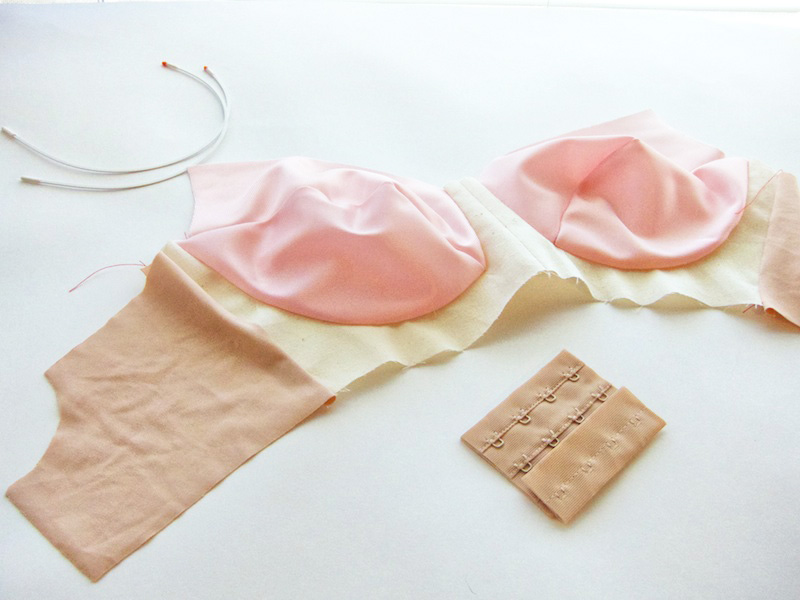
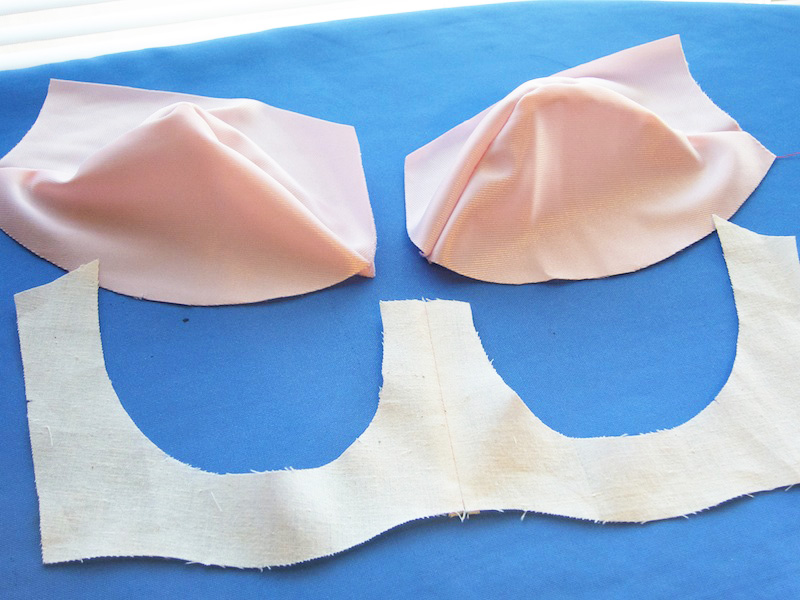
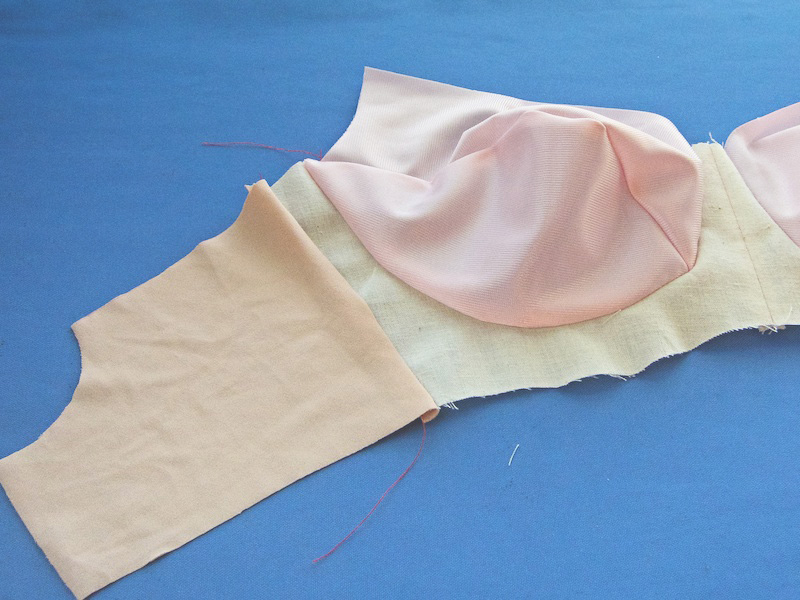
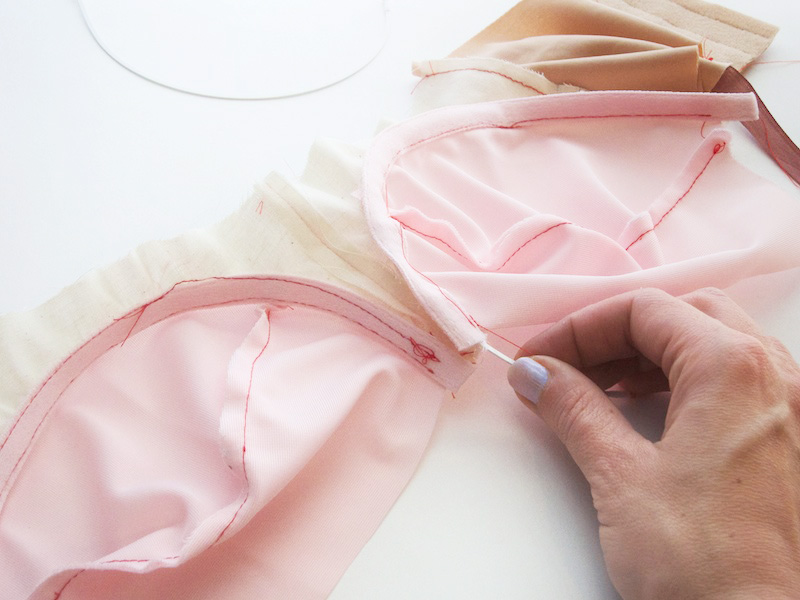
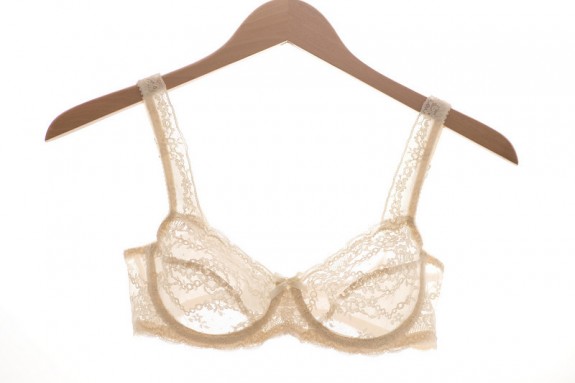
Today I’m going to turn the floor over to Norma Loehr, our guest bra-maker. She has been so gracious in joining the sew-along group and offering her expertise in bra fit and construction. I feel like I’m in bra bootcamp, don’t you?

You all had some great (especially fitting) questions for her and it was really hard to boil them down!

Q; The underwire size that fits me comfortably is about 2 sizes bigger than my bra size, and the wires are really high. I can’t find any shorter wires in this size. I’ve been cutting them off on both sides, filing and dipping them in adhesive. Do you have any tips to make this easier?

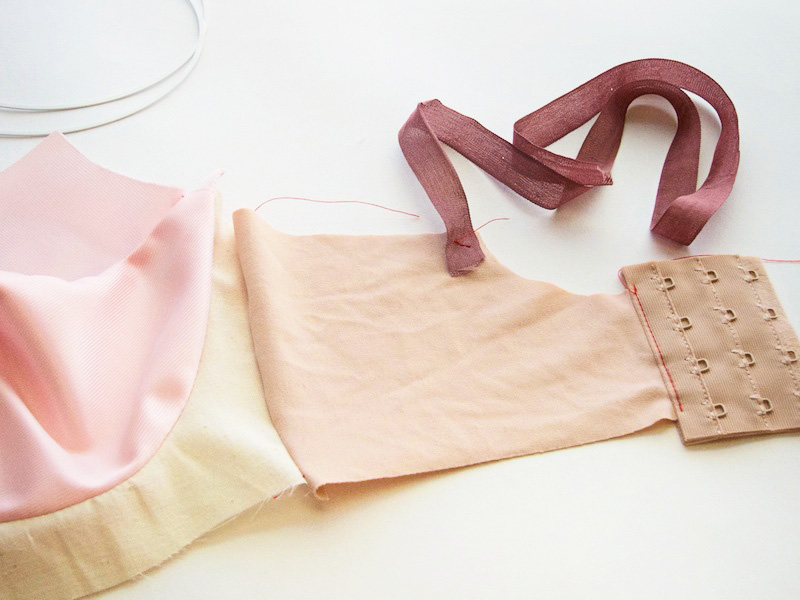
Yes, I frequently have to cut underwires to get them to fit into the bra. I use a DeWalt wire cutter that which snaps right through the underwire in one clip. To seal the edges, I use Household Goop which you can also find in the hardware store.

For both tasks I put the wire into a table vise so I can have both hands free and also don’t forget to wear eye protection! Those wire ends sort of fly off when you use the wire cutter.

I hope this makes the process simpler and faster for you!

Q: I have a prominent sternum and regularly have issues with the center wires digging in–especially if they are very tall. What sort of changes to my pattern do I need to make to accommodate this?

You should not need to make any pattern adjustments but you will need to reshape the underwire. I had a client with this exact issue and it was solved by bending the underwire in an outward arc, away from the body. The arc to accommodate your body should also help avoid the digging in at the tips of the wire because the wire won’t be tilted back in toward your body. You will need to experiment with the arc that works for you but do so in small increments because once wires are bent then do not go back to their original shape.

Q: I’m a 32A and most of the bra patterns I see seem like overkill for what little I have! I love the 15 minute set on your blog; do you know if there is an available pattern for something like that?

Lucky you! With an A cup you can wear whatever you want! Don’t worry about “overkill”, just make whatever style appeals to you.

If you like the 15 minute set the Kwik Sew 3167 with a band rather than the stretch lace at the bottom would be similar.

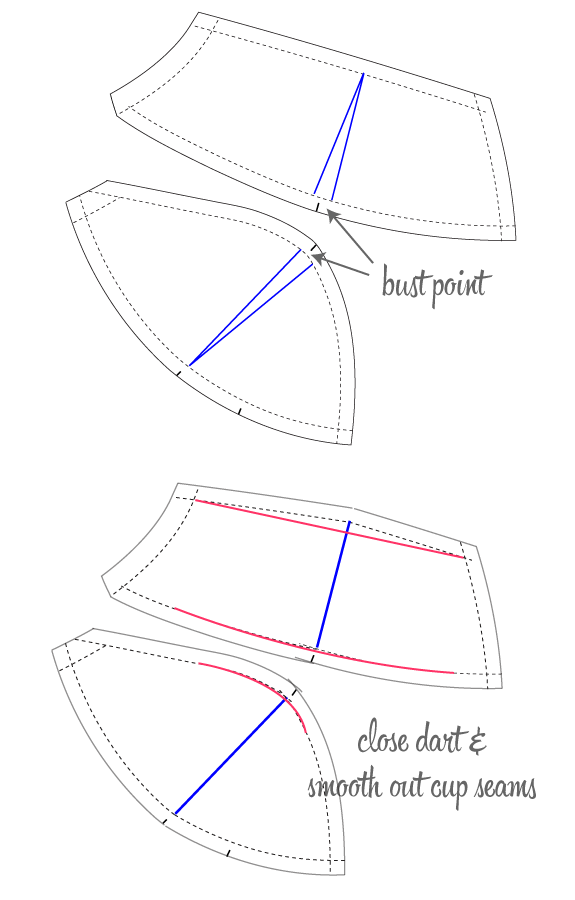
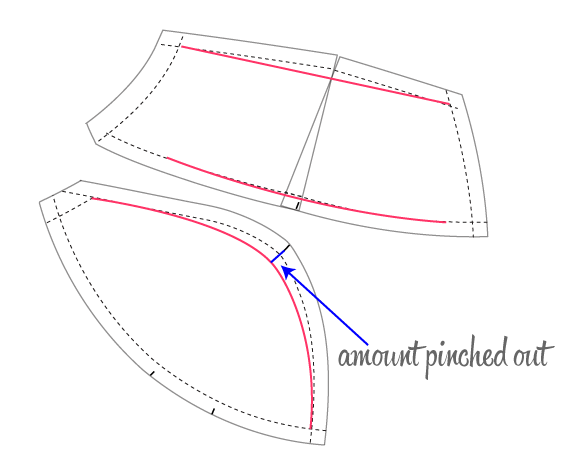
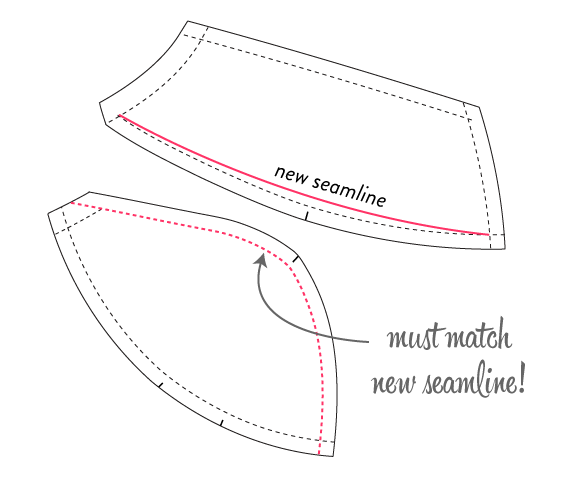
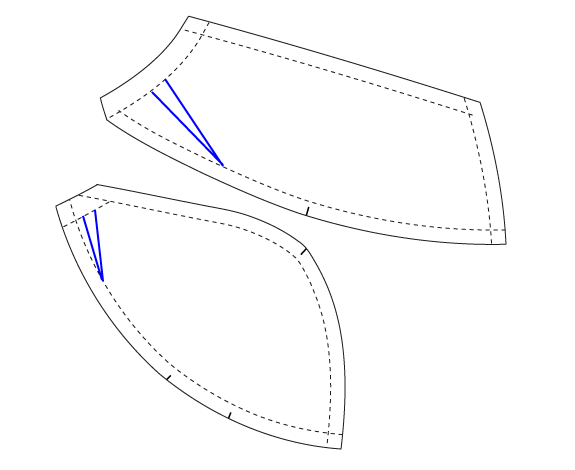
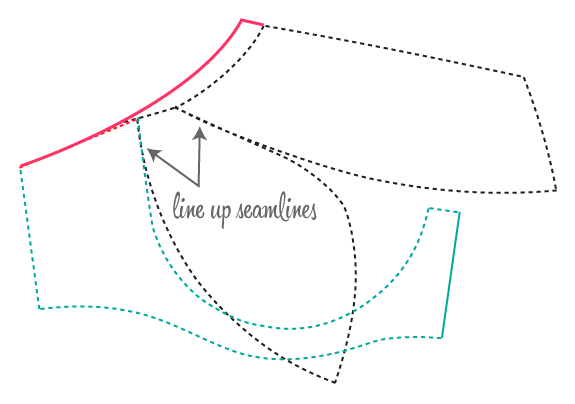
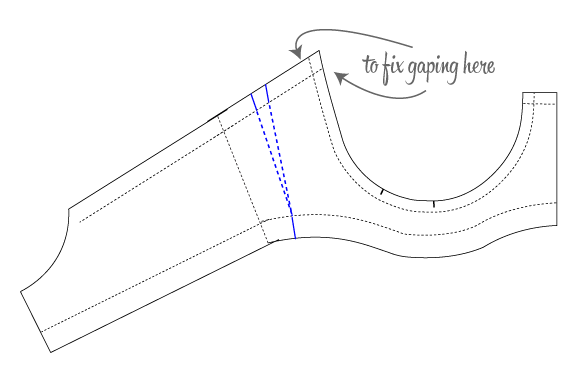
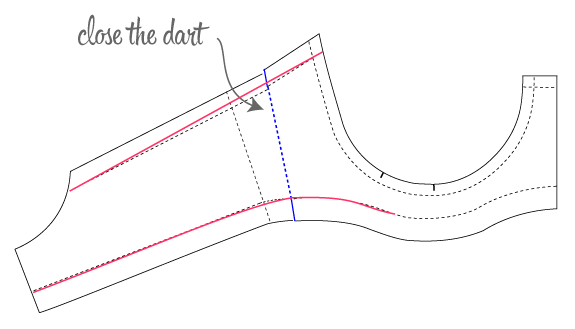
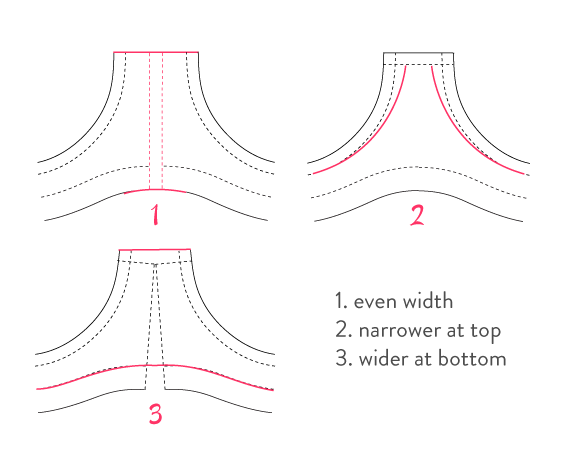
Q: I have a bit of a problem with east/west direction in my cups. What sort of seaming and other tricks do I need to do to achieve more front and center lift?

East/west really depends on where the pattern places the apex of the breast. A vertically seamed cup will be best at directing the breast tissue toward the center front.

In terms of lift, start with underwires and a band that fits properly. Look to the fabric and inner support to enhance the effect. In terms of fabric, use no more than 50% stretch for the band and a maximum of 25% stretch the cups. You can add inner cup support in the form of a power bar to also move the breast tissue out from the underarm and direct it forward and up.

Q: Is there anything essentially “wrong” with non-wired bras? My comfiest bras only have single straight bones at the underarm. The centre does not have a bridge and consequently doesn’t fit quite flat to my chest but this style is not particularly unflattering on me and is the only RTW one I can wear.

Underwires are the best way to get lift and support in a bra. Without underwires, both aspects will be decreased. It really is up to you and your preferences which is most comfortable and flattering for your figure. I suspect based on your comment that the wireless does not go back to the chest wall that you may be best off with an underwired bra.

Regarding wire size, I alway fit clients in an underwire separately from the cup sizing by trying the wire on them on its own. Getting the wire diameter correct is key for a comfortable wearing experience. It sounds like you have yet to find the right wire size so I would focus on that first. You can always cut the wire height down to fit into the bra.

Regarding the cup size, you should use the size that fits you best then combine the correct cup size with the correct wire size for your bra. This may require extending the cup at the underarm to fit the frame that corresponds to your underwire size.

——

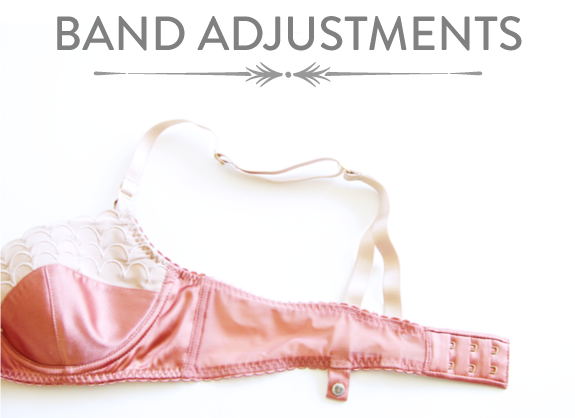
One helpful thing she shared with many of us while fitting our bands: “I test band size by inserting two fingers perpendicular to the body under the hook and eyes fastened at the loosest setting. If the band will accommodate more than 2 fingers it is too big. Less than two fingers it is too small.”

She has written much more about customizing bra fit on her blog, too!

Thank you so much, Norma!

Bra-making Sew Along: Cup Adjustments

Fitting adjustments for bra cups | Bra-making Sew Along at Cloth Habit

Continuing on with fitting adjustments, today I’ll walk through some possible alterations to your cups.

Some tips for working with these alterations:

  • Mark in your seamlines on your pattern so that you can measure exactly how much you want to adjust.
  • The best way to determine your alteration is by pinning out excess along the cross-cup seams, neckline or arm edges of the cup to see if that helps things fit. If you need more room you could cut a bit into areas of your tester bra to see what alleviates tightness. Measure how much you needed removed or added and write it down. I keep the pins in the bra so I can measure my little “darts” after I take it off.

Overall volume adjustment

If you simply want to add or remove more overall volume in the cup, pinch out darts along the main seams until the cup feels comfortable. Measure out this amount along the cross cup seamlines. Spread or close the dart and redraw the seams.

Fitting adjustments for bra cups | Bra-making Sew Along at Cloth Habit

I’m just showing one adjustment right at the bust point but if you are adding or removing a lot of volume, you may need to make several little darts or slashes along the seams so that you make an even shape adjustment across the cup.

Adding or Removing Lower cup volume

If you notice excess fabric pooling at the bottom of your cup, you may need to remove some of the volume from the lower cup. Pull up the lower cup and see if you can pin some of it out. This adjustment could also help lift the cups.

Fitting adjustments for bra cups | Bra-making Sew Along at Cloth Habit

You will have to adjust the length of the uppercup seamline to match the new lower cup seamline. The illustration above shows one way to do that, by cutting and overlapping to shorten the seam.

Smoothing the apex

If the cups are just too (yes I’ll say this!) pointy, you can always smooth out the apex curve of the cup. When doing this adjustment, start small so you don’t remove too much of the seam length. This is pretty similar to doing the above adjustment. Maddie of Madalynne has a great post explaining cup alterations, particularly this one!

Adding Lift

Both of the above adjustments will add some lift to the bra in some way. If everything fits and you still want a bit more lift, you can try flattening the seam of the upper cup. The flatter this seam is, the more lift a bra has. (Balconette bras with 3-piece seaming often have a totally flat upper piece.)

Fitting adjustments for bra cups | Bra-making Sew Along at Cloth Habit

To make this adjustment work, you will have to remove some length on the lower cup seam so that it matches the new upper cup.

Gaping at the Side of the cup

Fitting adjustments for bra cups | Bra-making Sew Along at Cloth Habit
Pin out the excess along various points of the cup to determine where the excess is. Transfer this to your pattern by slashing and closing the darts, as in the examples below.

Adding underarm coverage

This is an alteration I did to my bra. It could help if you want some extra coverage or support along the side of your cup, depending on your figure. This alteration requires both your cradle/band and the cup pieces which run along your underarm.

Fitting adjustments for bra cups | Bra-making Sew Along at Cloth Habit

Line up the cup pieces and cradle right along their seamlines.

Draw in the new underarm line starting from the band and going up toward the cup. In this illustration, I’m also making my straps further apart on the top of the cup.

Adding more coverage the top of the cup

If you have more breast tissue at the top of your cup and want more coverage, you can always raise the top seamline. Most of the patterns we are using aren’t entirely a “full cup” bra.

Fitting adjustments for bra cups | Bra-making Sew Along at Cloth Habitv

This new line can be either totally straight or just slightly curved–a curved line will add a bit more length.

That’s it–I hope these give y’all some good ideas! Tomorrow I’ll be featuring some of the great fitting questions you had for Norma.

Bra-making Sew Along: Band & Frame Adjustments

Learn how to make common adjustments to a bra band and bridge for an underwired bra pattern | Bra-making Sew Along

Happy weekend all. Let’s talk fitting alterations! I had planned to do just one post on these Friday, but decided it’d better to divide it into two–one for the band and one for cups.

I know that fitting isn’t always the fun part. And especially on something which we may have had trouble fitting in the past and has so much potential to hold our body image captive! But you can get there. Don’t be afraid to slash into your pattern and make little changes with each new bra, even if it’s something you’ve never seen done before. Your instincts are often better than you think!

In fitting your bra, try to pay attention to the fit of your underwire and band first and the cups second. Many problems can be solved by getting the right “frame”.

Adjusting band length

If you band feels too loose or tight, it’s easy to adjust the length. It should fit well on the loosest or at most 2nd hook. The hooks are there for you to adjust your band as the elastic starts to age. And it will age!

Learn how to make common adjustments to a bra band and bridge for an underwired bra pattern | Bra-making Sew Along

1. Draw a line down the center of the band.

Learn how to make common adjustments to a bra band and bridge for an underwired bra pattern | Bra-making Sew Along

2. Cut the pattern along this line and spread or overlap by the amount you wish to take out. (Remember this amount will be doubled in your bra.)

3. Trace and redraw the new band line making a smooth line connecting the pieces (red).

For a band that hikes up

If your band is hiking up, it may be too long so you can try the above adjustment. But sometimes shortening the band isn’t enough to keep it from hiking up. Perhaps your ribcage is narrower below the bust so you need less length along the bottom hem. And every pattern has a different band angle–experiment to find one that works with your body. This is also called a “downward hike adjustment”.

Learn how to make common adjustments to a bra band and bridge for an underwired bra pattern | Bra-making Sew Along

1. If you have a side seam, line up the cradle and the band along the seamline. If your pattern doesn’t have a side seam, draw a line about 2/3 up from the CB to the cup seam.

2. Extend the center back line down by the amount you wish your band to go and place a mark (blue). Extend the side seam line by 1/2 that amount and mark.

Learn how to make common adjustments to a bra band and bridge for an underwired bra pattern | Bra-making Sew Along

3. Slide down and rotate the back band to meet these new points. If you did not have a side seam, you’ll have to slash the pattern along the dotted line. Retrace your new band line (in red, along the seamlines). Don’t forget to add back your seam allowances!

Gaping along the underarm

This is almost the opposite of the above alteration. On my bras, I often had gaping running from the underarm of the cup around the side seam, usually right where the channeling was topstitched down to the band. I finally figured out that this had to do with excess length along the top of the band. The band plays a role in giving some tension to the underwire, but since I had too much length, the excess was crowding at the point of least resistance right inside the cup.

Learn how to make common adjustments to a bra band and bridge for an underwired bra pattern | Bra-making Sew Along

1. Measure out the amount needed to take out the gaping and draw in dart along the front of the band at the seamlines (blue lines).

Learn how to make common adjustments to a bra band and bridge for an underwired bra pattern | Bra-making Sew Along

2. Cut the pattern along the blue lines and close the dart. 2. Re-trace the pattern and draw in a new smooth line (red) connecting the pieces.

Note that if you have a lot of gaping at your underarm, you may need a cup adjustment. Gaping problems won’t be solved by pulling elastic tighter around the cup. I tested out this theory on several bras: the ones in which I pulled elastic tighter actually resulted in more gaping. Pulling elastic tighter while sewing ends up removing more of the elastic tension permanently so it stops behaving as it should.

Bridge adjustments

This little space can take a lot of different shapes! If you find it feels a little tight or loose, but your underwires and cups fit you correctly, try making some adjustments to the bridge. Tiny adjustments, like 1/16″ (1.5mm), can make a difference. Remember that whatever adjustment you make to half the pattern will be doubled.

Learn how to make common adjustments to a bra band and bridge for an underwired bra pattern | Bra-making Sew Along

These are just a few alterations I have experience with but hopefully they give you some ideas! Some great fitting questions have come up in the Flickr group. Thank you all, for being brave to share what you’re working on, and please be free help each other out because we all have different experiences. I’ve also posted some pictures of my tester bras so you can see the gory details. I’ve got a few adjustments to make myself!

Further fitting resources:

Bra-makers Manuals, Volumes 1 and 2. Both are available from Bra-makers Supply and Elingeria in book and CD form. These books explore every corner of custom bra fitting and construction. I love collecting bra-making books–particularly drafting books, which help me understand the theory–but these are really the only ones (I know of) that cover fitting to individual shapes.

If you know of other bra-fitting resources, please share in the comments!

Bra-making Sew Along: A Trial Run

a trial bra

Yay, the light came out today! My friend came over and we squeezed in some good photos and an instructive fitting session.

So these are my super purdy “bra muslins”. Or bra toiles, what have you! Cute, huh? One for my friend and one for myself, since I’m trying out a new cup.

trial bras

If you’d like to try a fitting bra, here’s one way to approach it. I make a very quick bra using some leftover bra materials and scrap. And no elastic. If this is your first bra, you can get some practice on those curvy seams without the pressure!

Some suggestions for the cups: If you can spare some of your cup fabric for a test run, perfect! If not, try using some woven scraps like cotton muslin or quilting cotton. But testing your cups in a stable woven will obviously only work if you’re making your bra from a stable fabric. If your chosen cup fabric stretches–including stretch lace or any type of fabric with spandex/lycra–and you don’t plan on lining the entire cup, the fit will be different. The closer you can get to testing your cups in the same or similar fabric to your actual bra materials, the better. Make sense?

tester cup, band & cradle fabric

For my bras, I cut the cups from leftover Duoplex. I think I have eeked out about eight tester bras from one Bra-makers Supply kit. You may have enough of your cup fabric to do a test run, too! I cut the cradle (or bridge) from muslin scrap, since that needs to be stable. I cut the band from the lycra and powermesh I plan to use. Every band fabric behaves differently and I often need to take in some fabrics depending on stretch. I’ve unbasted the bands and re-used them if they fit!

I won’t get into construction details until we make our bras, but here’s how I put it all together.

Sew the cups together. I added a seam to the center front of the bridge in case I need to adjust the spacing.

sewing cups together & cradle

Then sew the cradle to the band. Some patterns have a side seam, some don’t. And now you get to sew those cups into the cradle. This part is tricksy at first but don’t be shy! I’ll have some tips for you down the road.

cup, cradle & band fabric

And this is the really fun part. To get this to fit, find a way to get the underwire on that cradle seam. It will help pull the cup to the right position. You could baste in some of your channeling to the cup/cradle seam allowance with a long stitch. This is what I do. It doesn’t have to be perfect and you can re-use the channeling later. (Cut it a little bit longer if you want to save it.) Alternatively, you could try sewing a tiny tunnel right on your seam allowance. (Thanks Katherine, for a genius idea!)

tester cup underwires

Baste in the hook and eye. I do this pretty loosely. To simulate straps I baste in ribbon or seam tape in the back.

basting in the strap and hook

That’s it! I took some photos on my friend today and I’ll be posting these by the weekend in the Flickr group. I’ll be brave and post mine, too!

How is everybody doing? Have you sorted out your size and pattern? And don’t forget, Norma is here so if you have a burning bra-making question for her, don’t hesitate to ask! (And you are welcome to email me if it feels hard to ask here.)

Bra-making Sew Along: Pattern Tracing

Let’s take a look at our patterns!

tracing my pattern!

Today and tomorrow I’m going to prep the pattern and make a test bra for my friend. I’ve been drafting different bras so I needed a quick and dirty way to test them without sewing in the elastic. So I’ll share how I’ve been doing that. There are some things you can’t predict in a tester bra or cups, and you may just want to skip this part. But if you want to save your materials for the good stuff and do some fitting and styling fun next week, give it a whirl!

Before I get to tracing, let’s take a look at our pattern pieces. This is an illustrated scan of the pieces in Elan 645, and most of your patterns will be in some combination of these pieces.

elan 645 pattern pieces

If you are working with a three-piece cup (such as the Danglez patterns), sometimes the lower cup consists of two pieces, or there will be a side panel that reaches into the strap. A couple of the suggested patterns also include a fabric strap piece.

You’ll also notice that the band and cradle can have various seams, some with a seam below the cup, some with a side seam, or both. These are mostly just style differences.

tracing the pattern

When tracing your pattern don’t forget to transfer pattern markings like notches, direction of stretch (the ‘grainline’) and bust point. I’m going to trace a 32D from the Elan pattern.

traced bra pattern

The Elan pattern also has a little facing piece for the top of the cup. I might not use it but I traced it anyway.

For my initial pattern, I’m using this vellum paper to trace off but later I’m going to transfer the pattern to oak tag or something like card stock. I find it much easier and more accurate to weigh down the patterns and trace around them with chalk, rather than pin and cut. You could do this straight away if you wanted.

the seam allowances

Now there’s one more step I like to do and that’s draw in the seamlines. This is certainly not an essential thing, but I find them helpful when making fitting adjustments. Some of you may have the Danglez or another European pattern which comes without seam allowances so you’ll need to add them on.

Bras use small, precise seam allowances. The major seams are all 1/4″ (6mm), and trust me, these small allowances help with sewing precision, especially in sewing convex to concave curves! They also help the curves to lay smoothly.

The underarm seam on cups and top of the band are 3/8″ (1cm), for 3/8″ picot elastic.

bra pattern top hem allowances

(Totally random prop with my little Czech car.) And for the Danglez cups:

Danglez DB4 seam allowances

The hemline and bottom of the entire band is 1/2″-5/8″ (12-15mm) for your band elastic. Check your pattern to see if it has specifics. For the Danglez pattern, add the width of the elastic you plan to use.

bra band hemline allowances

The center back and the strap seam near it do not have seam allowances.

back band CB

Everything else is 1/4″ (6mm). The center front of the band is either cut on fold or has a seam allowance–check your pattern to make sure! (ETA: I totally goofed and had 1/4″ at 8mm before–I still don’t think in metric!)

Alrighty, I’m ready to cut and sew a test bra! I hope to have photos of the process by tomorrow but it’s been abysmally dark and rainy here. (Bad photo light… bad.)