Bra-making Sew Along: Band & Cup Construction

finished-cups-and-cradle

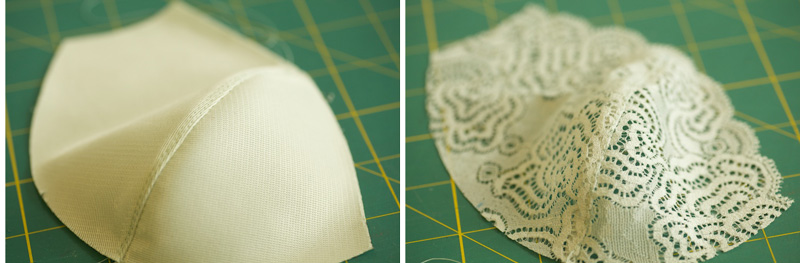
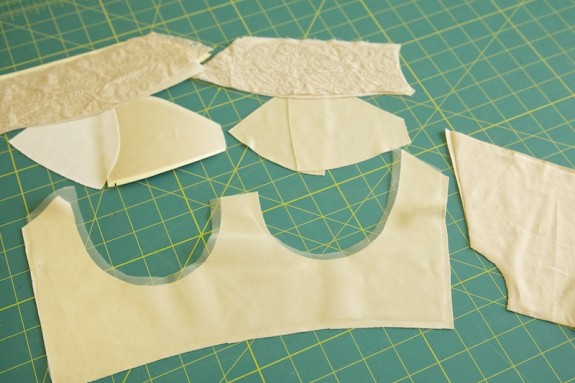
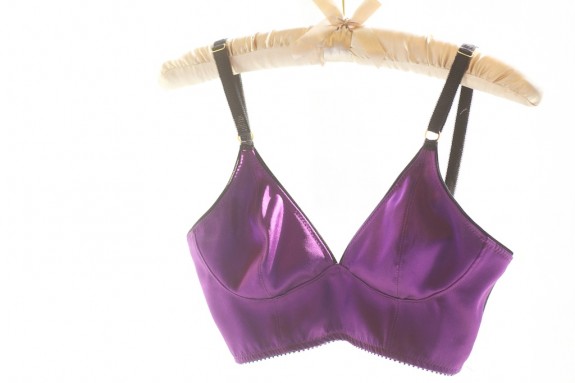
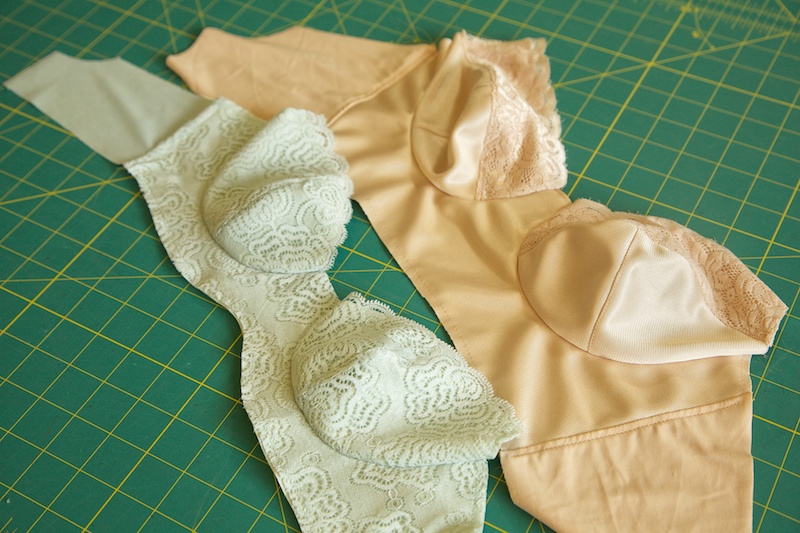
Starting to looking like a bra now! Today I’m going to assemble the band and insert the cups.

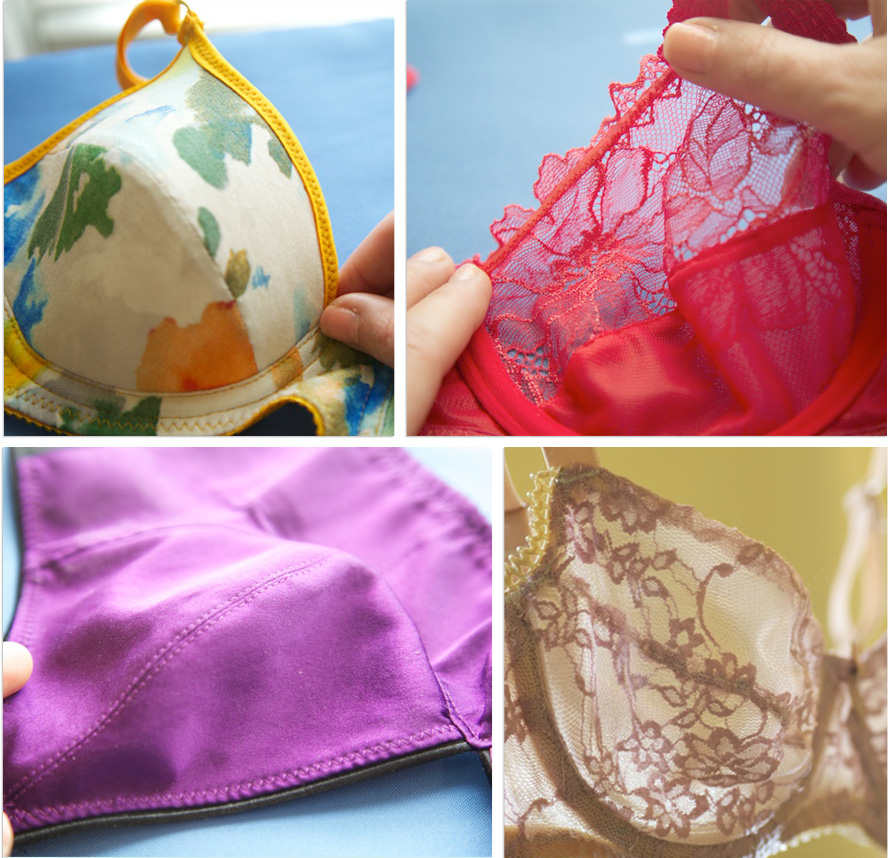
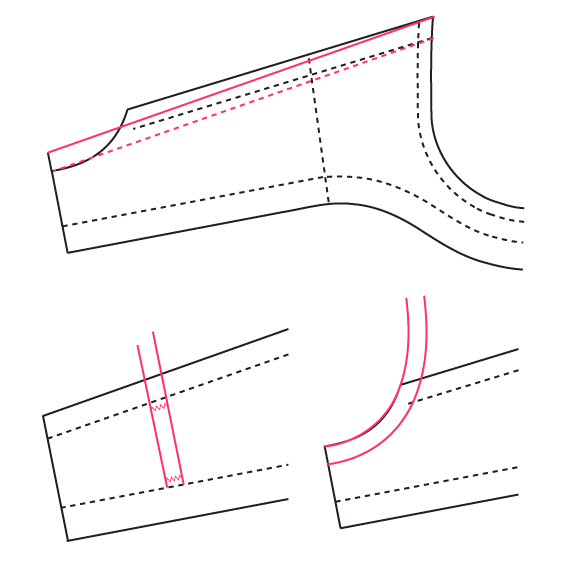
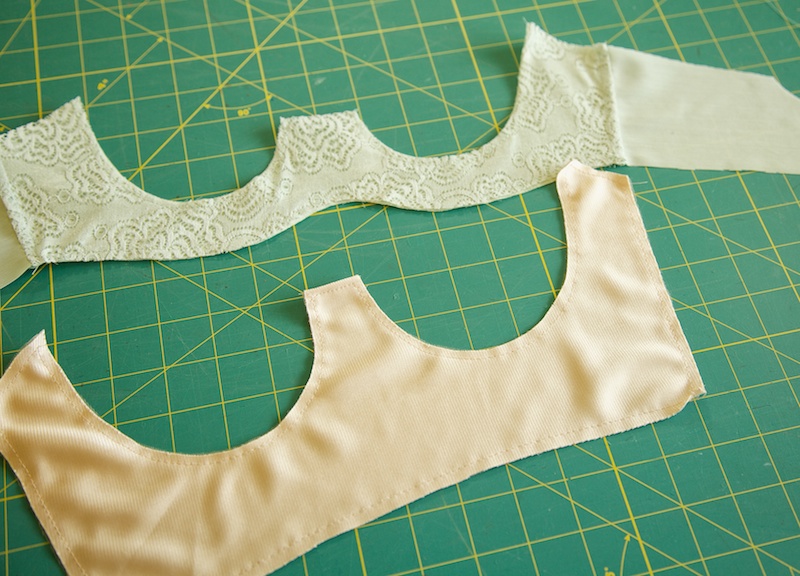
Since I am lining the cradle of both bras, I used the lining to finish the top of the bridge. With right sides together, I stitched a 1/4″ or 6mm seam across the top. I turned this right side out, pressed and topstitched about 1/8″ away from the top.

lining the bridge

lining the bridge #2

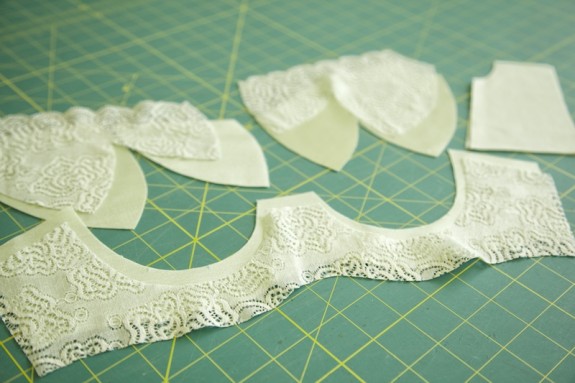
If you don’t have a lining and interfaced this part, you can turn down the center top by 1/4″ and topstitch. Another idea: if you’re using fusible interfacing instead of a lining, you could also sew the fusing to the top of the bridge glue side up, turn and fuse for a totally hidden seam.

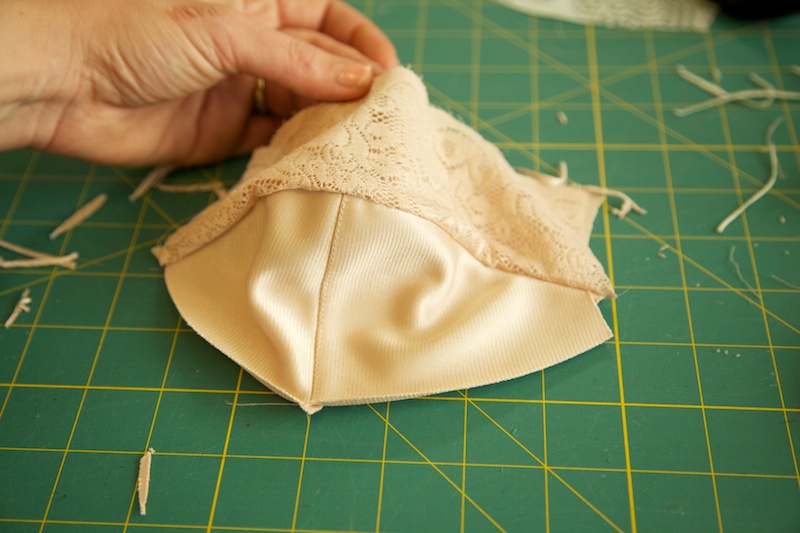
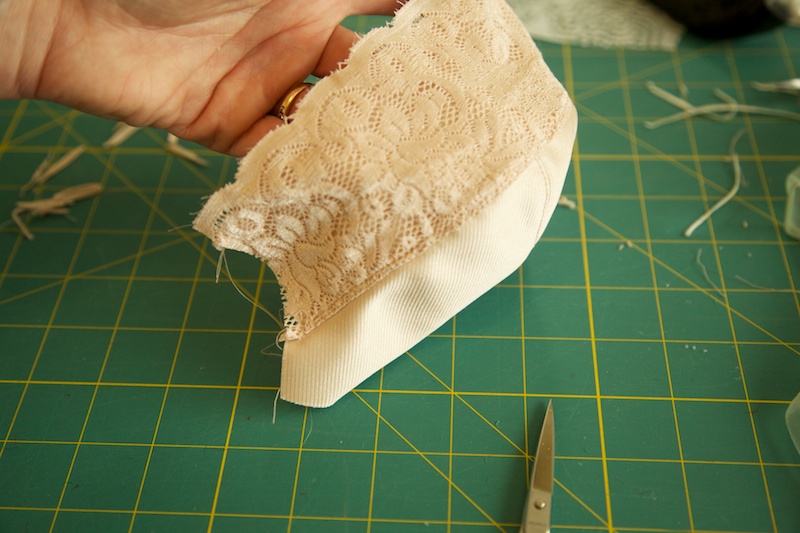
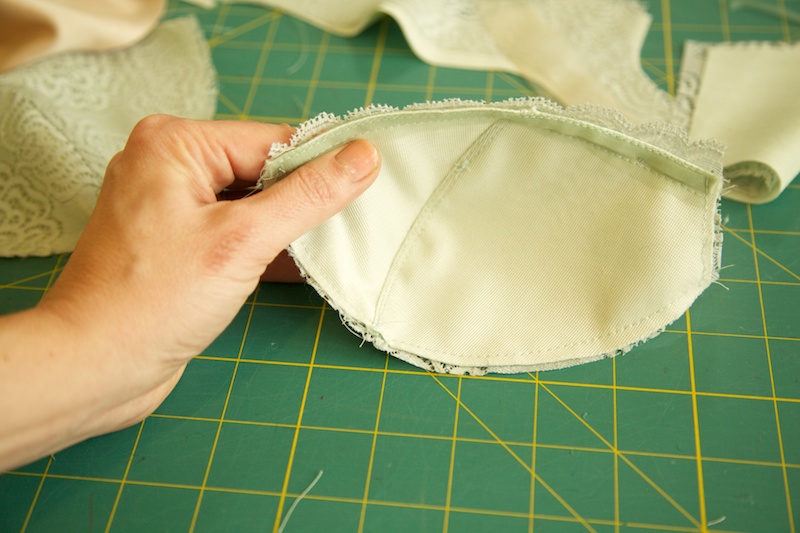
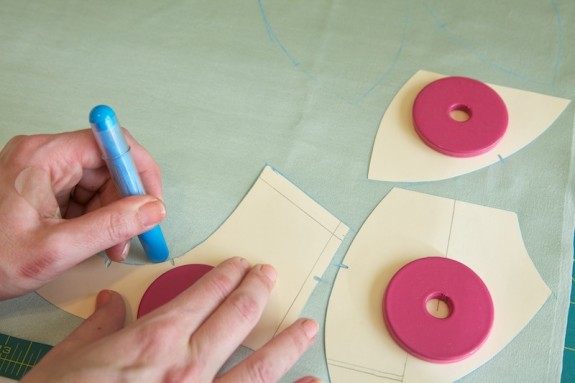
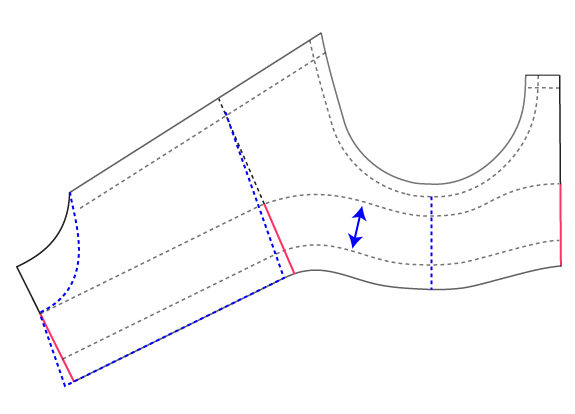
On my bra, I wanted the band seam to be hidden inside the lining so I sandwiched the band pieces into the cradle and lining and stitched the side seam and top of the bridge at the same time.

band sandwich!

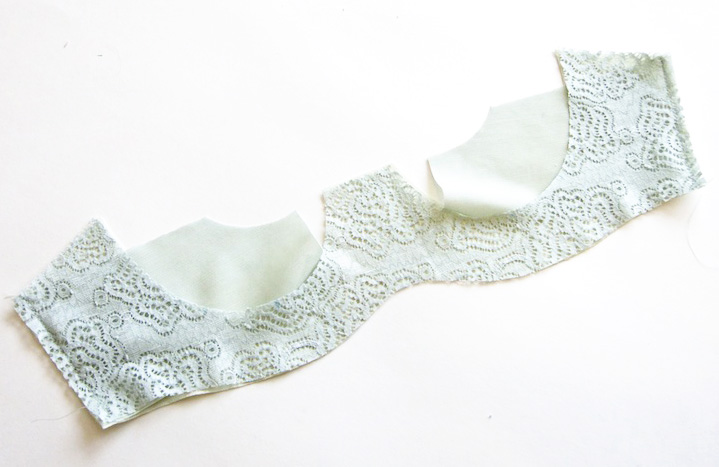
Then I turned it all ride side out and basted the layers together so they can be treated as one piece.

basted band & lining

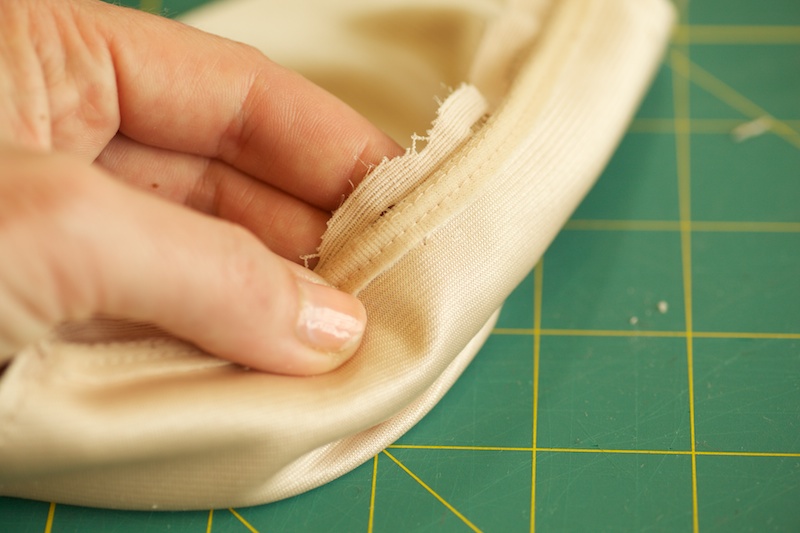
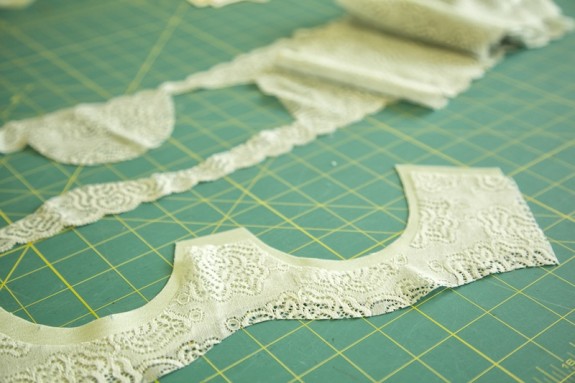
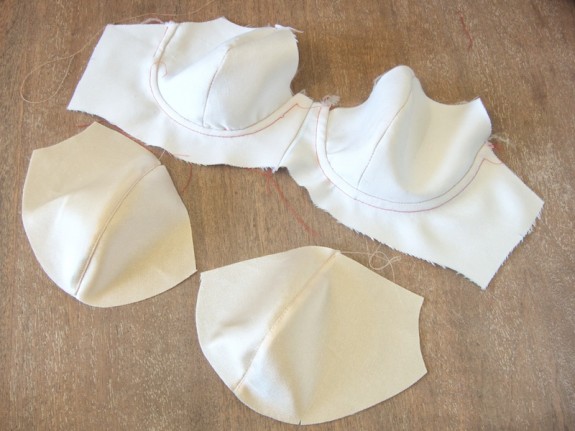
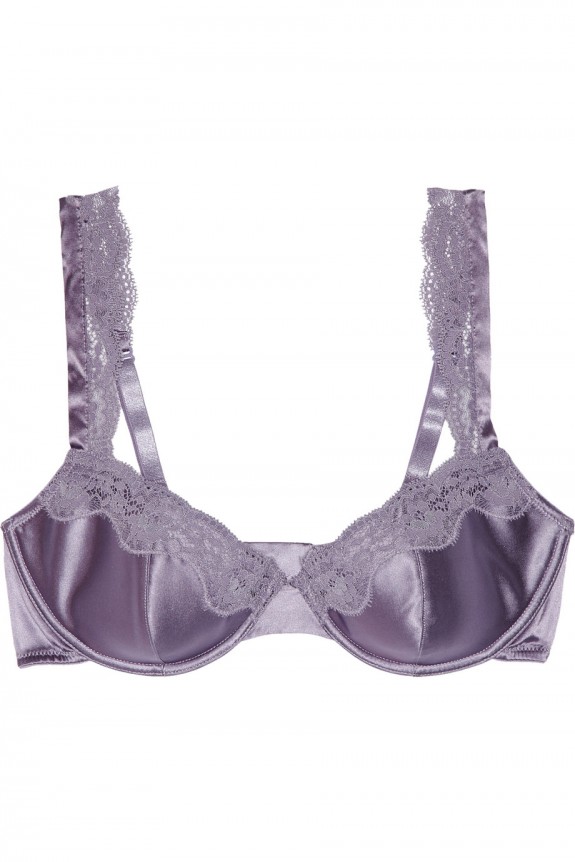
On this one I sewed the band in separately…

finished-band

Now it’s time to sew in the cups. I think this is the trickiest bit by far. Everything else after this is a breeze! But I promise, that with some practice, you’ll be kicking it out!

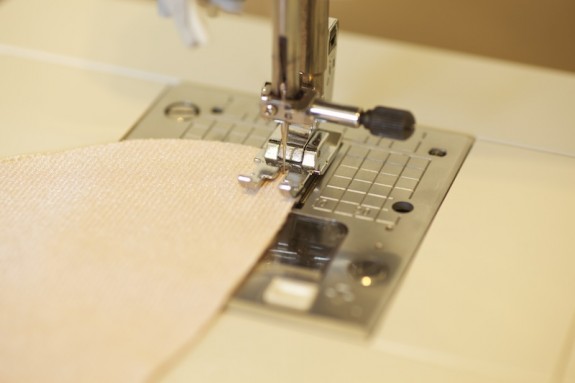
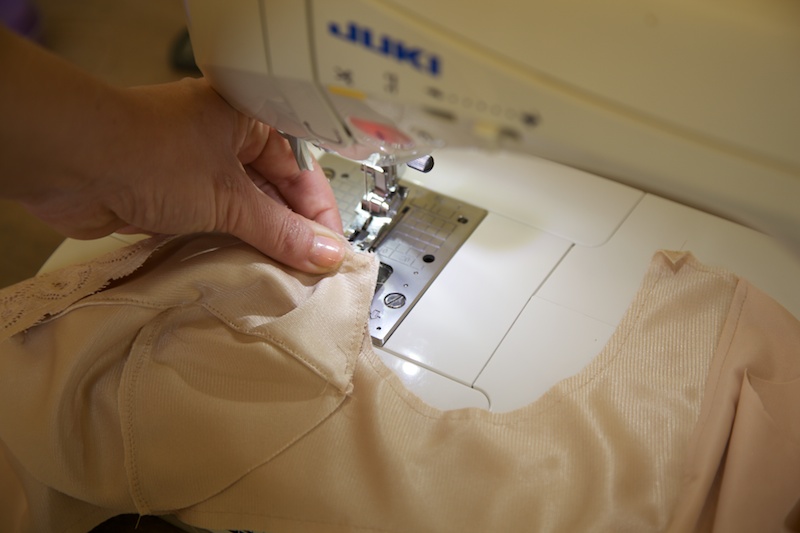
There are a lot of different techniques for sewing in cups. I like to sew both sides with the cup on top and the cradle on the bottom and–as I mentioned yesterday–I go at it without pins.

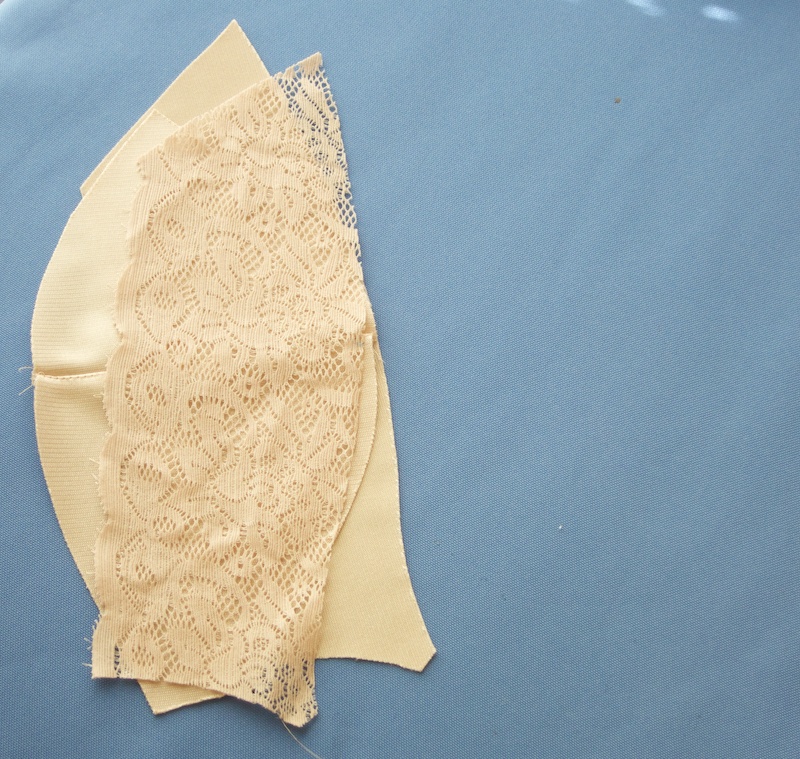
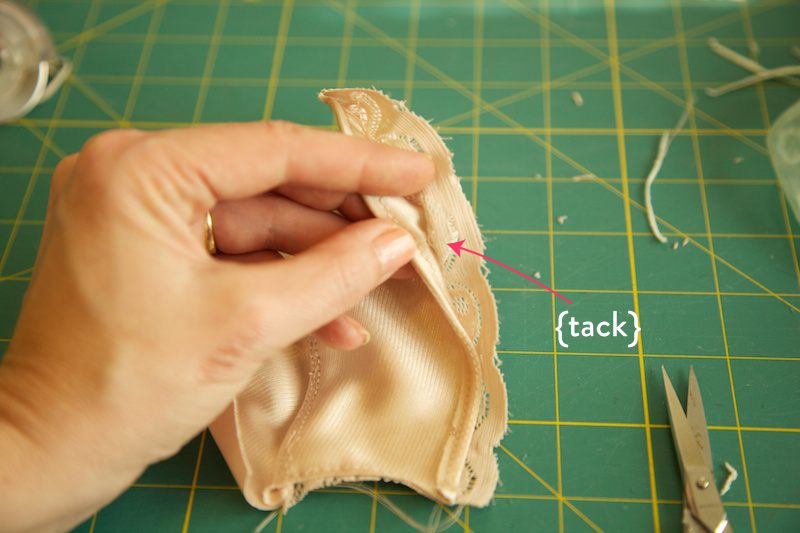
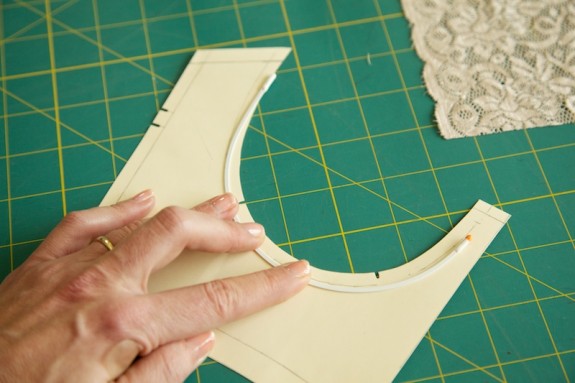
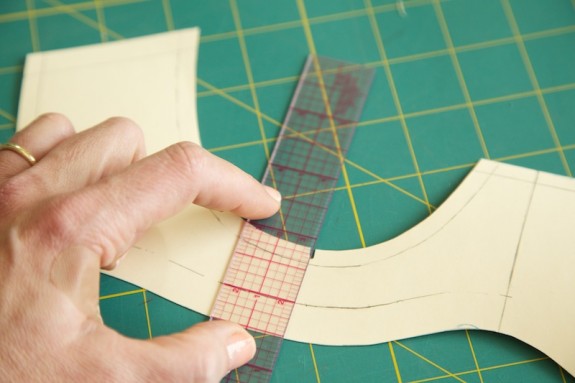
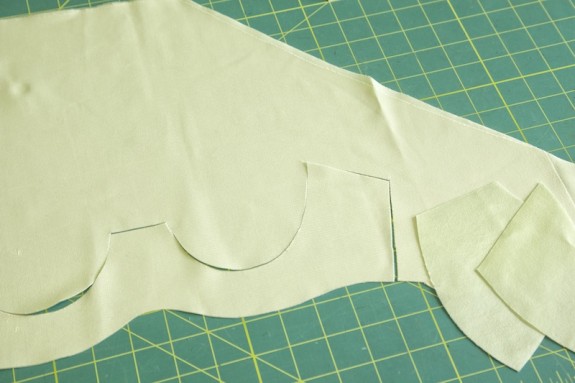
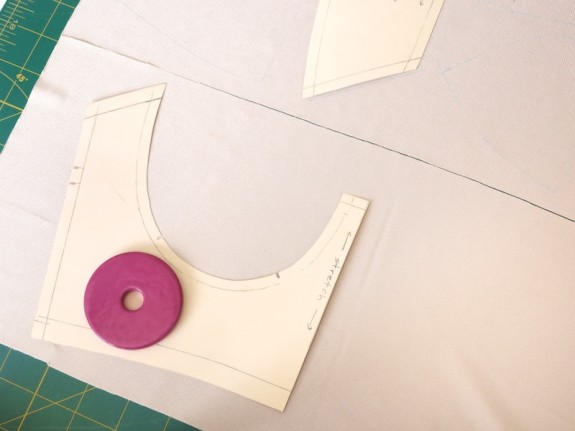
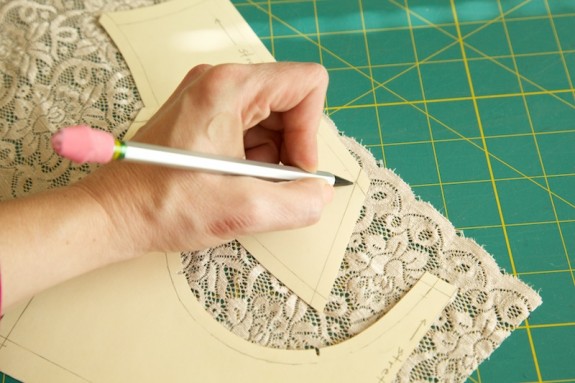
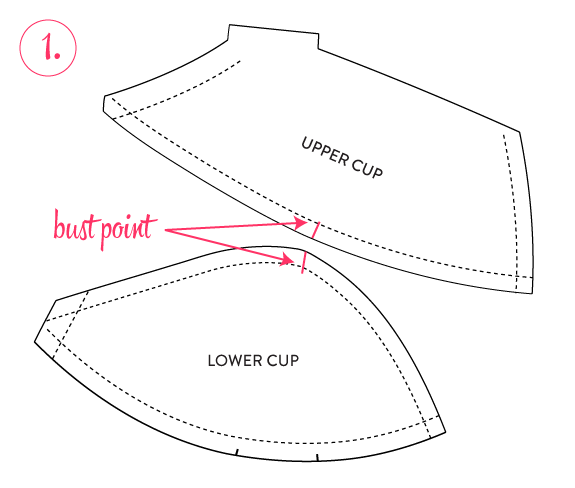
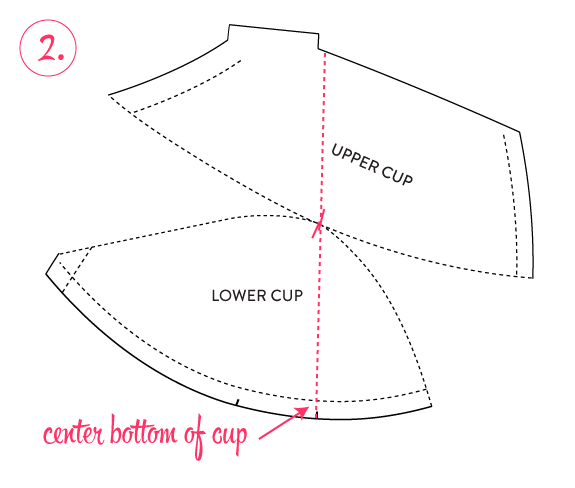
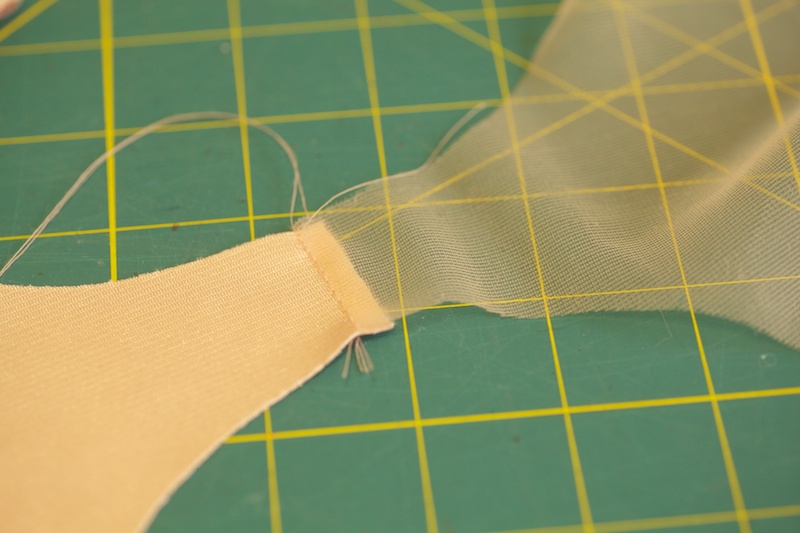
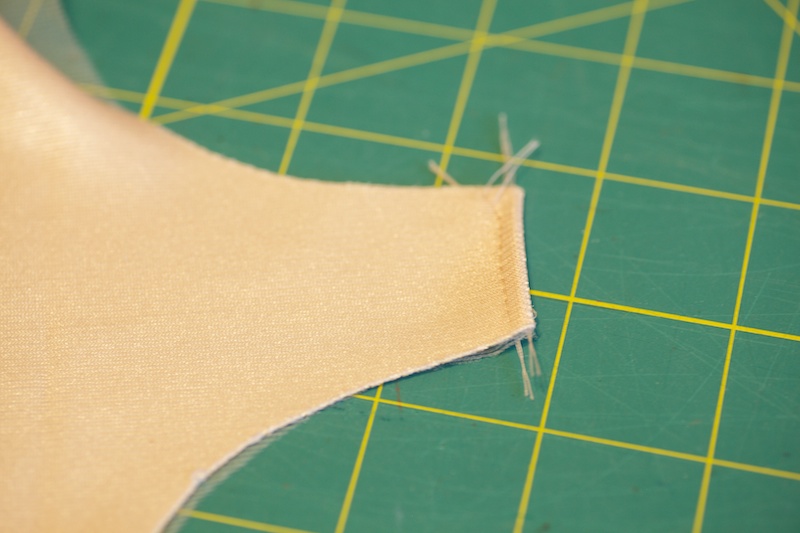
I start with the left cup. Remember how I cut with the scallops with the lowest point at the seam? I line up that point right with the seamline on the bridge and start sewing.

sewing left cup

The band is facing up and the right side of the cup is facing down. I sew all the way around the cup to the underarm, lining up the notches.

lining up notches

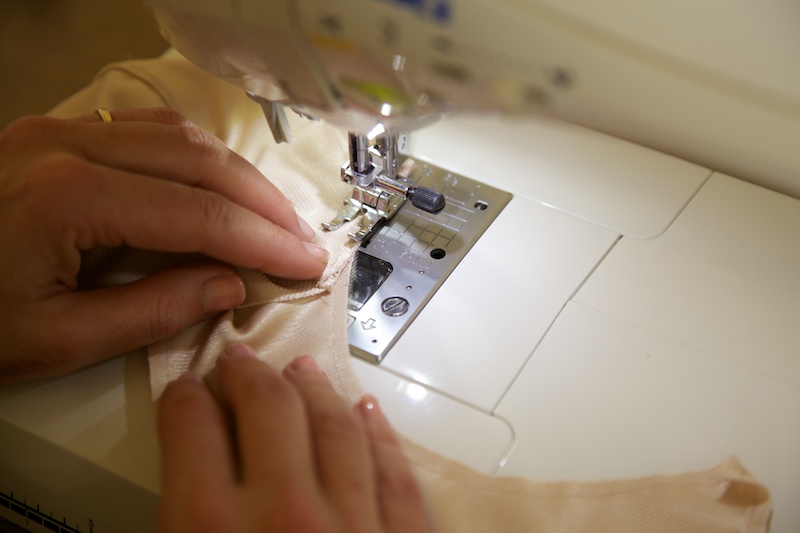
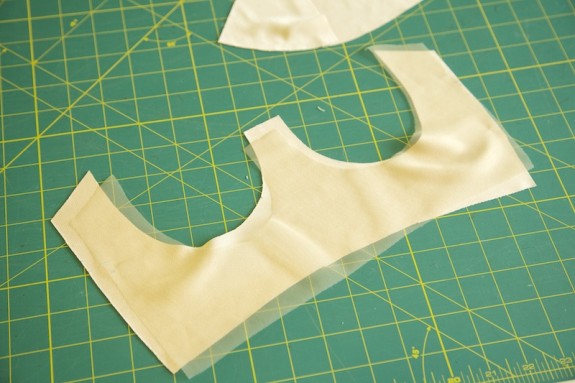
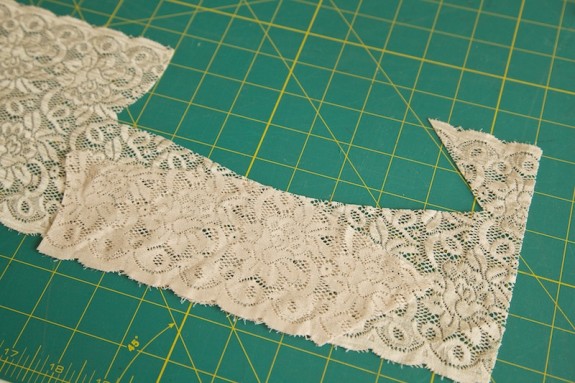
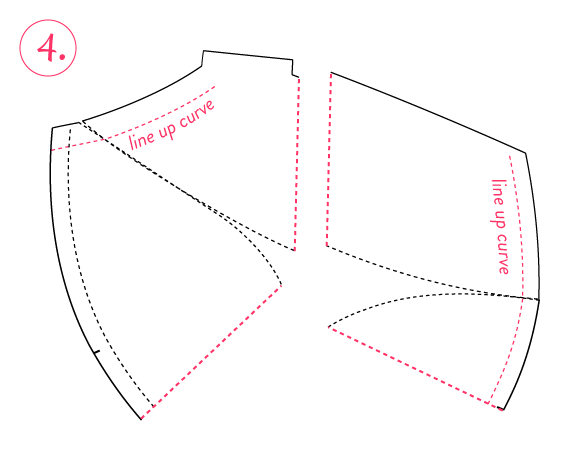
You can also see in the above picture how I keep the two curves opposing each other right up to the edge of the foot.

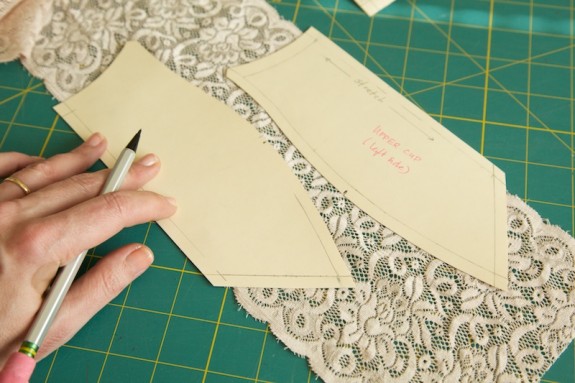
On the right cup, I start at the underarm.

sewing in right cup

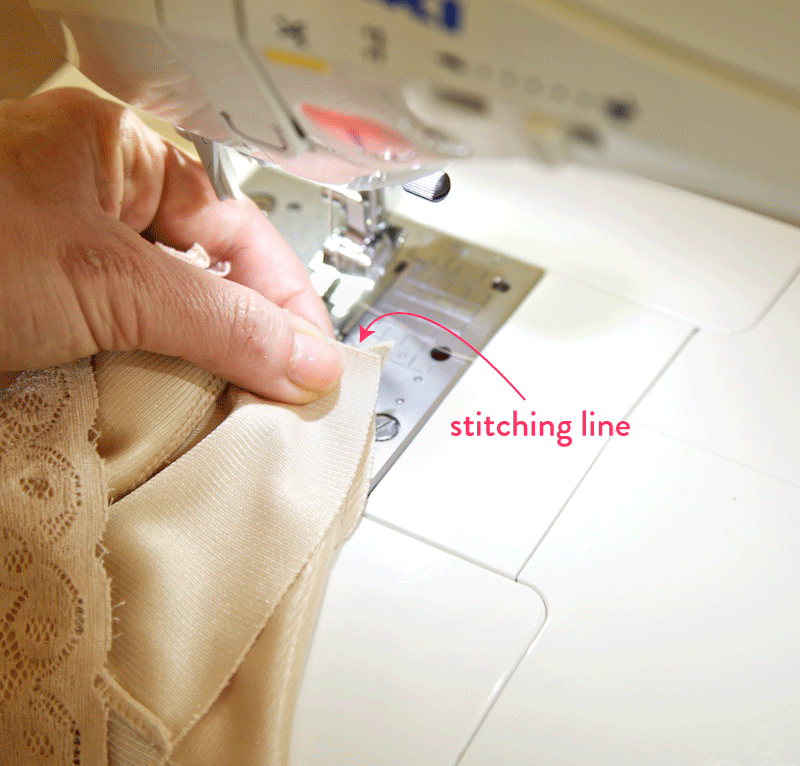
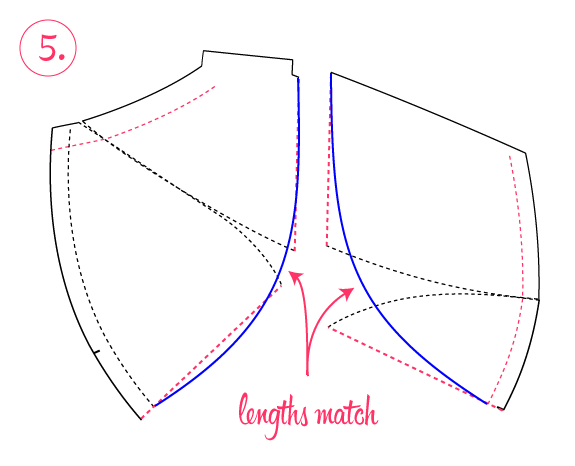
When I get close to the top of the bridge, I slow down and release the presser foot a few times to rearrange the layers, so that the scallops meet just at the end of the stitching line.

sewing cup toward the bridge

sewing-in-cups6

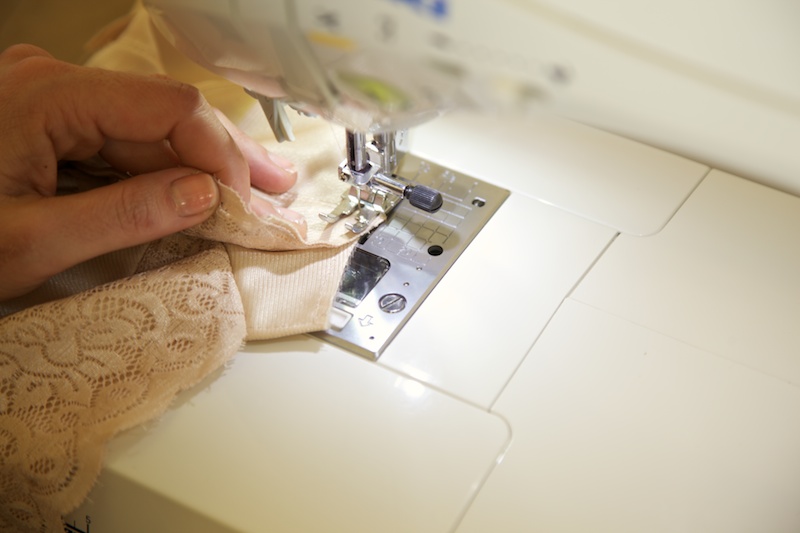
If you’re having trouble with puckering, it helps to release the foot pressure every so often if the layers start to bunch together. Speaking of which, it’s totally normal to end up with a few puckers now and then. Just like sewing sleeve caps. I unpicked one bra like 5 times–ugh… That was actually my impetus to go cold turkey on pins. Since then no more puckers and I stopped cursing my machine. (I know my mom is reading this–I remember you yelling at your machine, too! There was that velvet Christmas dress…)

Happy sewing y’all. I’ll be finishing off the bra tomorrow!

Bra-making Sew Along: Sewing the Cups

finished bra cups

Alrighty, how’s it going y’all? I’d love to hear. I know some are still fitting and some of you have made two or 10 bras by now! Me, I’ve made better friends with my Canon than I ever thought possible…

Before I break out the sewing machine, a couple of things that I’ve been using on my bras.

A straight stitch foot. I use my foot as the seam guide–the distance between the needle and the edge of this foot is exactly 1/4″.

straight stitch foot

Of course, don’t forget to switch to your zig-zag foot when sewing your elastic. There’s a big Ask How I Know. Which is why I have extra needles…

I use a stretch needle, size 11/75. This has been perfect for elastic and lycra, but also seems to work best on all the tricot-type fabrics. For lace I sometimes go to a very small needle. I’m always experimenting!

assemble the cups

How you proceed on your cups depends on whether you are fully lining your cup, or just lining one part (like the bottom)–or not lining at all.

On my friend’s bra, I’m using lace only on the top cup, as an overlay on the regular bra fabric (in this case, simplex from a bra kit). I want the cross cup seam allowances to be totally hidden inside the seam, so I stitched the three layers together with the lower cup sandwiched in between.

lace cup with an upper lining

lace upper cup with lining

“sandwich” turned right side out, before topstitching…

On my bra, the outer cup is entirely lace and the lining is interfaced silk charmeuse, so I constructed the two layers separately:

separate lace cup and lining

To flatten the seams, I turned the seam allowances over to one side and edgestitched onto the allowances, just a tiny width away from the seam.

sewn cup after edgestitching

Your pattern may have instructions to press open seams and topstitch on both sides. Or topstitch the seam allowances together to one side. This is really up to your preference and how thick your material is! Most often, I like to edgestitch which flattens the seam enough for me.

So when I was first starting to make bras, I struggled with rippled seams across the cup. Oh the dreaded rippled seam in knits! Since seam rippling is usually caused by one or the other layers stretching too much, here are a few things to try:

  • If your machine has this ability, try lightening the foot pressure.
  • As you are sewing, try not to pull or stretch the fabric in any way–let your hands simply be a guide.
  • Try sewing without pins! When sewing two different curves together, or concave and convex curves, pinning pulls one layer into the direction of the other which can cause the length to stretch. It takes some practice at first, easing off a pin here and there. Eventually I went cold turkey pin-free! Which has improved my curves sewing and feel for fabric handling.

finish the top of cups

At this point I want to finish the top of my cup! If you are sewing a continuous trim that finishes both the cup and bridge, you’ll wait till you’ve sewn your cups into the band.

Both of my cups have two layers on top–the scalloped lace and non-stretch lining. To finish the edge of the lining, I tried a technique based on one of my fave strapless bras. I sewed a strip of sheer tricot along the outside top of the cup with a 1/4″ seam allowance.

sewing tricot facing strip

Then I turned, and top-stitched this down along the inside. I could have done this in reverse, too–which would totally hide the seam. It’s pretty soft as it is. The tricot is cut along the least stretch so it stabilizes things a bit.

topstitching tricot facing strip

To keep the lace from shifting around on top, I tacked it down in three spots with a small back-and-forth zig zag stitch (almost like a bartack!). I saw this done in an Elle Macpherson bra and liked its invisibility.

tacking lace to upper cup

Since my bra has a vertical seam, I tacked down the lace to the lining with a couple of straight stitches right at their joining seams.

tacking lace to vertical seam

After you’ve finished the top of your cup, you can baste the layers together around remaining edges, so that the cup will be treated like one piece. I do this just inside the seam allowance–it’ll all get hidden underneath channeling and elastic! When basting stretch lace, it sometimes wants to stretch past the lining, as you can see in the above photo. It’s just the nature of stretch–I try to keep the excess toward the bottom of the cup and just trim it off!

other cup finishes

There are loads of different ways to finish the top of your cup! I’m always experimenting.

top cup finishes

l to r: foldover elastic as a binding, decollete or clear elastic along the bottom of scallops, picot or piping elastic, lace and lining layers sewn right sides together for an invisible finish (which I wrote about here).

Bra-making Sew Along: Cutting

How to cut a bra pattern, from the Bra-making Sew Along at Cloth Habit

The time has come to cut our bras!

By now if you’ve been making tester bras or alterations you probably know your bra pattern inside and out. And that’s a good thing! Understanding a pattern makes sewing so much easier, don’t you think?

Before I start cutting, I like to double-check a few things on my pattern:

Check the cradle seam to make sure it has enough length for your chosen underwire. The cradle seam should be the length of your underwire PLUS 5/8″ (or 16 mm).

How to cut a bra pattern, from the Bra-making Sew Along at Cloth Habit

This extra length gives your wire about 8mm wiggle room on each end (called “wire play” in bra drafting). If you have ever tried to sew a bra without that allowance, you might know the pain of breaking a needle because you hit the wire while sewing down elastic (CHECK!) or your wires have strained and popped the channeling seam (CHECK!). If you end up needing more length you can add a bit more to one side or the other, or both. Don’t forget you’ll have to add this new length to the corresponding cup seams.

The distance between the cradle and elastic seam lines should be at least the width of your band elastic (otherwise you’ll be sewing elastic into your cup!).

How to cut a bra pattern, from the Bra-making Sew Along at Cloth Habit

After that, it never hurts to walk your seams in your cups and cradle to make sure the actual stitching lines match–especially if you’ve been making alterations!

lining or interfacing

You may have already figured this out in some of your tester bra experiments, but there are many ways to stabilize a cup and remove some of the stretch. You can either sew a lining underneath your main cup fabric, interface it, or both!

For my bra, I’m cutting my entire cup and cradle out of lace and lining it with silk. I really wanted to try silk on this bra!

For stability, I interfaced the silk with a fusible knit. You can see I blockfused my fabric before cutting. I’m a fan of blockfusing, especially when it comes to small pieces that get finicky and time-consuming to interface.

How to cut a bra pattern, from the Bra-making Sew Along at Cloth Habit

For my friend’s bra, I’m using simplex from a bra kit with lace on the top cup. I’m new to this fabric and debated over whether to fuse it–it’s stable but has a lot of drape which I suspect will make the cup drop a little. She’s definitely going to get another bra after this anyway!

The cradle or bridge area should not stretch at all horizontally. Again, I don’t think a lining is necessary for simplex but I went ahead and cut one out of sheer tricot.

How to cut a bra pattern, from the Bra-making Sew Along at Cloth Habit

stretch directions

All of your pieces should have a line which indications the stretch direction. Bra fabrics can have their greatest stretch in either direction, so test your fabric to be sure! Even the more stable bra fabrics have some mechanical stretch.

Regardless of the pattern, I usually cut my upper cups with the neckline running parallel to the stretch. Unless I’m stabilizing it, I don’t really want this piece stretching up and down as it will stress the strap, nor on the bias which tends to permanently stretch.

How to cut a bra pattern, from the Bra-making Sew Along at Cloth Habit

How to cut a bra pattern, from the Bra-making Sew Along at Cloth Habit

If you are using lace, 4-way stretch fabric or a print that you want to run in a particular direction, it can be lined or interfaced to stabilize it.

cutting lace

There are many ways to use lace in a bra and I really love working out lace puzzles!

When cutting the lace, it is helpful to have your seam lines marked in your cup and cradle pattern. I usually cut one side of the cup first to center the motifs. I make sure the stitching line of the upper cup is lined up with the lowest point of the scallops:

How to cut a bra pattern, from the Bra-making Sew Along at Cloth Habit

I also try to line up the piece so that the stitching line that meets the bridge hits a bottom point of a scallop. When the bridge and cup are sewn together it will match up nicely:

How to cut a bra pattern, from the Bra-making Sew Along at Cloth Habit

I usually cut one side first, then flip over the cup pieces to cut another mirroring side. It just so happened I have a 2nd pattern piece that I can flip:

How to cut a bra pattern, from the Bra-making Sew Along at Cloth Habit

But often when I’m cutting a bra, I simply cut the first piece, flip it to find a matching side and carefully run a rotary cutter around it.

How to cut a bra pattern, from the Bra-making Sew Along at Cloth Habit

Some galloon laces have mirroring motifs, some don’t. If not, I try to get close so the motifs are similar on both sides.

All cut!

How to cut a bra pattern, from the Bra-making Sew Along at Cloth Habit

How to cut a bra pattern, from the Bra-making Sew Along at Cloth Habit

cutting notes

I mentioned this before, but I like to transfer my master pattern to something like card stock or in this case oak tag (same paper as manila file folders). I’ve even scanned my pattern so I can print it out multiple times onto weightier paper. (No more re-tracing!) This not only preserves the pattern but gives me an edge on which to trace around with tailor’s chalk directly onto the fabric:

How to cut a bra pattern, from the Bra-making Sew Along at Cloth Habit

I use a small weight (or just my hands!), chalk around the pattern, then cut away the chalk lines. I like doing it this way because it gives me a really accurate cut, while pinning sometimes distorts the fabric (especially lycra and lace). This is just a cutting method that I’ve picked up from pattern-makers–it takes me all of 5 minutes to cut a bra pattern!

Bra-making Sew Along: Vertical Seam Variation

(Hack Your Bra Part 2!)

I love a diagonally-seamed cup because it is especially pretty in lace, with an unbroken line of scallops across the top. But it’s been fun to play around with seam directions for different style and shape options.

vertically-seamed cups

In today’s tutorial, I’ll share two pattern variations you can make to your cup: 1. adding an additional seam to your lower cup for a 3-piece pattern and 2. changing the entire cup to a vertically-seamed one. I’m using the 2nd variation for my own bra which you will see in action next week!

A tip for these alterations: The main seams in a cup should cross over your bust point. In some patterns, there is a notch at that point–usually right at the apex–if not, find it on your bra and mark it on your pattern so you know where it is. After your alterations, walk your pieces and double check that the lengths of the actual seam lines match.

Adding a Seam to the Lower Cup

ONE: For a second seam in the lower cup, mark a line going from your bust point down to the bottom seam line.

lower cup seam #1

It doesn’t matter where the line ends at the bottom so feel free to experiment! In this example, I’m dividing the lower cup into two relatively equal pieces, which will result in a seam that runs perpendicular to the main seam.

TWO: Cut the pattern piece along the lines and trace your two new pieces. Draw in a smooth, even curve connecting the top and bottom seamlines. The curve should be fairly subtle.

lower cup seam #2

THREE: That’s it–your new pieces! Don’t forget to walk the seamlines and add 1/4″ allowances to the new seam.

lower cup seam #3

Vertical Seam Alteration

For this alteration, first mark where you want your seam to start and end. A vertical seam doesn’t have to be straight up and down–you could slant inwards or outwards. I found my starting points by marking these positions on a previous bra. It just so happens that my pattern–Pin-up Girls Classic–has a notch right at the center bottom, which is usually where a straight vertical seam starts.

ONE: Mark the bust point of your pattern.

vertical seam alteration #1

TWO: On both pieces, mark in lines on the top and bottom cups, going from the desired starting point of your new seam to the bust point. I rotated the bottom cup in this example so I could draw a straight line down the two.

vertical seam variation #2

THREE: Split these pieces apart on the lines. You should now have four pieces total.

vertical seam variation #3

FOUR: Line up the top and bottom pieces along the sides until the seamline along the sides of the cup form smooth curves.

vertical seam variation #4

The cross-cup seamlines will match each other for a short distance, but will not come together at the bust point. Trace off the these new inner and outer pieces.

FIVE: Depending on your pattern style and where the apex is, one side may have smaller “dart” than the other. In this case, the outer cup has the smaller dart, so draw your new seam line on this side first. Draw in a smooth curve connecting the two upper and lower pieces close to the bust point.

vertical seam variation #5

On the inner cup, draw another curve of equal length. Because the “dart” on this side is so wide, the curve will not go around the apex. (You need to take some out from that “dart”, if that makes sense!) You can use a measuring tape to find the right curve length.

ETA: The flatter these curves, the less length (and volume) the cup will have. In your fitting, experiment with them to find the shape you like. If you’d like to pull things in more, you can experiment with making the inner curve slightly flatter than the outer curve–a good tool to use in shaping!

SIX: Smooth out all the new seam lines, mark your bust point notch, and add seam allowances.

vertical seam variation #6

In the above illustration I’m also smoothing off that strap extension from my pattern, because I’m not going to use a fabric strap.

There ya go–a totally new cup!

I hope these are clear, so let me know if you have any questions!

Have a beautiful weekend, all. And get ready to start the engines–on Monday we’ll finally get to sewing and I’ll start with some cutting and layout tips. See you then!

Bra-making Sew Along: Hack Your Bra #1

I have to admit that this part of the sew-along is the part I was most excited about! I love the process of thinking about shapes, of sitting down with paper and rulers (or lately, Illustrator) and drawing new design ideas. I know pattern-making can seem intimidating but bras are such a great way to jump in and exercise your secret hacker. It all involves so little paper and fabric!

So in the spirit of my Lingerie Fridays, I want to share some of my favorite bras with you along with some ideas on how to generate them from your base pattern.

band style

How about a longline? (Cool examples: Freya, Fortnight…) I love these for style but they’ve got a function, too. The wider the band, the more supportive it is. And I think they look pretty sweet underneath thinner tops. I’ve made this alteration to a few of my bras:

How to make simple style alterations to a bra pattern, from the Bra-making Sew Along | Cloth Habit

You can lengthen the band straight from center front, side seam and back, as the lines in red demonstrate. The longer these lines get, the narrower the band will at the bottom so if you need more width you might have to try lengthening at a different angle (lines in blue).

How to make simple style alterations to a bra pattern, from the Bra-making Sew Along | Cloth Habit

strap style

How about fabric or lace straps?

How to make simple style alterations to a bra pattern, from the Bra-making Sew Along | Cloth Habit

Again, style and function–the less elastic the strap, the longer it lasts. This beautiful Stella bra uses a scalloped lace and a silk satin strap in the front.

The back design is really up to you. I love having options in back strap designs. It’s easy to change your pattern back and forth from a u-back to a camisole back.

How to make simple style alterations to a bra pattern, from the Bra-making Sew Along | Cloth Habit

In a camisole style, the elastic works best if it is tacked down to both the top and bottom of the band.

bridge style

You can do a lot of funky things with the bridge, too. If you are using longer underwires but want create a little plunge effect, you can try using separator wires, as in this lovely Huit bra.

How to make simple style alterations to a bra pattern, from the Bra-making Sew Along | Cloth Habit

These wires come in all sorts of shapes. The construction would be a fun puzzle, as you either need channeling or a tunnel to insert the wire. I may try this on my next bra and I’ll let ya know how it turns out!

demi cups

If a demi style appeals to you, you can always take some of the height out of your cup and bridge. This is an Elle Macpherson demi bra with similar seams as some of our patterns. To do this you’ll need shorter or plunge wires, or clip your own.

How to make simple style alterations to a bra pattern, from the Bra-making Sew Along | Cloth Habit

How to make simple style alterations to a bra pattern, from the Bra-making Sew Along | Cloth Habit

I love playing the game of “How Did They Do That?” and often do a little investigation in the stores (it must look funny, as I look inside the seams–the things you do when you sew!). So I hope this gives you some fun ideas as you continue your bra-making adventure.

Tomorrow I’ll be taking the pattern-hacking a bit further with a tutorial on adding vertical seams to your cups. After bit of a breather over the weekend, on Monday we can finally get down to the business of sewing our bras. Woo!