Today I’m going to finish my bra!
At this point I have two sets of cups–the foam cups and the outer coverings–and have also assembled my frame and band, including putting in the hem elastic. Most of the remaining steps are the same as your normal bra construction. If you need to fill in some gaps on constructing bras, check out the Bra-making Sew Along.
Covering the Cup
1. Before I start assembling the cups, I like to finish the neckline and underarm area of the foam cup with either narrow serging or a zig-zag. This helps to flatten the edge of the foam.
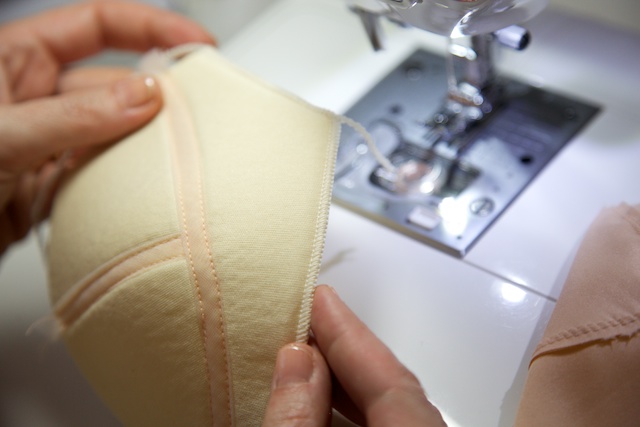
Some bra-makers like to zig-zag around the entire edge of the cup but I’ve never had trouble with these edges being too thick. Experiment to find what you like…
2. To join the fabric cup pieces, line up the necklines with the right side of the outer cup fabric against the inside of the foam. Stitch 1/8″ away from the edge. (The distance between the needle and the toe of my presser foot is 1/8″, which makes this easy.)
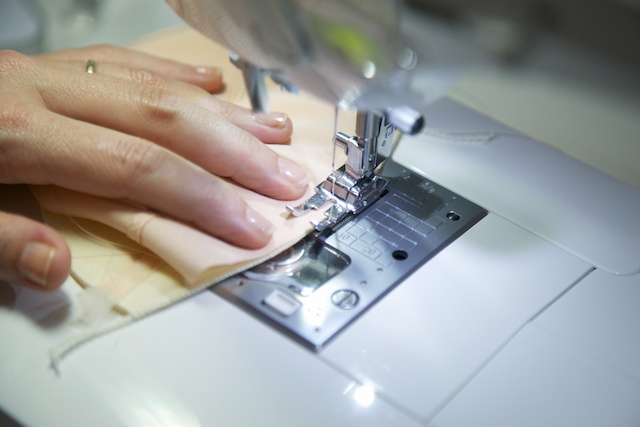
Turn out the outer cup piece to the front of the foam. It should look like this on the inside:
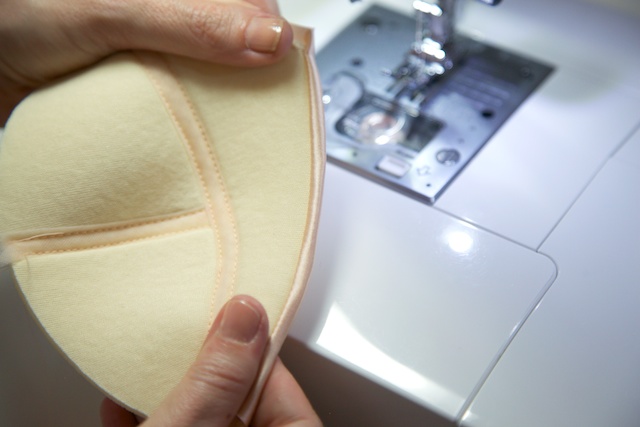
3. Now we’re going to baste the cup fabric to the foam so the cup can be treated as one piece. Arrange and smooth the cup fabric gently so it lines up well around the foam cup and pin close to the edges.
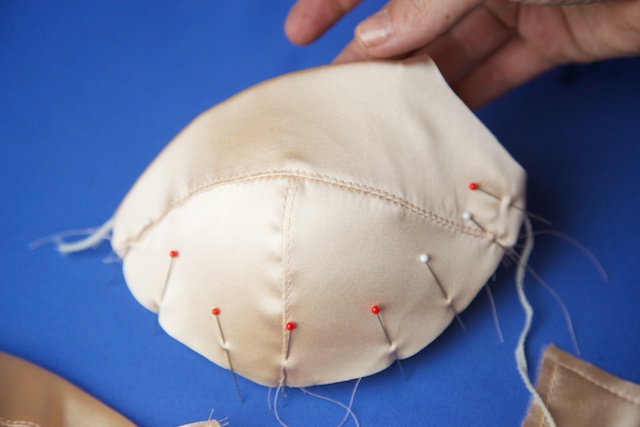
While you’re pinning, check the cup occasionally by rounding it over your your fist. This helps to make sure you haven’t pulled too hard on the outer fabric, and potentially flattened the cup. Depending on how stretchy your fabric is, it will sometimes go past the edge of the foam–that’s ok! You’ll trim this off later.
Once this is pinned and smoothed out, baste the fabric and foam together, keeping your stitching inside of 1/4″. (I stitched about 1/8″ away from the foam edge.) You are only going to baste the wire seam–the seam that goes into the cradle.
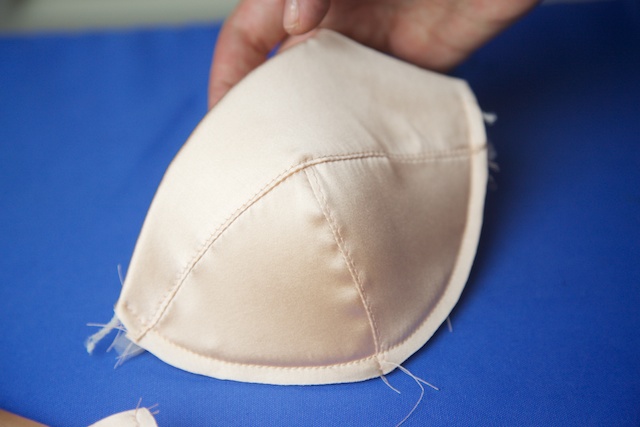
After basting, trim away the excess fabric that hangs over the foam. I do this by running a rotary cutter around the edge of the foam:
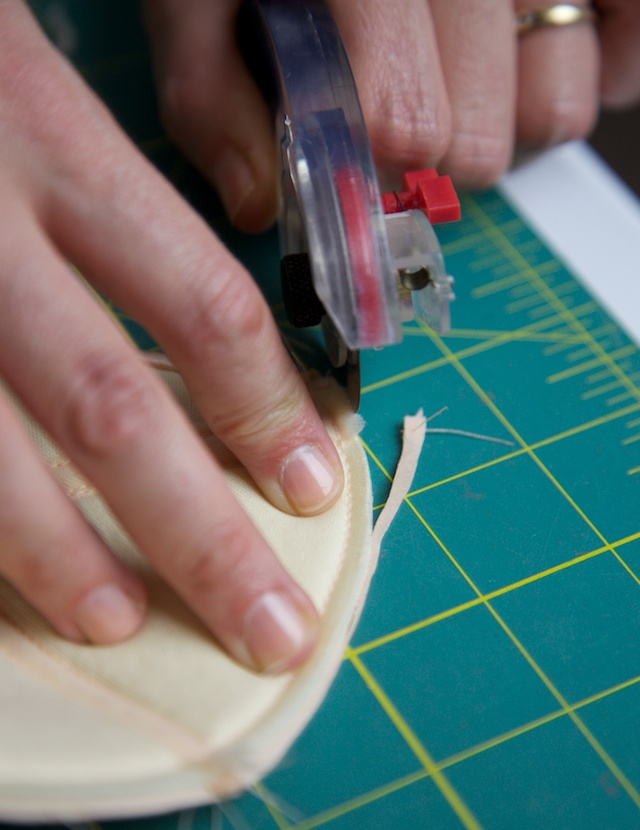
Man, that looks close to my finger…
Inserting the Cups & Channeling
1. Now it’s time to insert the cups into your cradle. There aren’t any special tricks here, but I wanted to show you what my hands are doing when stitch these in, because I don’t use pins when sewing in cups.
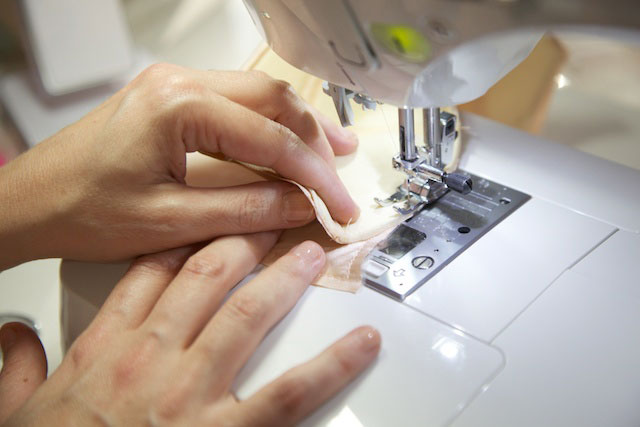
I hold the top layer (the cup) slightly above the bottom layer (the cradle) until just before the two layers go under the presser foot. If you have a few notches that match the cup to the cradle, it will help as you are sewing. Sewing convex to concave curves are so much easier without pins!
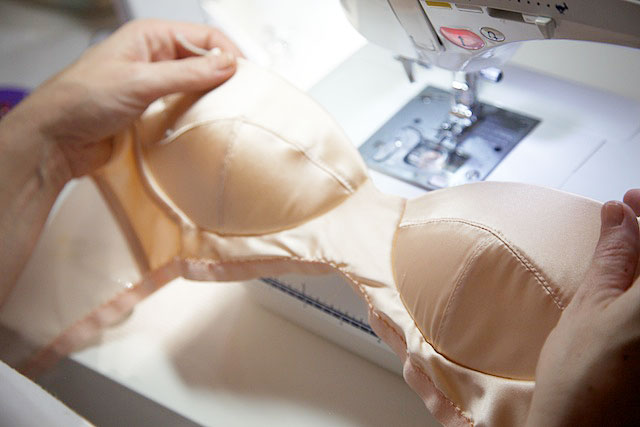
2. Once the cups are in, stitch in your channeling and topstitch as you normally do.
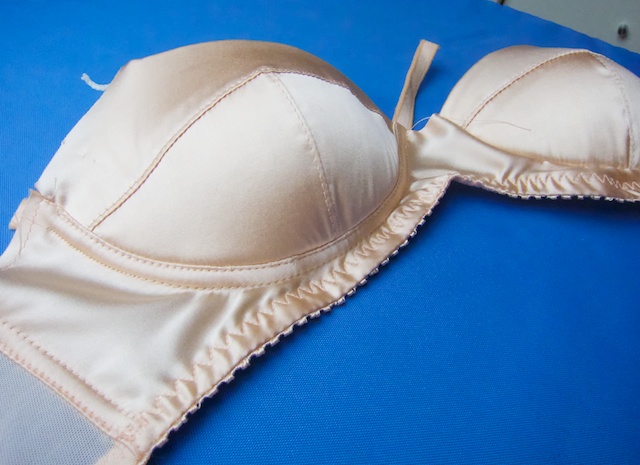
3. Close your channeling in front and insert your wires. You’re almost done! All that’s left is putting in the underarm elastic, straps and hooks.
Underarm Elastic
There are a couple of different trickeroos to underarm elastic and foam. First, you don’t want to fold the foam cup back on itself in the underarm area and create bulk. That’s why we cut off the underarm seam allowance from the foam. (Note that a foam bra don’t necessarily need elastic in the underarm area–some RTW foam cups don’t have it–but the order of sewing is a bit different than what I”m doing here.)
1. Begin sewing your underarm elastic as usual. When you get to the cup seam, stop and backtack a couple zig-zags.
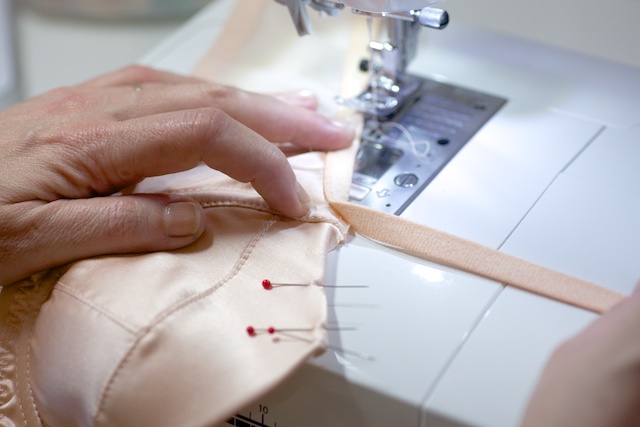
Fold the excess cup fabric over the foam and pin it smoothly into place. Tip: Wonder Tape is genius for “basting” temporary little seams like this. For some reason I couldn’t get it to stick to the silk so I went with pins.
2. Now do your second pass of stitching. I do this from the right side so I can keep the cup fabric secured at the neckline.
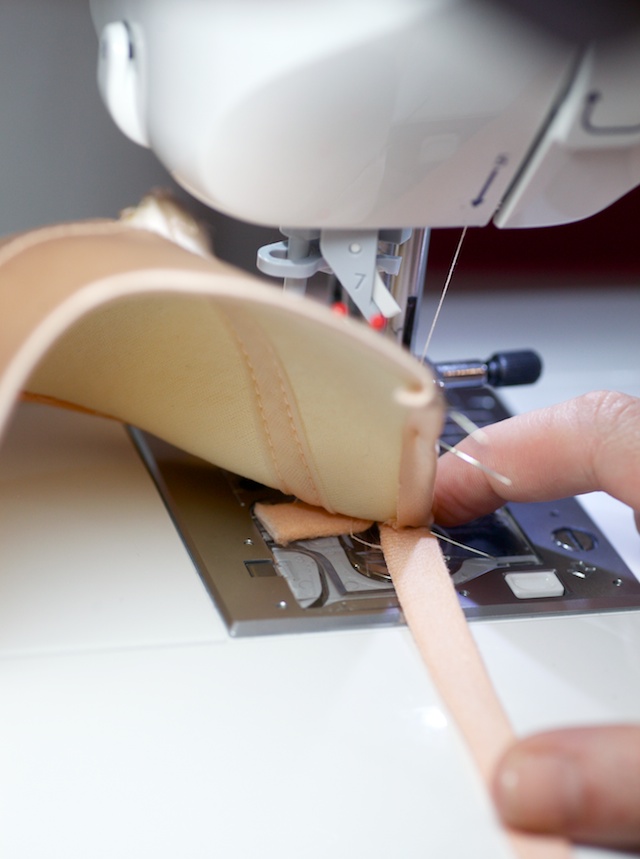
When you get to the cup seam, keep the elastic lined up underneath. Continue to zig-zag the same distance from the edge till you get to the end, and backtack a couple of stitches to secure.
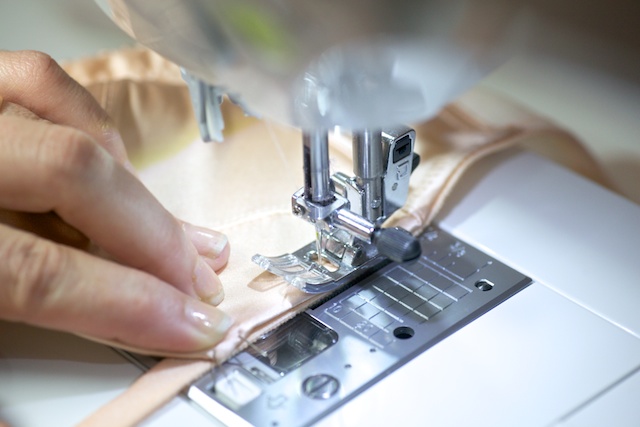
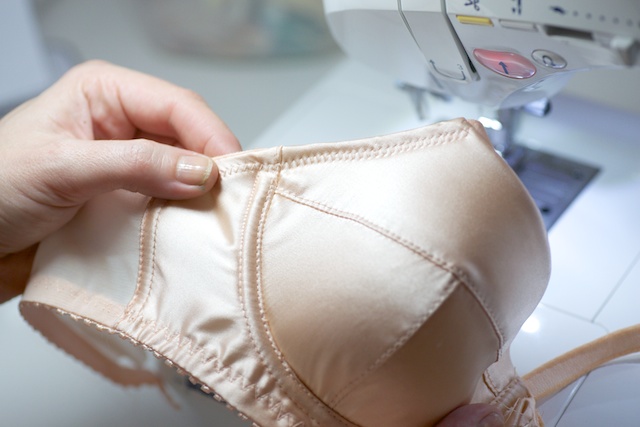
The finished arm elastic:
Finishing Up
Time to put in your straps and hooks! I’m assuming you have a favorite method of inserting your straps.
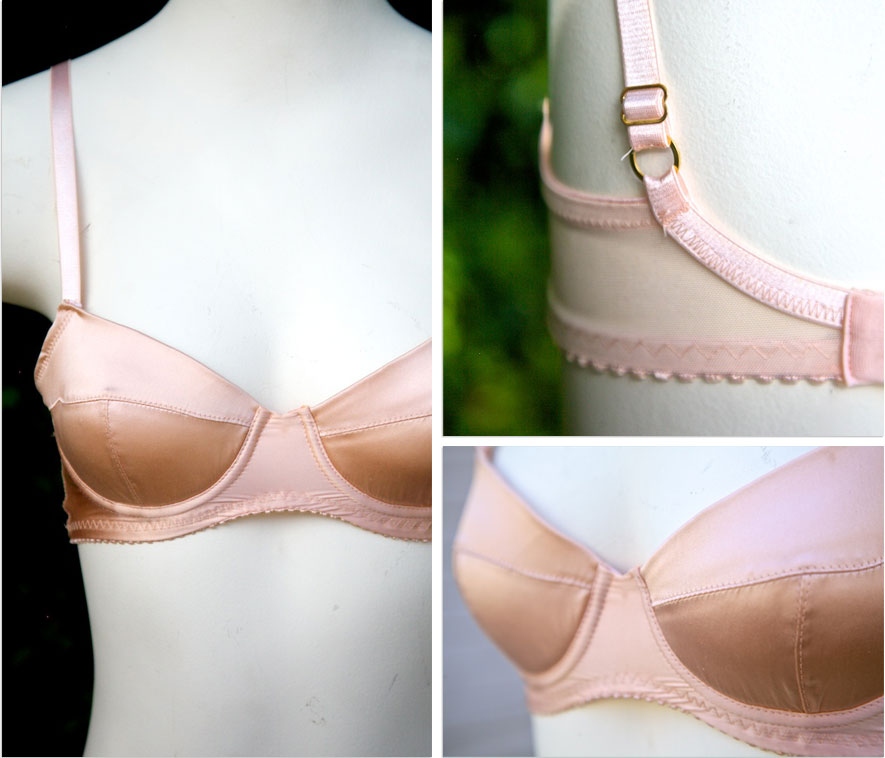
Normally, I like to put the adjusters in front and often use a technique I described in this post to stabilize the ring “loop”. However, I did a dumb-dumb and forgot to cut the arm elastic long enough for a loop! Ah well. I put my adjusters in back, and secured the edge of the strap on top of the strap elastic to hide it neatly away.
Stitch in your hooks and eyes, and you’re done! Annnd here is my finished bra:
In case you are wondering, silk makes a lovely bra material! For some eye candy and silk bra inspirations (many with foam cups), have a look at Stella McCartney, Fleur of England, or the Rolls Royce of silk bra design, Carine Gilson. I’ve been wanting to knock off one of her bras for years. Her designs got me wanting to make bras in the first place… I’ll just have to practice a bit of applique first!
Credits: All Photos by Stephanie Press
See more posts in the series Make a Foam Cup Bra.
Would you like tips and inspiration in the craft of lingerie sewing? Sign up for my weekly eletter The Lingerie Maker.

You’re making me want to make a billion bras again. Also, an idea for the future… STRAPLESS BRAS. Yet to find one that doesn’t make me give up and just strap my boobs down iwth ace bandages.
Thank you for all the work you did on this! You are an inspiration.
Do you have a favorite bra pattern?
Barbara
thanks Barbara! The commercial pattern I have made the most is Pin-up Girls Classic, but I also make a lot of self-drafted patterns. I customized my band, cradle and bridge to fit and keep using these as my base no matter what cups I’m making.
This is fantastic Amy. You are a true inspiration. My daughters thank you.
I bet you’re having fun dreaming up bras for them!
Great end to the series Amy! I enjoyed all three parts and took lots of notes! I haven’t gotten into foam yet, but I know it’s the next step for me, especially when I see the Carine Gilson’s collection.
Thanks Amy – you are the best. My mind has bee mulling over how to make a foam cupped bra and now my questions are answered. I continue to be inspired by your beautiful creations
That is absolutely gorgeous! I usually just do cut seams but I’ve been struggling with foam for a swimsuit. Thank you for the demo!
Gorgeous, Amy. Great idea on overlocking the foam edge. I’ve just been using a zig-zag but I think serging it would be quicker and easier.
Thanks Anne. Serging is a lot easier! I just switch to a narrow 3-thread overlock. It also makes a nice finish if you want a foam cup behind scallops on the upper cup but don’t want to cover the foam with a lining.
Ah-maze-ing! It’s beautiful as well. I imagine it would take me a lot of practise to do something this tricky. 🙂
http://www.etsy.com/uk/shop/buildingmywendyhouse
I nominated you for the Sunshine and Shine On award. See my blog for more info.
I finally ordered some foam this week… so I WILL be making a bra similar to this soon. SOOOO excited. Thanks for the well written directions and tips along with the photos. P.S. I actually found a seller on Etsy with Poly laminate space foam, she sells smaller sizes and it’s more economical compared to Sew Sassy with shipping (but only if your buying a small amount of the foam and nothing else) https://www.etsy.com/shop/JoyTheSeamstress?ref=l2-shopheader-name
Yay! Can’t wait to see what you make. And thanks for the tip on another foam seller.
How did you manage to attach the fabric cup to the foam one and turn it without the foam trying to fold over itself? I’ve been having trouble trying to get the fabric not to pull the foam down, maybe I don’t have enough seam allowance at the top and am pulling it too tight?
Hi Niki – hmmm, I didn’t do any special tricks here. I sewed the fabric to the cup with a 1/8″ seam allowance. When rolling the fabric over, make sure you’re keeping it loose enough, not pulling too tight. Did you add a 3/8″ seam allowance to the neckline as I showed on this post? That gives you enough for a 1/8″ seam plus allowance for rolling over the thickness of the foam. Hope that helps!
Question about the seams of these foam cup bras. There are obviously seams on the cups… but are you able to accomplish a seamless look underneath clothes with these. Do the seams “disappear” under thinner fabrics on your tops? Or are the seams just as prominent as the un-foamy lined ones? I would love to be able to make a “t-shirt bra” with this spacer foam. I know I can get the ready-made cups to cover with fabric/lace from different shops online, but they can be a bit more pricey then creating my own cups.
Hmm, I don’t think there’s much of a difference between this and my other seamed bras. I still have seams on the outside cup fabric, the same as I do in my other bras. I guess I don’t think of using this type of foam to create smoothness, but more as a way of adding shape or support. I have heard of molding the foam yourself–maybe something to look into? To be honest, I don’t notice seams through my shirts much but I know everyone has different preferences there. If I’m wearing a really stretchy close-fitting camisole or t-shirt especially in a pale color I have a molded nude bra for that occasion, but for most others I do like my seamed bras.
This is awesome! Thanks for putting so much effort in posting this for us! It’s greatly appreciated! Wonderful work! 😉 Thx!!
Hi Amy,
Thanks so much again for these tutorials. Just ordered a plethora of bra-making books and samples from Amazon, Beverly Johnson, Sew Sassy and Fabric Depot Co. Thrilled–I feel so spoiled. Happiness. Sorry to bother you, but I was wondering two things. One, which exact bra pattern did you use for the champagne-pink bra that you depict in these photos. It’s the shape of the cups I am after–I realize that one might have to alter the band a bit. Also, is the fabric a champagne colored tricot? What kind of fabric is that? Two, I was wondering if one needs any special presser feet when sewing together/joining the polylaminate foam cups and/or in other parts of the bra-making process. Would love to hear your thoughts! I hope all is going well with you! Cheers–Francesca
Hi Francesca! I’m so excited for you. It sounds like you are on a bra-making adventure! I hate to say it but I drafted this bra completely from scratch, so it’s not a pattern for sale ;). However, I’ve been developing a very similar style for a future Cloth Habit pattern!
Oh I didn’t catch your other questions! I put up a new page that links to all the posts in this series: Make a Foam Cup Bra. It should answer all of these questions ;). The fabrics, the adjustments to the pattern, etc. I used a regular zig-zag foot; you can see in the 2nd or 3rd post exactly how I stitched the foam.
Thank you for the tips. I am very busty and have been making my own bras for a couple of years now. But in winter sometimes its nice to have a foam cup for modesty. Have u ever used quilting cotton for bra cups? Where do u get your tricot. Do you use powernet for the band?
Hi Rebecca, I have not tried quilting cotton but I’d be interested in how it works! I list all my personal sources for tricot and powernet here and have even more stores listed on my bra-making resource page.
where did you get the bra strap elastic
I buy all my personal bra elastic from Fabric Depot Co. and dye it. I have a page full of resources here.
Whoa you offer such fantastic advice and instructions. I normally don’t comment on blogs much (definitely a lurker :p) but I felt compelled to thank you! You definitely have a new subscriber 🙂 thanks for all you do!
Hi Cherry, you’re welcome! Thank you for such a nice encouragement.
Hi Amy, I am making my first foam bra (a MakeBra). But the foam is a bit stretchy, and the lace I want to use to cover it also has stretch. Should I line the lace with cup lining?
Hi Carlijn, that depends on your fit needs/support preference. If you want absolutely no movement you could line it. Every foam behaves a bit differently so experiment with or without lining to see what you like!
Amy, you are a Bra Goddess!
With your very detailed discriptions I managed to sew my first underwire bra with foam! (not to mention that my first bra was Watson of course 🙂
Thanks a lot!! It turned out to be beautiful.
Réka
Love this bra, so pretty! I started making my own bras while I was at home towards the end of last year. I have a fashion degree so am not new to sewing but we never did lingerie and your blog is invaluable! I gave in and downloaded the Watson pattern after failing at drafting my own and it’s a great fit! I’ve ordered some foam to try and make a proper padded bra next.
Amazing, just what I was looking for to make/cover an existing bra for dance competition.
Thank you.