I love fashion etymology. My friends have been getting an earful education in lingerie definitions–things like nursing sling, cookie (you know, that insertable floating foam thing in bra cups), and longline. The distinction between a tanga, a boyshort, or a cheeky. (For example, the Ladyshorts pattern is drafted in a style of cheeky.)
Outside of poetic retail descriptions that often lump really different styles under the same terms, there are many distinct cuts and styles in underwear.
In the first chapter of Bra-makers Manual II, Beverly Johnson reminds her readers that there really aren’t any standard naming conventions–in lingerie or in any apparel category. “The more a bra style evolves,” she writes, “the more specific its definition becomes.’ She uses the example of padded bras, which twenty years ago referred to any bra with any kind of foam or fiberfill lining, but are now a distinctive (extra-padded) idea in the sea of foam-lined bras.
Among underwired bras, one could at least divide them into two main types: those with a frame and those without. The frameless bra is sometimes known in sewing as a “partial band bra”.
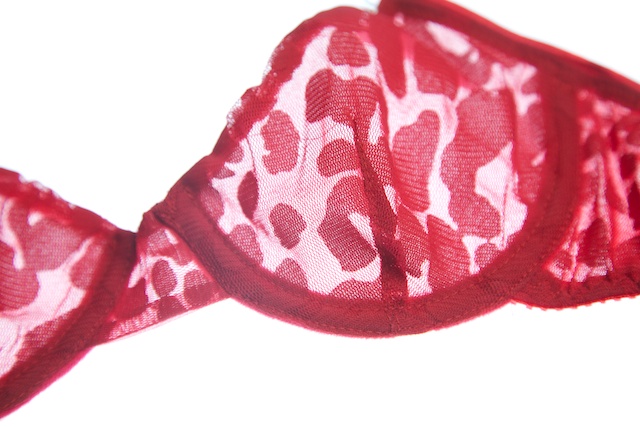
In frameless bras, the underwire and its casing are sewn into the cups, since there is no frame or cradle running under the cups. The wings and bridge have to be completely finished before sewing them into the cup.
The cup seams are different than a framed bra, since there needs to be enough room for the wire to go into the cup. One of my patternmaking books calls it the “hook-up bra”, which I’m guessing means that the wings and bridge are “hooked up” to the cup?
I never really noticed the difference between the two types before I started making bras. When I looked through my older purchased bras, nearly all of them were frameless. So by default, that’s what I made for my first-ever bra. Since then I’ve veered into all kinds of new styles. I just love longlines, and that you can’t do with a frameless bra.
There are pros and cons for each.
Frameless vs. Full Frame
I find that the frameless bra is just a bit easier to sew, but it is also harder to modify into new styles. I tend to put more plusses under the full-frame bra since it can be a foundation for all sorts of other styles (bodysuits, longlines, strapless).
On a frameless bra, there is a limit to how wide the band can be which is a con especially for larger cup sizes. A too-narrow band wouldn’t put enough balancing force in the back, causing the front to drop down. I think of the band as a lever, balancing the weight in the front. Wearing it more tightly is one solution but then there is the potential for pinched skin and pushing the elastic–and fabric stretch–to its limits. Then the straps want to absorb some of the pressure. All that to say, a wider band can alleviate strap pain, pinching, and help with a little smoothing.
But I still dig the frameless style, so I had a go at designing one of my own.
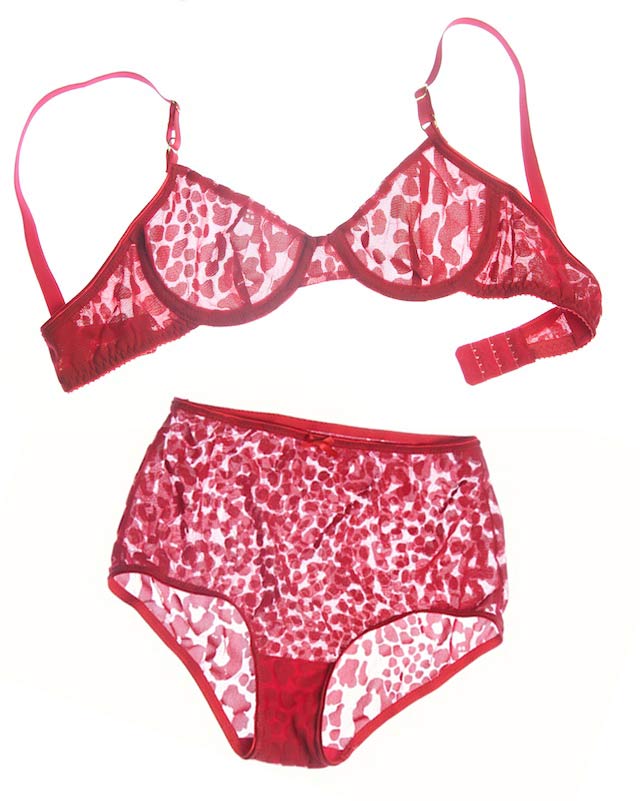
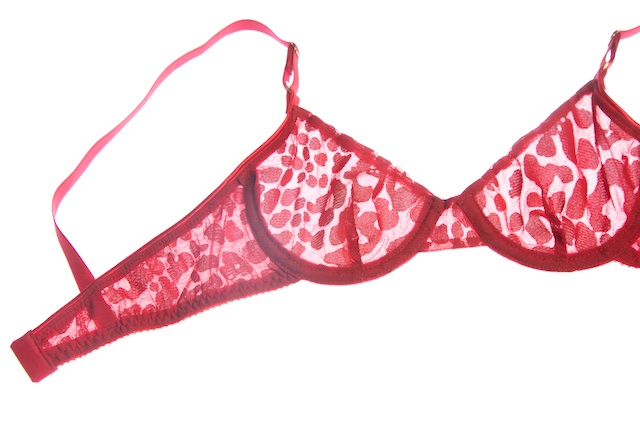
Last summer I spied a cute little leopard bra in one of my favorite lingerie shops and wrote it down on my “project idea list”. Oh that long wishlist. The muse did strike eventually, when I found the right fabric, an unusual jacquard mesh. I made the knickers right away but kept them neatly folded in a sewing drawer until I could get around to a matching bra. I’m just that particular about finishing. My studio is happily strewn with bits of lace lying about like lines of half-started poems. I also have notebooks full of just lines, phrases I hear right in that half-dream state when I’m about to fall asleep.
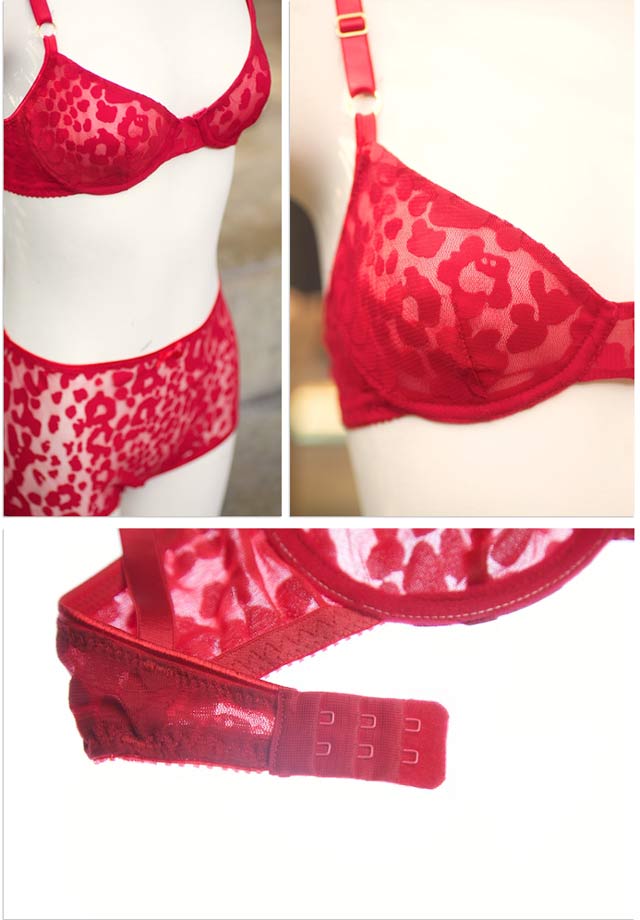
I’m so glad I experimented with this pattern. I drafted the cup with a single dart and used a plunge wire for a demi style. It’s the shortest cup I’ve made so far, but I really love how it fits and it has turned out to be a good style for me. The undies are a simple high-waisted knicker (the same pattern from which I based my bodysuit).
Now how did I end up putting levers, red leopard and poetry in the same blog post?
Details:
Patterns: self-drafted
Main Fabric: leopard mesh from Etsy
Lining Fabrics:stretch mesh and sheer tricot lining, Fabric Depot Co.
Plush and strap elastics: Fabric Depot Co., a few from stash
Elastic and Lining Dye: Rit “Scarlet”
Would you like tips and inspiration in the craft of lingerie sewing? Sign up for my weekly eletter The Lingerie Maker.
Lovely, lovely set. It’s been a long time since I made a frameless bra. Indeed more difficult to fit in larger cupsizes.
Wow, this set is gorgeous. As a fellow fashion geek I also teach my friends a lot of terms, whether they’re interested to learn or not 🙂
What a truly gorgeous set!
I really like the elegant simplicity of the shapes and how the pattern really stands out. It also looks really great for layering and that it would show off shape.
Beautiful set Amy! Simply stunning, as always. And I always love the little bit of education you throw in there. I’ve been eyeballing bras like this one on HerRoom quite a bit recently, contemplating buying since my bra fitting skills are sadly undeveloped.
Soooo lovely… you really have a great knack for finding awesome fabric. You’re making me want to abandon all my fall sewing plans and make a hundred bras. DAMN YOU AMY!
Gorgeous set! I’m still gathering everything I need to try sewing my first bra. This is great information, and wonderful inspiration 🙂
Gorgeous! Did you dye white elastic or nude elastic/hooks. Did you dye the sliders? I cannot imagine the prep time that went into this with the pattern drafting and dying.
Thanks! I dyed white elastic, lining and the channeling, but not the sliders. The nylon-coated sliders are difficult to dye into dark colors so I use these gold metal types since they go with everything. When I do prep in stages, it doesn’t seem to take so long. (Dyeing takes about 30 min.) And I know I’ll use this pattern over and over ;).
As always, this is just beautiful! I have to figure out how to take my partial band bra pattern (the one I’m working on right now) and turn it into a full band bra. It’s not that I want a full band version, but I want to be able to turn it into a longline and a body suit.
Thanks! I hope your bra making is going well! It’s not too difficult to change into a full band–shoot me an email if you get stuck. (You need your wire to get the starting frame shape.) I did the reverse here and drafted a partial band off of a full band.
So, so pretty.
oh how very pretty and very inspiring.
Absolutely stunning Amy.
Great minds seriously think alike. No joke, I have a post scheduled for this coming Monday on this EXACT SAME TOPIC.
I love the bra you made – gorgeous!
This set is gorgeous!
Beautiful! I desperately wish your lingerie draw was mine!
Hi! I am starting classes soon to get back into sewing and am hoping to make my own lingerie. I have always loved the products just not the expenses… I have been researching different patterns and tutorials online and yours has been so helpful!! I was just wondering if you (or any one else) knew particularly good websites to purchase your lingerie fabrics?
Hi Anna, I buy lingerie supplies from all over the place. You may want to have a look back through the Bra-making Sew-along, particularly this post. I’ve been trying to list the details of where I get my materials at the bottom of every project. I buy most of my basics from Fabric Depot Co. and Sew Sassy. I buy a lot of laces from Etsy and Ebay sellers. Merckwaerdigh is my favorite. As I mentioned in this post, the bra linings and elastics here all came from FD and I dyed them to match.
Stunning! Gorgeous! Perfect! I love everything about them. Are you thinking of releasing patterns anytime soon, because I would totally buy this one!
Thanks, Carolyn! & yes ;).
This is adorable! I saw a beautiful sheer silk that looked just like this on my last shopping trip. Could you use silk organza as the cup lining? And bias cut silk organza for the band lining?
Hi Rebecca, now there’s a thought. In general, I find organza a bit stiff and prefer something with a bit more movement as a lining, but why not give it a try? I do think it might be a bit too stiff for the band. Ideally, a band should have something with spandex so it can stretch and recover easily and smoothly. Bias stretches and keeps on stretching, and doesn’t recover. I lined the mesh here with another layer of solid color stretch mesh.