
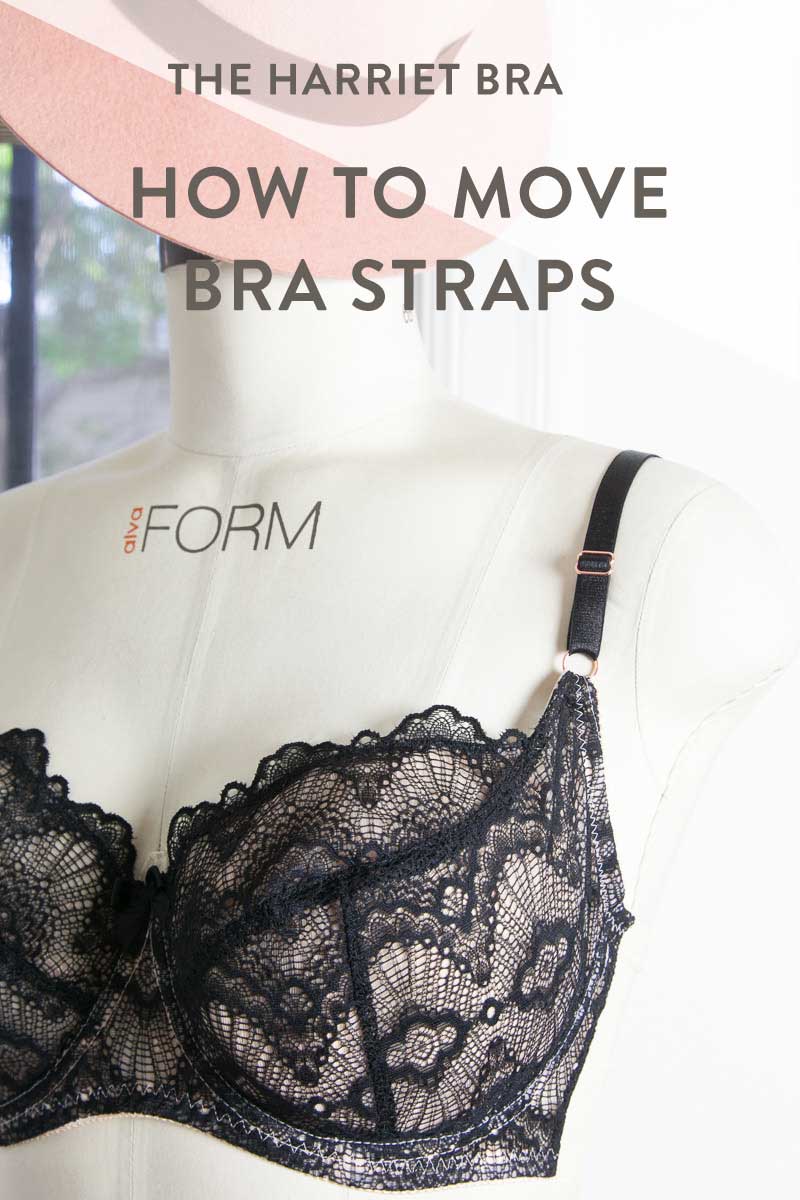
Alrighty, this tutorial has been a long time comin’! I’ve had many requests for a tutorial on how to move the straps on the Harriet. This adjustment can help improve your strap comfort if you have narrow or sloping shoulders, or if for any reason the straps feel too close to your underarm. Let’s get those straps moved inward!
But first let’s talk about bra strap positions in general…
The Harriet is designed to have a wider neckline. In full cup or triangle-style bras, straps can be quite centered over the breast. In bras with a demi/half cup or balconette neckline, straps are typically wider apart. Sometimes that helps create a certain silhouette, but sometimes this is just a natural consequence of the height of the cup:
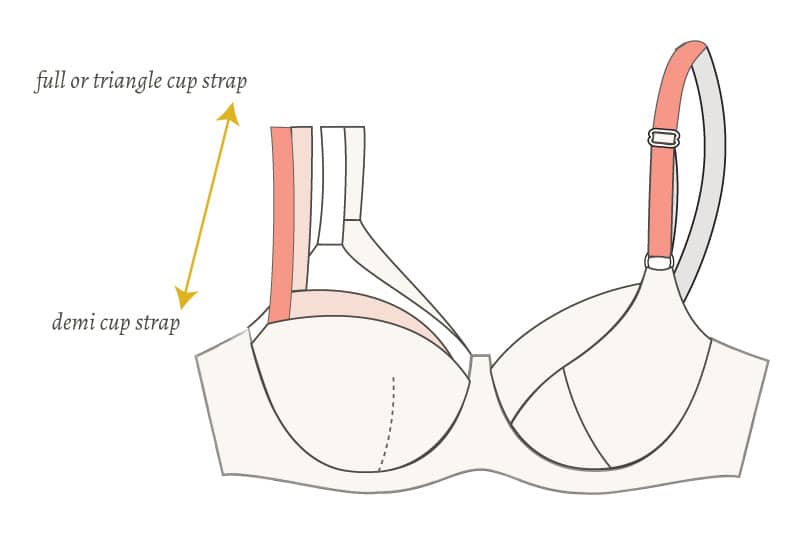
(For more theory behind necklines and strap positions, see Is that Bra a Demi, Balconette or Full Cup?.)
Here are some examples of the Harriet’s cup seam style in ready-to-wear:
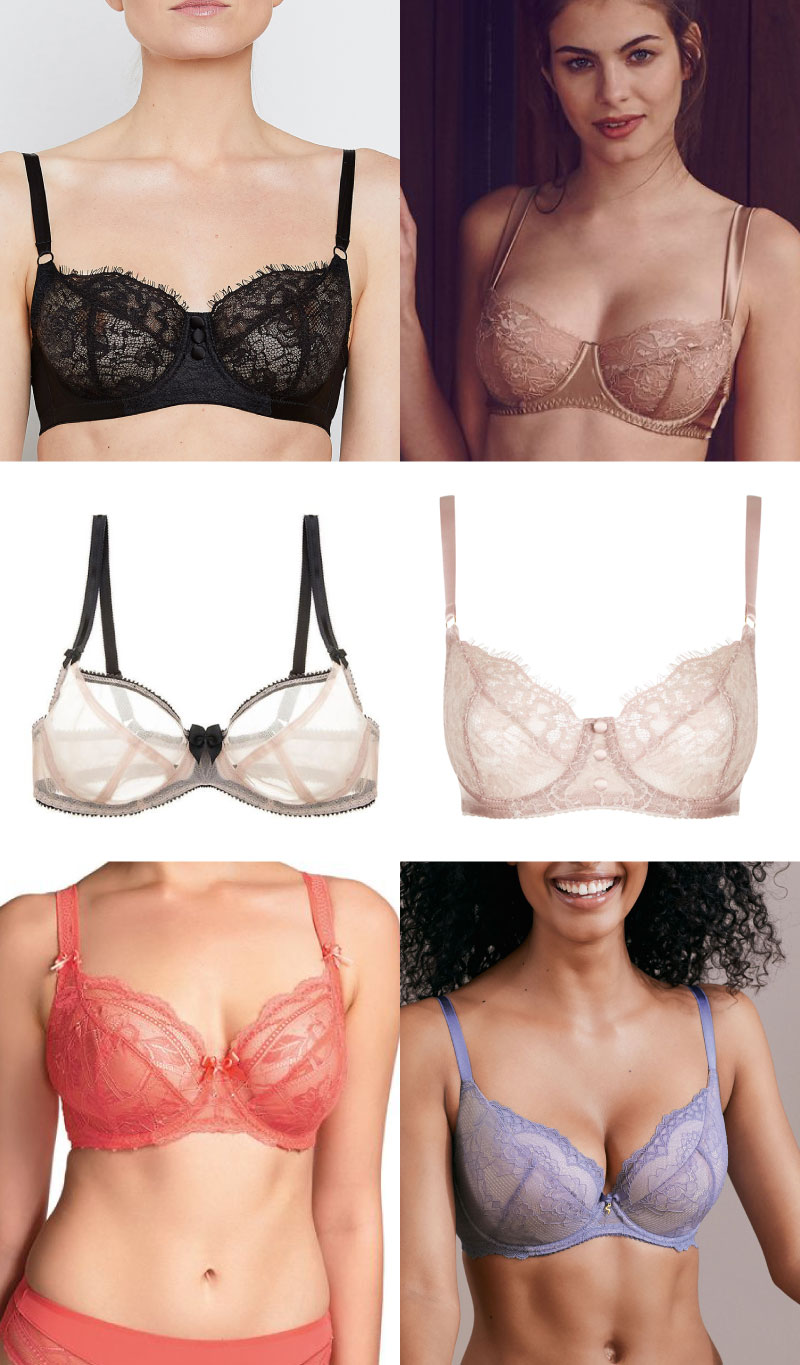
(one, two, three, four, five, six)
Obviously these are model bodies and the patterns behind the bras all slightly different, but they give you an idea of the various strap positions that are often found on this cup style.
When trying the strap alteration you don’t want to aim at centering the straps, which will change the fit in the cup and possibly create a funky cup shape that pushes down on your breasts. Instead aim at getting them to a comfy spot that doesn’t fall off or irritate the skin around your arm.
Onto the alteration!
Step One
Take your upper cup and outer cup piece and line them up at their seamlines. Draw a straight line following the neckline all the way through the strap:
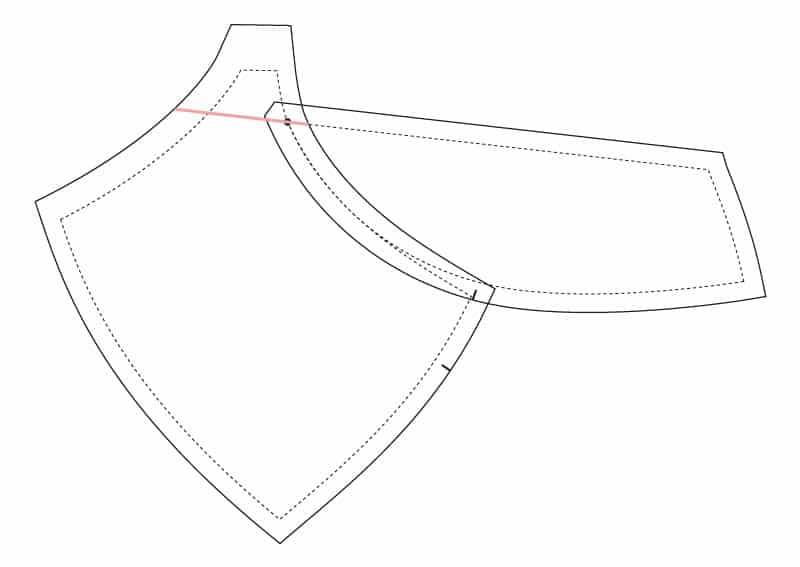
It might help to remove the seam allowance from the upper cup to help with this. You can trace it back in later.
Step Two
Along the line you drew, cut off the strap extension and slide it inward 1/4″ (6mm). Tape your pattern to a new sheet of paper and draw a new seamline (yellow line) and add the seam allowance:

If you feel like you need to move it in more, try up to 3/8″ (10mm) but no more than that until you’ve tested this. Small adjustments really add up in bra patterns! It’s all about little tweaks at a time.
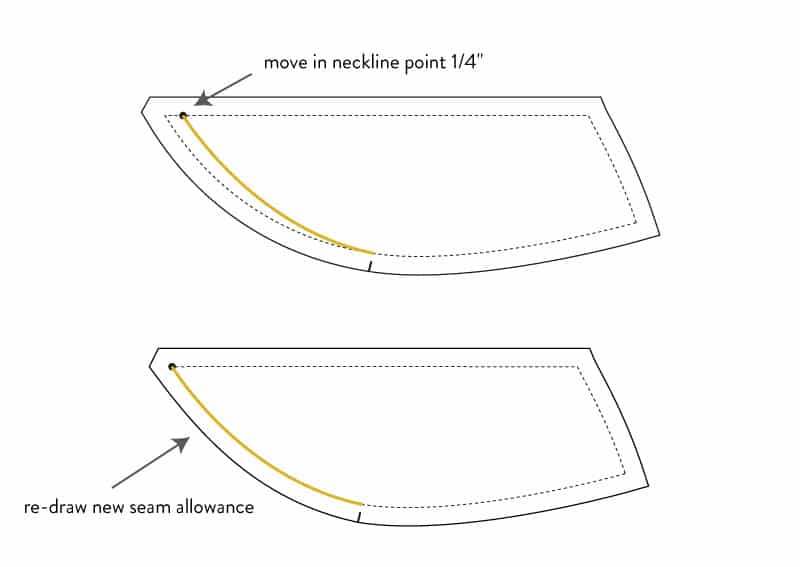
Step Three
Mark in 1/4″ (6mm) from the point of the neckline, and draw a new seamline with a smooth curve going all the way to the notch. Re-draw your new seam allowance.
Step Four
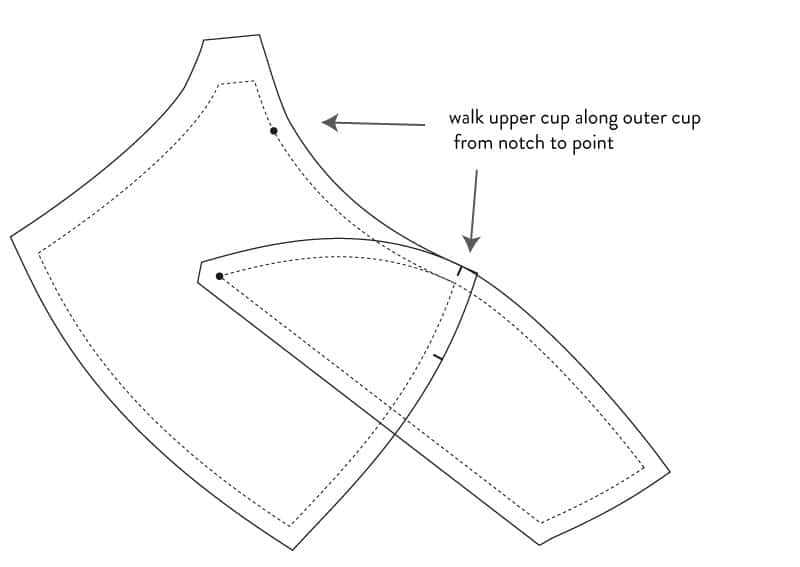
This is just a “double check” step, but it helps to walk your pieces after adjustments to make sure notches and points match. Walk your upper cup piece from the notch toward the point, and put a dot or notch on your outer cup where the new “meeting point” will be.
What this adjustment changes
This adjustment moves the strap, but any time you move straps inward on a bra it changes the fit of the neckline. If you need to remove length from the neckline AND want to move the straps inward, I’d recommend trying this adjustment before taking out any length along the neckline.
The j hook
Lastly, I can’t leave this tutorial without talking about the clever invention of J hooks!
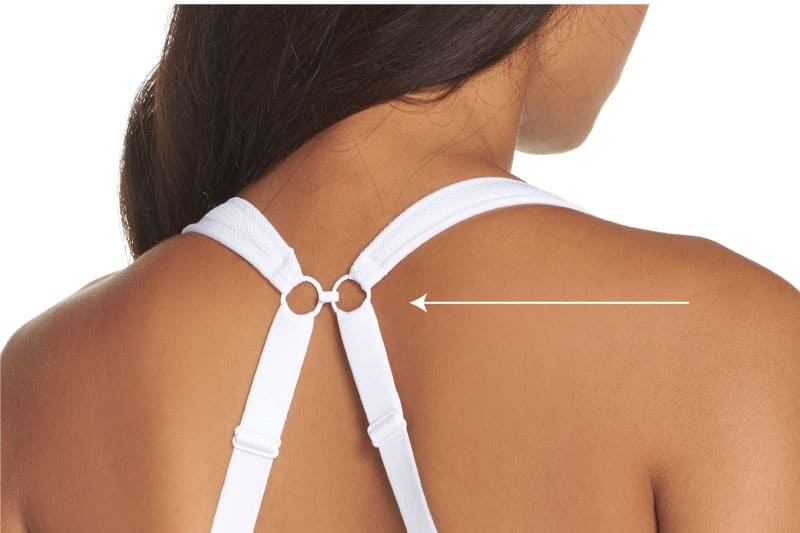
(J-hook on the famous Panache sports bra)
If you are one of those people for whom straps on any bra are always slipping, a J-hook and a corresponding plain ring can be sewn into each strap and connected together for a more controlled strap position. They’re also great for getting your bra straps to hide under racer back styles (if you are in the ‘hide the bra straps’ camp!). Many bra supply shops carry these–too many to list here, so check with your favorite stockist on my bra supplies page.
Happy sewing!
Would you like tips and inspiration in the craft of lingerie sewing? Sign up for my weekly eletter The Lingerie Maker.
This is awesome Amy! I shared it in the bra group! It will be very useful as there are quite a few there using your patterns.
Thanks Donna! I’m glad it helps.
I am a rookie… Wanting to make a bra for a long time already , but now i’m going for it! I’ve been browsing about everything of bramaking on the internet and found some interesting and useful things…. but… your pages are really the best. A new world has opened for me. You explain everything so clear and synoptic… it’s the best!!!
You are to me a BRA-ANGEL
thank you so much
Carla (from Belgium – English is not my native language, so sorry for the typos)
Hi Carla, you didn’t have any typos. 🙂 And thank you for the kind words–I hope you have fun learning to make bras!
Hi Amy
I bought the Watson when you first released it and have just made my first two – finally! I love them. They actually work on my rather hangy breasts. Don’t find the longline as comfortable – I’m short waisted and have developed a post total hysterectomy pot which both don’t help. Anyway, thank you for a brilliant pattern . I’m presently adjusting my seam allowances as I want to use the shorter length with wider underbust elastic, 3/4″. I’m working with the regular cradle and band. Would you mind if I asked your opinion on whether it’s better to do that, or rather to shorten the longline? Thank you
Hi Francesca – it’s easier to add length to the regular cradle. You’ll just need to make sure you have at least 1 1/2″ distance from the seamline where the cup sews into the cradle–to accommodate the 3/4″ elastic plus the 3/4″ allowance it takes up in folding.
Amy, thank you soooo much for this! You’re a star.
Oh, really great. I went in a course where I’ve “learned” to sew bra. I needed to slash the upper cup to give the more room for breast tissue, but afterwards the tutor forgot to alter the strap position. I went with undone bra home and needed to think pretty long how to solve this problem. There was a woman having same alternation as me, her and me sewed second strap to the padding of the bra and connected this to the outer strap, which needed to be altered- it turned to a new strap design . Of course this can’t be made always and depends how far the original strap is located. Later I was thinking how to keep the original design lines, when I alter the strap and got it as you described in your post
I just made this adjustment on my second Harriet (1/4″ adjustment) with excellent results. I would like to make a small adjustment to round the cup slightly for my next version, but I can’t find a tutorial. You’re older post on adjustments suggest flattening the lower seam on the upper cup. The Madalynne post you mention is gone, but an image on Pinterest looks like she suggested straightening both the upper cup seam lower seam and the upper seams of the lower cups. I’m nervous about lowering the apex too far by removing fabric, but I might try. Is this what you’d recommend for the Harriet? Thanks!
Hi Sargeant, I don’t have any recent tutorials on this but here are some thoughts: Yes, flattening the curves does make the curve less steep and so makes the cup “rounder” but there are some consequences to be aware of. If you flatten the seam on the upper cup to make the curve less steep, a couple things happen: 1. that seam becomes shorter, so you will need to make corresponding adjustments to the lower cup pieces to match the new length of the upper cup seamline. I don’t recommend doing it to just the upper piece. And 2. you will be reducing volume so the cup will be slightly smaller. It really depends on how much you flatten the seam. Even 1/4″ will reduce the cup volume by almost an entire size, so if you try this, remove a very small amount and see what happens.
Hello, I recently bought the Harriet bra pattern and have fallen in love with it. I’ve made myself a few and have just converted it into a bikini top for a teenager with big boobs and a small back. The straps are too wide for her small frame, so this will come in useful to adjust them inwards. The results look stunning on her and she is very happy with her first “big girl” bikini top.
So glad it worked out for you! Amy