I am a slowwwww sewer. And I actually have time to sew, but I move at such a contemplative pace.
A friend of ours recently quoted something he read, “The first 40 years of your life you’re trying to beat death. The second 40 you’re embracing it.” It wasn’t a cynical observation at all, if you knew him–it sounded like a 90-year-old wise old oak rocking on his front porch.
I’ve been thinking about his little proverb nugget ever since, especially in regard to creativity and productivity. While finishing my jacket I kept hearing Feist in my head, crooning, “Take it slow, take it easy on me”.
I’m being a bit selfish here in showing some detail pics, because I want some advice before I sew the buttonholes, close up the sleeve lining and model it. And well, press it, because I haven’t really done much of that yet.
First the good:
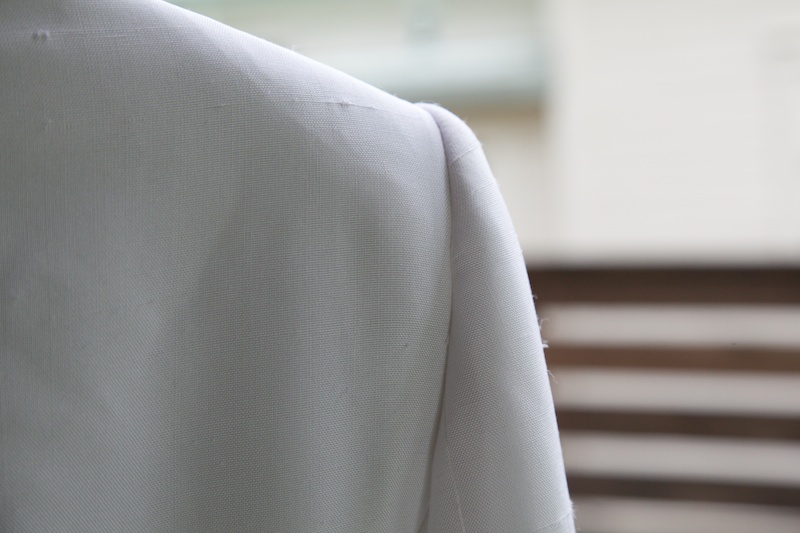
I love how the sleeves came out. I was very nervous about this, despite the fact that I didn’t have to wrestle large amounts of sleeve ease. This fabric easily puckers. And I wanted a very strong shoulder, so I ended up hand-sewing in a a stiff and contoured shoulder pad, rather than machine sewing it to the allowance. I didn’t want in any way to crush the lift!
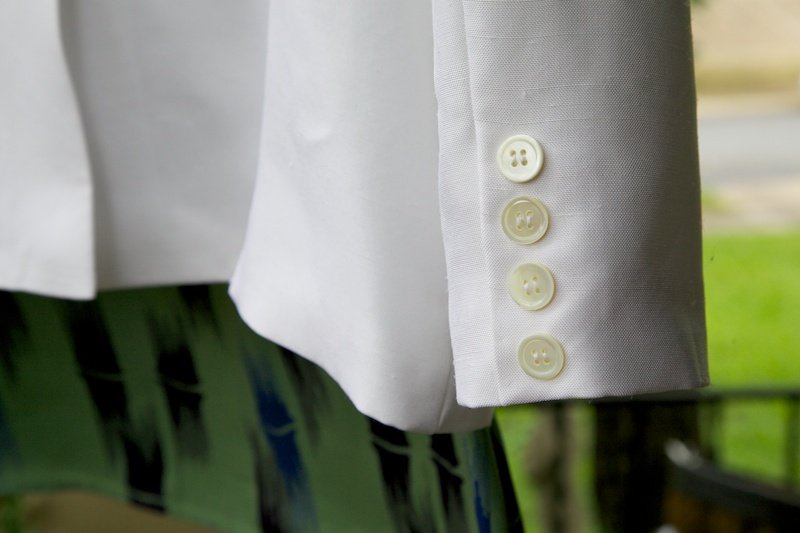
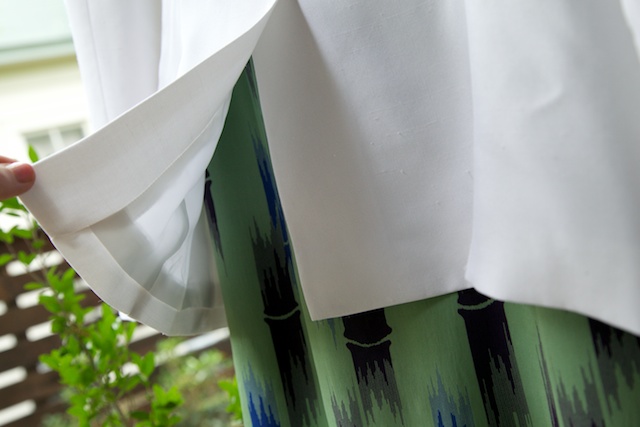
My pattern didn’t include vents on either the sleeves or back, but the original jacket I was knocking off did, so I drafted those. I used Sherry’s sleeve vent tutorial for the sleeves.
I searched high and low for true white buttons, but apparently button-sellers like calling ivory “white”. I ended up with a bunch of buttons I didn’t want and then decided on mother-of-pearl–if I’m going to go ivory, might as well go pearly.
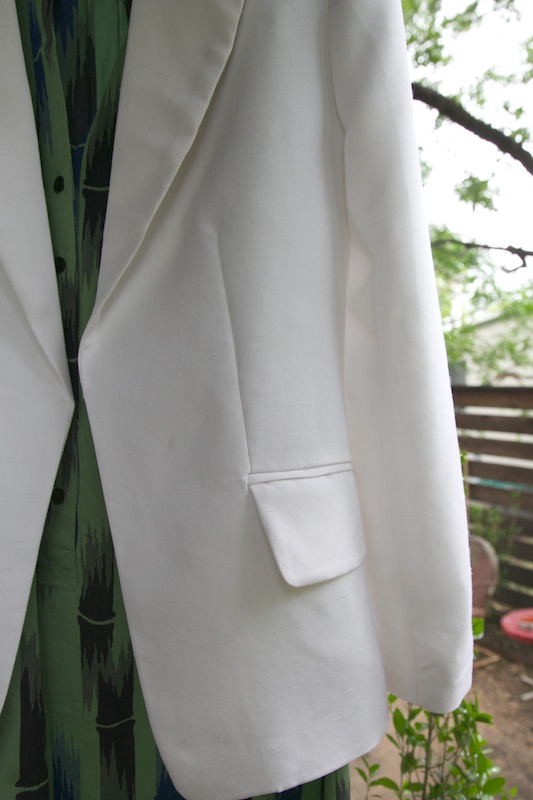
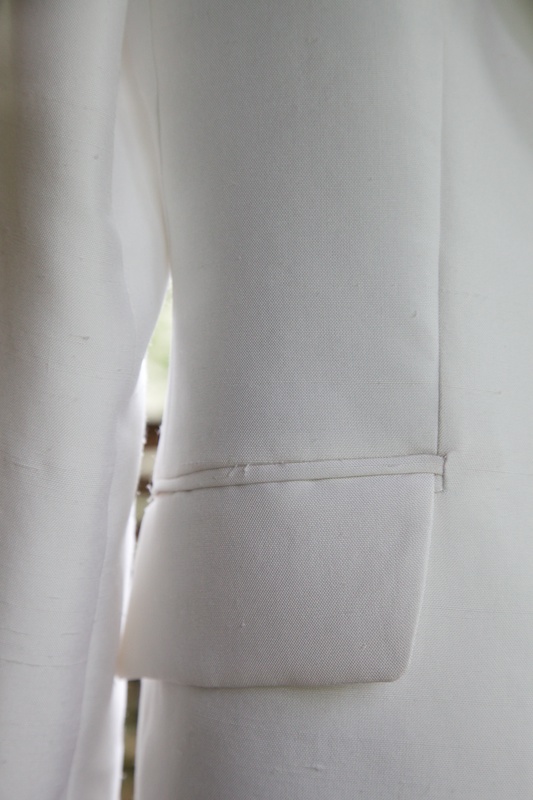
Pockets turned out alright, the flaps a bit short for the welts, but I’m happy.
For the back vent, I followed Fashion Incubator’s tutorial on facing & lining junctions (here and here). Unlike my sleeves, the back vent also has a vented lining and needs to be drafted differently.
I drafted the vent a little too long in the end and had to hand-tack part of it down so it doesn’t start swinging open near my waistline.
I love how the lining came out. I sewed the entire thing in two passes, following the sew-along except at the facing hem, where I again used the tutorial at Fashion Incubator.
Now the bad:
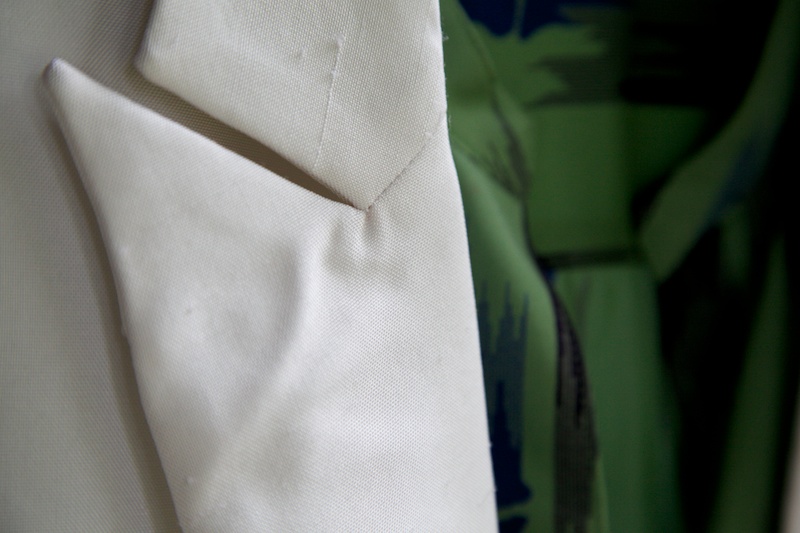
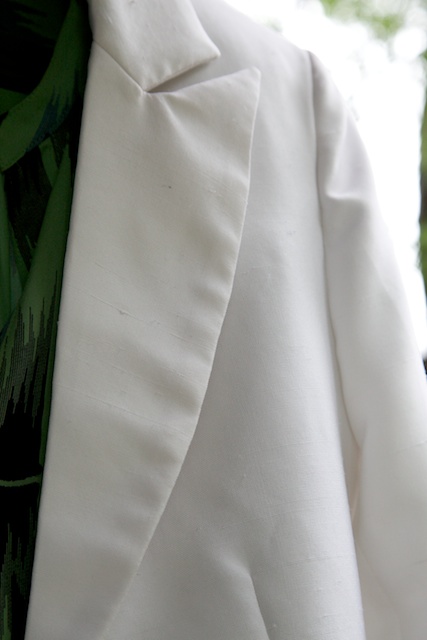
The collar disappointed me a bit. It’s got a little bubble where the lapel meets the collar. Any advice on this?
You can see how this particular lapel also has a wavy doohickey going across the point. Don’t know what to do about that either.
The lapel itself looks wavy on the edges. I suspect this has to do with the seam allowances–the outer edge is actually longer than the seam and by squeezing itself in there might be causing the waviness?
Would a smaller (maybe 1/4″) seam allowance prevent this, or is this the nature of my fabric?
Ok, enough of lapel talk. The only other thing that is driving me mad is just occupational hazard. White really does dirty up quickly if you are working on it for long. I washed my hands quite frequently but that didn’t stop it from getting a little dulled. I may have to take it to the cleaners already–which might give me a great final press, too. What do you think?
I really dislike having silk dry-cleaned frequently. It starts to dull after awhile. But I do spill and am not especially neat. Hand-washing is out of the question for this jacket so it will have to be handled with kid gloves.
[box type=”alert” style=”rounded” icon=”none”]
Edit: I corrected this entry to give proper credit to the “Unnamed Tutorial” series at fashion-incubator.com by Kathleen Fasanella. This series includes a technique of drafting a pattern so that a jacket’s lining and facing are entirely sewn by machine resulting in a very clean finish.
I had previously included links to a sewing blog demonstrating this technique–which I found from yet another sewing blog. I mention this only because I feel it is important bloggers track down their sources properly. Original tutorials with photos are proprietary information belonging to the author/publisher, whether from a blog or a book. I take these issues seriously, and apologize for not crediting properly the first time.
[/box]
Would you like tips and inspiration in the craft of lingerie sewing? Sign up for my weekly eletter The Lingerie Maker.

I’m all about the slow sewing as well. I find it can be very meditative and inspiring when taken a stitch at a time. Love the jacket, by the way. Not sure what to tell you about the lapel puckers, as I haven’t much experience with those sorts of things, but I think Sherry helped another seamster out with a similar issue in the Flickr group.
Here: http://www.flickr.com/photos/54137424@N06/5677204162/in/photostream
Kimbersew had a similar lapel dimple problem, and I left some notes on her Flickr photo and her blog which hopefully help. In the end I think the easiest way, unfortunately, is to unpick the whole lapel between collar and break point, and try to analyse where the fault is occurring by looking where the top layer of fabric wants to move to. I’ve tried unpicking parts here and parts there and it becomes messy – in my experience it is easier to do it properly in one fell swoop! And it’s easier to let the fabric go where it wants rather than try to force it. For the outer edge, I think it is more a case of too much ease, although smaller allowances will help.
Otherwise it looks totally fabulous – what a beautiful sleeve head!
Thanks Amy and Sherry – for some reason I missed that photo on flickr but it helps as does your advice here. My lapel was so pointy that I tried to be very accurate in putting dots, knowing when to stop/start, etc. but I can see that for this style I possibly had too much turn of cloth and such. Alrighty, I will contemplate whether or not to unpick!
Could you go back to the puckered seam and locate the stitch or two that’s creating that pucker? Usually that’s what it is…
I think I might do that. At least turn it back inside out and look. Now that I am objectively seeing it in pictures, it seems like the lapel wants to release a bit from the collar.
Your jacket is so pretty, crisp and gorgeous. I love the slubs and that’s a sleeve head for the books. It’s really really smashing and you should be SO proud. It’s better to be a slow sewist than a reverse sewist (lots of unpicking…).
wow. i have absolutely no advice for you whatsoever. just quiet stun-ment.
Wow, I think your jacket is amazing! I’ve never made one myself, so I can’t offer any advice, but I’d like to make a fully lined men’s jacket someday. I’m having trouble finding resources on construction for men’s jackets though.
Glad to have found your blog, and it’s good to hear that I’m not the only slow sewer out there 🙂
Hey Taylor, thanks for visiting! Yeah, my husband is already asking me for a jacket and pulled out some of his favorites. I actually think I enjoy making tailored-type clothing the most and it’s the kind of stuff that takes time. I know there are books about the hand-tailoring way of men’s jackets. I have an older one, can’t remember the title just now. But I kind of like the machine-made way. I just like machines!
Looks like it’s going to be very cool and stylish, great job on the sleeve caps
As far as the jacket getting dirty, you could just keep wearing it till it gets too dirty and then die it a certain color. I would practice with other things before dying this first. I have not had the most consistent time dying things, but I don’t have a washer at my house. It looks great though!