The Hunt for Red

Since there is a dearth of fabric stores in Austin, I buy most of my sewing stuff and especially fabrics online. Which, yeah, is always a gamble especially in terms of color. I am so picky when it comes to color. I bought 5 rose bushes before I found the perfect shade of coral-y shell pink flower I was looking for. Coral is not coral is not coral.

And color always shifts in relation to its surrounding colors.

{Credit}

Not to mention some fabric stores take pictures under flourescents and using flash, making things much warmer than I know they really are.

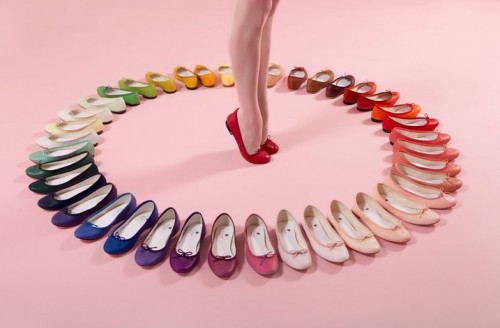
I get certain color combinations in my head specifically with fabric. For the longest time it was orangey coral with a bright cobalt blue. Last winter I wanted a red wool crepe dress to wear with red tights and black boots. Have you ever tried to shop red fabrics? I wanted bright, clear red. Not an orange red, not a blue red, not a dark red. I wanted the kind of primary red that looks straight out of a cadmium red paint tube.

It was impossible to find. Lots of fabrics were/are described as “lipstick red” and anyone into red lipstick knows “true red” is in the eye of the beholder and the skin tone of the wearer. MAC has at least five good but wildly different reds. I took a risk on a doubleknit described online as “true red” but ended up with a very brick red.

Right now I have a fascination with tomato red, a risky color on me because I tend to look pallid in very warm orangey colors. And uh, what exactly is tomato red? I mean, some interpretations of “tomato” are almost purpley red, as tomatoes can be. But I’m thinking more like a flame red pigment. Argh, I blame this all on that four-month color theory class.

Speaking of fabric stores, one of my favorite textile shops of all, Britex in San Francisco, has just recently opened an online shop to include an edited selection of fabric. Britex in person is a bit of an experience. Be prepared to have opining salespeople bringing you fabrics left and right–it’s not a place to sneak–but I like talking fabrics with them. Be also prepared to drop your jaw and see prices up to $100 a yard both online and in person. They have Valentino silks and Dior leathers, after all–but once in awhile it’s fun to just see such gorgeousity!
Digging into Patternmaking Again

About eight years ago, I dug out my dusty broken-bobbin-hole Brother machine after many years of not sewing. I sewed for much of my teens and made almost all of my clothes in college, but after that I went in tiny spurts–partly because I was able to afford nicer fashion than what I had been sewing. I’ve always loved fashion and spoiling myself with clothes when I can.

Still, I could never get rid of that sewer’s itch every time I looked at a gorgeous piece of fashion: “how did they *do* that?” And all my sub-dreams of learning fashion design would rush to the surface.


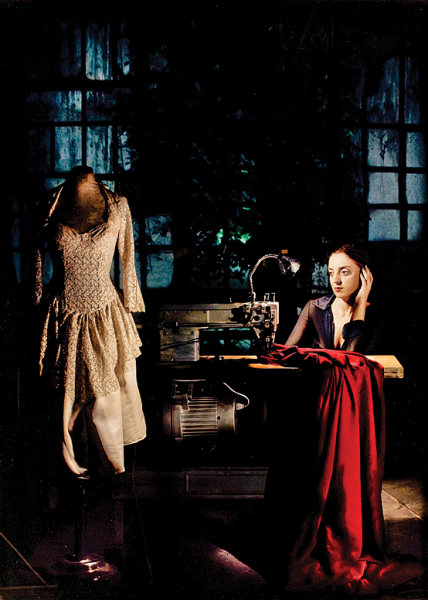
[From a current exhibit here in Austin, I loved this enormous print by contemporary Argentine artist Nicola Costantino. Credit and the fascinating history behind this photograph, a self-portrait.]

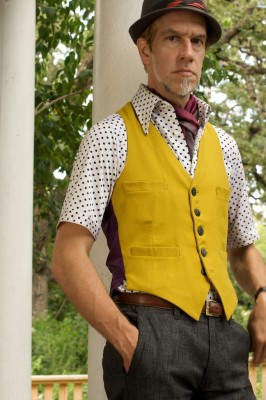
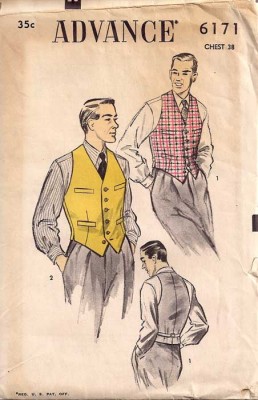
So when my husband asked me to make him a vest–and he went into elaborate detail about what this vest would be, what shape of pockets, lining, fit, type of buttons–I took it as a challenge to make a pattern from scratch. The one vest pattern I could find at Jo-Ann’s was a horrible boxy McCall’s thing straight out of the 80s so that wouldn’t do. This was before Pattern Review, sewing blogs and the onslaught of vintage sewing mania so I didn’t have much to work with.

I googled “patternmaking” and the only things that came up were an expensive (to me) patternmaking textbook and Lutterloh. I decided to enroll in some college courses in fashion design but got sidetracked once I took the illustration courses, which I loved.

Long story short, it took me a few more years before I’d find a vintage pattern and make something of D’s dream vest.


I have a few patternmaking books now, which help me with details I want to add on to an existing pattern, but I’m itching to learn more. I like theoretical knowledge and am rarely satisfied with just learning techniques. And some patternmaking books just give you a long list of things to do–rather than teach you why you’re doing them. Over a year ago, I made some slopers from Elizabeth Allemong’s European Cut and she does have some little gems of “why you are doing this” teaching. Although the slopers are very basic and have no ease–at all–I had a few lightbulbs go on while working on them. Perhaps I’ll do a review of this book in another post.

After someone recommended it, I decided to order Winifred Aldrich’s Pattern Cutting for Women’s Tailored Jackets over the weekend. This might be a bit backwards as I don’t have her introductory book, but I’m really keen on making my own jacket block, perhaps this winter, or modifying my silk jacket draft to do other things. Does anyone have this book and what can you say about its drafts?

I’ll be taking it with me as holiday reading next week. Yes, I’m a geek who reads stuff like horticulture manuals in bed. Don’t worry, I’ve got poetry going with me, too.

Simple, Pretty Vintage Blouses

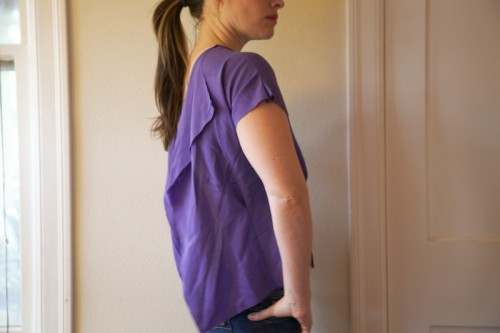
After sewing a second test of the Sencha pattern, I’ve decided to pass. Even after going up two sizes, the issues in my original muslin are still present, only in larger proportions. Shoulders oddly tight, too much bunching around the armholes and an unreal amount of billowing below my chest that would take too much work to adjust.

There are some lovely Senchas out there, and I think it looks good on certain figures but has the potential to be sloppy-looking on others. I mean no offense by that; it’s not for everyone! I feel perfectly happy breaking up with a pattern; why wrangle it down to something it’s not?

So I went back out on a pattern hunt. Basically, what I am looking for is a slightly loose, 40s-style cap-sleeve-ish blouse pattern with tucks or multiple waist darts. It can be buttoned either front or back–that part is easy to change. There are a motherload of vintage or repro patterns with almost identical shaping as the Sencha–and a few neckline variations.

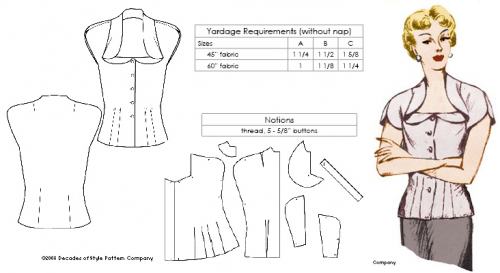
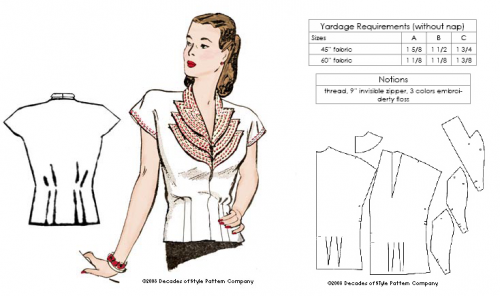
First up is my favorite from Decades of Style:

I love how older patterns include illustrations of the pattern pieces–you can get a better idea of the shapes and tune into subtle differences. For instance, this blouse has a curved petal-like sleeve opening. It has similar tucks as Sencha, and there’s a back shoulder dart. What say you about shoulder darts? There are a lot of those in vintage patterns, and I wonder how they help fit.

Another from Decades of Style, the Girl Friday Blouse:

Double-tucking on front and back, which I like, a front shoulder dart, and that gorgeous triple collar! I won’t need the collar for my project but it’d be fun to try this out some day.

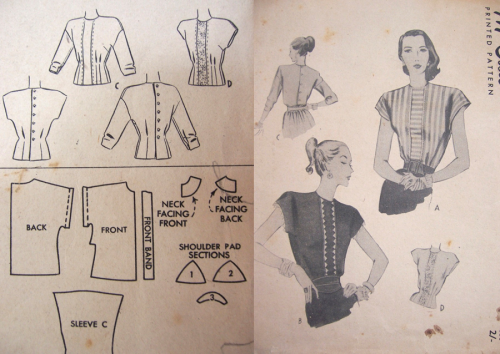
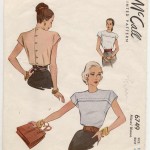
A McCall’s pattern, almost identical in shaping, but adds a bust dart (which might help with fitting?):

{Credit}

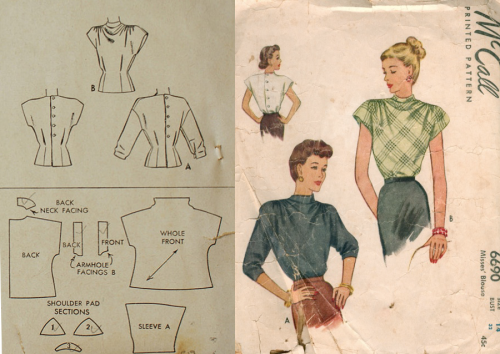
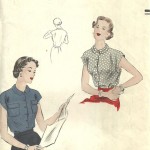
Another McCall’s, with lovely shoulder gathering and optional cut-on sleeves. I wonder how those fit:

{Credit}

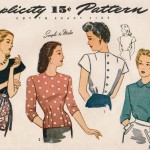
More ideas:

{Credit: McCall’s 7231, McCall’s 6749, Vogue 6749, Simplicity 4987}

Are you bloused out yet? I think I know which one I like best style-wise, but am more concerned with fit and hope one of these patterns might have better proportions for my body. Which one would you pick? I’m pretty new to sewing 40s patterns. Perhaps it’s time to pull out my old attempts at bodice blocks and draft my own. Either way, starting another blouse will have to wait for fall!

The Silk Tank, Version 3.2?

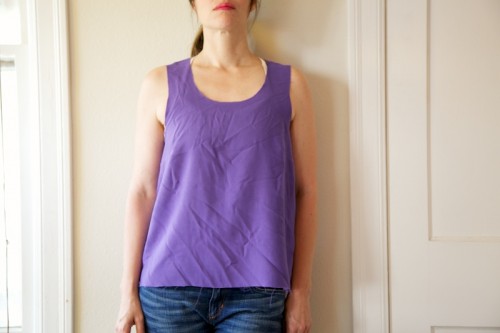
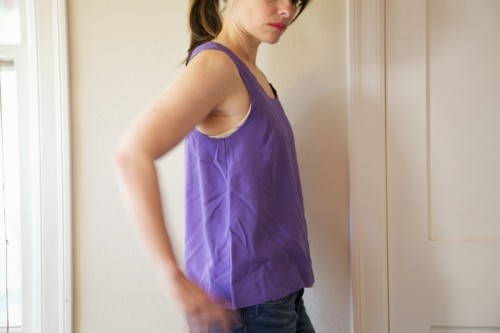
My latest test of the silk tank pattern is turning out nicely, thanks to advice by Sherry and Steph, who suggested a full bust adjustment, with an added dart, that would give me some extra room in the chest.

You’re going to see a lot of this purple fabric (and wrinkled, too–heh). Rayon challis solids were like $1.50 a yard during an extreme sale at fabric.com last year, and I bought an entire bolt of 12 yards! It has been very handy for muslins for my never-ending queue of silk projects, as its weight and drape are so close to silk’s.

Since my previous version of this pattern, I made two adjustments.

1. I raised the neckline about an inch. I realized that if the top fell over my bust properly the neckline would be too deep and revealing. The only reason it was staying up was that my chest was pulling it up.

2. Added length and width through a full bust adjustment, which also added a dart. I’d be happy to illustrate how I did this if anyone’s interested.

Between these two alterations I think the pattern has balanced itself on my body–no more hiking up and a pretty even hem.

I love the way it fits now and it’s comfortable, but the style is still not exactly what I am looking for. By adding room, I lost some of its dramatic tent shape, going from narrow to wide–and have ended up with something boxier-looking than I want. To give the illusion of that shape I’m going to try and narrow the scoop of the neckline. I also want to make sure there will be no more bra-peek-age from the armholes, ya know? (I’m wearing a high-riding sports bra in the photo but still.) Isn’t it amazing how one can get stuck on something so simple as a tank? I might as well have drafted this from scratch because it barely resembles the original pattern! I’m having fun learning about armhole and neckline shapes, however–so experimenting on a tank is better than something bigger and more wasteful of fabric.

That’s it for now–back to more testing! Tonight I’ll hopefully get to sewing a little muslin of the Lonsdale bodice.

Sencha for a Small-er Bust

Finally, after a week or so of pattern tracing and cutting I started in on a few muslins over the weekend. (My multiple-pattern project is going great except–big except–I have little piles of patterns everywhere–which could make things get chaotic fast. I really need some hangers or clothespins because I don’t want to fold them up.)

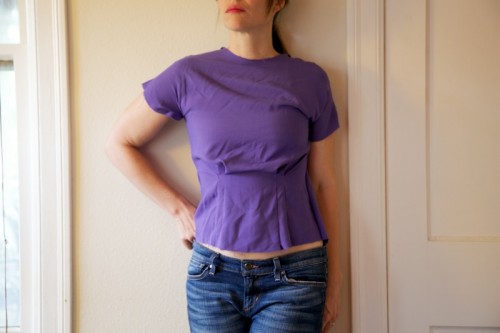
First up is the Sencha blouse by Colette Patterns. Here is what could happen when one picks a sewing pattern by bust width:

Hilarious, right? I’m sure there’s some sort of style in this. (I had no one to help me pin the back, but I don’t think it would’ve pinned shut anyway!)

Many patterns recommend picking a size based on bust width, and according to Colette Patterns that would put me at size 0, their smallest. I knew that was silly as I was tracing it, but I decided to make a muslin out of the 0 just to see what would happen. (My Lady Grey coat started out as a size 4, with some bust alterations.)

It’s a good example of how picking by bust width might get one into shoulder trouble. I’ve read on blogs that Colette Patterns are based on a C-cup. That tells me that a 33-inch bust would correspond with a 30-inch upper bust (mine is 32). What I don’t know–outside of measuring the pattern itself–is the shoulder to shoulder width for each size. Obviously my shoulder width is at least two sizes larger than Colette’s proportions for my bust size–I can’t even tell you how painfully small these cap sleeves are–hard to see from the photos but they barely go over my arms.

As darling as they are, it’d be awesome if Colette included more measurements in their patterns. I’m sure larger bust ladies need them, too, because not every larger-busted woman has large shoulders. The only patterns I’ve used that do include more than the usual bust/waist/hip (and sometimes) back length are Burda and HotPatterns. Hotpatterns really goes into detail, which is very helpful when picking out sizes.

So back to tracing another size, most likely a 4 to fit my shoulders and chest, and doing an adjustment in the bust area. I’ve got some big plans for this pattern if I can get it fitting correctly–a top secret design I’ll share soon!