In Which I Dream of Stella Once Again

Why hello! I didn’t want May to get away from me before I stopped by my own blog. As you can tell I have been on a sort of blog vacation–pretty much a forced internet vacation with the sluggiest hotel wi-fi on the planet. I’ve been seriously eyeing an iPad as a result, because 3G is just better in travel circumstances and traveling with a ginormous Macbook is just not doing it for me anymore!

So I was just immersed in two weeks of an intensive course in counseling, consisting of 9-12 hour teaching and practice every day with activities at night. It was enough to send me crashing into bed every night with barely enough inspiration to brush my teeth. But somehow I convinced myself while packing I might have time to sew. I brought along my bra patterns and a few lingerie fabrics–mini sewing! and what little spare time I had was spent designing and drawing out a few new bra styles. I also picked apart an old bra to clone and I’ve been deconstructing several others to learn more about materials and construction. It’s fair to say that I’ve been obsessed with bras the last month, and here’s what’s been inspiring me lately…
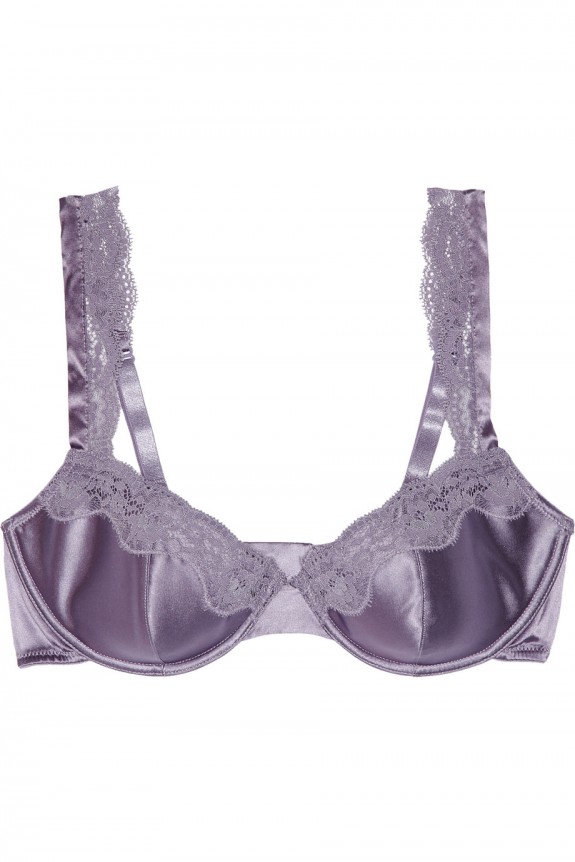
Stella McCartney. I just fawn over this lingerie. Such beautiful little details, like silk wire channeling, pleated straps, funky metal rings. This is a simple contour padded bra but the drama is in the details, which I appreciate now that I’ve made a few bras of my own, and have tried on a few of hers! {via net-a-porter.com}
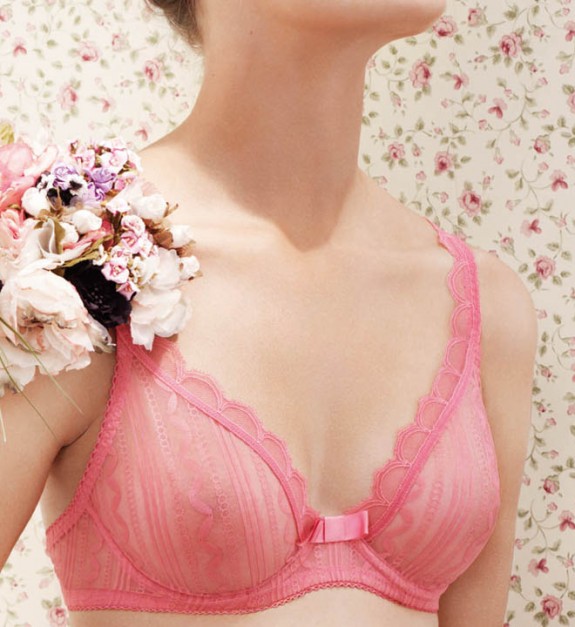
Huit. This is a French lingerie company and most of their bras are soft cup or unlined cups, which are perfectly fine by me. They work really well under simple tops. I really adore their simple little designs and especially the colors.{via herroom.com. More Huit here and here.}
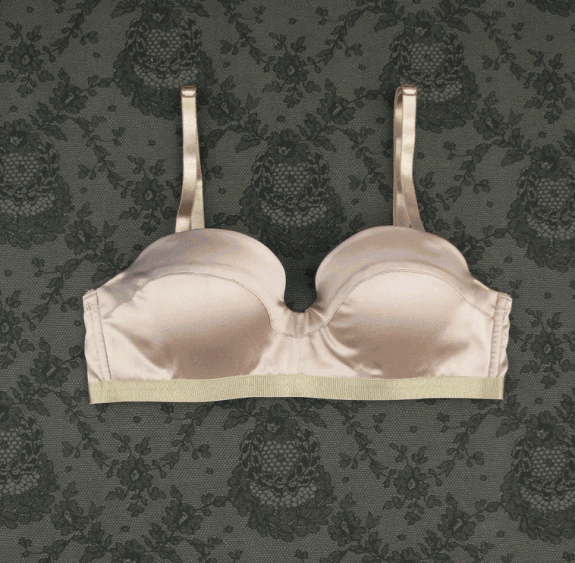
Wundervoll. I adore the funky styles by this German brand. They veer toward athletic-inspired designs, a bit left of center. {via lilleboutique.com}
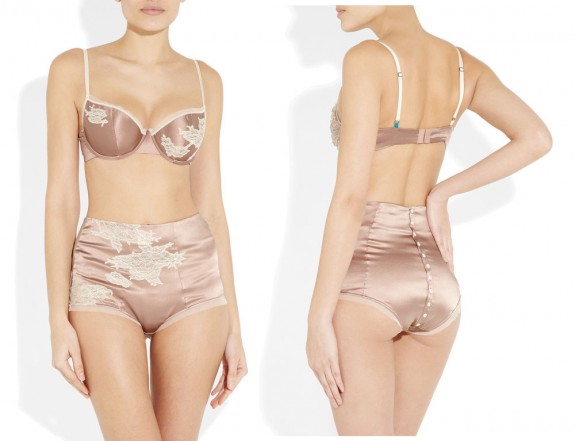
{via net-a-porter.com}

Elle Macpherson Intimates. I own a couple Elle Macpherson bras and they fit me wonderfully (great deals when on sale!). This season the brand really embraced the vintage-style look, and this lace applique silk set just really nails everything I love about lingerie right now.

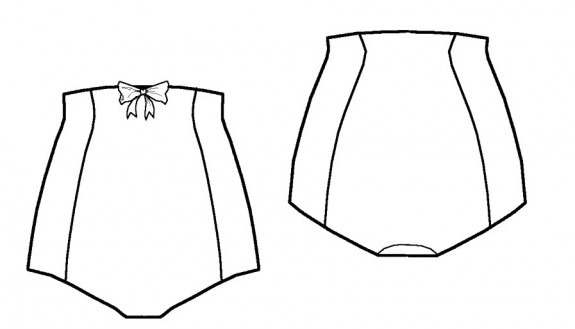
Check out those high-waisted knickers! Coincidentally, just before I left I won my very first internet give-away in the form of the high-waist Betty Knickers from OohLulu, thanks to Lizz at A Good Wardrobe. These would be a great starting point to knock off Elle Macpherson, dontcha think?
I’m glad to be home, despite the oh, 40-degree temperature hike from Washington to Austin, and ready to dig into new projects! And as you can guess, a new bra is in the works!
Fixing a Rise: Scallop Shorts Alteration

Howdy all, hope you’re having a beautiful week! We’ve been having mad storms here the last couple of days, and hallelujah, I’m so happy it’s raining. Our dogs, on the other hand, get nervy with all the thunder and lightning, and last night the youngest one bolted out of our gate, disappearing for SIX hours. Nothing like running around in Texas-sized tree-felling winds, yelling out “JAKEY WAKEY!” all over the neighborhood (Jakob, Jake, Jakey, Lanky Jakey…)! Turns out he found his way to our friend’s house several blocks away to huddle on the porch–smart border collie.

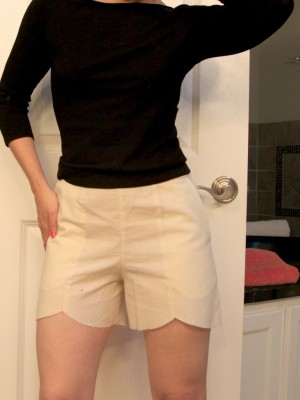
Anyways, a few readers asked for a visual of how I adjusted the front rise of my scallop shorts so I used a little rainy day to put together a pictorial. I know it’s hard to explain those things in words! I dug out my muslin to give you an idea of what was going on. I don’t know what was going on with this pose, my awkwardest attempt to keep the side seams closed while simultaneously keeping my arms out of the picture:

Unfortunately, I adjusted my muslin before I could get pics, but this is what it looked like after doing a minor version of my adjustment–you can see the residual problem and it got even better after I did more adjusting.
Problems:

* Front rise is too long (hence the horizontal folds or droopiness).

* The curve or dip point of the front crotch seam stands too far away from the body. The radiating folds that extend from it feel restricting.

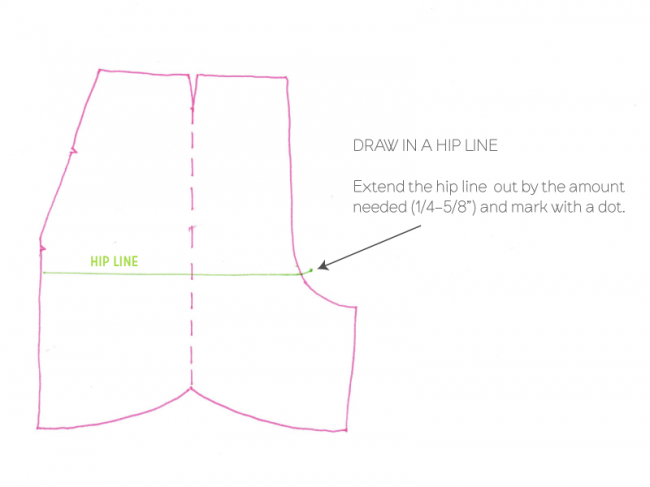
It seemed the folding was due to both excess vertical length AND stress from being too tight around the hips. So here’s what I did:

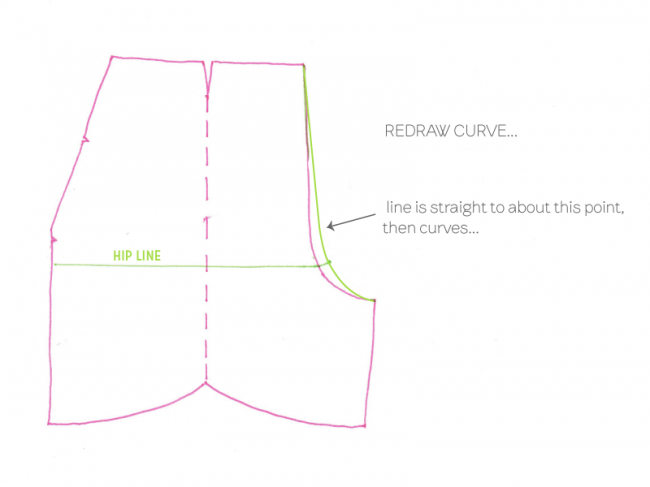
1. Drew in a hip line. There wasn’t one on my pattern, but I marked the spot on the center front of my muslin where the fold was, and used that as the hip line.

2. Then I extended the hipline about 1/2-5/8″ from the original edge and marked a dot. I tested this by re-sewing the curve 1/4″ into the seam allowance on my muslin, then re-drew it further out for the final version.

(If you want to get really precise, you can mark in the seam lines, and measure out from that line, then re-draw the seam allowances.)

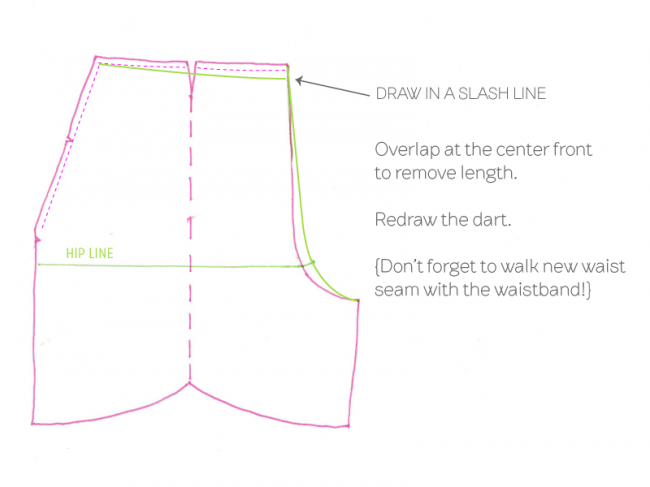
3. Then I re-drew the curve to meet that dot. The curve is now shallower, which also makes it shorter. You can also see that the front hip width has now gotten wider as a result. By re-drawing that curve, I gave myself about an inch total more hip room.

4. I still had a bit of excess length in the front so I took out a wedge along the waistline, about 3/8″, starting at center front and tapering to nothing at the side seam.

I’m pretty happy with the way it all turned out! Has anyone else battled this kind of fit issue? I’d love to hear what has worked for you.

I hope that helps!

Going for a Test Drive: Sewaholic Cambie

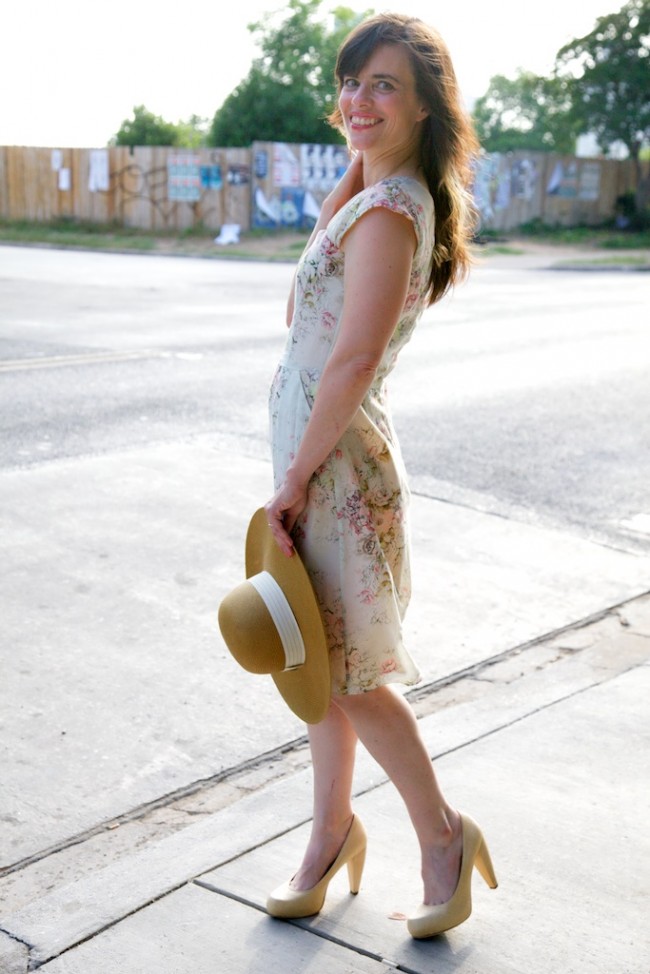
Last month I was on a top-secret sewing mission. Not as rigorously top-secret as Sidney Bristow going undercover in a Balkan mob but I can dream. (In college I harbored fantasies of working for the CIA… I think I read Harriet the Spy too many times as a kid.) It was a fun mission nonetheless–I had the pleasure of being a super spy tester for Sewaholic’s new pattern, the Cambie dress.

So far I’ve only made the Lonsdale dress, but it fit so well that I’ve really looked forward to trying other Sewaholic patterns, and I leapt at the chance to try this out.

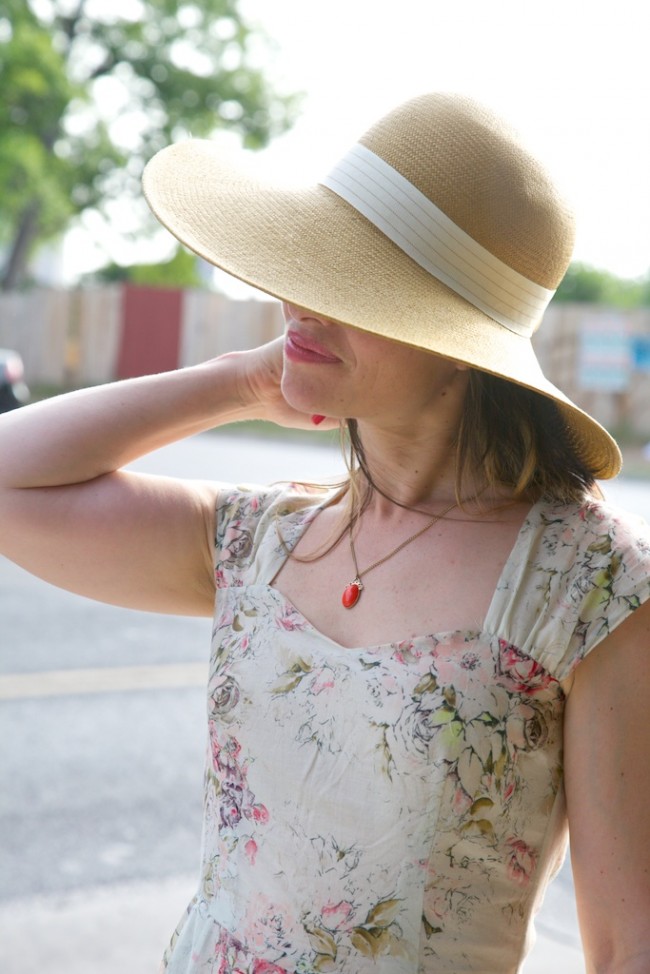
My first impulse was to get all rocknroll on the dress, possibly contrast with all the femininity in some kind of animal print. Then Derek talked me into the hat. I HAD to design the dress around the hat.

It was the week before Easter, and I was reminiscing over all the wonderful Easter Sunday church clothes my mother made for us girls. And dreaming of sipping mint juleps on a lovely Sunday afternoon in the garden.

My friend Stephanie and I decided to make a day of playing dress-up and took off to the East Side to catch some light and street shots. “Everyone dresses pretty funky over there, no one will really think we’re out of place,” she assured me.

Hehe, we were not exactly invisible. There is something about girls in their summer clothes… That and the fact that we were running around with all this camera equipment. I think our waiter at the restaurant afterward thought we were doing a magazine editorial, because he asked for credit. (Thank you, Paul!) A lovely elderly gentleman stopped us while we were sitting on a bench and exclaimed, “You young ladies are so pretty. Y’all remind me of summers in Mississippi. Those dresses… those dresses are like the ones the ladies and my mama all wore on Sunday afternoons. Takes me back. Brings a smile to my face.” (Insert a big fat Texas drawl in there, and you will hear the essence of Southern graciousness.)

Just so Y’ALL can see what she was wearing.

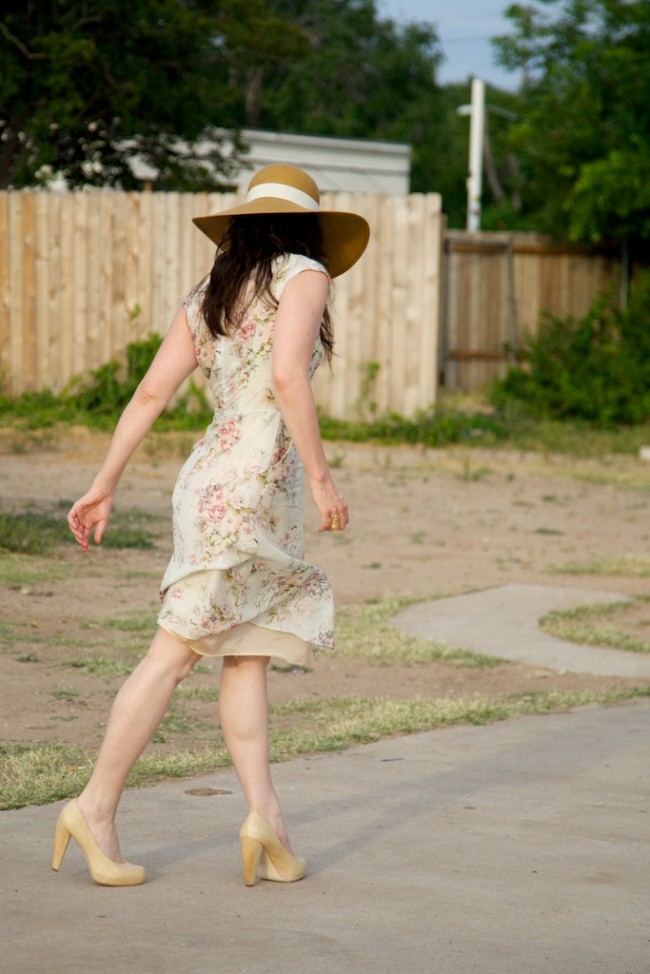
It was so much fun to have a friend behind the camera because, gee, I’m actually laughing and dancing in most of them! She’d just seen a flamenco performance the night before so I was taking cues.

So, details, details. This dress is actually my second version! I made another out of a simple cotton jacquard so that I could give honest tester feedback by following the testing instructions, with one of the recommended fabrics. I put some photos up on Flickr so you can get an idea of what it looks like with the waistband and in a more structured fabric.

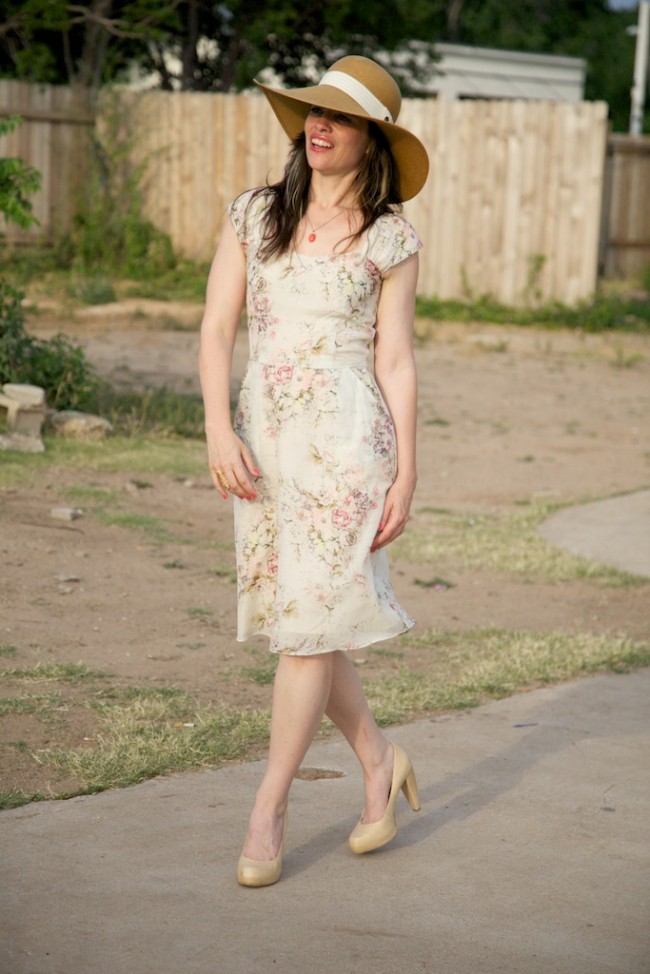
Fabric: Absolutely delicious, couldn’t-stop-stalking cotton/silk voile with a delicate watercolor floral. So soft to the touch. Despite this being a sheer fabric, the voile was actually a dream to sew. It unravelled like a beast, though, so I needed to work fast to finish the seams. The lining is a nude silk habotai.

(I should probably mention that Tasia didn’t recommend sheer fabrics for the a-line version… but I didn’t mind a bit of pocket show-through. It sorta blends.)

Pattern & Fit Changes: My muslin fit almost perfectly, but I wanted to take out some of the width around the hips. On both front and back pieces I took redrew the side seams about 1/2″ in from hem up to the hipline, and graded back out to 0 the waist. This took out 2 inches total from the hip and hem width. Some of you may notice that the pockets of the a-line skirt version and the waistband are almost identical to those on the Lonsdale. I almost took the waistband out of the Lonsdale and wanted to try doing so on this dress. This was actually a very simple modification. To keep the length and the waistline in the right spot, I lengthened both the bodice and skirt waistline by 1/2″, re-shaped the darts, and walked the pieces together to be sure the waist seams matched.

Anyone thinking of making this? I’m convinced this pattern will make a lot of happy dresses and makers, especially for those of you who like a bit of frou. I’m pretty happy because I think I’ve just found myself a good starting block, tnt, what have you… I’m already dreaming of a strapless version with a few bodice changes….

The Mariner’s Suit

I’m such a copycat.

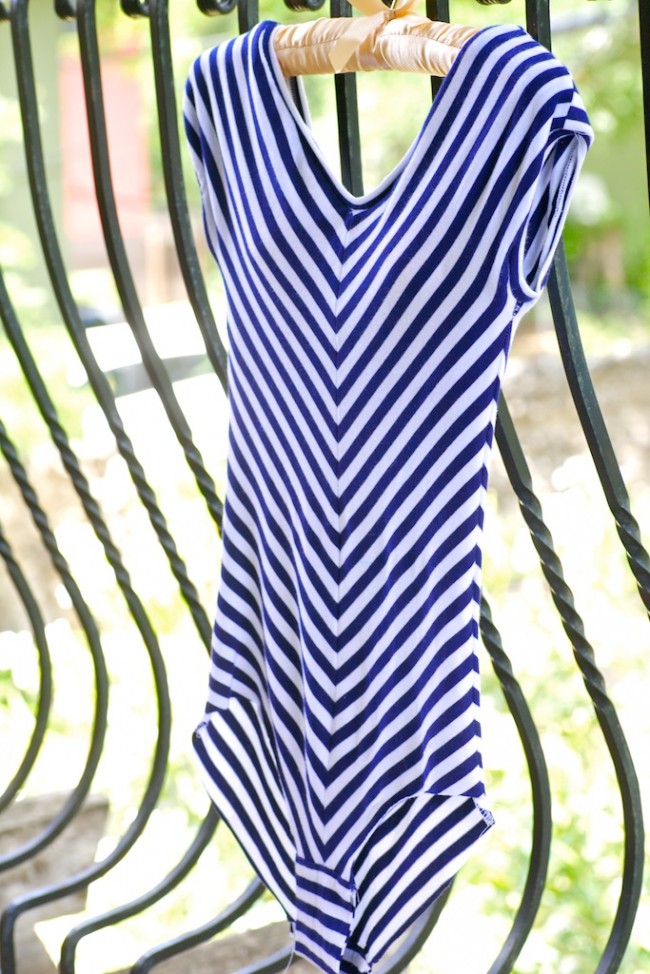
Grease was my first big person’s movie (not, you know, Tubby the Tuba). So of course I really wanted an Olivia bodysuit, just like Christine’s. Then I wanted a nautical chevron-y one, just like hers, to go with my new red shorts. I have an insane amount of blue and white striped modal jersey that was perfect for this (when you see good stripes, you gotta go for them, right?). And of course I wanted to try out sewing in bra cups, just like she did.

So you saw the bodysuit in action yesterday, and here’s the scoop. It’s super easy and fun to draft your own, thanks to her awesome tutorial. All you need is your favorite pair of undies, a ruler and some paper.

She also has a good tip on how to cut matching chevron stripes. Y’all have probably learned this the hard way, but sometimes a serger wants to push the top layer when you first start a seam, and that causes all sorts of mismatchiness even after super-careful cutting. So sometimes, if I’m really feeling perfectionist, I’ll baste the seam first with the sewing machine, than serge. That’s what I did for the center front. Other times, I will pin about an inch down from the beginning of the seam and then push the top layer upwards a bit so that by the time it goes past the knife, the two layers are even. This takes a bit of experimenting to get right but I’ve got the hang of it on my machine.

On the geeky pattern side of things, I’ve been meaning to draft my own bathing suit for awhile, and perhaps use it for other tight-fitting knit tops. Occasionally, I stalk the Pattern School website, which has all kinds of stretch patterns one can draft, including a basic one-piece block. I spent an hour or so drafting this from my measurements, and two bodysuits are pretty darn close, except for the neckline.

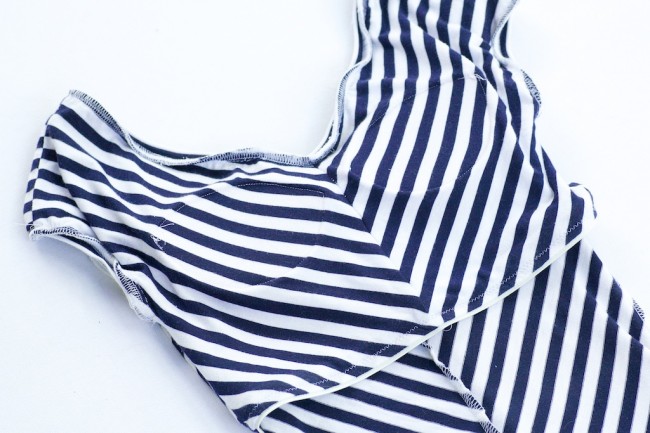
For the sewn-in bra, I made a lining from the same fabric and stitched in foam cups just like the tutorial.

It might have worked better if I stitched the cups to the inside rather than the outside (in the wrong light, they definitely show through!). And next time I will probably cut the lining from a beefier knit, perhaps a cotton/lycra, or some kind of supportive stretch mesh…. experiment, experiment, experiment! My jersey is very light and flimsy and definitely not support material, but at least it’s holding the cups in the generally correct location! I’ll be experimenting a bit more with making these, but it was fun to just jump in with what I’ve got laying around.

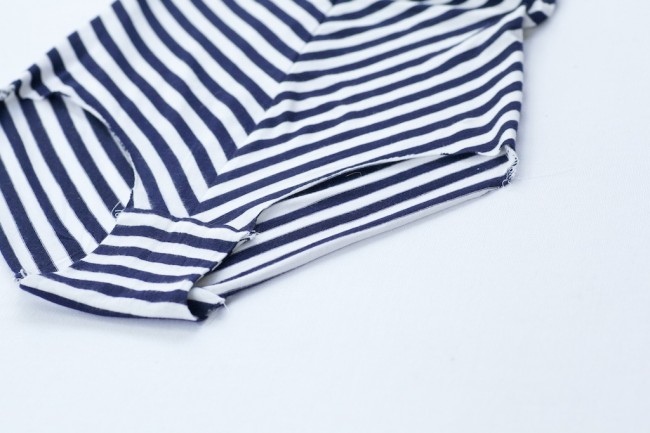
I messed around with the bottom shape a bit and I made a separate gusset. A gusset can either be its own piece that is sewn in to both front and back, or it can be part of the front or back pieces. You can also use the gusset piece to cut out a lining (a light cotton knit is the best for this, but I just go with whatever jersey I have on hand).

The only thing missing from mine is some elastic for the leg openings. I really like plush-backed elastic. (And it’d also feel nicer than the waistband elastic that I used on the bra lining.) Some folks like fold-over elastic. I should probably stash some basic colors for my lingerie adventures!

Has anyone else made self-supporting tanks or t-shirts? I’d love to hear your tips! (Steph published a great tutorial for sewing in a bra for a woven pattern. I’ve been meaning to try that one, too.)

First Summer Shot: Red Scallop Shorts

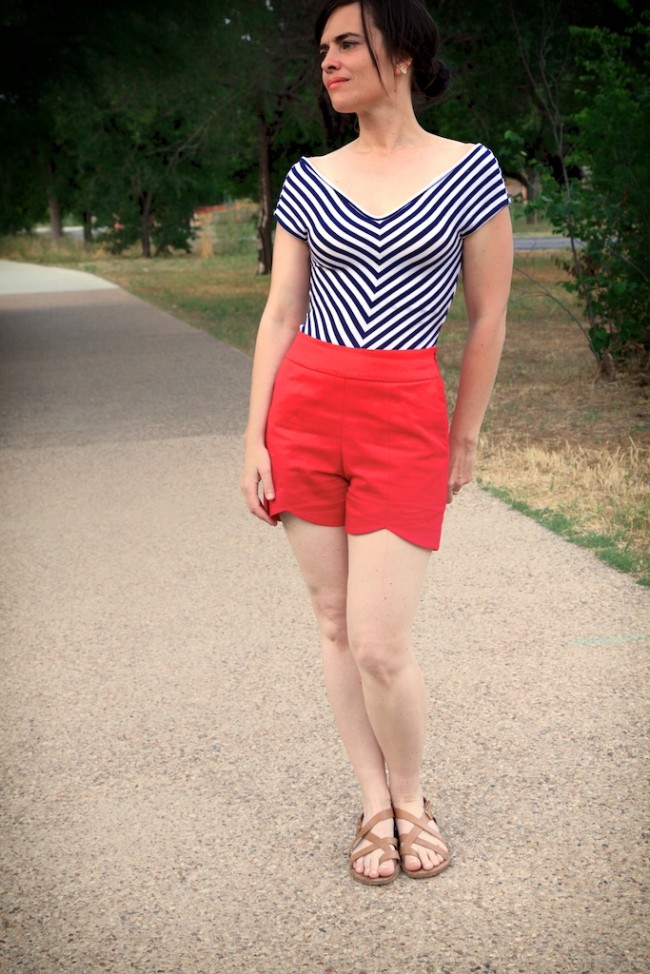
These shorts were really fun to make. Or at least I was having a lot of fun saying scallops, scallop. Isn’t it a cool word? The consonance, I guess.

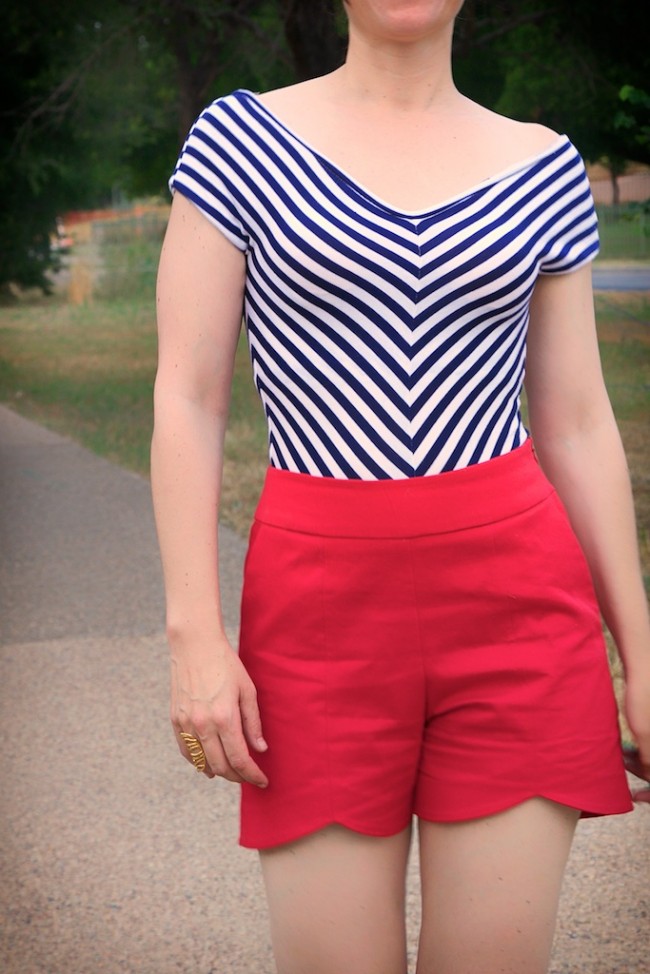
They were finished over a week ago, but I really, really wanted to wear them with this exact top–a body suit, actually–which is a straight-up knock-off of Daughter Fish’s. And that turned into an adventure of drafting not one but two different bodysuits. (More on that later!)

As I got to my unshaded location, the sun went behind clouds and the chiggers came out. Ouch, ooh, ouch, they sting. Ahhh, signs of summer in Texas!

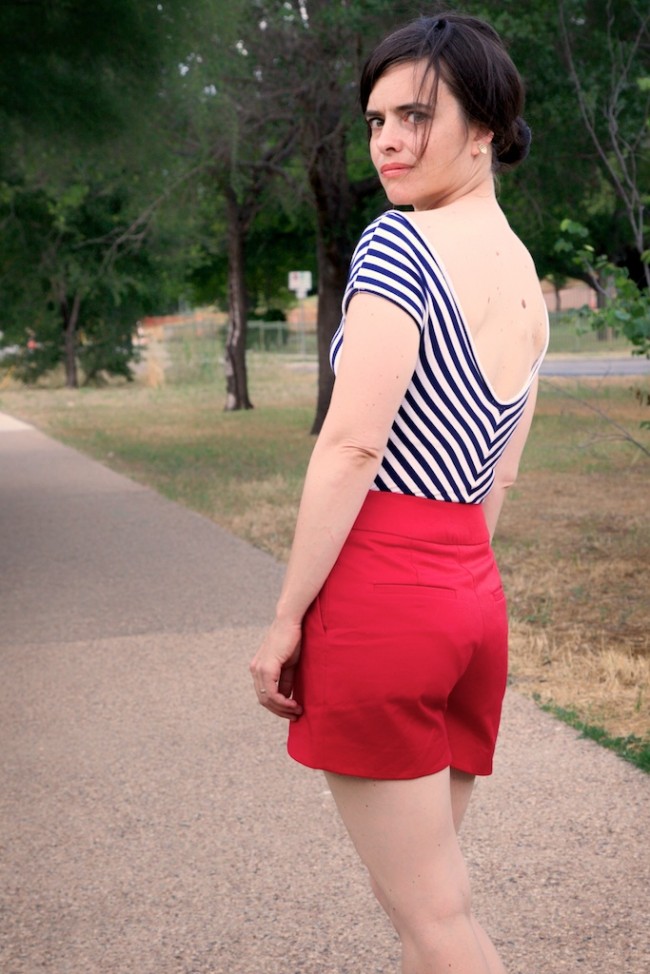
Now, I have to admit that styling shorts is not my forte. I have one pair of ikat shorts, kind of shorty shorts, that I love pairing with floaty blouses. There’s something about floaty and oversized with a smaller silhouette on bottom that looks right on me. I like these two together in a classic nautical way, but looking at the whole outfit in photos makes me feel a bit, um, revealed.

What do y’all think? A white button down with these might be cute. Or perhaps a drapey tank? Definitely not these sandals, if only because they are wearing out and I’m kind of bored with them. I’ve already got my eye on the “every day” sandals I want for this summer. They have just a smidge of a wedge heel, which I like. I usually only wear flat sandals with things that cover my legs, like maxis or long trousers.

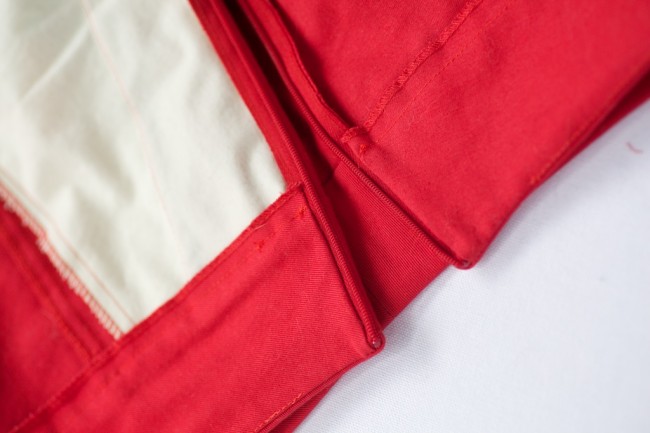
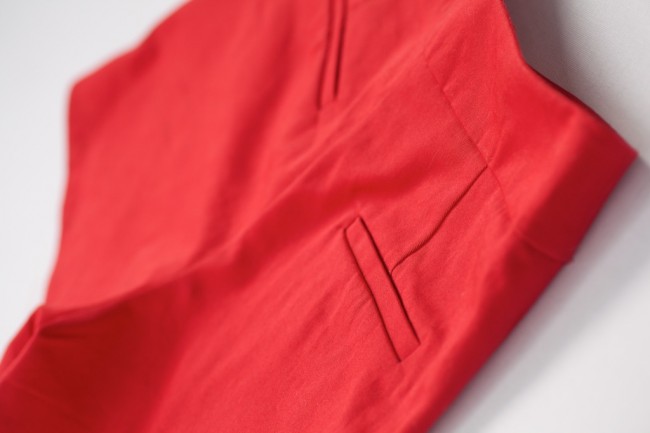
Pattern: Pattern Runway Sweet Scallop Shorts. Lots of cool little details, like separate front pieces with lots of top stitching, hem facings, welt pockets, yoke pockets with again, facings. This pattern is facing-happy! I really like them on hems–they make such a nice finish. It also has some good little “industry” techniques, such as how the invisible zipper is inserted, by machine, into the waistband facing. I’ve used this method several times before to line and face zippers, and it really turns out beautifully.

(Note: I bought the pattern in September and it had incorrect instructions for the welt pockets, which gave me a bit of a head mash and I ended up sewing the underwelt backwards. If you make these make sure you have the updated instructions or see Sarah’s tutorial. She kindly pointed me to it when I thought I was going crazy!)

Fabric: Red organic cotton twill from Mood, a nice twill with a soft hand. It was terribly off-grain, but after a lot of pulling on the bias, I was able to get it all straight. They have some other really pretty colors, too. I only had a yard, and that was enough; I even had just the right amount left over to cut a 2nd front piece, after I serged a hole right through my original front while putting in the pockets. OOPS.

Fitting notes: I’m exactly in between an XS and S in the pattern sizing so I went with the XS and made up a quick muslin. I mentioned before that this pattern has a lot of ease, but when I made the muslin, it didn’t seem so gargantuan and in fact looked slightly more fitted than the model picture. I still think going down a half size was a good idea.

I also knew that my fabric would work better if the shorts were more fitted. This twill is stiff (and non-stretch), kind of like a mid-weight denim. I tend to think that the stiffer and weightier a fabric, the more it is suited to a fitted style, which is why it’s so hard to predict the look and fit if you use a lighter or drapier fabric on the muslin. I’m glad I didn’t overfit the muslin, though, because after adding all the fusings, facings, etc, the shorts felt even tighter. Thankfully, the fabric relaxed a little as I wore them about!

On the muslin, I folded out just a smidge of a wedge out of the back for a swayback, and took in the waistband by a teensy bit. I might be able to stand even just a smidge more of a swayback adjustment. I made the biggest change to the center front seam/crotch curve. Commercial pants patterns often do this weird thing right where the center front seam forks. That looks funny now that I’m writing it, but tailors use the term “crotch fork”–why can’t I? It looks baggy in the front but feels tight from side to side. In most of my rtw pants, including jeans, that curve is much shallower (and usually the inseam is closer to the front). So I redrew the curve to be shallower, which also makes it shorter AND adds extra room for the hips. Does that make sense?

Happy summer sewing!