Bramaking Sew-Along Prep: Pattern Choices

Alrighty, today let’s talk through pattern options! I know there are a lot of patterns out there, and in the end each one of you will have a unique preference for shape, style and materials. But I want you all to leave with a feeling of accomplishment! Yes, you can make a bra. So for the sake of simplicity and ease of teaching, it’d be ideal if we were working from the same or similar pattern.

The most basic bra pattern is a two-piece cup with a band that runs under the cups. And this is usually the pattern block from which all other bra designs originate! So I’ve narrowed down the wide world of pattern options into a few that would make for a good first bra-making experience, and which can be sourced from more than one store:

Pin-up Girls #1200 (Classic Bra)
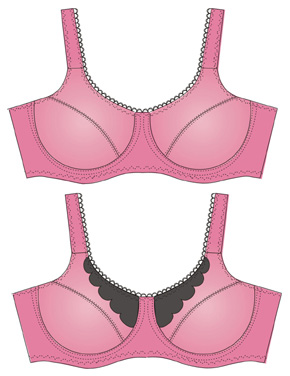
Pin-up Girls #1200 (Classic Bra). This is my favorite basic bra pattern. The grading covers a lot of sizes–all the way down to a 30AAA as well as sizes for narrow band and large cups (up to 30H/I). Available: Bra-makers Supply, Elingeria. Update: Bra-makers Supply now has a shop on Etsy (no kits/fabrics, just patterns).

Elan 645
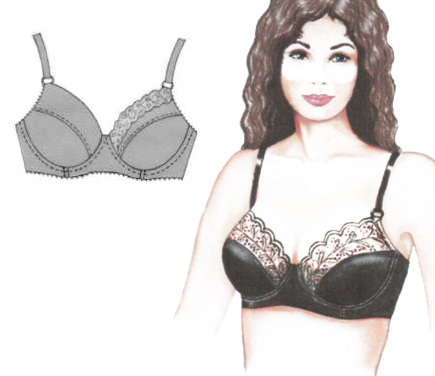
This is also a very nicely-drafted pattern with a wide range of sizes and is constructed much like the Pin-up Girls pattern. Available: Elingeria, Sew Sassy, Fabric Depot Co., Bonnie’s Pattern Shop (ebay), Vena Cava Design (UK).

Option for larger sizes:

Danglez DB4
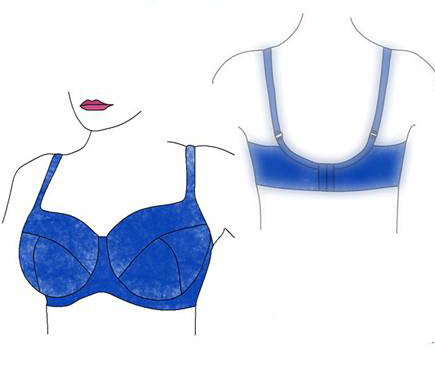
This might be a good option for those who need more coverage, especially around the underarm. If you run above an E/DD especially with a smaller band, try Danglez DB3–this one sizes into the I cups and has what’s often called a “powerbar” seam along the side of the cup for support. Available: Elingeria, Danglez (apparently her shop is going to close so there’s a sale!).

Elan 520

This is very similar to the Elan 645 but is made for fuller band/cup sizes. Available: see the Elan pattern above for shops.

You might notice I left out a lot of popular patterns, but I did so because they either have limited size options (Merckwaerdigh, Kwik Sew), limited or specific underwires that won’t be easy for everyone to buy (Make Bra, which uses long underwires and often the same underwires for several cup sizes), or special construction techniques. That includes all partial band patterns, because they are constructed a bit differently and I won’t have time to cover both.

Truly, a basic pattern goes a long way. The tack I’d like to take in this sew-along is to share some ways to modify a bra pattern to your liking–changing the neckline shape, softening the curves, changing the seaming. I’m going to make a very simple version of the Pin-up Girls pattern with few frills and then a modified version with lace and some easy shaping alterations.

Some questions that came up:

Can I leave out underwires?
Yes–with these patterns you can make a supportive bra without them.

Will you make a foam-cup bra?
No, I won’t be making one in the sew-along, but I have a little treat waiting in the wings for some time in February. I’ve written a tutorial showing how I adapted my pattern for foam shaping. (A bra which I haven’t blogged about!)

Just as an FYI, there are two types of foam cup bras: those that use pre-molded cups (usually seamless t-shirt bras) and those that use pieced and sewn foam. The pre-molded cups seem to work best using a pattern specifically designed for them. The latter are sometimes called “cut and sew” bras and use what’s called polylaminate or spacer foam as a lining. (The Make Bra patterns are built around this lining.) Any pattern can really be adapted for it. They’re fun to make because you can use just about any fabric on the outside of the cup without worrying about support. Some of my best RTW bras have this type of lining and I might offer some suggestions later on the sew-along, but if I do it’ll be short and sweet. If this is your first bra, I’d recommend getting used to basic construction without it, so you don’t fight with the foam!

Can I use my own pattern?
If you already have a pattern that fits, or your own personal block, chances are you already have a head start and can follow along for whatever parts you want to follow! I can’t address the particular techniques of your pattern, however. But if it’s similar enough you’ll have no problem and perhaps others can chime in with help!

I hope that covers it! I’ll be back next week with a bit about sizing and materials and then we can start our shopping.
Bramaking Sew-along: Schedule

Hello everyone! I sat down this week to plan out a schedule for the sew-along, and thought it’d be good to share that first before we dive into choosing a pattern (tomorrow’s post!).

I’ve decided to break up the sew-along into three parts, running just around three weeks. That may seem long to some, but I’d really love for this sew-along to be all about fit and style and getting the most out of your bra pattern. Some of you may want to make more than one (because the second one is always better!). And we’ll have some room to answer any questions that come up. The subjects will roll out a bit like this:

First week: Fitting

  • Tracing the pattern, cutting out a tester bra
  • Sewing the tester bra and first fit
  • Fitting alterations for the band and cups (probably 2 posts)

Second week: alterations for style and aesthetics

  • Changing the neckline shape and strap positions
  • Adjusting for stretch fabrics, changing band styles
  • Major style alteration: changing to a vertically-seamed cup (either two or three-piece)
  • I might add possible surprise posts here!

end of the third week: sewing our bras!

  • Final pattern tweaks and cutting out your bra
  • Assembling cups and linings
  • Assembling the band, sewing in cups and elastic
  • Finishing elastic, channeling, underwires and hooks

This week we’ll make some decisions:

Tomorrow: Picking a Pattern!

Tuesday, December 4: Choosing a size and a way to measure yourself.

Friday, December 7: All about materials! Different types of bra materials and kits, where to find them, along with a list of notions you’ll need.

December 7-January 7: Time to shop and gather and have a Happy Holiday! And I’ll probably eat too much pumpkin pie.

Some Questions!

Do I need a blog to participate?
No, please feel welcome to join. I imagine some of you would like to keep your bras a secret ♥.

Do I need a serger?
No, most bras are sewn entirely on a regular machine. You do need a zig-zag stitch for sewing in the elastic.

Can I make a bra for someone else?
Well, sure! Of course she needs to be comfortable with you measuring her pretty closely and fitting a trial bra.

I’ll answer some more pattern-specific questions in the next post!

And you’ll notice I added a new badge to the main sew-along page. Just because… I’m a graphics person and I love making them! Plus I thought some of you might like a sort of vintage-y alternative. I’ve updated both badges, with link codes.

Bramaking Sew-Along: It’s Official!

Update: If you’re visiting this post for the first time, please note that there is a central Bramaking Sew-along page with updated information related to the sew-along.

Wow! I’m so glad to hear you are interested in participating in a bra-making sew-along. That makes it official! I love how sew-alongs have encouraged me to make things that would’ve gone at snail-pace on my own, and I hope this is no different for you.

First things first: all sew-alongs need a badge, right?

Badges

Bra Making Sew Along | Cloth Habit

Bra Making Sew Along | Cloth Habit

If you’d like to include a badge on your blog, right-click and download the image, then upload to your blog. It’d be super if you linked the image to the Bra Making Sew Along page!)

Now some questions and thoughts:

How do you all feel about starting January 7?

This would give us enough time to prep. For many of you, it will be easier and most cost-effective to order materials and patterns from the same resource, so there are a few topics I’d like to cover before we get to shopping:

  • Picking a Pattern
  • Finding Your Size, Q&A
  • Materials and Where to Buy

I know y’all might have questions about patterns and I’ll try to cover these in the next post. Sizing is also an important prep topic because unlike many other sewing patterns, bra patterns often divide up their sizes into different packages. I can post about these topics over the next two weeks, so that you can start gathering/ordering your supplies by December 10. I’ll also work on coming up with a posting schedule so you know what’s coming! For this sew-along I would like to spend at least a week on fitting and style alterations. The actual sewing takes no more than a couple of hours but I’m a big believer in working out patterns and fit first.

To get the most out of this, I’d like to have some way of sharing pictures, posting works in progress. Of course you can ask questions as we go right in the comments, but since we’ll be talking bras and breasts and what might feel like sensitive body issues, I want to make this as safe and open as possible for everyone. What do you think about a private forum on this blog? (If I started this, it might be fun to keep it open as a general bra-making forum where folks could join in and continue to share ideas and projects long after the sew-along is done!)

That’s it for now. Please give a shout if you have any questions along the way!

Lingerie Friday: How About a Bra-making Sew Along?

Amy’s edit: If you’re visiting this post for the first time, please note that there is a central Bramaking Sew-along page with updated links and information related to the sew-along.

For today’s Lingerie Friday, I’d like to kick off a New Year’s plan: A Bra-making Sew Along!

Who’d like to do one with me?

If I haven’t mentioned this before, sewing bras isn’t that complicated. After you’ve done one or two, you’ll start to get the hang of it. This is also something you can sew without pushing aside other creative projects; it takes up little room and can be easily put away.

And I think the most important part is getting a good fit, so I’d love it if you came away with a good-fitting pattern. Obviously, I’ve found bra-making incredibly rewarding and fun–that might sound like an infomercial but it’s true. Making pretty and well-fitted underneaths has affected how I feel about my “outerneaths”.

And for experienced bra-makers, I’d love to have you join as well. Especially when we get to the fitting stage, because we are all different shapes and I love to learn from others’ experiences.

Now as for times and dates, I’m aware that the holidays add extra pressure into the mix of things so I’d like to wait until it’s allll over. I’m thinking the beginning of January. That way no one gets project anxiety and we can take our time. Secondly, bra supplies take a bit of time to gather and I’d like to make sure everyone gets what they need! Even before we got to shopping, I’d need to talk sizing first.

What do y’all think? If I have enough interest, I’ll be back early next week with some practical brainstorming.

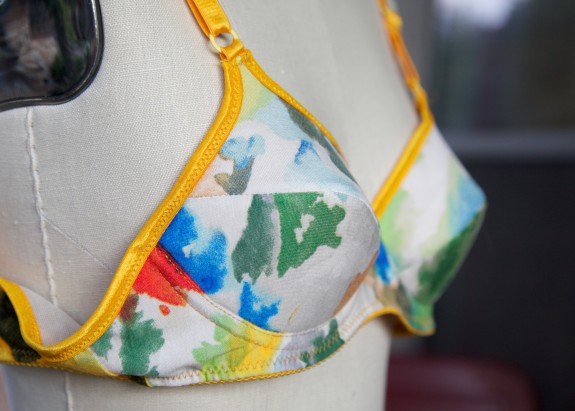
and p.s. The bra at the top is a sneaky peak at one of my recent projects. I’ve spent the last week finishing up several half-finished bras so that I can move on to (can you believe it?) sewing something other than lingerie.

Lingerie Friday: Pattern Shapes, Cup Shapes

Does anyone else love origami? When I was in school, I’d never heard about about spatial-visual reasoning and only recently discovered that’s why I often spend more time thinking about a design rather than in the tactile experience of making it. Why I have often visualized chess moves, computer code, and even musical note relationships. And when it comes to making clothes, I’m constantly thinking about their pattern shapes. Some nights I fall asleep seeing convex and concave curves floating together in various formations.

So this week, in celebration of shapes, I wanted to share different styles of bust shaping in bras and along with my guess as to their piece shapes.

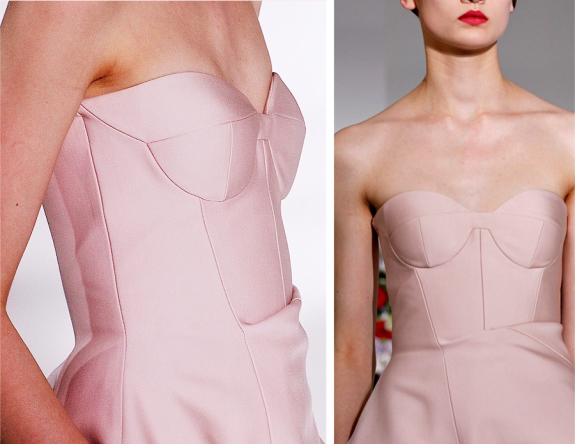
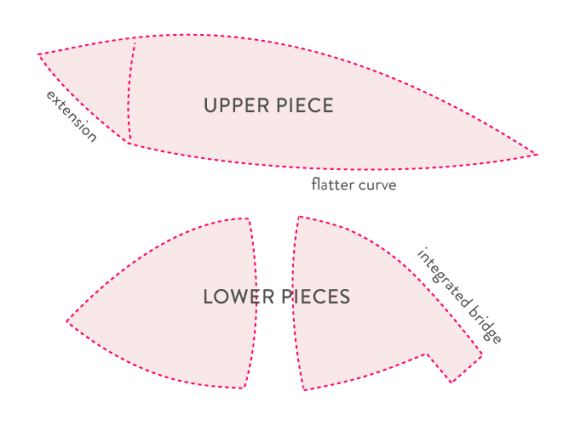
First up is an example from Raf Simons last show for Jil Sanders. This entire collection really took my breath away–so elegant in shape and color scheme. (It just confirms my soft spot for all those Antwerp designers.) A post at The Cutting Class has some wonderful examples from his collections of what can be done with bust shaping–darts, pleats, folds, tucks. One of my favorites is this bodice using a 3-piece cup with an unusual upper-cup piece.

I’m guessing there might an structural under-layer with boning or underwires. Possible pattern:

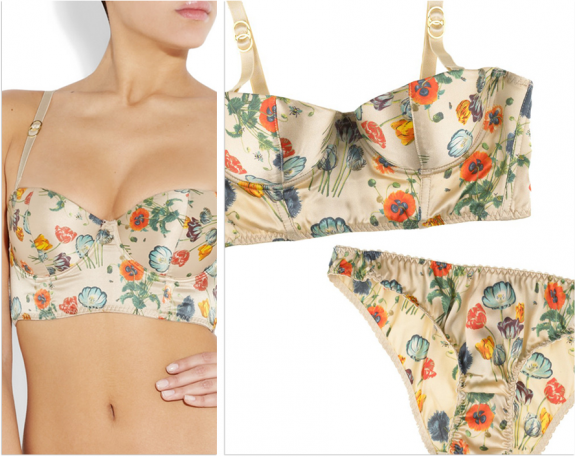
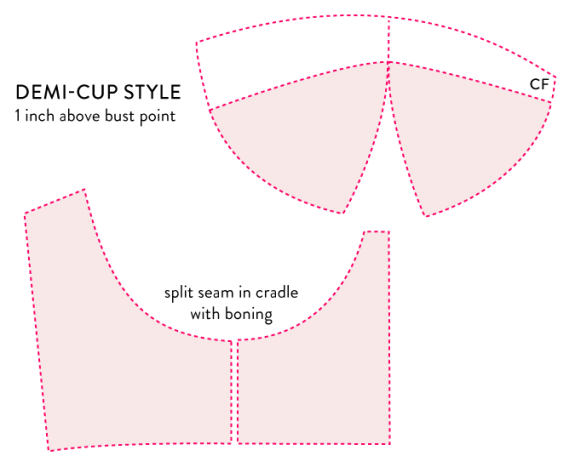
This beautiful bustier-style from Stella McCartney has a demi-cup shape with a longline band. The cup is shaped and pieced with a foam lining and covered with silk satin.

In this drawing I’ve thought about to draw on that top shape if you already have a two-piece lower cup. As an aside, a demi cup is usually 1 inch above the bust point, where a balconette is even lower. Apparently, the term “balconette” came from the notion that one could look down from a balcony and not see ladies’ undergarments. (Just cleavage!)

A few moons back, someone asked me why I preferred vertical seams in bras. I think I have been so used to vertically seamed bras or t-shirt bras with no seaming that the horizontal or diagonal seams looked out of date. A vertical seam or dart in the lower cup can really help refine the shape, make it a bit rounder (like the Stella bra), less like a pointy shelf. The “shelf” look becomes especially more noticeable once you add padding, as you can see when I tried to turn my Pin-up Girls pattern into a foam cup bra.

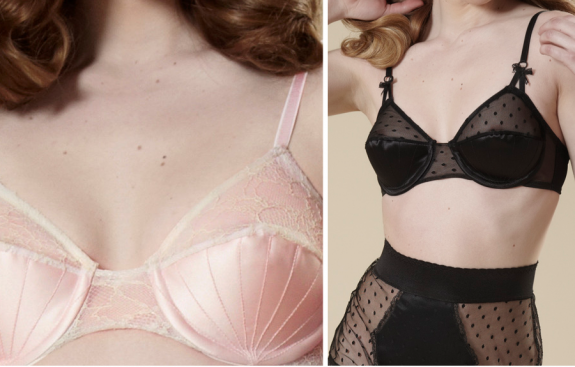
Then again, the more I look at it the more I think that it’s got a vintage flare. For a change of pace from the perfectly round shape vis a vis contour foam bras, I really like these beautiful handmade bras from Dottie’s Delights, which they describe as a “60s silhouette”.

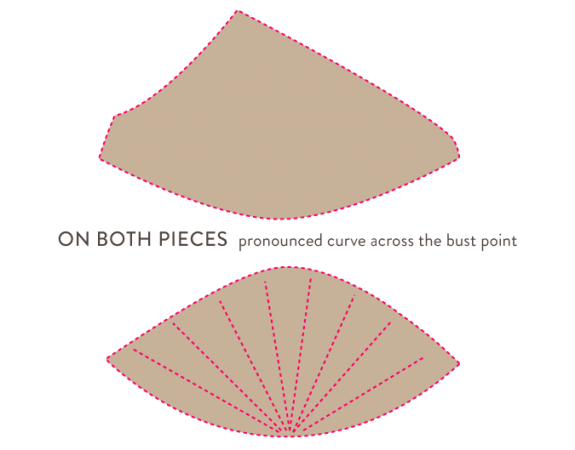
My guess is that this “vintage” shape has a deeper curve along the cross-cup seams on both pieces. In my experience, the more you flatten that upper curve, the more you pull up the bust. You might also want to take a look at Maddie’s post which shows how she softened that point. As she writes, bras are very particular and so are their shapes and how they work for each woman. Just tiny adjustments in curves can really change how it all looks!