It has been a wonderfully on-and-off overcast week here in Austin. I’m pretending it’s raining more than it really is and that I should be having an “inside” day. Which means sewing and lots of pattern-cutting. And blogging. And playing with new tech toys…
My silk shorts pattern is finished and I’ve decided to sew a couple of pairs at the same time. I love a little assembly-line sewing! Until I get them done, I thought I’d share a few things I learned along the way… Today is all about yoke pockets. Over the last year I’ve made several patterns that have had some form of hip yoke pocket. The Lonsdale, the Cambie dress and my shorts all have these pockets. And of course you’d be familiar with them from many trouser and most jeans patterns.
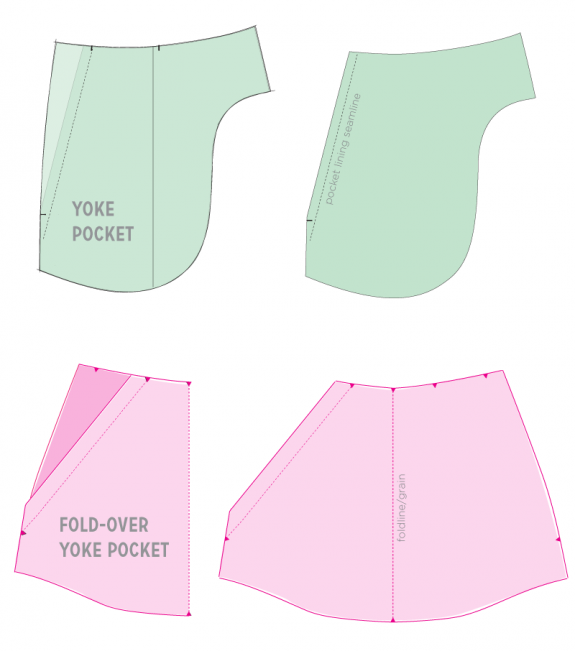
The top pocket is a pretty common Burda pocket in anything with a fly. In Burda patterns, there is often just one piece on the pattern sheet. You’d trace off two separate pieces from that–one for the yoke piece and one for the lining that sews into the front skirt or pant piece. (The little extension is sewn into the center front.) The example on the bottom is a folded yoke pocket that includes lining and pocket in one.
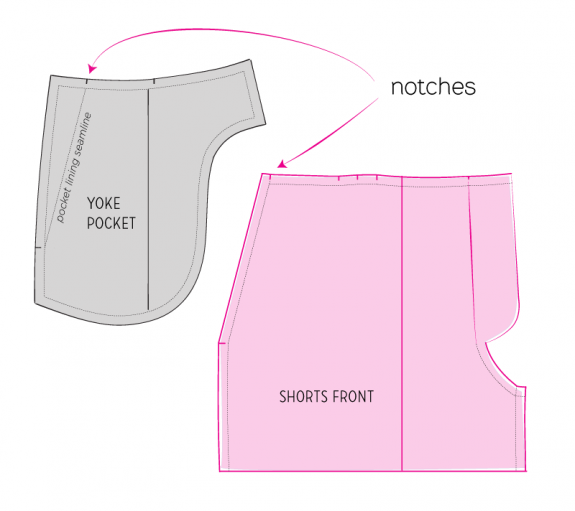
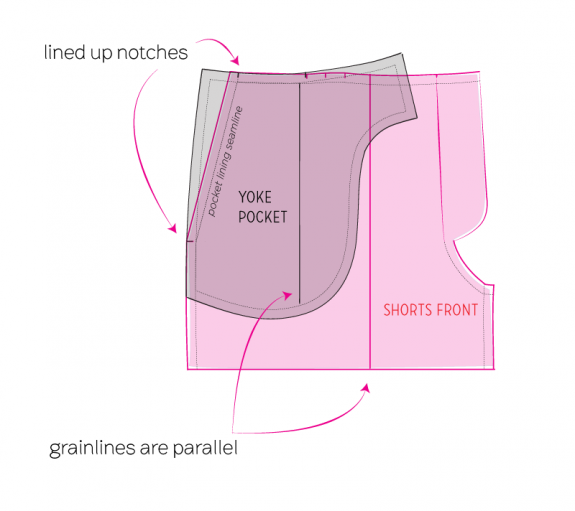
It seemed a bit laborious to sew entire pockets into the muslins of these patterns, but I did–four times! Now I’m guessing I may not be as clever as my readers, but I really didn’t think of a way around this till I started making several test runs of my silk shorts. To cut the pocket and front as one for a muslin, I lined up the yoke pocket piece with the side seams, making sure the grain lines of pocket and short fronts were parallel. The patterns with these pockets often have notches near the hipline and along the waistline where the pocket lines up, which helps lining them up.
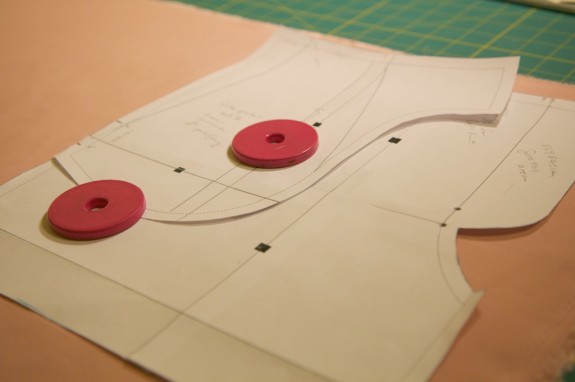
When cutting them out, I kept weights on them to make sure they didn’t shift.
Once lined up and taped/weighted onto that front piece, I could draw in the hip shape, remove the pocket and then proceed to cut the front as one whole piece.
What I really want is a flexible shorts block that I can use for multiple styles. So after finally getting the fit I wanted, I ended up making two blocks, one for shorts with pockets and one without. Now I have possibilities for side zips!
If you’ve ever made something with these kind of pockets, you have probably noticed they pull and bulge a bit if there is not enough hip room. Sometimes bulging–or a draped pocket–is intentional, but the pocket and short/skirt front have to be cut that way. Once I did a muslin without pockets I got a much more accurate fit without depending on the ease of the pocket “give”.
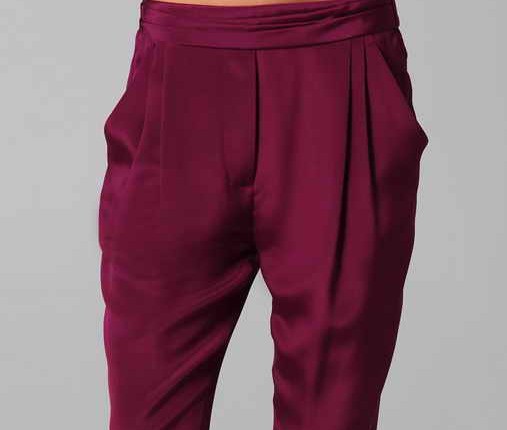
Hmmm, now I might be playing around some cool draped pockets like these Philip Lim trousers…
p.s. Sorry all if you wanted or tried to comment on my last post. My offline blog writer played a tricksy on me. All should be working now!
Would you like tips and inspiration in the craft of lingerie sewing? Sign up for my weekly eletter The Lingerie Maker.

It looks like someone is getting really good at Illustrator! Bravo lady! This post is excellently written, illustrated, but most of all… INFORMATIVE!
Thanks for the pocket tips. I’ll bookmark this for later shorts making. Also wanted to commend you on sweet-ass graphics. I know you spent some time in Adobe on those bad boys.
Ha ha, I just saw that Maddie said the same thing. GREAT MINDS…
can i just say i’m drooling over those graphics? and, erm, the perfectly printed pattern?
a cloth habit line, mayhaps?
Here Here! Beautiful illustrations and a nice informative post. Yes to Oona’s suggestion of a cloth habit line. And yes to those Philip Lim trousers…
Thanks guys, for your cheers on the illustrations… I had a previous life doing freelance graphic design (mostly print) but it has nowhere to go now but my own blog! I really love messing around with Illustrator.
I agree, your illustrations are beautiful! And your little coral shorts are sheer perfection, they look so pretty on you 🙂
Thanks so much for your comment too.
Now all I can think about are drapey pockets….