Time for all the finishing bits! Okay, so there are a lot of finishing bits, so get on your elastic because this post is going to be picture heavy.
Band Elastic
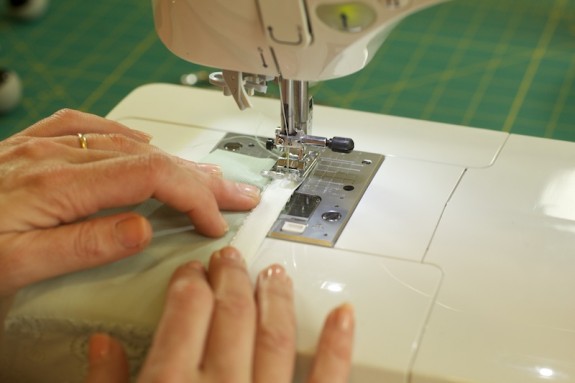
If you’ve made other lingerie goodies with picot elastic, you’re probably familiar with how this is done. The first side is sewn with the fuzzy side up and a regular zig-zag, getting very close to the picots.
If you want to cut your elastic to measure, a good general rule of thumb is to cut a length about 95% of the seamline of your hem. I like to “feel” it in as I am sewing–just something that happens from experience with sewing elastic. How much tension I put on the elastic depends on the elastic quality. (Update Jan 2015: See this post for some tips on sewing elastic and how how much tension to use. Since this sew along, I have reduced the amount of tension I use in elastics.)
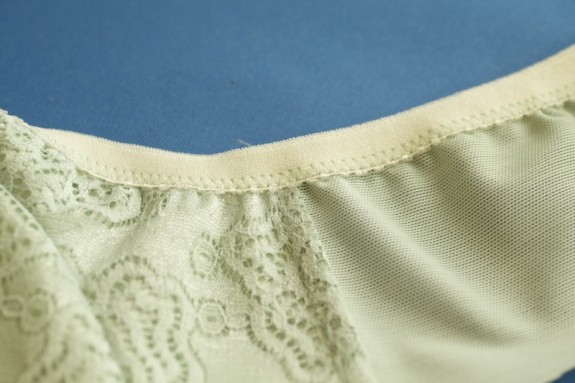
I flip and on the reverse, stitch the elastic with a 3-step zig-zag. You could also stitch from the elastic side. I prefer doing it fabric side up so I can keep the puckers away:
I set my 3-step at 4.8 width and 1.2 length. (I wrote all my bra stitch lengths on a little post-it note on my machine so I don’t have to look it up every time I make a bra or panties!) The 3-step is just security to keep stitches from popping. But if your machine doesn’t have a 3-step, you can use a regular zig-zag and experiment with smaller stitch lengths.
Channeling
I know the channeling gets finicky. Readers have asked me about how I did this on previous bras so I thought I’d show in pictures!
I usually attach the channeling first, before putting in the band elastic. It’s easier to make that first pass without the elastic in the way but it adds another step and I wanted to make this simple visually.
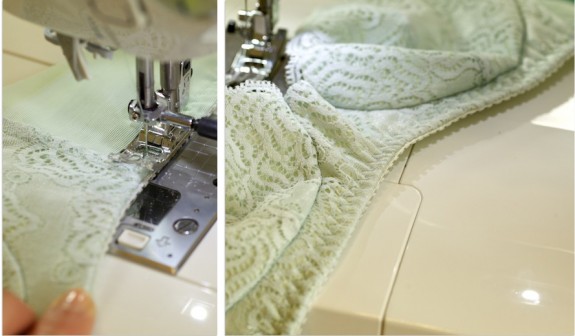
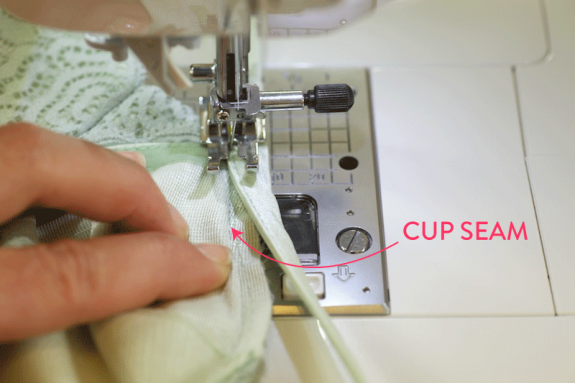
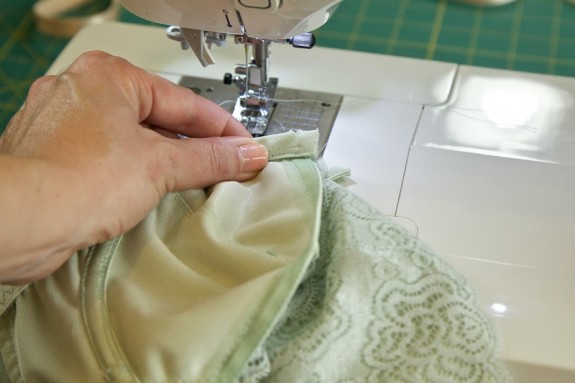
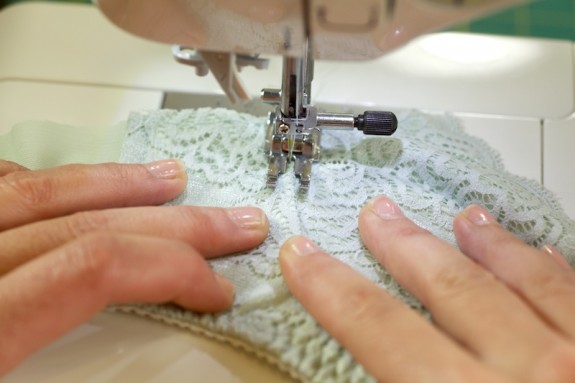
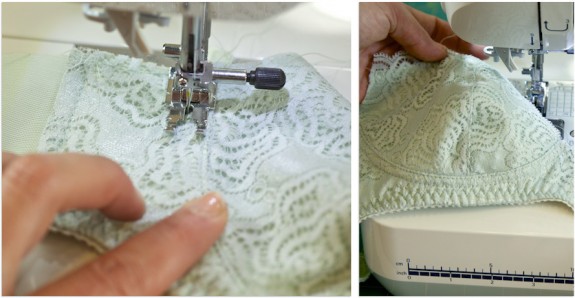
First I lay down the channeling so its seam is right on top of the cup seam and start stitching right on that seam. To make sure I don’t accidentally stitch into the cup, I hold the channeling in my right hand, lift it up, re-arrange it as I go–while using my left hand to guide the cup seam. This has worked really well for me.
I stitch all the way to the top of the front but stop and backtack about 1/2″ before I get to the end of the underarm seam. It’s good to leave a little extra hanging off each end. This helps to finish the channel neatly later on.
After stitching the channeling I grade the seams if there are a lot of layers–and there’s quite a few here!
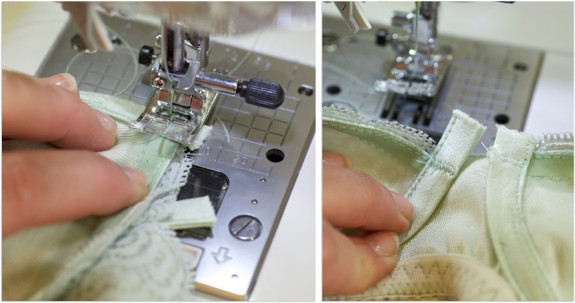
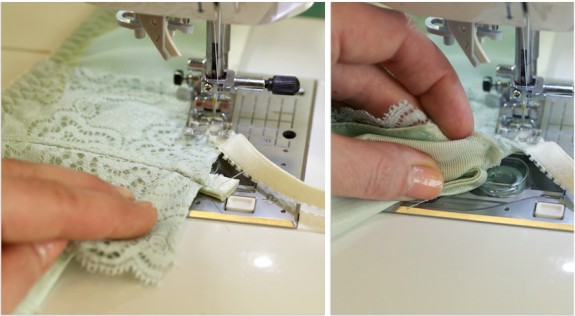
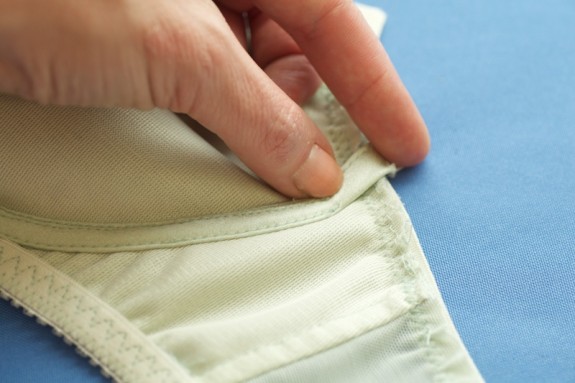
Before I do anything else, I close off the channeling in the front. Since the seams are still free and not topstitched down, I grab the top of the channeling with the cup seam allowances and fold everything else out of the way:
Then I stitch a really tight zigzag that almost looks like a bar-tack. Whatever it is, it needs to be secure!
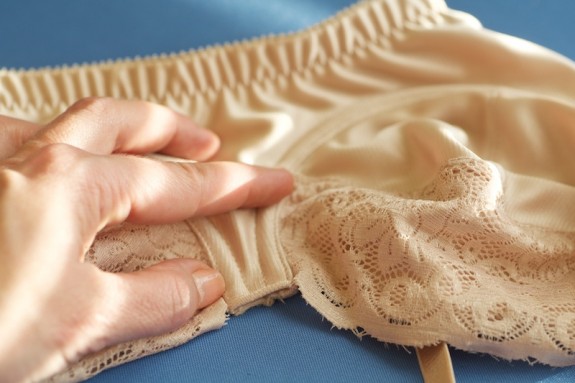
The closure is invisible from the outside. (On my friend’s bra–I forgot to snap a pic of my mine!)
Time for the topstitching! I switch back to my straight stitch foot (ok, I just found out my machine calls this a “patchwork foot”). I turn the bra over and arrange the cup seams and channeling so they are folded under toward the band. If you’ve ever done an understitch on a facing, this first part is just like that. I hold the fabric on both sides a little bit taut, and start topstitching about 1/8″ away from the edge of the cup seam.
I have to keep feeling to make sure this stitch is going into the channeling. If you sewed your first pass with the channeling seam on top of the cup seam, this shouldn’t be a problem.
Then I do another line of topstitching with the first line of stitching lined up right under my foot edge. This is about 6mm on my foot. Don’t forget to stop your topstitching 1/2″ away from the underarm so you can fold it out of the way for your elastic.
Underarm Elastic
Now’s the time to put in my underarm elastic. I do my first pass just like the band elastic with the fuzzy side up. I use a bit less tension in this elastic than I did with the band.
When sewing in the elastic I have to fold away the channeling–that’s why I stopped stitching it 1/2″ away:
Before folding over the underarm elastic I put in my underwires, sliding them in from the open underarm sides toward the front.
At this point you need to decide whether you want your channeling to be closed on top of the elastic or folded into it. I’ve done both and it really depends on how thick the channeling is!
Right below my thumb is where I’m going to close the channeling with another “bar-tack” again:
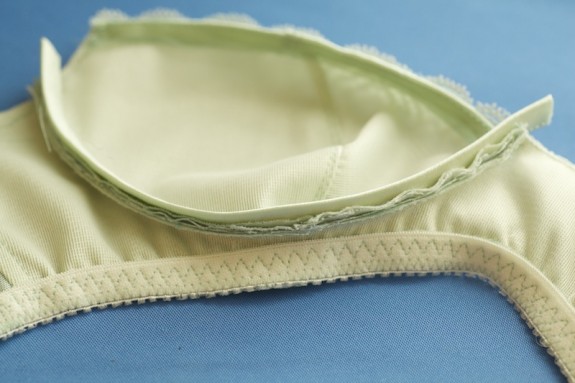
I need enough room to fold down my elastic and stitch another 3-step–this is where that wire play I talked about comes in handy. I can’t tell you how many times my underwire has reached right to the fold of the elastic–a recipe for underwire and needle disaster!
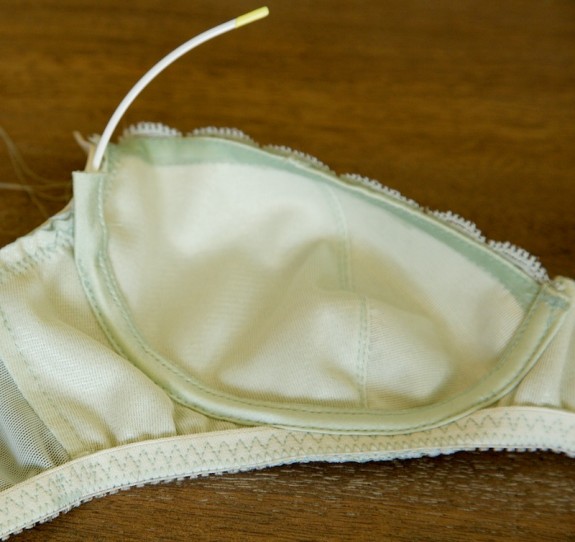
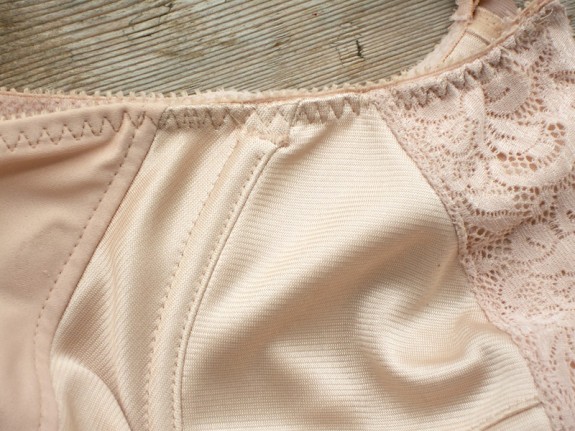
After closing off the channel and stitching down the underarm elastic, this is what it looks from the outside:
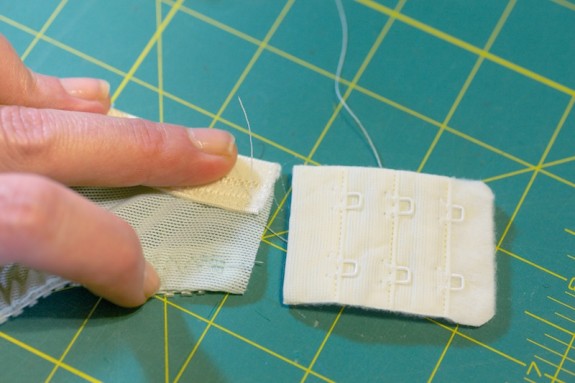
Almost there! Now I attach my straps and finish off with my hook and eye. Every pattern has a different width at the end of the band for a hook & eye attachment. You usually need to adjust that to fit your particular hook and eye width before you sew in your strap elastic:
Update: Attaching Straps and Hook
For my detailed tutorial on sewing the straps and hook & eye, visit this page at the Watson Sew Along.
It covers 1. how to adjust the center back for the width of your closure, 2. how to sew in straps to a u-back style band, and 3. how to stitch in that funky hook & eye!
—
That’s it! My bras are done and I’ll be back Monday with photos and some roundup questions. Happy sewing weekend everyone!
Would you like tips and inspiration in the craft of lingerie sewing? Sign up for my weekly eletter The Lingerie Maker.

Question: if I’m not using wires, can I skip the channeling? I had thought you needed it either way for structure but I have several RTW non-wired bras that don’t have it, so I wonder if I could do without. It seems silly to go through the hassle of sewing in channeling if you’re not using wires.
And if so, how should I finish the seam that’s normally hidden under the channeling? Could I line the cups and somehow use the lining to cover the seam? Or…?
Hi Eva, it’s totally up to you! You could always copy how you see it in your RTW. The channeling does help make some structure and many RTW soft cup bras use it for that. Without it the cup loses shape even more. I have made several soft cup bras with no bridge and serged the cup seams together, then topstitched them down to the band. They end up fitting more like a camisole (just fine by me sometimes!). If you don’t have a serger, you could make bias tape and cover the seam that way, then topstitch it down. (Channeling is basically thick bias tape.)
OK, I will keep using it, just thought I might try something else. Bias tape might work but I do like the support the channeling gives. I wish I could still use underwires–I used to wear these lovely highly structured bras by Freya, etc., but I had breast surgery last year and since then they cause nerve pain. Thus my quest to make a pretty, well-fitting soft cup bra. I want to really thank you for doing the bra sew-along because I never would have attempted it otherwise!
So glad you attempted it! And I hear you and understand that wires are not for everyone, including some who are closest and nearest to me. I’ve always been curious about what can be done with a “cross your heart” bra. Of course I used to wear these in the 80s as a teen… but it seems like they could offer something different in terms of soft cup beauty. 🙂
Absolutely beautiful, Amy! Your work is immaculate, so beautifully finished. I’ve finished my bra too, and am planning to take some piccies for the Flickr group, but not with me in it since it is half lace and therefore see-through!
Thank you again for all these throughly detailed and informative posts, and a fantastic sewalong 🙂
Thank you! I’m so excited to see bras. I might have to call them out of the woodwork. 😉 I’ll be taking pics for the Flickr group, too.
Thank you so much for spending all the time involved in helping out, Amy. I have now finished my bra. Will just wait until tomorrow for some decent light to take pictures. I love it – it’s pretty, comfortable and not a size I have ever worn before! In fact, it’s not actually a size that is manufactured but a bit of a frankensize. Thanks to you and all the others who pitched in with comments. No wonder RTW bras never fit:) I am now planning my next bra, with improvements. Just a bit of fine tuning and a few design changes……
Amy your bra looks stunning. I just want to say a huge thank you for all your hard work, time and effort you’ve managed to put into this invaluable sew-a- long, its very much appreciated. I’ve learnt a hell of a lot and can’t thank you enough. I think bra-making has quickly become my favourite new thing to do.
I made a bra and knicker set which I’ll take piccy’s of and pop on Flickr soon.
Again, THANK YOU!
Thank you! and you’re very welcome. It was really an honor and I’m so glad to hear it helped!
I have been lurking but did finish 2 bras in my first web challenge! You can see them here at http://www.theurbanpheasant.blogspot.ca/p/blog-page.html. Thanks for doing this. The tutorials have been really inspiring!
On the channeling edge at the bridge, where you zig-zagged the bar tack… did you just cut off the extra really close to the zig-zag?
I know this is, what, three months after the original sew along, but I’m just now getting around to trying it. If I could come over and give you a HUGE hug, I would. You’re terrific for doing this for us!
Thanks Becky. Yes, I cut the channeling really close to the bar-tacking. This is one of those times having little scissors helps! 🙂
I know I’m six months late to this party (just found this online about a month ago!) but am trundling along, trying not to fight the elastic or stab myself in the boob with an underwire. My question is: when you say to cut the elastic 85% of the seamline for the band – is that seamline with or without the 2″ that will be taken up by my hooks? Or does it matter? I’m picking off the picot from my first not-so-great try, hoping to do better this time…
Hi Cayla, hang in there! My first couple of tries at elastic were pretty funny, but after making a couple of bras it does get easier. Promise! When I measure for the bottom band elastic I measure all the way from the center front to the edge of the back band piece (without the hooks). For the top of the band I go all the way from the cup where it meets the straps to the top edge of the back band. I usually use a little less reduction in the top elastic. The 85% is also a suggestion–it might be too tight for some, but it’s a good place to start! Does that help?
Yes I think so. Thanks so much! I’ll get back after it. Is there a way of attaching elastic with a serger? Seems like that might look prettier… or be worse… hmm.
I haven’t tried it, although I occasionally serge in elastic on underwear. I rarely if ever see it in bras except for maybe camisole or athletic bras. The first pass of elastic is almost always zig-zagged and the raw fabric edge gets hidden once the elastic is folded to the inside and zig-zagged again. If I were to serge in the elastic, I’d want to make sure I got really close to the picot or decorative edge of the elastic, which might also mean that I’d have to cut off part of the elastic with the serger knife, which I definitely don’t want to do. But if you experiment with it, let me know how it goes!
I purchased a strapless bra and the elastic (has no soft side on the inside of bra) and therefore burns the skin. Question how do I attach a skin over the elastic on inside of bra?
Hi can you show how you attach the hook and eye as well please?
Thanks
Rebekah.
Hi Rebecca, I know this stops short of sewing it on. I was so wiped out by the end of these tutorials! Keep checking in to my blog–at some point I will show how I do this when I make another bra. &hearts Amy
O.K. Will do.
Thanks for replying!
🙂
Hello and thank you for all of the info in your awesome blog – I refer to it often:) I was wondering if you have (or have a post about it:) ever made your own underwire channeling. If yes, how did you do it, what fabric did you use, etc.? Any info would be great. Also, any tips on preventing the underwire from poking out of the channeling would be great – I’m tired of being stabbed in the underarm:) I’ve had this happen when the underwire comes through the casing itself and not the stitching….. Any advice would be great and thank you!!
Hi Tania,
Thanks! I do make my own channeling from time to time but I haven’t done a tutorial on it. I normally use silk charmeuse when I want a special channeling.I have a whole method to it, but it’s not super hard to figure out. At some point I might do a tutorial but the most basic channeling is just bias tape folded and sewn, then turned inside out like you would a spaghetti strap and finally topstitched. I fuse the tape before sewing to give it loft and strength.
That said, homemade tape is probably less sturdy than some of the better premade channelings you can buy. You may have better luck with a better, sturdier channeling. There are lots of cheap thin channelings that can definitely suffer from”poke through” with all that strain of the wire. My favorite comes from Bra-makers Supply. Worth the extra cost.
Wires poking holes in the channeling might also be from stress of not having enough room for the wire to shift around inside the channeling. If the wire is pushing right up against the underarm seam, then it is bound to break either stitches or fabric with all the tension that is on that spot. This can happen with both handmade bras and ready to wear that’s not drafted properly. I talk about how to add “wire play” to your pattern here: https://clothhabit.com/bra-making-sew-along-cutting/
Hope that helps!
Amy
I have a bra pattern, not the same one as you refer to and ive not sewn with it before and i dont understand how i work out how much channelling to use! Is it simply a case of put the wire in and work it out like that?