B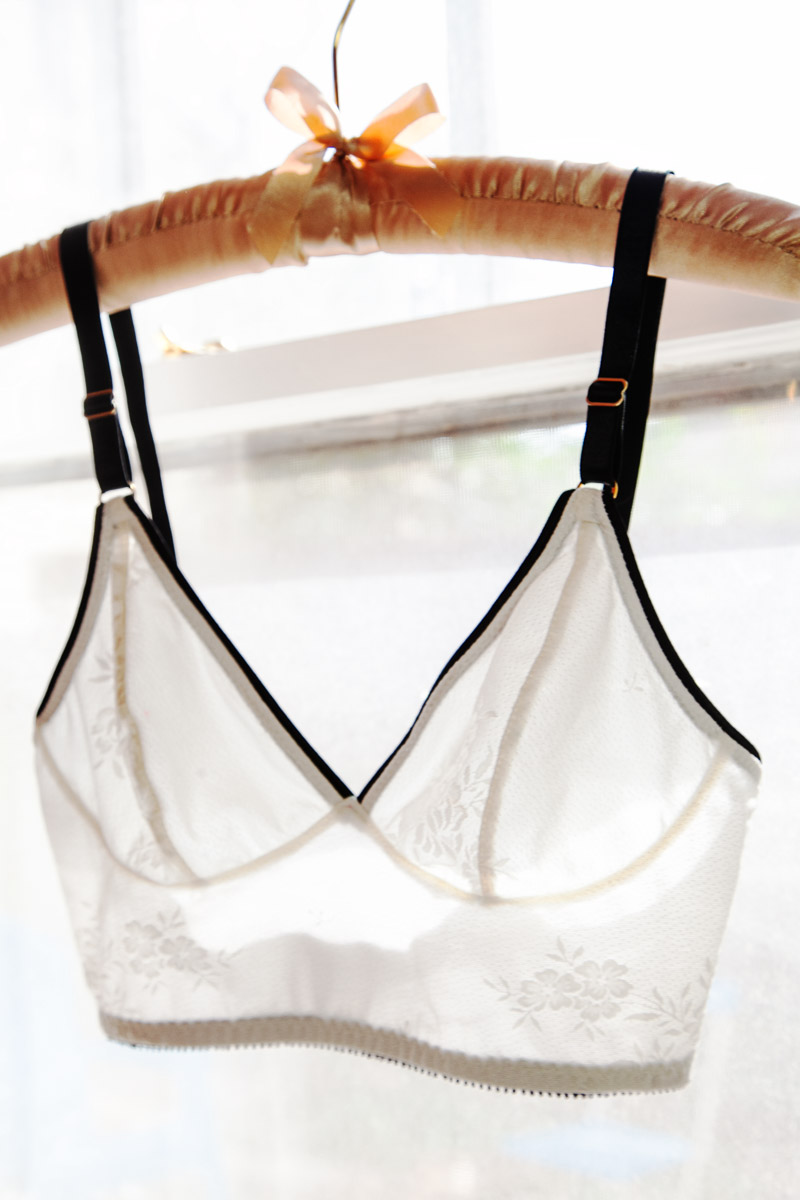
It’s our last day of the sew along! I hope you have enjoyed making your own lingerie as much as I do! Along the way I’ve covered many lingerie sewing techniques, materials and some of the “whys” behind them. I hope these give you confidence in sewing your next lingerie projects!
Today we are going to put the finishing touches on the bra by adding the straps and attaching the hook & eye.
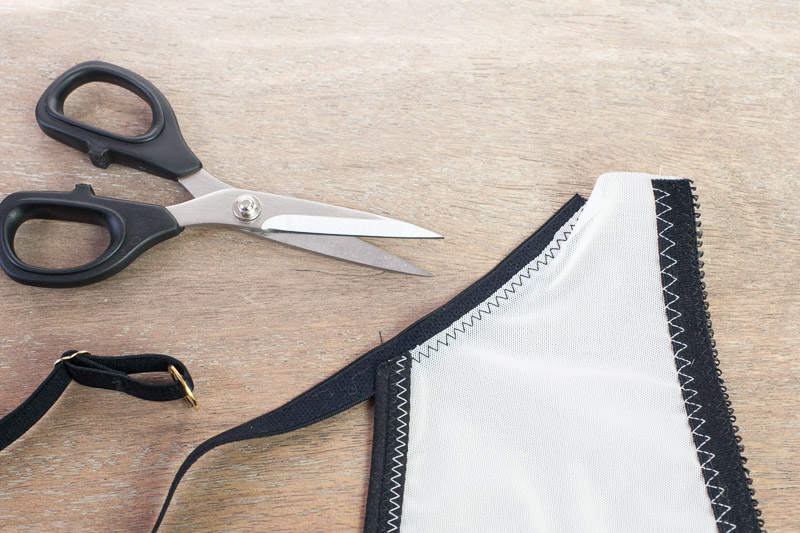
Adjust the Back
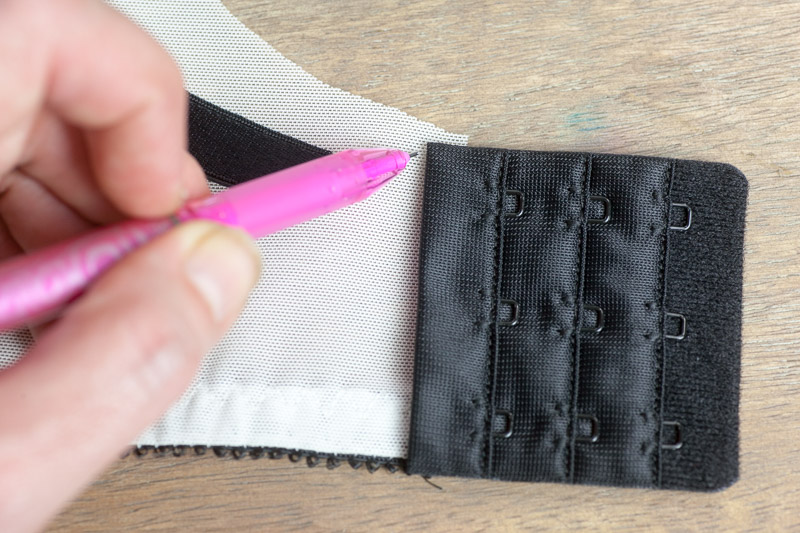
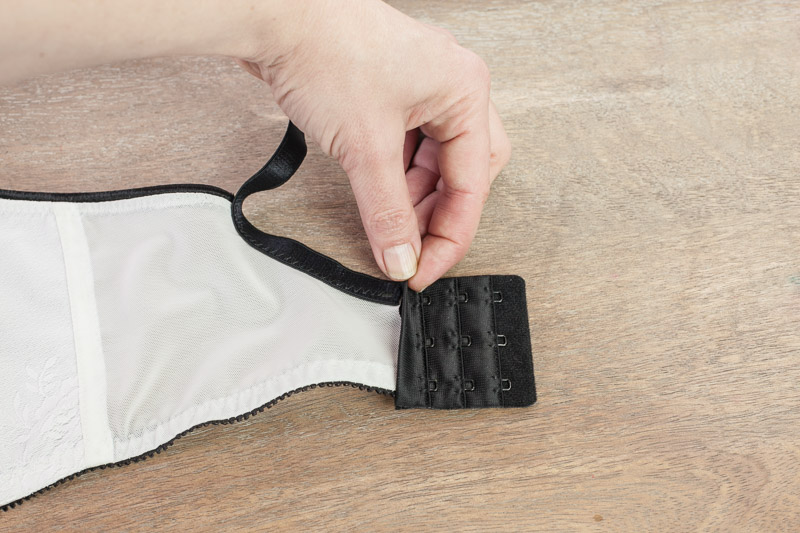
Hook & eye closures come in a few different widths, so your chosen closure may be slightly smaller or slightly bigger than the pattern’s. On a scoop back strap attachment, this is easy to adjust near the end of the bra. It’s simply a matter of changing the point where the strap elastic joins the center back.
Place your hook & eye closure next to the end of the band. Mark a spot slightly under the top of the closure.
Trim away the excess, curving gradually into the original strap point at the top of the band. Repeat the same step for the other side.
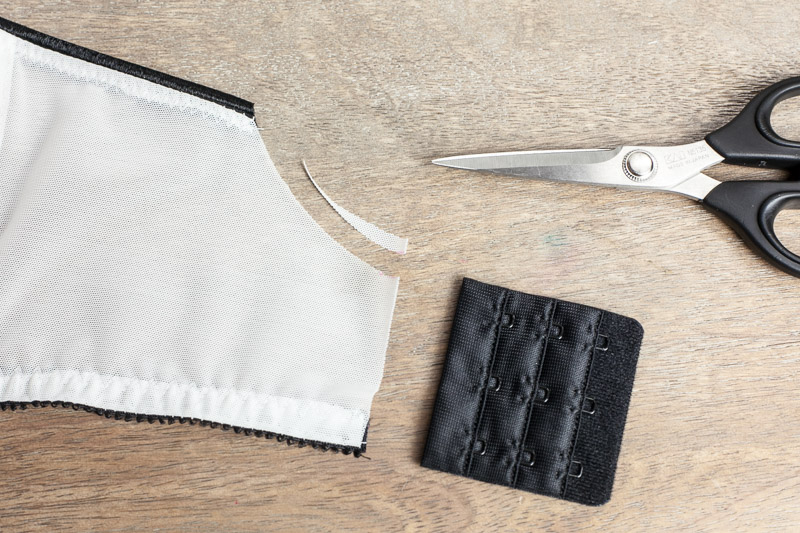
If you are using uncut hook & eye tape, simply cut your tape to fit over the center back.
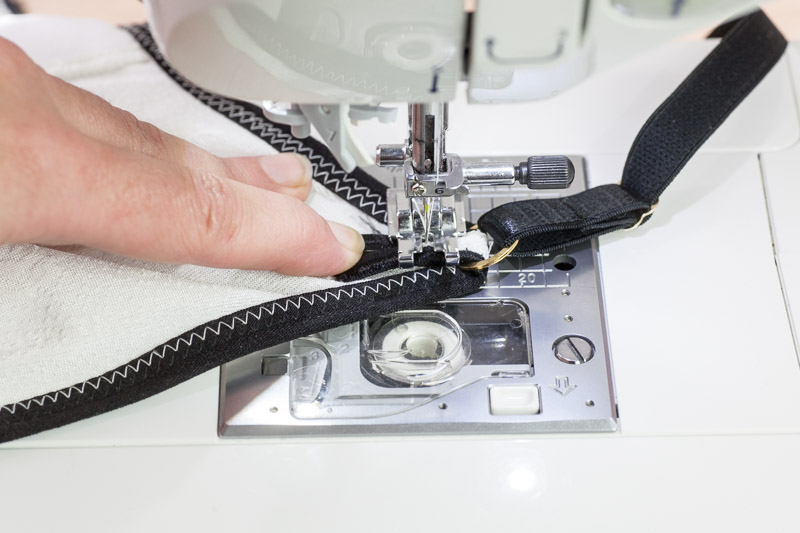
Attach the Straps
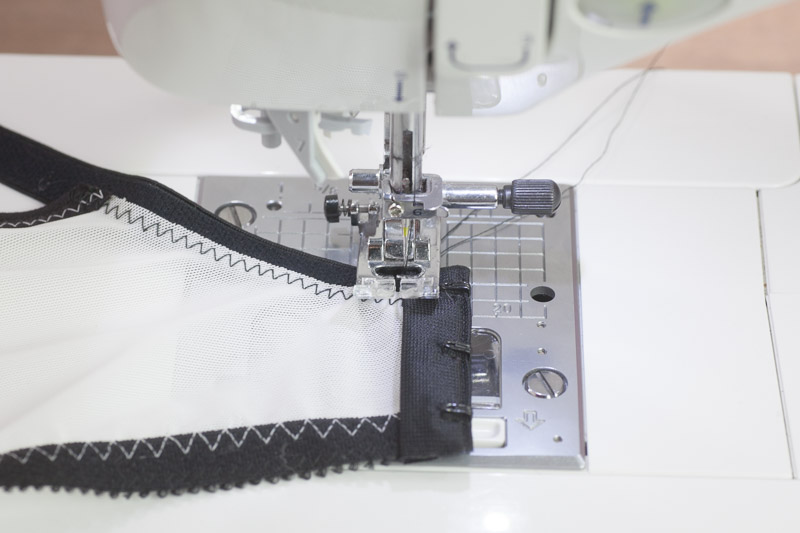
From the right side of the bra, line up your strap elastic with the cut edge of the fabric. Stitch it in with a small to medium width zig-zag, taking a few backward zig-zags at either end to secure.
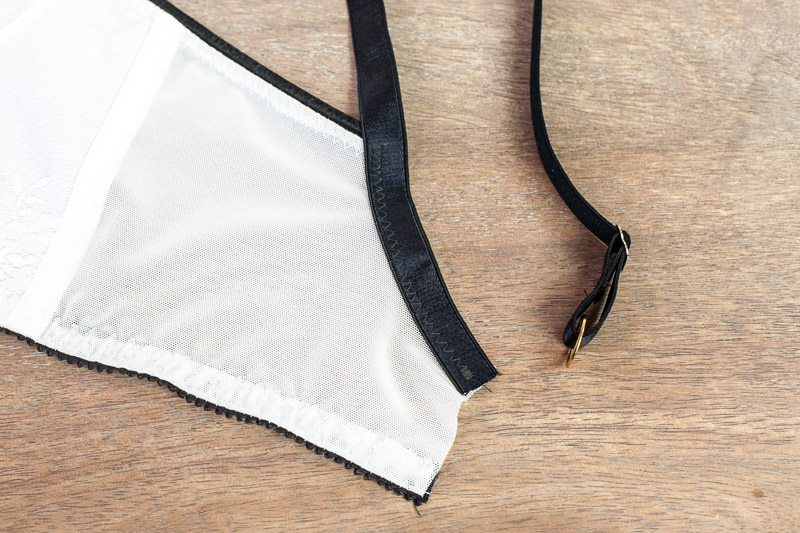
Sew this elastic in flat without pulling or stretching. The zig-zag should be on the inner side of the elastic, toward the bra. I use a 3.2 width, 2.0 zig-zag.
Underneath the strap, away the excess fabric close to the stitches.
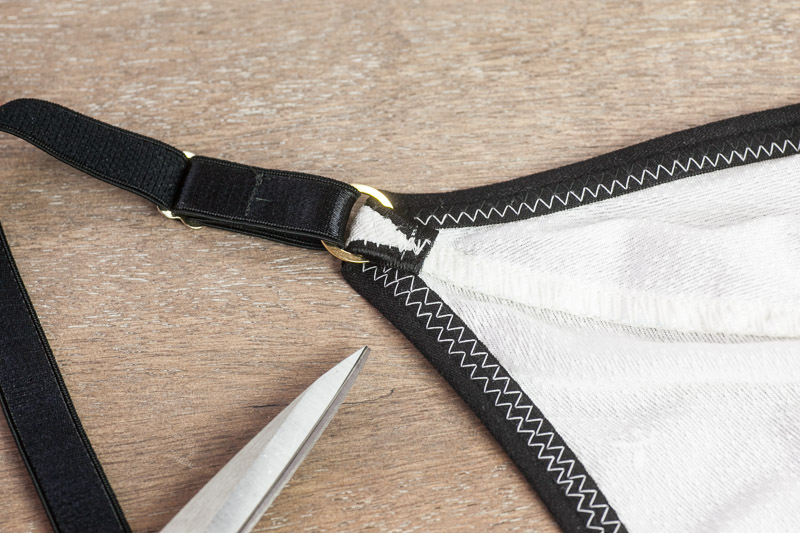
Secure the Strap Rings
Thread the top of the cup through your strap ring and from the wrong side of the cup secure the fold with two lines of stitching. Remember how I left some extra elastic hanging off the end of the cup? This gives me something to hold onto and keep the fold taut as I am stitching:
Secure with a small straight stitch, about 1.5 to 2.0 in length. To make stitching easier, stitch one forward line of stitches, turn the work around—just like I did when I assembled my straps—and stitch the second line back over the first. If you are having trouble with this bulky fold slipping out of place, try starting your stitches in the center of the fold, rather than the edge of the elastic. Use the handwheel for assistance.
Trim away the excess fabric near your stitches.
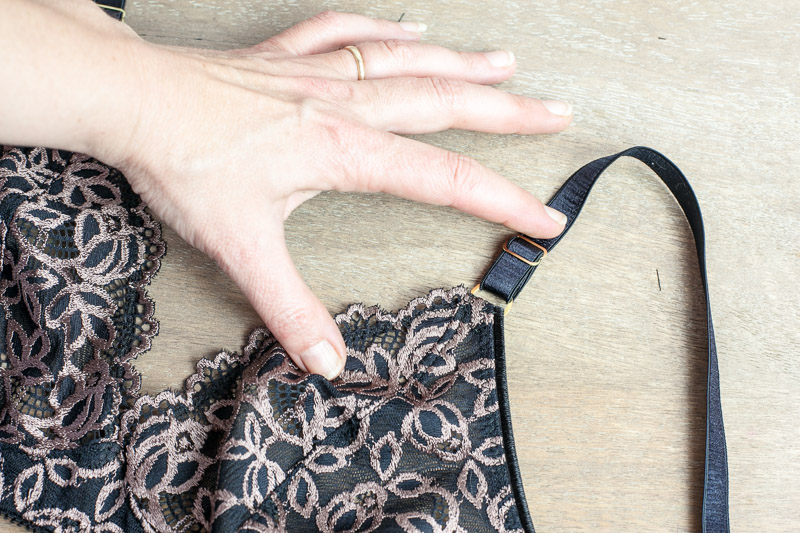
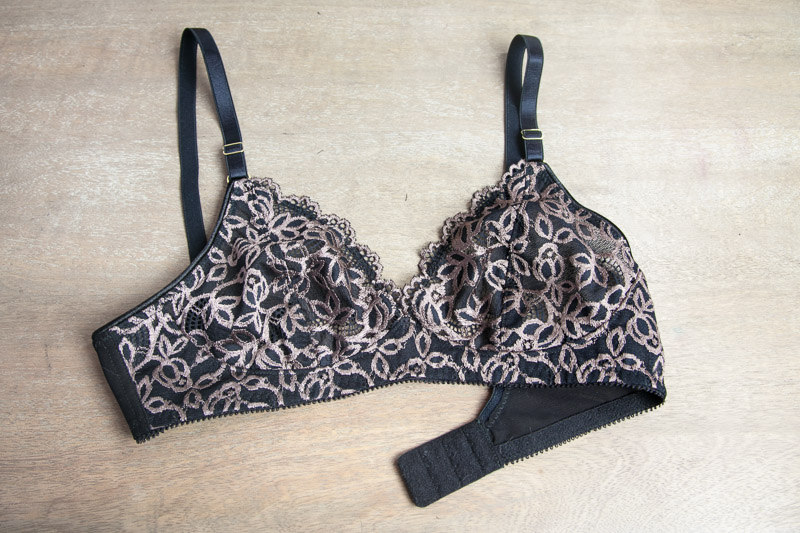
For the scalloped lace cup version, the steps are the same. Since the width of the strap fold will vary based on the size of your lace scallops, that extra elastic hanging off the end is convenient for giving you more “loop length”.
Attach the Hook & Eye
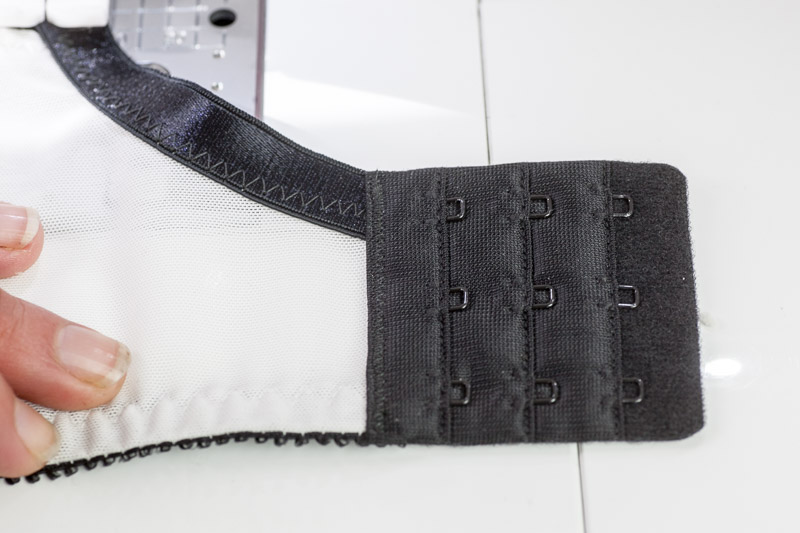
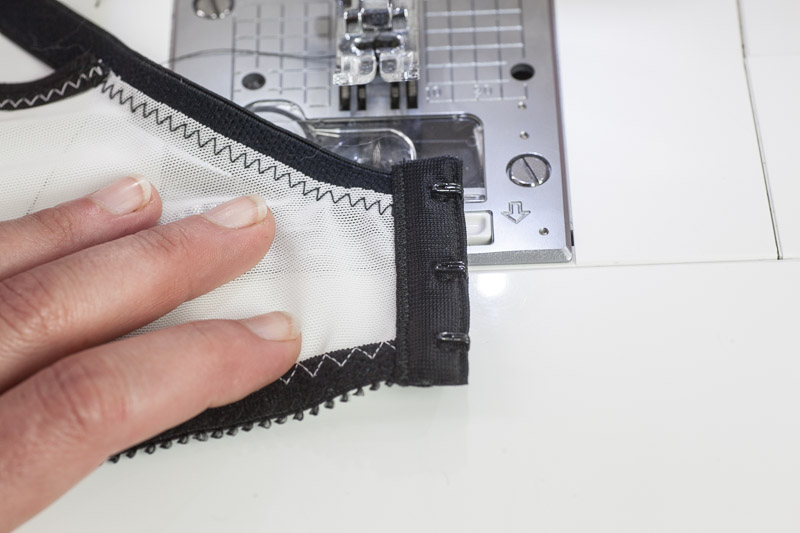
Start by sewing in your eyes. From the left side of the bra with the right side of the band facing up, slip your eye closure over the ends.
Hook & eye tape have little “envelopes” which slip over the ends of the bra band. Sometimes these envelopes will be heat-sealed, and to make attaching easier, pry them open. The envelopes will overlap your fabric by about 1/8” to 1/4”.
Set your stitches to a small zig-zag. I use a a 1.5 width and 1.0 length. Slip your eye tape over your ends and arrange them under the presser foot. Line them up in such a way that the left side of the zig-zag will end just near the edge of the eye tape. Stitch across the tape, securing with backward zig-zags at each end.
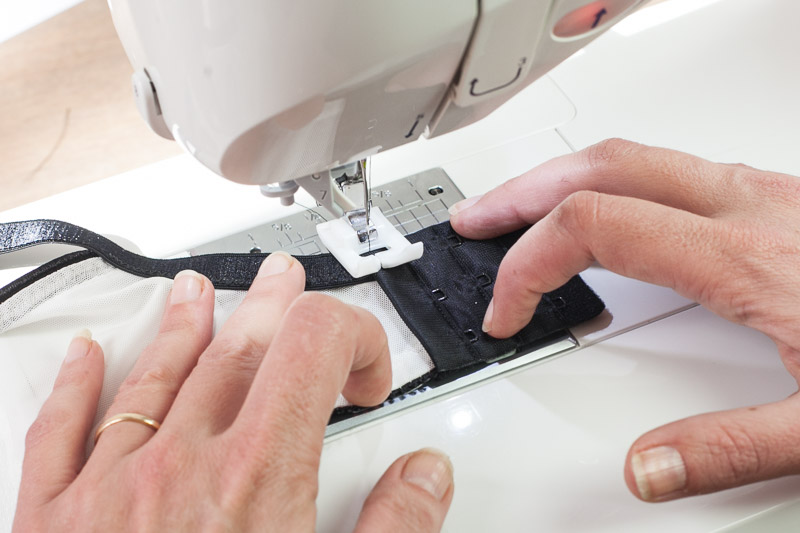
Tip: It helps to go slowly, and to start stitching a little bit away from the end of the tape, then backtacking. In the above photo you can see that I arrange everything while the foot is still up. Once I get it all into the proper position, I keep both hands on the layers and drop the foot with my knee lift.
Attach the hooks to the right side of the bra, with the wrong side and the hooks facing up.
The hook side is tricker because the hooks will be so close to the foot. If your machine has the option to move the needle position, this will come in handy. Move your needle all the way to the right and set the stitch to the same zig-zag you used for the eyes. Arrange the layers carefully underneath your foot and slowly stitch across the tape.
If your machine does not have a needle-adjusting option or you can’t get close enough to the edge of the tape without hitting the metal hooks, try switching to a narrower foot and use a straight stitch instead. Use a small stitch length, about 1.5-2.0 in length and backtack at either end to secure.
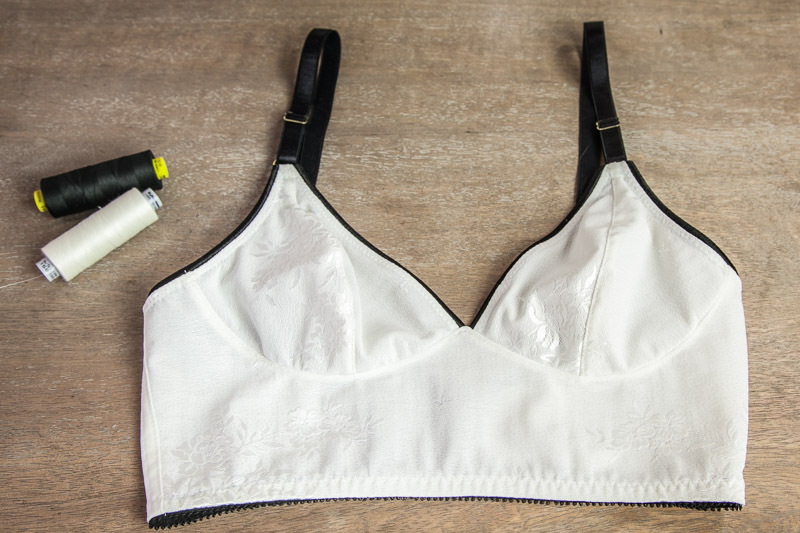
And you’re finished! Congratulations–you’ve made a bra! (Or two.)
Have you made a Watson set? Show it off! You can upload your project photos to the Cloth Habit Flickr Pool, or on Instagram, use hashtags #watsonbra or #watsonbikini. I’ll be featuring some of your work in a blog post next week!
Thank you all so much for sewing along, and for all your helpful comments, questions and shares here and in the FB group!
Would you like tips and inspiration in the craft of lingerie sewing? Sign up for my weekly eletter The Lingerie Maker.
Amy , May I be the first of many to thank you for this amazing Sew Along for the Watson pattern. The amount of time and work you put into this is deeply appreciated !
Barbara
Thank you, Barbara. It was a treat!
Yay! I haven’t started mine yet, but have a small pile of kits and fabrics ready to go. Though I’ve been sewing for decades, this is new to me and I read along with each post for the sew-along and really found it helpful. Can’t wait to make my first one up!
Amy, these are both so lovely. You must be delighted to have not only made these both, but designed the pattern too! Thanks for hosting the sew along. As it was before, it’s so informative and fun to ‘meet’ so many others who are sewing lingerie for themselves.
Just finished and am wearing the long line Watson. It’s my new favorite. As a wearer of many different unstructured bras this one outshines the rest. The long line and firm cradle makes the Watson a winner. Thanks.
Amy, I’m still waiting for my kit to arrive from Canada but I have followed along and learned so much. The quality of your photos and text were really excellent and I really appreciate the time you must have put into this. I can’t wait to sew my first bra. Thanks so much!
Just another tip…I put wash away wonder tape inside the hook and eye area…it keeps is nice and secure while I’m trying to get everything situated! http://www.wawak.com/products/product.cfm/pid/11694?gclid=Cj0KEQiAgMKmBRDMjo_F9OfUubABEiQAp8Ky13VTvV8VyEOd4Ae9ZXM1ZmLLPJZ0eJ1dBRPPT2by2UgaAiKh8P8HAQ
Thanks for the tip on moving the location of your needle!!! I’ve made a bunch of bras and never once thought of that!
Amy,
I suspect this is not the last lingerie pattern you plan to design. Have you considered creating a pattern ( and stitch along) for a Sports Bra with a razor back ? The RTW ones don’t fit well and there is no practical way to alter them
Thanks
Barbara
Soy de Buenos Aires, me encanta lo que hacés. ¿no podés hacer un curso de moldería? Acá es muy difícil encontrar quién te enseñe.
Saludos.
Hola Graciela,
Tal vez es posible hacer un curso de moldería en internet? My Spanish knowledge ends there, so it helps to write comments in English ;).
I don’t offer patternmaking courses, if this is what you are asking?
Thank you so much for the sew along. I have completed my first Watson. I knew from the beginning that it would probably be too small. I normally wear a 38 DDD. I sewed a 40 D in the Watson. I wondered if it would help to attempt to make a full bust adjustment(FBA) and gather in the fullness at the cradle?
Hi Sandra, you could simply make the curves deeper in the cup. If you make the cup bigger at the cradle seam, it would be easy to make the cradle seam longer, instead of having to ease the cup into the seam. I would just draw up the seam lines in the front and side of the curves to make it longer.
Any tips for scratchy lace at the top of the bra where it folds over the strap ring?
I’ve finally got the PERFECT fit for this pattern (4th and 5th tries… partly helped by some fitting changes, and partly using better fabrics/notions). They are as pretty, if not prettier, than my $100+ Lonely bra. Hooray!
Thank you so much for these informative posts! 🙂 I just finished sewing my first Watson & I got tripped up in a few places but these posts answered all the questions I had & now I am ready to do the fitting adjustments I need for an even better second version! 🙂
Thank you so much for all the tutorials. I made my first and am ready to make more!! 🙂 (http://glitterpretzel.blogspot.com/2016/06/navy-silver-lace-watson-bra.html)
Can I sew the back without the closures? I mean, do I have to sew bras with the hook and eye?
My fave bralettes are made by Hanky Panky and Cosabella. They have straps and they’re longline; however, there’s no back closure — just a seam.
Would this be possible with the Watson?
Hi Jennifer,
Anything is possible but the hook and eye lets you put it on. 🙂 Hanky Panky bralettes are very stretchy and light, and the Watson was drafted for fabrics with a bit more rebound in their stretch. If you use the suggested band fabric and line the cradle as recommended it will be too tight to pull over your head. Pull-on bralettes are not as supportive since the band is designed with extra stretch or length to be able to pull over your head camisole-style. So with that in mind you would need to experiment and make some modifications to the pattern—add length to the back or use a stretchier fabric and/or remove the lining from the cradle.
YIKES! I think it’d be best if I made the Watson as-is first, plus get more bra making experience, before I try this.
TBH, I have breast implants. I don’t need support, just modesty. My hb is 30″, fb 35″, under bust 29″, waist 25″. You can understand my plight in finding a bra that doesn’t double boob.
Also, mine are very round and hard-ish — there’s no pushing these suckers down. Oh, what a 19yr old will do to her body. I’m 37 now and hate these things!
I love the idea of making my own bra. Right now, I pay over $100 for custom 30DDD. It’s ridiculous and they all look like my grandma’s bras or my old maternity bras!
Thanks for replying. I’m going to fiddle with the Watson and then take your advice and tweet it a bit.
Xoxo
Jenny
Make one and then fiddle is a good strategy! This is always what I recommend the first time you make a bra; you’ll learn as you go what kind of fit/style/material you like and I promise you that process gets addicting. ;). Welcome to the fun world of bra making!