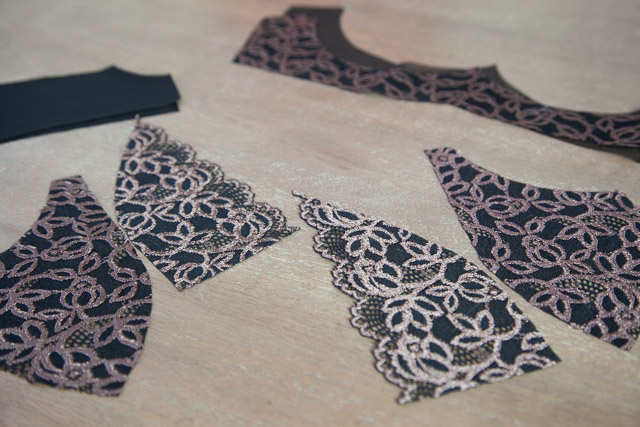
Cutting scalloped lace for lingerie is one of my favorite things to do. It involves a little bit of creativity and some lace detective work. It’s a bit like cutting plaids, but thankfully lingerie pieces are tiny!
I’ve made the Watson in a few scalloped laces for fun, so today I want to share how I cut the cup pattern for them. (We’ll start sewing the bra later this week!)
Stretch laces vary quite a bit in stretch, weight, and “openness” or tightness of their design. Sometimes they stretch in all directions, and other times they stretch very minimally in one direction. When you are cutting the Watson from these laces, you may not be able to get your pieces in the proper stretch direction so this will probably change how it fits. It’s experimental! For a lace that stretches very minimally in one direction I usually go up a cup size.
Pattern Alteration
Normally when I cut a scalloped lace piece for an underwire bra, the pattern neckline has a straight edge. The Watson’s neckline has a slight curve so we need to alter the pattern in order to cut it on a straight line.
On your inner cup piece, draw in the seamlines where the bottom of the cup and neckline intersect. These seam allowances are 1/4” (6mm).
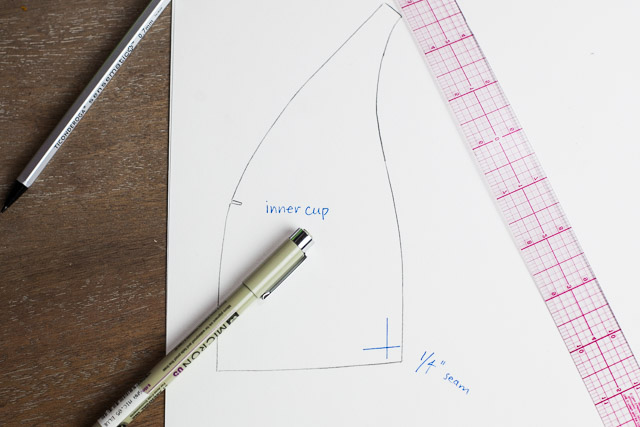
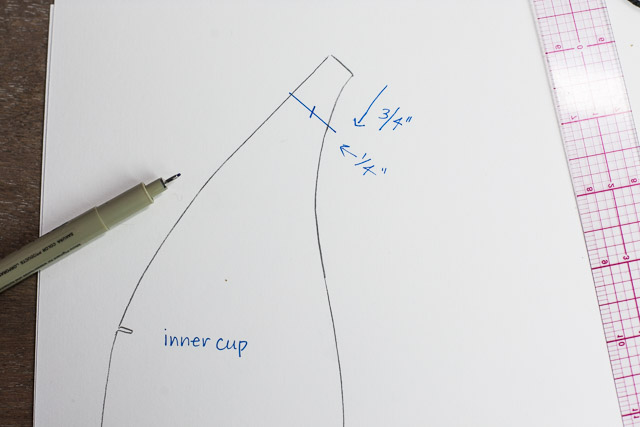
Draw a line 3/4” down from the top of the cup (this is your fold line for the strap) and then draw the the neckline seam that intersects with this fold (1/4” or 6mm from the outer edge).
Draw a straight line connecting these two cross marks, going all the way through the cup:
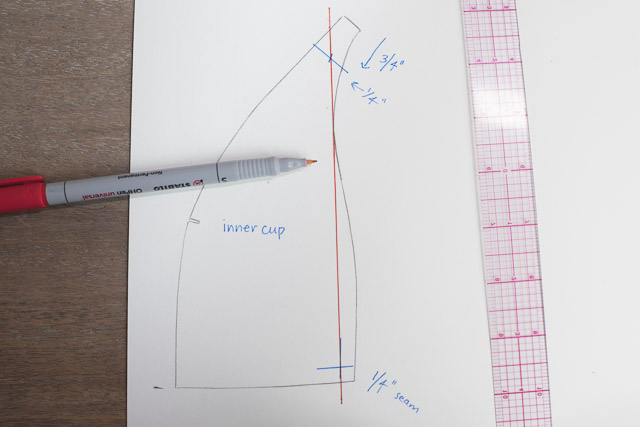
Cut out your cup piece, cutting along that new line. I mark the cup for scallops, so I don’t forget!
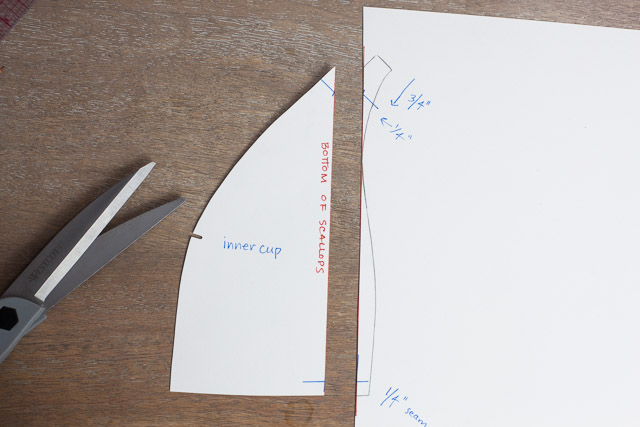
You’ll notice that straightening the neckline, as I am doing in this alteration, makes the neckline slightly shorter. It also makes a funny point to the top of the cup, which means I’ll might have to do some adjusting when I get to the strap loop. I’ll show you what I mean when we get to sewing the bra.
Cutting the Lace
Now this is the part where you get to play detective (because this is Watson, after all!). Lay out your lace and move your pattern pieces around until you find the motifs you want over your cup pieces.
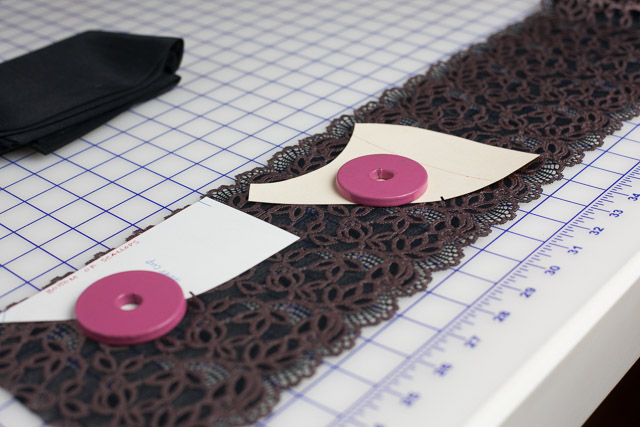
Once you get the your new inner cup piece in a good area, line up the edge of the neckline piece so that it is even with the bottom of the scallops. Move it around until you get that bottom seamline mark (marked in blue) lined up with a low point of the scallops:
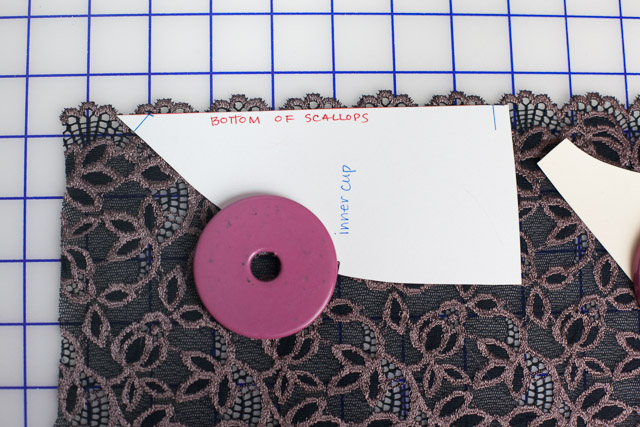
It’s important that the bottom seam meets a low point because this is where the two cups join at the center front. Once you have the pattern piece where you want it, trace and cut.
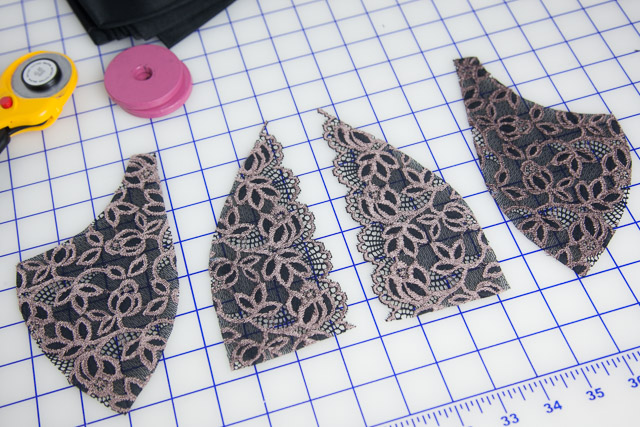
Some decorative laces will have a mirrored design, which means that you can flip your piece to the other scalloped side and cut a perfect mirror of your first piece. If your lace doesn’t have mirroring sides you can move your pattern piece around until you find a similar motif. When I want to get a really good mirror, I often take my first cut piece and flip that over instead of a paper pattern.
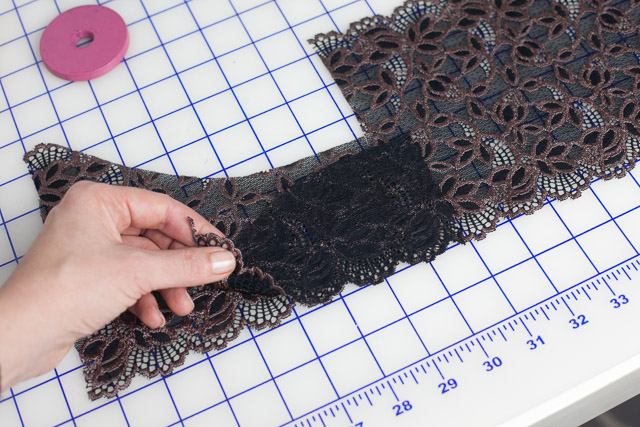
Once I get this piece lined up over its mirror, I trace around it with a chalk wheel. To save time I often by bypass chalk tracing and use a rotary cutter and run carefully around the first cup, being cautious not to cut anything away from it.
Done cutting!
Next up: cutting and sewing the bikini!
Would you like tips and inspiration in the craft of lingerie sewing? Sign up for my weekly eletter The Lingerie Maker.

What an exciting post. I have a pretty beige stretch lace that yields 35-40% stretch on the lengthwise grain. It does have minor stretch on the diagonal so I think I’ll go ahead and give it a try. I’m going from a 34C to 34D. Is it safe to assume the band length will stay the same?
What gorgeous fabric! I ordered some scalloped lace today for more Watsons!
I’m looking forward to tracing and cutting my red lace tonight and tomorrow:)
I have been following this series with interest but unsure if I can do this since I have never tried making a bra. However, today’s installment with the pictures of cutting the “lace bra” hooked me- LOL. I can see that will be a gorgeous bra that would cost a small fortune in a store. I am going to buy the Watson pattern and give it a go.
Barbara
Hi Barbara, bra-making definitely involves a lot of new skills, but if you take it once step at a time, I promise you that it catches on quickly. It’s a very addicting craft and rewarding in that you can make things that look like they cost a fortune.
Amy, I have done quite a bit of sewing in the past and I have made numerous pairs of panties and slips, so I am comfortable sewing with lingerie fabric and stretch lace. I ordered a bra kit so I don’t need to hunt for supplies for my practice bra. So far your directions don’t look difficult. Thanks for all the work you are doing for us. Taking all the pictures and writing the tutorials is time consuming.
Barbara
Hi Amy, in the Pattern Alteration section above, it says in the third sentence “On your outer cup piece..” but the photos/alterations are with the inner cup piece. Maybe I’m not following properly but just thought I would mention it in case its a little mistake – I got a little confused about it.
Loving the sewalong, I’ve already made a Watson but I’m keen to make one in lace as well.
fixed!
This is a great sew along with lots of interesting information. Thanks for doing it.
Hi Amy,
I hope you are still reviewing comments to this thread.
I’m wondering if the lace you used in the photos above is lined?
And do you / would you line a stretch lace for the cups?
Thanx!
Trudy
Hi Trudy,
No I didn’t line these cups. It needs the stretch to fit. The *only* time I line stretch lace is when I am trying to eliminate stretch which I don’t recommend for the cups in this pattern.