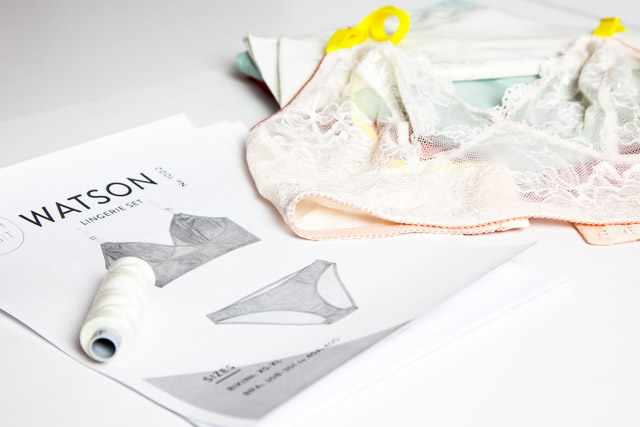
Hello everyone and welcome to the Watson Sew Along!
I’m excited to get started, and today we’re going to jump in with a little preparation and gather up our supplies.
Find Your Size
First things first… If you haven’t done so yet, you’ll want to measure yourself and find your size using the suggestions in the pattern. If you haven’t measured yourself in a while, it’s worthwhile to re-take your measurements.
Quick measurement tip: when taking the measurement under your bust, exhale all the way and take a very close fitting tape measurement. This is how I now measure others for their bands and I tend to get a better fit this way. For example, when I fully inhale and measure, my underbust is 30″. But when I exhale all the way, I measure about 28”. I use the smaller measurement to determine my band size.
Print & Assemble Your Pattern
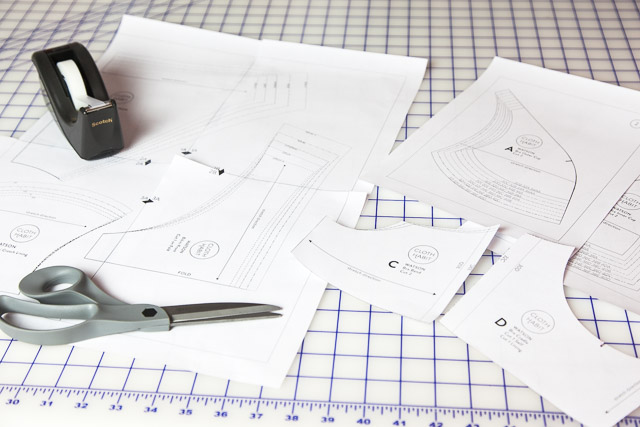
For the bra pattern, you’ll only need 4 or 5 pages. Don’t forget to check the Bra Printing Guide so you know which pages to print off for your size. Most of the bra pattern pieces fit entirely on one page but in some of the larger sizes, you’ll need to tape two pieces together using the page notches as a guide.
Gather Fabric and Notions
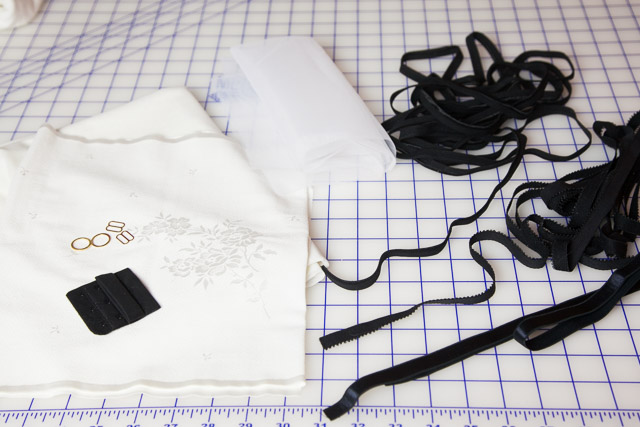
I’m going to be making a cream-colored set with black trim. Very ooh la la, and hopefully easy to photograph!
Before every lingerie project I print out a checklist and collect everything together in a little baggie as I go. It makes gathering all the bits and bobs so much easier.
You’ll need:
- cup and cradle fabric*
- cradle lining or interfacing
- band fabric (if different from your cup fabric)
- strap elastic
- 1/2” plush back elastic
- 1/4” plush back elastic
- 1/2” rings and sliders
- hook & eye (I recommend a 3-row for the longline version)
- main bikini fabric
- 1/4″ lingerie elastic
Note on elastic widths: The pattern can be easily adjusted for wider elastics if you prefer them. If you wish to use a wider strap elastic, make sure to buy your rings and sliders in the same width as your strap.
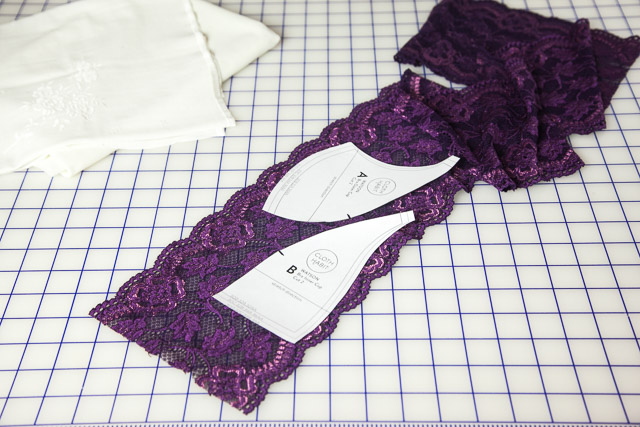
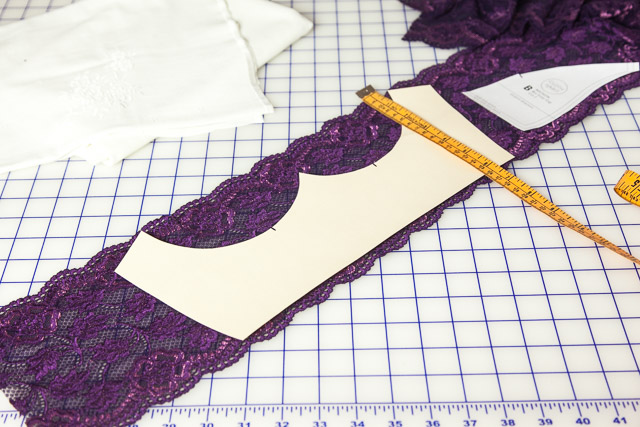
*For the scalloped lace variation of the bra, you’ll need:
- at least 1 yard/meter of stretch lace
- 1/2 yard or meter of narrow clear elastic to stabilize the edge of the lace scallops
When buying stretch lace, make sure the trim is at least 6 1/2″ wide. The cups will be laid out a bit like this:
And if you want to use lace in the longline version, you’ll need to measure across the widest part of the cradle so that you get a wide enough lace:
Tools & Supplies
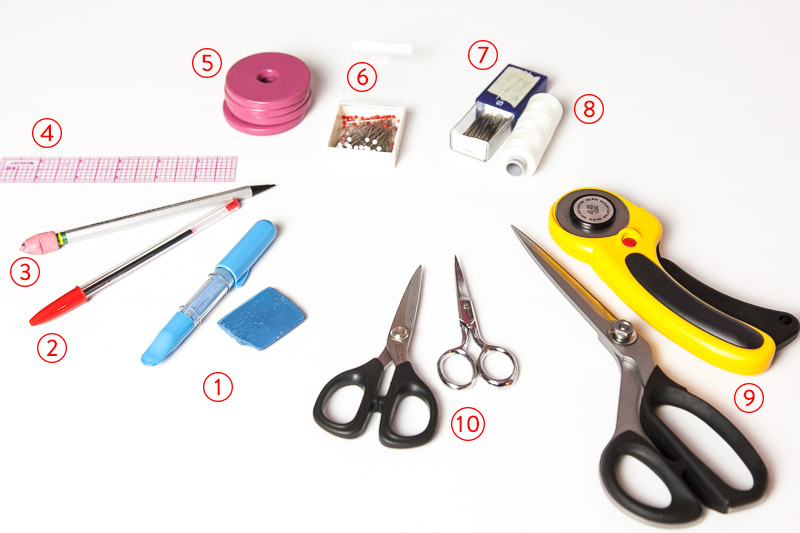
Some of these tools are completely optional but they are extremely helpful in lingerie making. Be sure you have a few good marking tools, machine needles, and thread!
- Tailor’s chalk or chalk wheel – for tracing around patterns onto fabric
- Ball point pen – for tracing onto fabrics that don’t tend to accept chalk wheel marks. You can also use a fabric-marking pen.
- Pencil – for marking in seam lines
- C-Thru ruler
– this is my preferred tool for marking in seam lines. I use several of these rulers for patternmaking; the B-50 is my favorite for bras.
- Pattern weights – for weighing patterns to fabric. (I don’t know where to buy the weights in the photo as I have had them for years, but I also use cheap washers from the hardware store.)
- Silk pins
– These are inexpensive glass head pins, and they are wonderful for lingerie sewing. Fine pins won’t snag as easily on lycras, laces and delicate lingerie fabrics.
- Size 11/75 stretch needles – I buy these by the box because I use them so much in lingerie making. If you can’t find a stretch needle look for a size 11 ballpoint needle.
- Polyester thread*
- Sewing shears or rotary cutter (if you are a fan of rotary cutting)
- Embroidery or tailor point scissors – these are great for trimming seams and clipping threads.
- Serger thread* – only if you plan on serging either the bikini seams or the bra cup seams.
- Card stock – I like to print out bra patterns to card stock, which makes the patterns much easier to trace onto fabric. You can also trace the paper patterns to oak tag (manila folder paper), heavier weight drawing paper—anything that holds an edge.
- Straight stitch foot (you can see mine here) – For neat lines of topstitching and edgestitching. Your machine may call this a “patchwork foot” or “1/4 foot”.
*For extra soft seams, you may want to try a finer polyester thread or wooly nylon in your serger. See my post about these threads.
Prewash Fabrics
You may also want to prewash your fabrics the way you intend to wash them afterward. Many nylon-based fabrics don’t shrink at all but I’ve had a few surprises! (My first Bombshell swimsuit shrunk almost two sizes and I learned my lesson on pre-washing lycras!) For most lingerie fabrics, I handwash in cold water and hang to dry. Spandex does wear out with heat and I like my lingerie fabrics to last as long as possible.
That’s it for today! Any questions? Feel free to ask in the comments!
Would you like tips and inspiration in the craft of lingerie sewing? Sign up for my weekly eletter The Lingerie Maker.

Amy, super exciting day! Thanks for the check list we can print off. That will make things easier. I’m really looking forward this sew-along. Such fun!
Hi Amy,
What printer do you use that will print on cardstock? I like your idea of printing the pattern on cardstock, but most printers jam using card stock
Thanks
Barbara
Hi Barbara, I use a Brother black and white laser printer. It’s several years old. Previously I used a regular old HP inkjet printer and that didn’t seem to have a problem with card stock. Maybe you could try putting in one piece of paper at a time? Sometimes I have to do this; otherwise it jams or the paper tries to come out a few pieces at a time.
Thanks Amy, I have an HP that will not take card stock even the 65# weight. I need to find a different printer.
Barbara
Thanks for the reminder about card stock – I’ll probably print mine on paper then transfer it to something thicker. Usually I trace my patterns onto lightweight patterning paper (similar to non-woven interfacing) but this makes cutting smaller pieces REALLY inaccurate
Hi!
I have a size problem…
I know how measure myself and I know my bra size: 34AA no problem! (not easy to find in RTW, most of the time I don’t wear bra, but at 44 years old and after breastfeeding 2 children… well!).
After looking at your pattern, I can’t find my size…
On patterns instruction 34AA is on page 2,3 and 4, 5 (or 6,7).
I find my bandsize on pages 4, 5 (or 6, 7).
But I can’t find my cupsize on page 1, 2… the size 30C-32B-34A-36AA will run too large (I don’t give it a try, but…) will the size 30B-32A-32AA be ok for a 34AA, or not ?
I am a bit confused and I don’t know what to do… If you may help…
Hi Lune, your pattern has a typo which I later corrected. On pages 2 and 3, the smallest cup size is a 30B/32A/34AA (not 32AA).
Thank you!
I will give it a try.
I found your website a while ago while searching for tips on sewing swimwear. I was disappointed to see I’d missed a sew-a-long. I’m excited to see you doing another one! Hopefully, I’m not too late to find materials and follow along.
Thank you for doing this sew along. Finding a good fitting bra is always an issue, maybe making my own is the way to go.
So excited. Have my supplies gathered and joined the facebook group.
Hi Amy.
A question regarding the lace… Can I only use a 4-way stretch? I’ve just received my ordered scalloped lace, and I’ve just realised it’s only a 2-way stretch, with no stretch from scalloped edge to scalloped edge. If that makes sense.
Oh, and it’s not wide enough for the pieces to lie as in your ‘horizontal stretch guidelines’ in the instructions. Am I right in assuming I need to get some new lace?
Hi Ingrid, I used a 2-way lace for the scalloped lace bra featured in the pattern shop. I have some advice on laces and cutting directions in this post.
Basically, you have to experiment with cutting directions a bit since the scalloped edge will usually be the greater stretch. If your fabric has stretch in only one direction, you’ll probably have to go up a cup size. A lot of this is experimental, since laces can vary so much in their stretch, but if you have already made a Watson that fits, you can compare your previous fabric to the lace and if it has less give or stretch than you know you need a bigger cup, if that makes sense!
Fantastic – thank you! Was worried I was going to have to send back the scalloped lace – so phew 🙂 Can’t wait to get home and sew!
Hi. I’ve got a question regarding measuring/sizing. I would normally wear a size 32F – my breasts are big. But measuring for the Watson as indicated on the pattern is giving me a 2″ difference between upper and full breast, which would make the cup not very big. Am I doing something wrong? Thanks!
Hi Ce, it can be hard to get an accurate full bust measurement if your breasts are soft. I’m guessing the difference is bigger than that, or your breasts are really full on top which adds to your upper chest measurement. Just a guess! You are welcome to write me for a suggestion. I’d probably need a bit more information to make a good one.
Hi just wondering.
In your pattern booklet for buying fabric guide it says (for example) Bikini main fabric 1/4yrd/m.
Can you please tell me what this means?
Im new to all the terminology and would love to give this project a go.
Hi Larissa,
This just means that you need 1/4 yard (or meter, if the fabric store uses metric measurements) of fabric for the bikini.Suggested fabrics for the bikini are under the section titled “Fabric Suggestions”. Typically, a sewing pattern will abbreviate yards as “yd” and meters as “m” or “mtr”. Does that help?
I probably didn’t need to say “main”, but that is typical of sewing patterns that use linings. Some people like to line their underwear crotch area with a separate cotton knit fabric, and if you want to do that you’ll need a mere scrap of fabric in addition to your “main” fabric. I tend not to use a separate lining just because it doesn’t matter to me. Whatever you choose, 1/4 yard is enough to make the whole bikini, including the lining.
I hope that helps!
Amy
Hi Amy! I’m looking forward to getting started on this pattern! This would be my first bra so I’m having trouble understanding the materials. Regarding elastics, can you use the same elastic for the band and the straps? What is the difference between those two types of elastics?
Thank you so much for all of the work you’ve put into this sew along, I would’ve never considered bra making but you make it really approachable!
Hi Carla!
Strap elastic is much firmer/less stretchy than elastic for other parts of lingerie, including bra bands. The most common strap elastic will be satin on one side and plush on the other. Elastic for the band usually has one plush side for comfort, and typically has a decorative edge on one side—the side that peeks out a bit from the hem.
When shopping for either of these elastics, you’ll have the most success buying from a shop that sells these materials specifically for bras or other supportive lingerie. That way you don’t end up with flimsy, poor quality elastics. This is why a kit is often a great way to go when you make your first bra so you can get to know the materials instead of shooting in the dark. Have a look at my page on shopping for lingerie supplies here: https://clothhabit.com/bramaking-resources/
On that page I listed a few shops that sell kits with all the Watson materials. Even if you don’t buy a kit, many of the shops on that page sell quality bra elastics and will specifically describe these as “strap elastic” or “band elastic”.
Amy
By ‘the band’ I meant the bottom hem of the bra – sorry if I got the term wrong!