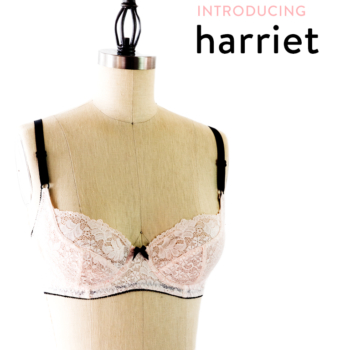
Tag Archives | bra-making

Adjusting Your Bra Band (With Math!)

zebra lace and lycra

I’m making a new lingerie set using this funky yellow zebra lace from Merckwaerdigh. I find animal prints hard to resist and this one is so soft, feminine and subtle. But to make a bra from this set I have to make some pattern adjustments to the band. The matching lycra is a super stretchy 4-way lycra/spandex fabric, and if you have ever tried to make bras with new band fabrics you probably figured out that no two band fabrics fit alike!

If you were to take apart a few of your RTW bras and detach the elastic, you’d notice the bands are all different lengths. This doesn’t necessarily mean they are different band sizes, just that they were drafted with the negative ease particularly needed for that fabric. Unfortunately, most commercial patterns aren’t always clear on the stretch percent or type of stretch for which they were drafted, probably to allow for the widest interpretation possible.

There is a way to get around all this without worrying about sizes. I like to adjust my band pieces for each bra using just a little bit of math. It’s easy math, I promise!

{ONE} If you have already made a bra from your pattern, put on your bra and measure from the side seam of your bra around your back to the other side seam:

measuring for band

The line of the tape should be level with your underbust along the elastic hem. Try to hold the tape firmly–you want a firm number.

*If your pattern doesn’t have a side seam, you’ll need to measure from the side of your cup where the underwire is all the way around to the other side.

{TWO} Find the width of your bra back closure, with the closure on the loosest hook. Subtract this number from the back measurement you just took in step 1.

measuring hook & eye closure

My Back Measurement 15 7/8″ – Closure Width 2 1/8 = 13.75″

Divide this number in half. This is the length of your bra band piece with no negative ease. Mine would be 6 7/8″. Now you need to adjust it for the stretch of your fabric.

{THREE} Find out the stretch percent of your fabric. I first find the direction in which the fabric stretches the most, and take a length of about 5″ or 12cm and stretch it to its maximum along a ruler.

lycra at rest

My lycra stretches from 5 to almost 10″, which is 100% stretch. The calculation: (5″ stretched / 5″ original length) x 100 = 100%.

lycra stretch percent

Using your stretch percent, you can now make some logical adjustments to your band. Obviously the more a fabric stretches the shorter you want your band to be.

{FOUR} For band fabrics, I have found that reducing length by 3% for every 10% of stretch generally works. For example, if your fabric has a 75% stretch, then multiply 3 x 7.5 to get the stretch reduction of 22.5%. My lycra stretches almost 100%, so I multiply 3 x 10 to get a stretch reduction of 30%.

I take my measurement from step 2, and multiply it by 70%. (Reducing by 30%.)

6.875 x .70 = 4.8″

That is how long I want my new band piece to be along the hemline, from the stitching line of the side seam to the line where the back closure is sewn. My current band piece is 5.4″, which was a good fit in a heavier powernet.

band original width

To shorten this piece, I slash down the middle and overlap. until the new hem length reaches 4.8″. Then I retrace the band and smooth out the lines. Voila–a new band piece!

slash and spread band piece

*Note that it’s important to take these measurements between the seam lines and not the edge of the seam allowance. Seam allowance doesn’t count toward length!

Of course math isn’t the whole story and there are other factors which will influence the fit, including how tightly you pull your elastic while sewing. But I have found this to be a good starting point so I don’t end up with too-loose bands. As always testing is always your best friend!

· Comments { 15 }

Polka Dotty Lingerie

dotted knit foam bra

Over the summer, Katherine of Blooms Endless Summer and I exchanged a few lingerie patterns we had drafted. It’s been wonderful finding online sewing friends with whom to chat about patternmaking experiments, and we both share a genuine love of pattern analysis. She was gracious to share the pattern she drafted for her Daisy bra, which I had some time to finish over the weekend.

A few moons ago I bought this comfy soft dotted rayon jersey for some Ladyshorts and, well, a lady has to have a bra to match!

dotted lingerie set

Katherine drafted her bra using Patternmaking for Underwear Design by Kristina Shin, a book I’ve since bought and used as a reference in some of my own drafting. Because Katherine’s a different size than me and the book does not demonstrate drafting in measurements other than a 34B, I used my own bra blocks to adjust and grade the size and fit. In her post about this bra (linked at the top), she also included an illustration showing how she adjusted the original draft to fit her particular shape. This may help some who have have less volume on top and need to visualize what cup pieces could look like. As so many of you have figured out in the sew-along, bra fit is such a subtle thing. We all have different shapes, or a shape we’d like to be!

In this bra, the lining is the structural layer, a three-piece foam cup which allows for the shaping and support. The outside is only a two-piece cup meant to be made from lycra, or possibly a jersey as I used, to shape smoothly over the foam.

dotted knit foam bra

dotted knit bra, inside

In these type of bras, the foam is usually joined by a zig-zag or triple zig-zag, then covered with seam tape. I have made them both with and without covering tape and it doesn’t seem to affect the feel or strength. But of course I like neat finishes! For this one I used a soft 1/4″ cotton twill tape and stitched a straight stitch on either side.

dotted knit bra, inside

To stabilize the cradle and bridge I used a fusible knit interfacing. On top of that I stitched a lightweight tricot lining to the bridge so I could clean finish the clever little “v”. I like this part of the design, which follows the neckline of the cups to a point. I have some space to work with in my bridge so little style changes like this one are easy to incorporate.

You might be wondering, do I wear all these bras I make? Yes! Yes, all of them, and I’m nearly at the point where I have phased out store bras except for a couple of investment lingerie pieces which I splurge on for my own luxury. My first couple of handmade bras fit fairly well and while they may have not been my favorite fabrics, style or fit they still work when everything else is in the laundry! Another thing to remember is that no bra lasts forever. Elastic can age very quickly with two- or three-times-a-week wear. And it particularly does in a climate like mine, where sheer body heat breaks down highly elastic clothing. I have to replace my workout clothes once or twice a year! I’m very particular about handwashing my delicates. I lightly wash after two wears to rinse out body oils, I don’t wring, I use a very mild detergent made for lingerie in small doses. But even with that care, some bras don’t last more than a year. I too have been guilty of wearing bras way past their point of usefulness!

This is one of a few foam style bras I have made for some comfy whatever days and since I work from home I have more of those than I care to admit!

dotted knit bra

· Comments { 24 }

Bra-making Sew Along: Grand Finale!

Friends, it has been a wonderful ride and it’s time for a wrap-up. I love season finales. You know, the kind of plot ending where all the characters–even the ones who mysteriously morphed into into their evil twin two seasons ago–return to the screen for one final blow-out episode. Plot loopholes be darned, closure is good for the heart.

My finished bras!

pale green lace bra by Amy

This bra fits me like a dream. If you’ve been following along you’ve probably picked up on all my little (and not so little) alterations. I altered my cup to a vertical seam. I also used shorter underwires, lowered the neckline about 3/8″, and widened the straps in front–more of a demi style. My bra is made from mostly stash materials that I dyed to match the pale grey-green lace. (I’m really into blushing mints right now!)

pale peach longline bra by Amy

My friend’s bra is made from Elan 645 using a bra kit from Fabric Depot Co. I made some alterations to her cup seams to fit for a softer look and lengthened her band a bit–both around the body and lengthwise for a longline bra.

Some highlights from the Flickr group and beyond…

knit & lace set, Handmade by Carolyn

Carolyn made Kwik Sew 3300 in a lovely blue marled knit and cream lace. And she’s a fellow knicker-making fanatic. You can read about these lovely laceys on her blog Handmade By Carolyn. Thanks Carolyn, for your amazing participation and encouragement!

Sewy Rebecca by Michelle Sews

Michelle joins me in a passion for collecting bra patterns. She started out with Danglez DB3 but decided she’d be better off trying Sewy’s Rebecca bra (above). Rebecca is a fantastic pattern, especially for larger cups. Michelle also informed us that Bra-makers Supply was about to release a new pattern called Shelley–as of today it’s available here. For those Sewy Rebecca fans and others who need the option of a side cup piece and multi-seaming–this one’s gonna be a big hit. I just know it. Hop over to Michelle’s blog to see a she drafted a Shelley-type bra from her Pin-up Classic pattern.

black lace by, by Mirza of Let's Tweed Again

This is Mirza’s stunning black lace and red-trimmed bra from Pin-up Girls Classic pattern. You can see more gorgeous pics and read her review en le français on her blog Let’s Tweed Again. Oh Mirza, what a delicate beauty!

satin bra by Ginny

Ginny finished her first bra and isn’t it so beautifully made? This one uses a matching kit from Summerset on Etsy–more on her blog GinPins. I just love the ornament idea!

black lace set, Melissa of Fehr Trace

Melissa of Fehr Trade got the kick to revisit her bra patterns and made this decadent bra from Elan 330. In her post about this set, she also included a great tutorial about a way to finish off the top of a cup with multiple layers.

lace and satin set by KazztheSpazz

Kazz went on a bra-making spree, y’all. Here’s her post about this set. I think I’m going to have to pull out all my black lace now because wow. Wow. She took the “Hack Your Bra” idea to heart and is just killing her Elan 645 pattern with all kinds of styles–bustiers, longlines

Did you make a bra and would you like to share? Let us know in the comments! Understandably, I got behind on all my blog reading, so I may have missed you if you blogged about it. If you were a secret sew-alonger you can email me, too. I’d love to hear about your project and how it went.

Over at the Flickr group we had quite the fitting expedition. I’m even in the process of custom-drafting a bra for someone! I really want to thank Norma Loehr and her generosity in answering so many of our fitting questions. And there were many!

It was such an honor to host this sew-along, chat with many of you, and I hope it inspired y’all to keep on at it! You caught the lingerie bug, didn’t you…

Note: All photos here are © their owners.

· Comments { 39 }

Bra-making Sew-Along: Elastic, Channeling and Finish!

Time for all the finishing bits! Okay, so there are a lot of finishing bits, so get on your elastic because this post is going to be picture heavy.

Band Elastic

If you’ve made other lingerie goodies with picot elastic, you’re probably familiar with how this is done. The first side is sewn with the fuzzy side up and a regular zig-zag, getting very close to the picots.

sewing band elastic

band elastic zig-zag

If you want to cut your elastic to measure, a good general rule of thumb is to cut a length about 85% of the seamline of your hem. I like to “feel” it in as I am sewing–just something that happens from experience with sewing elastic. How much tension I put on the elastic depends on the elastic quality.

I flip and on the reverse, stitch the elastic with a 3-step zig-zag. You could also stitch from the elastic side. I prefer doing it fabric side up so I can keep the puckers away:

band elastic 3-step zig-zag

I set my 3-step at 4.8 width and 1.2 length. (I wrote all my bra stitch lengths on a little post-it note on my machine so I don’t have to look it up every time I make a bra or panties!) The 3-step is just security to keep stitches from popping. But if your machine doesn’t have a 3-step, you can use a regular zig-zag and experiment with smaller stitch lengths.

Channeling

I know the channeling gets finicky. Readers have asked me about how I did this on previous bras so I thought I’d show in pictures!

I usually attach the channeling first, before putting in the band elastic. It’s easier to make that first pass without the elastic in the way but it adds another step and I wanted to make this simple visually.

First I lay down the channeling so its seam is right on top of the cup seam and start stitching right on that seam. To make sure I don’t accidentally stitch into the cup, I hold the channeling in my right hand, lift it up, re-arrange it as I go–while using my left hand to guide the cup seam. This has worked really well for me.

stitching channeling to seam

I stitch all the way to the top of the front but stop and backtack about 1/2″ before I get to the end of the underarm seam. It’s good to leave a little extra hanging off each end. This helps to finish the channel neatly later on.

After stitching the channeling I grade the seams if there are a lot of layers–and there’s quite a few here!

channeling seams

Before I do anything else, I close off the channeling in the front. Since the seams are still free and not topstitched down, I grab the top of the channeling with the cup seam allowances and fold everything else out of the way:

closing front of channeling

Then I stitch a really tight zigzag that almost looks like a bar-tack. Whatever it is, it needs to be secure!

closing top of channeling

The closure is invisible from the outside. (On my friend’s bra–I forgot to snap a pic of my mine!)

closed channeling bridge view

Time for the topstitching! I switch back to my straight stitch foot (ok, I just found out my machine calls this a “patchwork foot”). I turn the bra over and arrange the cup seams and channeling so they are folded under toward the band. If you’ve ever done an understitch on a facing, this first part is just like that. I hold the fabric on both sides a little bit taut, and start topstitching about 1/8″ away from the edge of the cup seam.

edgestitching channeling

I have to keep feeling to make sure this stitch is going into the channeling. If you sewed your first pass with the channeling seam on top of the cup seam, this shouldn’t be a problem.

Then I do another line of topstitching with the first line of stitching lined up right under my foot edge. This is about 6mm on my foot. Don’t forget to stop your topstitching 1/2″ away from the underarm so you can fold it out of the way for your elastic.

channeling outside topstitching

Underarm Elastic

Now’s the time to put in my underarm elastic. I do my first pass just like the band elastic with the fuzzy side up. I use a bit less tension in this elastic than I did with the band.

When sewing in the elastic I have to fold away the channeling–that’s why I stopped stitching it 1/2″ away:

applying underarm elastic

Before folding over the underarm elastic I put in my underwires, sliding them in from the open underarm sides toward the front.

inserting underwires

At this point you need to decide whether you want your channeling to be closed on top of the elastic or folded into it. I’ve done both and it really depends on how thick the channeling is!

Right below my thumb is where I’m going to close the channeling with another “bar-tack” again:

finishing channeling

I need enough room to fold down my elastic and stitch another 3-step–this is where that wire play I talked about comes in handy. I can’t tell you how many times my underwire has reached right to the fold of the elastic–a recipe for underwire and needle disaster!

After closing off the channel and stitching down the underarm elastic, this is what it looks from the outside:

channeling backtack

Almost there! Now I attach my straps and finish off with my hook and eye. Every pattern has a different width at the end of the band for a hook & eye attachment. You usually need to adjust that to fit your particular hook and eye width before you sew in your strap elastic:

attaching hook & eye

That’s it! My bras are done and I’ll be back Monday with photos and some roundup questions. Happy sewing weekend everyone!

· Comments { 16 }