A Guide to Dress Forms

Guide to Dress Forms | Cloth Habit

Let’s talk about one of sewing’s favorite subjects: dress forms!

Over the last month I’ve been shopping for a new dress form, both by doing a bit of online “window shopping” and by asking questions of various dealers and makers. It’s been a fun process!

The first time I went shopping for a dress form, circa 2002, I had access to very little information about them. The little that was out there on the internet about patternmaking and draping seemed to reinforce the mystique of, or my need for, a dress form. I was convinced that I needed one for any kind of serious sewing work.

Of course this was fueled in no small part by my lifelong romantic ideals of fashion designers all draping away on their dress forms. When I was a teenager, I used to imagine that a vintage Wolf form was something Molly Ringwald’s Pretty in Pink character might have kept in the corner of her bedroom. And I adored that character (what she did to that prom dress!).

I now own two dress forms. I bought one for personal use and one for professional pattern work and display photography. However, neither fills the specific need I have at the moment.

Why You May Want a Dress Form

Before I dive into dress form specifics, let’s talk about all the reasons one might want a dress form:

  1. You are a professional custom dressmaker or fashion design student who needs a form, or several forms, for patternmaking and draping. Chances are you already know what kind of forms work for you, based on your training, your clients, or what your school recommended to you.
  2. You often make very fitted patterns with a lot of design details, and want a dress form to assess style lines, or play with the drape of fabric.
  3. You draft your own patterns but prefer draping as part of the drafting process, rather than only working with flat patternmaking. It helps you visualize ideas.
  4. You want a form to mimic your body so you can use it as a fitting tool.
  5. You are a blogger or shop owner who needs a prop for styling and taking photographs.
  6. You are a collector! Or you simply want a fun clothes/jewelry showpiece in your house.
A guide to dress forms, with discussion on types of forms and their purposes (not just for patternmaking or fitting).
Source: 1st dibs, 18th century dress form

Do any of these stand out for you?

Knowing what you really want to use it for can help you choose from among the various dress form styles.

For example, when I look at this list, I’m most drawn to a form that works for both blog photo styling and makes an interesting collector’s piece. I’d also like the ability to pad the form for fitting purposes in the future. So I’m interested in looks as much as function.

Clearly I don’t prioritize having a form for fitting or draping purposes, which is probably the biggest reason many sewists want a dress form. The truth is, even if I had a better form or a totally customized body cast I don’t think I would use it very much for fitting. I prefer to fit directly on my body, and I can often visualize what flat pattern adjustments are going to do.

However, if you have trouble visualizing adjustments or pattern lines, a form might be a helpful tool!

Types of Dress Forms

Now let’s have a look at some of the different form types out there.

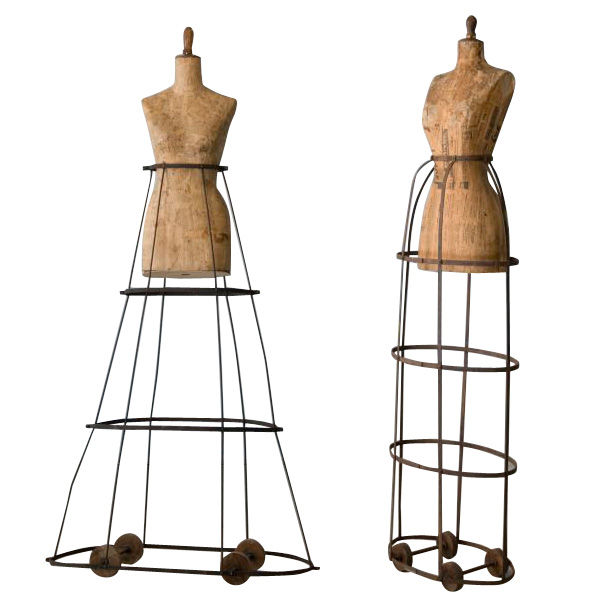
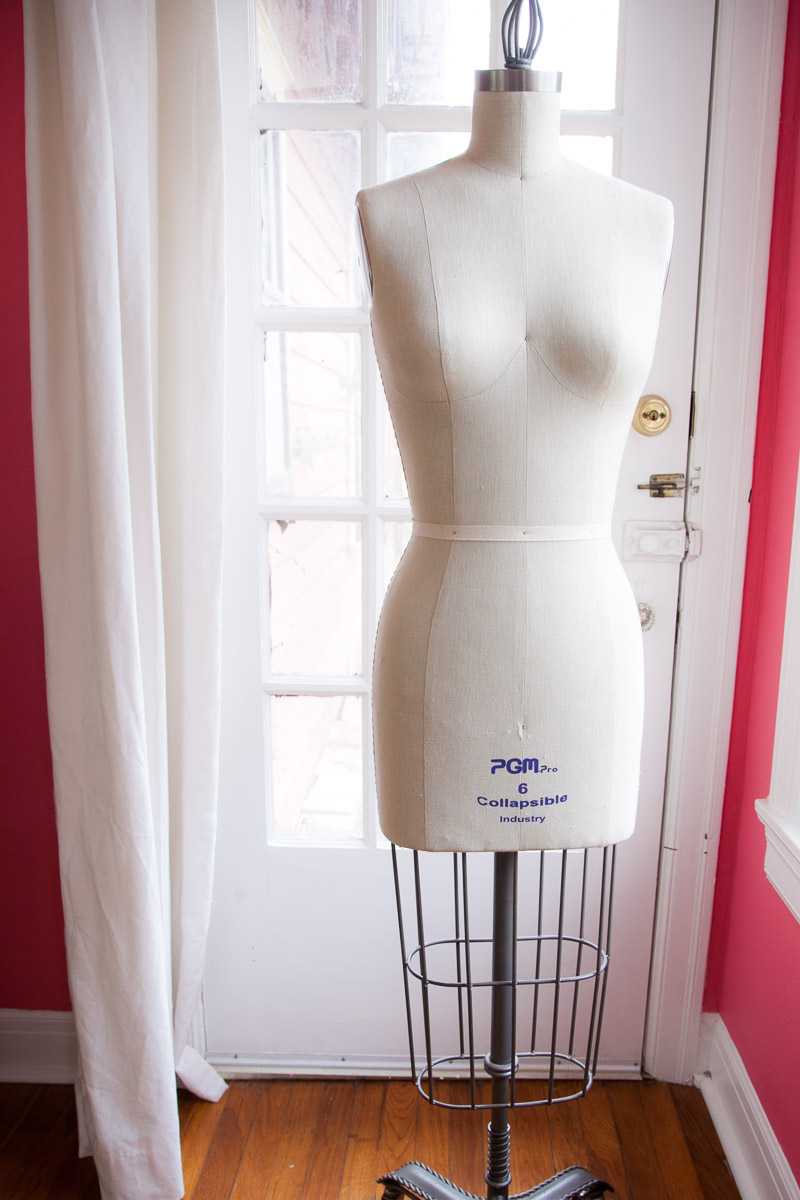
1. Professional dress form with cast iron base. These kind of forms are usually made with papier mache, padded with a few layers of cotton wadding and covered in linen. These are usually available either as a classic dressmaker form with a skirt cage or as a full body with legs.

Among these kind of forms is a huge variety in quality, and I’ll talk more specifics about these forms in my next post.

Guide to Dress Forms | Cloth Habit

2. Display form. These forms are often designed to look just like sewing forms but they are really produced for display purposes. The form is usually made from either foam or fiberglass, and have a more simplified body shape to them.

Some dress forms cover a middle ground between professional sewing form and display form. For example, Urban Outfitters is selling this dress form, which was probably produced as an inexpensive form by one of the major form makers:

Guide to Dress Forms | Cloth Habit

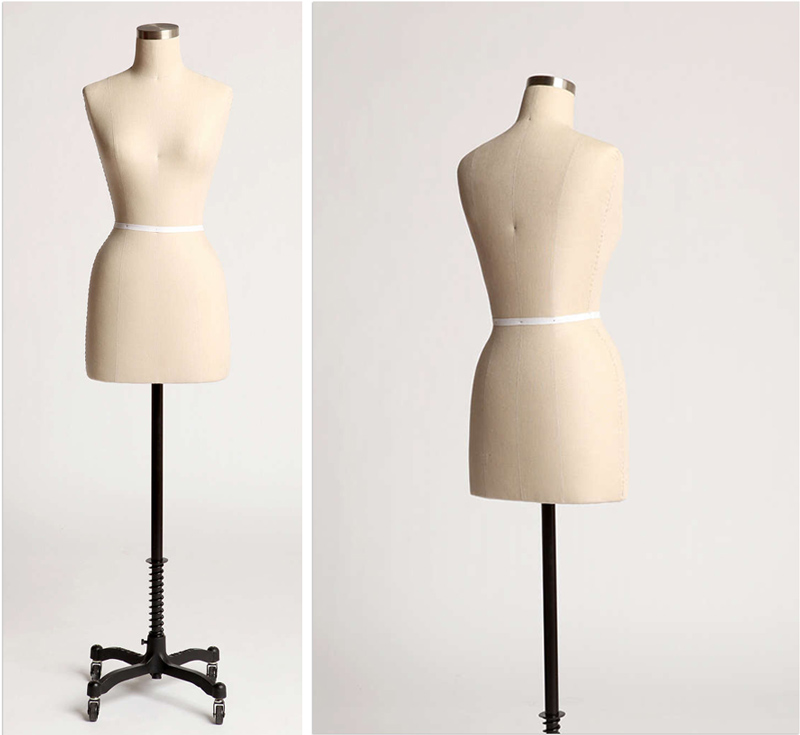
Although it is advertised as a sewing tool, it doesn’t have collapsible shoulders, is made from foam, and the stand has a height pedal that is purely decorative. You’ll also notice that the body shape is quite simplified, with absolutely no butt.

3. Adjustable dress form. These are the forms with dials that allow you to expand and contract the form as needed for different measurements.

4. Handmade dress form. There are a lot of fun methods for making a totally customized body form: plaster-casting, duct-tape and papier mache. Among these methods I’d include the mother of all crazy inventions, the Uniquely You form, which is a compressible foam form that you squeeze into a custom-fitted cover. Whoever first came up with the name “torpedo boobs” for this form deserves a sewing hall of fame star! I own one of these babies, too. A story for another day.

An important thing to keep in mind is that most dress forms can’t totally replace the work of fitting on an actual body. Bodies move and breathe. Most of these forms need work in order to replicate important body measurements and posture.

If you don’t need to do a lot of heavy fitting work, almost any of these will work for light sewing purposes. What you choose depends on budget, how much you need to fit precisely, or whether or not the form is for other non-sewing purposes.

—-

So after all this you may wonder what I’ve chosen for myself! As I mentioned I have a very specific need and I’ve narrowed it down to a few options. I’ll share more about that, along with what I loved and disliked about particular forms, in my next post.

Do you have a form? What do you use it for? What do love or wish you could change about it? And if you’ve blogged about your form, do share a link. I love reading dress form posts!

Be My Valentine Lingerie

Valentine lingerie set | Cloth Habit

On our first date, Derek took me to see Amelie in Prague, in one of those old European theaters whose screens still have curtains that close during a halfway intermission. We were the only two people in that tiny theater, and the experience was made especially mysterious by the fact that we were seeing a movie in French with Czech subtitles. I didn’t understand most of what was being said, but who needs language in a magical movie like Amelie?

Afterward we wandered around the empty city—it was October, and fairly tourist-free—in search of a shop that would sell us a hot chocolate to warm our hands, and ended our evening around four in the morning on Charles Bridge, with only the sound of a flock of birds flying overhead.

The whole night I felt like I was in a movie of my very own. I know that sounds cheesy but it’s true. Just like the main character, I’m a diehard romantic and it couldn’t have been a more poetic evening.

I’m thankful I married another diehard dreamer so I wanted to make a set for Valentine’s day. Of course, this is all a roundabout way of talking about sewing!

Valentine lingerie set | Cloth Habit

We haven’t been out on a Valentine’s Day in a few years. To be honest, I usually forget! Still, as life gets busier and as our marriage gets older, it’s good to have reminders to stop what we’re doing and just be together, the two of us. It’s not always about going out. Sometimes it’s just staying in, making a fire, talking and watching a film.

Even though that was the gist of our “date” this year, I still wanted to finish this just in time for Valentine’s night. It felt like a dreamer thing to do. Make a lingerie set for nothing other than staying in on a cozy winter night…

When I was drafting my strapless bra, the cup pattern fit so well that I started drafting a few other bra cups off of it. I ended up with a little stack of cup patterns that I’ve been slowing sewing up and this is one of those. I wanted something that would show off lace but at the same time feel feel comfortable and supportive and this design was the perfect candidate.

Valentine bra | Cloth Habit

Ignore my dress form, which does not fill out my bras!

I knew that the basic block/shape was going to fit based on a few measurements but I quickly taped up a paper cup so I could see if I had the strap point in a good position. This is actually neat little trick I’ve been doing for my bras. And I’m very happy with the fit! I love designs that have higher strap extensions. They make me feel much more “contained”, if that makes sense. (Here’s another example of a pattern with a higher strap point.)

The lace shorties are another pattern I am working on. I’ve made these several times but this is my first time posting about them. They’re a great excuse to use the same lace I’m using in a bra.

Valentine lingerie set | Cloth Habit

For the bra I threw in a few luxury treats, like silk ribbon, hardware detailing, and silk channeling.

valentine-bra-detail-2

Valentine bra | Cloth Habit

(And by the way, some of you asked about this… I am working on a tutorial for making your own silk channeling.)

And there you go… love and sewing!

Details:
Lace: somewhere off of Ebay…
Cup lining: Bra-makers Supply
Elastic and stretch mesh (lining the band): Fabric Depot Co.
Except the lace, all materials were dyed with Washfast acid dyes.

Guest Post: Make Your Own Bra Pressing Curve

I love making up sewing tools. There are times a tweezer works better than a bone folder, and a rubber hammer works better than an iron. I have a pencil that works great for spaghetti straps and probably do “wet finger” pressing on silk more times than I care to admit.

It’s really fun and easy to make your own pressing tools, and this week I’m pleased to share a guest tutorial on making your own bra pressing curve from my fellow lingerie-making addict Maddie Flanigan! You may know her from her blog Madalynne, gorgeous sewing photography and brand-new bra making workshops in her Philly studio. So let me step aside as Maddie brings on the drill…

——–

Make Your Own Bra Pressing Curve | Cloth Habit

Based on a similar item sold at Bra-makers Supply, my bra pressing curve has become a
valuable tool. I first came across it when Beverly Johnson mentioned it during her class
on Craftsy. She said it was easy to make and she was right. All it took was a trip to the
hardware store and about 30 minutes. I use it mostly to press cross cup seams without
touching other parts of the bra.

Supplies:
All supplies except for round ball can be sourced at most hardware stores such as Home
Depot and Lowes.

  • Power drill
  • 3″ wood round ball
  • 5.5″ x 5.5″ wood square
  • 1 1/4″ diameter wood dowel
  • Dowel center pins
  • Brad point or dowelling drill bit
  • Just like bra making, sourcing all those little bits can be intimidating. To make it easier, you can buy a dowel kit such as this one.
  • Regular drill bit
  • Pencil
  • Masking or painters tape
  • Wood glue

Make a Bra Pressing Curve | Cloth Habit

Prep: Most likely, your hardware store will sell long, rectangular pieces of wood, not one that is exactly 5.5″ x 5.5″. The same goes for dowels. Having it cut down isn’t a hassle. The hardware store should do it for free. Ask to have extras pieces cut so you have a spare in case you mess up.

Step 1: Using a pencil, mark the center of the sphere, the center of the dowel at the top and bottom, and the center of the square at the top and bottom as well. Mark all of these points with a cross mark.

Make a Bra Pressing Curve | Cloth Habit

Make a Bra Pressing Curve | Cloth Habit

Step 2: Mark the center of the dowel pin and then place it next to the drill bit as shown. Using masking or painters tape, wrap the drill bit at the point where the center point is on the dowel pin. Why? Because you don’t want to drill too far into the ball or the dowel.

Make a Bra Pressing Curve | Cloth Habit

Make a Bra Pressing Curve | Cloth Habit

Step 3: Use power drill to drill a hole into the ball and the dowel at both top and bottom. To ensure that you drill straight down, use a quick grip clamp or have someone hold the ball and the dowel while you drill.

Make a Bra Pressing Curve | Cloth Habit

Step 4: Connect the ball with the dowel by placing a thin coat of wood glue on the dowel pin and inserting one end into the ball and the other into one end of the dowel.

Make a Bra Pressing Curve | Cloth Habit

Step 5: The final step is to connect the dowel/sphere (which is now one) to the wood square. Using a regular drill bit, drill from the bottom of the square block up through the bottom of the down with a regular screw.

Make a Bra Pressing Curve | Cloth Habit

Make a Bra Pressing Curve | Cloth Habit

Adventures in Cutting Mats

caring for a cutting mat | Cloth Habit

Over the last month I’ve been in a mood to upgrade and tend to my sewing tools. I acquired some new marking tools, sharpened my shears, cleaned and oiled my sewing machines, and biggest of all, DIY-ed a proper cutting height table from an old dining table top. That last one has been a life-saver!

While I was at it, I had a good look at my rotary cutting situation. I’m not a big rotary cutter user. I love my shears and always feel like I have so much more cutting control with them, especially when going around tight curves. However, there are times when a rotary cutter comes in handy, especially when I’m cutting lace, or more recently, five yards of silk bias binding.

I kept feeling like I was missing out on some big secret because my cutter never seemed to cut all the way through fabrics. It did not matter if I had a new blade or a more expensive blade. Any time I used it I’d have to run back through the pattern piece with my scissors to cut any bits the rotary skipped.

After awhile I began to think the problem might be my cutting mat.

I had two large Olfa green cutting self-healing mats that I could piece together for one large mat if needed. I liked that because it made for easier storage, but my new cutting table allows me have a “full-time” cutting mat!

While wading through the many choices in cutting mats, I came across a few interesting discoveries but I wanted more technical information on mat types. I wrote Mike Barnette, owner of cutting-mats.net, a big online shop devoted to drafting and cutting tools. I figured that might be the place to get the lowdown!

Self-Healing Mats

Most of us are familiar with “self-healing” mats but did you know these mats don’t technically heal? The scratches remain but close back up by virtue of the surface being softer.

Mike told me, “Most self healing mats have a hard plastic core with layers of other plastic materials.” Usually the top and bottom surface is a softer vinyl layer. “When the knife blade is removed from the cut, the vinyl layer appears to ‘heal’ itself.”

Among self-healing mats, there are various qualities and thicknesses. For instance, most Olfa mats advertised for rotary cutting are 1.5mm thick. These are the standard type you find in craft stores. Olfa also makes a more “professional quality” self-healing mat that is 3mm thick. Thicker means longer-lasting and Mike advised me to pay attention to the thickness above all else. If you are a crafter or sewist that uses a mat daily, you may want to look into a mat that is thicker than the typical 1.5mm hobby mats.

Solid Plastic Mats

A step up from the self-healing mats are those made from solid plastic instead of multiple plies of poly material.

According to Mike, these “hard surface” mats are made from solid polyethylene plastic (they do not have a vinyl surface). He says that these mats can have some self-healing properties, although they are not advertised as such.

Prolonging a Mat’s Life

Most importantly, I learned that all mats have a lifespan (just like needles and pins–we all change those, right?) and eventually lose their cutting mojo. According to Mike, “many variables affect a mat’s lifespan, including type of material being cut, type of knife used, sharpness of cutting blade, cutting pressure by user, or how often mat is rotated during repetitive cuts.”

His top piece of advice? “ALWAYS change your blade often. It makes no sense to pay $100-300 for a cutting mat and not change a $3 blade.”

To preserve the lifespan of a mat it’s important to:

  • Change blades often.
  • Rotate the mat regularly.
  • Clean regularly with warm soapy water. (I also find a lint roller useful, which helps pick up “invisible” fibers.)
  • Don’t use more cutting pressure than is necessary. I’m in the habit of pressing extremely hard in order to cut and I’m going to have to train myself to cut a little more lightly or whatever is required by a certain fabric.

choosing and caring for a cutting mat | Cloth Habit

I had already purchased my mat before my emails with Mike but I am very happy with my choice so far. It is a Mega Mat in the exact size of my cutting table. (I later learned that Mike’s company will cut custom mats to your size at no extra charge.) My new mat is a solid plastic mat, and about 2.5mm thick, and is advertised as “pinnable”, which I think just means the plastic is soft enough to hold a pin.

While not as thick as some Alvin self-healing mats or very thick solid plastic mats I hope this provides me with some good cutting for a few years! Just by virtue of being new, I could immediately tell the difference in cutting. My rotary cutter works SO MUCH better. I’m ready to start cutting some bias tape!

Do you have any secret tips to happy rotary cutting? I’d love to hear them!

Watson Sew Along: How to Attach Bra Straps & Closures

BHow to Attach Bra Straps and Closures | Watson Sew Along

It’s our last day of the sew along! I hope you have enjoyed making your own lingerie as much as I do! Along the way I’ve covered many lingerie sewing techniques, materials and some of the “whys” behind them. I hope these give you confidence in sewing your next lingerie projects!

Today we are going to put the finishing touches on the bra by adding the straps and attaching the hook & eye.

Adjust the Back

Hook & eye closures come in a few different widths, so your chosen closure may be slightly smaller or slightly bigger than the pattern’s. On a scoop back strap attachment, this is easy to adjust near the end of the bra. It’s simply a matter of changing the point where the strap elastic joins the center back.

Place your hook & eye closure next to the end of the band. Mark a spot slightly under the top of the closure.

attaching bra straps | Watson Sew Along

Trim away the excess, curving gradually into the original strap point at the top of the band. Repeat the same step for the other side.

attaching bra straps | Watson Sew Along

If you are using uncut hook & eye tape, simply cut your tape to fit over the center back.

Attach the Straps

From the right side of the bra, line up your strap elastic with the cut edge of the fabric. Stitch it in with a small to medium width zig-zag, taking a few backward zig-zags at either end to secure.

attaching bra straps | Watson Sew Along

Sew this elastic in flat without pulling or stretching. The zig-zag should be on the inner side of the elastic, toward the bra. I use a 3.2 width, 2.0 zig-zag.

Underneath the strap, away the excess fabric close to the stitches.

attaching bra straps | Watson Sew Along

Secure the Strap Rings

Thread the top of the cup through your strap ring and from the wrong side of the cup secure the fold with two lines of stitching. Remember how I left some extra elastic hanging off the end of the cup? This gives me something to hold onto and keep the fold taut as I am stitching:

attaching bra straps | Watson Sew Along

Secure with a small straight stitch, about 1.5 to 2.0 in length. To make stitching easier, stitch one forward line of stitches, turn the work around—just like I did when I assembled my straps—and stitch the second line back over the first. If you are having trouble with this bulky fold slipping out of place, try starting your stitches in the center of the fold, rather than the edge of the elastic. Use the handwheel for assistance.

Trim away the excess fabric near your stitches.

attaching bra straps | Watson Sew Along

For the scalloped lace cup version, the steps are the same. Since the width of the strap fold will vary based on the size of your lace scallops, that extra elastic hanging off the end is convenient for giving you more “loop length”.

attaching bra straps | Watson Sew Along

Attach the Hook & Eye

Start by sewing in your eyes. From the left side of the bra with the right side of the band facing up, slip your eye closure over the ends.

Hook & eye tape have little “envelopes” which slip over the ends of the bra band. Sometimes these envelopes will be heat-sealed, and to make attaching easier, pry them open. The envelopes will overlap your fabric by about 1/8” to 1/4”.

attaching a hook and eye | Watson Sew Along

Set your stitches to a small zig-zag. I use a a 1.5 width and 1.0 length. Slip your eye tape over your ends and arrange them under the presser foot. Line them up in such a way that the left side of the zig-zag will end just near the edge of the eye tape. Stitch across the tape, securing with backward zig-zags at each end.

attaching a hook and eye | Watson Sew Along

Tip: It helps to go slowly, and to start stitching a little bit away from the end of the tape, then backtacking. In the above photo you can see that I arrange everything while the foot is still up. Once I get it all into the proper position, I keep both hands on the layers and drop the foot with my knee lift.

attaching a hook and eye | Watson Sew Along

Attach the hooks to the right side of the bra, with the wrong side and the hooks facing up.

The hook side is tricker because the hooks will be so close to the foot. If your machine has the option to move the needle position, this will come in handy. Move your needle all the way to the right and set the stitch to the same zig-zag you used for the eyes. Arrange the layers carefully underneath your foot and slowly stitch across the tape.

attaching a hook and eye | Watson Sew Along

If your machine does not have a needle-adjusting option or you can’t get close enough to the edge of the tape without hitting the metal hooks, try switching to a narrower foot and use a straight stitch instead. Use a small stitch length, about 1.5-2.0 in length and backtack at either end to secure.

attaching a hook and eye | Watson Sew Along

And you’re finished! Congratulations–you’ve made a bra! (Or two.)

finished lace bra | Watson Sew Along

finished bra | Watson Sew Along

Have you made a Watson set? Show it off! You can upload your project photos to the Cloth Habit Flickr Pool, or on Instagram, use hashtags #watsonbra or #watsonbikini. I’ll be featuring some of your work in a blog post next week!

Thank you all so much for sewing along, and for all your helpful comments, questions and shares here and in the FB group!