Reader Question: Sewing Machines for Lingerie

what to look for in sewing machine features for lingerie making | Cloth Habit

Hi Amy, I’m interested in sewing lingerie. Do you recommend a sewing machine or are their special features I should look for?

Over the past year or so I’ve received many questions about how to choose a sewing machine for lingerie or bra making. Some of you feel your old machine is just not up to the job, and some of you are brand new to sewing and possibly picking out a machine for the first time.

I’ll share some features that I appreciate in lingerie sewing but I think it’s important to start here: you don’t need a specialized machine to make lingerie (or bras).

On my particular machine I have sewn leather, wool, fur, silk and delicate lace. Unless you want to start your own lingerie business and plan on doing production sewing (making 100 or so of the same thing in the same fabric over and over), a good domestic sewing machine is all you need!

So what’s good? Well, that depends on your experience and budget.

If you are brand new to sewing and inexperienced with sewing machines, I recommend visiting a local sewing machine dealer. Nowadays a lot of us just want to press buy and get it right on our doorstep! But hear me out: Where you buy your machine is often more important than what brand you buy. A good machine dealer can help walk you through machines, may offer free classes on the one you choose, give you a better price than you’ll get online (true for all three machines I have bought), and more importantly technical support when things go wrong. And trust me, occasionally things do go wrong.

If you have experience with a machine you probably have a good handle on a few things you like or don’t like about your current machine. If this is your situation, test-driving a few machines with your favorite fabrics is going to be your best guide.

For lingerie and bras in particular, here are a few features I would look for:

1. Adjustable foot pressure

If I were to pick one feature I couldn’t live without, this would be it. I have turned away many a beautiful vintage machine because I couldn’t adjust the foot pressure.

Adjustable foot pressure is a great thing to have for any kind of sewing with knits and lightweight silks. I find it invaluable for sewing stretch lace and other light lingerie knits. Loosening foot pressure can help the foot glide over fabric rather than push it and cause mismatched or wavy seams.

2. Easy to fine-tune zig-zag length and width

Some vintage and really low-end sewing machines only offer a few predetermined zig-zag stitches. For underwear and bras, you’ll be using zig-zag stitches a lot! And you’ll want to change and fine-tune the settings for each project.

3. A 3-step zig-zag

This is a fairly common feature on mid-range and up machines, but many older and low-end machines don’t include it.

Triple zig-zag stitch is a very good machine feature for bra and lingerie sewing | Cloth Habit

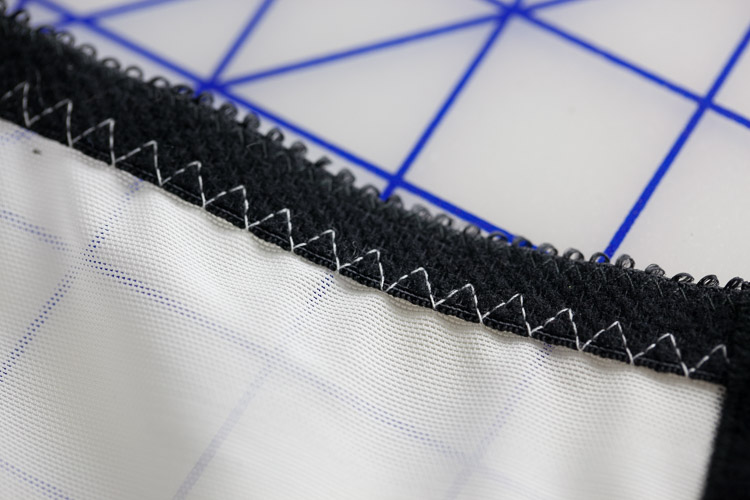
A 3-step zig-zag (or triple zig-zag) takes 3 steps up and 3 steps down. For most lingerie and elastic, a regular zig-zag works just fine but a 3-step is extra strong, and useful for areas where you want extra durability in your zig-zag stitches.

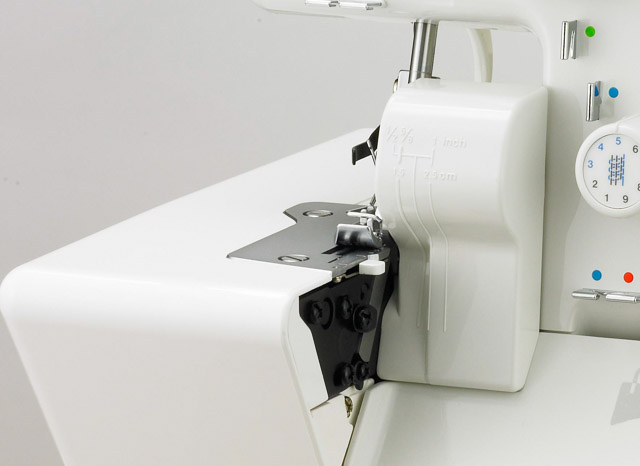
4. A straight stitch foot

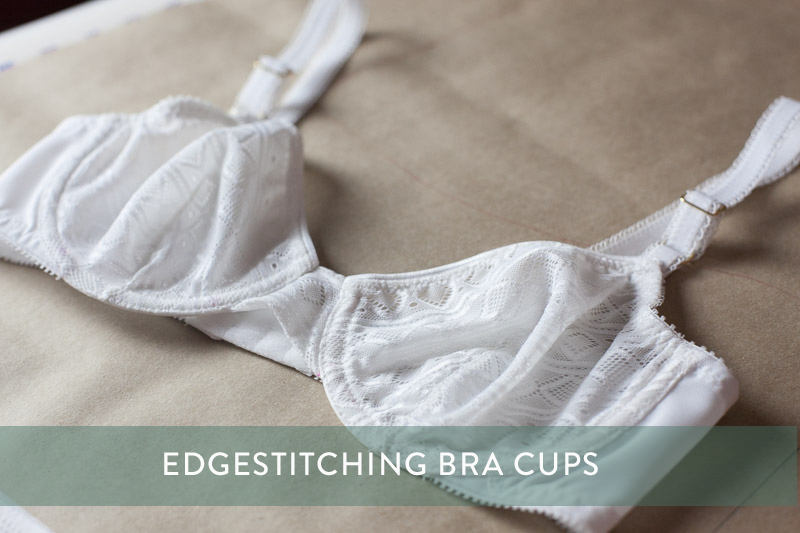
A straight stitch foot is useful for sewing 1/4″ or 6mm seams. Similar feet go by different names. Look for a foot that has a 1/4″ or 6mm distance between the needle and the edge of the toe. This might be a straight stitch foot, 1/4 foot, or a patchwork foot (this is what I use for my Juki). Whatever it is called, this will be slightly narrower than the “all-purpose foot” that comes with your machine.

The great thing about feet like this is that you can use the foot as a seam guide wherever you are sewing 1/4″ or 6mm seams, which are typical on bras. I also use them to achieve neat topstitching rows.

Examples of straight stitch feet for 1/4" seams | Cloth Habit
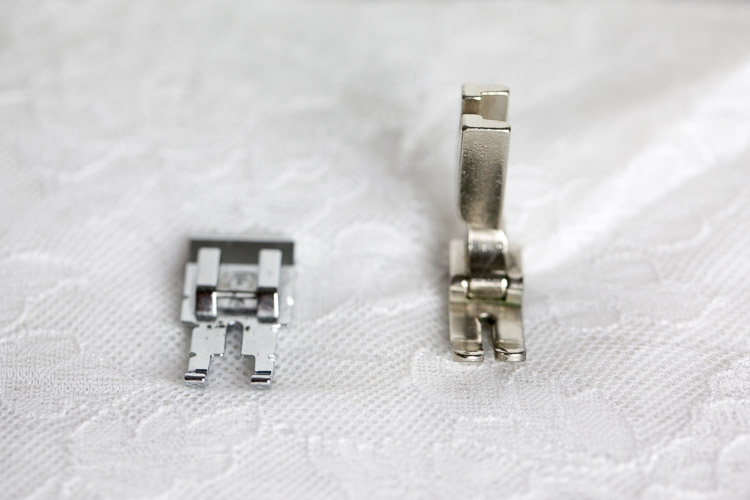
On the left is my Juki’s patchwork foot and on the right is a generic industrial straight stitch foot that can screw on most industrial and vintage machines.

—-

And that’s it! Just four features I’d consider essential in lingerie or bra sewing.

Of course those aren’t the only things I’d personally look for if I was shopping for a machine right now. For example, I prefer to have a knee lift so that when I am sewing tight curves I can keep my hands on the fabric while occasionally lifting the foot. And good machine light is super important to me! But these features are things I have learned to appreciate with experience.

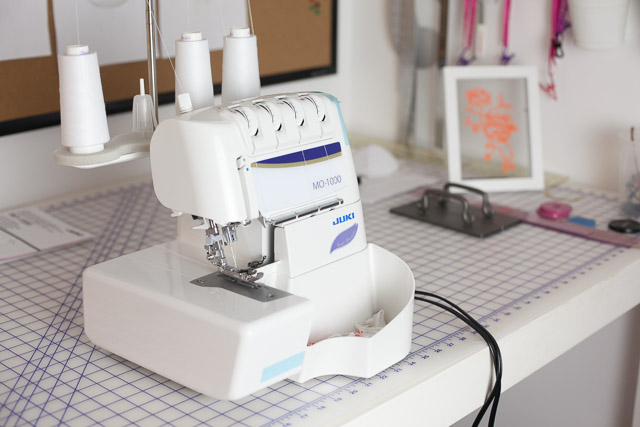
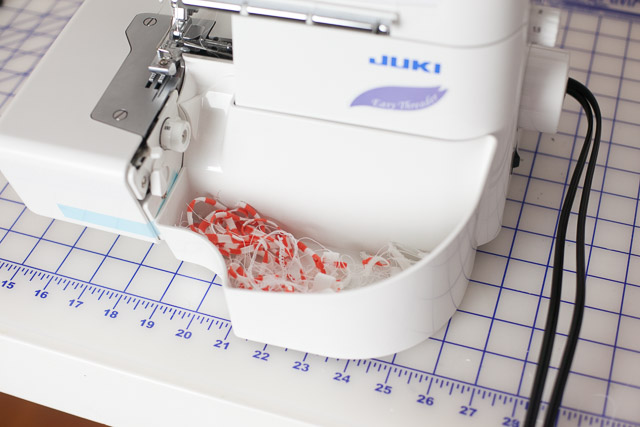
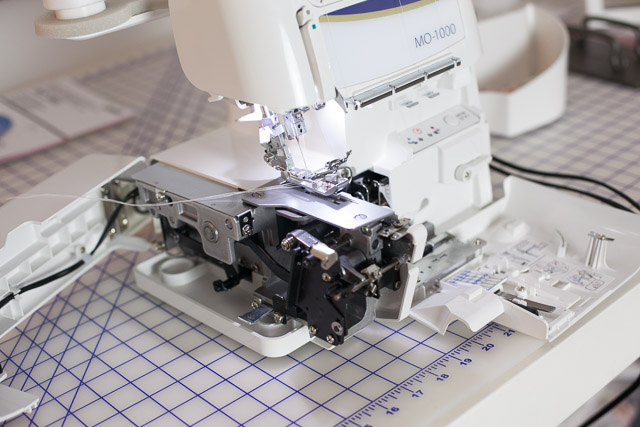
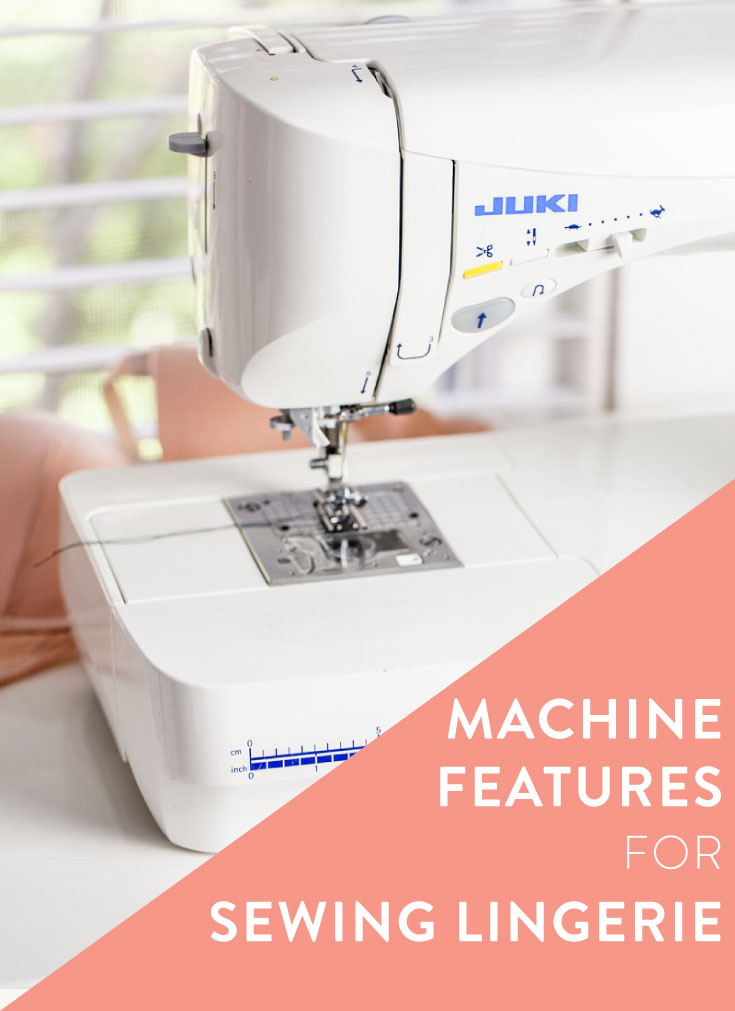
In case you are curious about the machines I use, I have several but I use a Juki Exceed for all of my lingerie sewing. It has served me happily for about five years. I occasionally use a vintage Bernina 830 that I pull out for regular sewing when I’ve had to service my Juki. It is a fantastic vintage machine that will last forever, but it’s a great example of one that has no presser foot adjustment or triple zig-zag. These were two of the missing features that drove me to a newer machine.

If you sew lingerie, what machine features are important to you? Any tips to offer my international readers?

Other sage sewing machine advice (not just for lingerie):

Tie-Dye Sallie

Tie-dye Sallie jumpsuit from Closet Case Files | Cloth Habit

Ahoy, and Happy July!

The last couple months I have had a bit of an obsession with knits. I can’t stop sewing or wearing them. I love how easy they are to sew, to satisfy my maker itch while I work on bigger patternmaking projects and manage a home renovation. For the first time I’m sewing most of my summer wardrobe and filling all those “basics” holes. And it feels good!

When Heather of Closet Case Files asked me to test her new Sallie jumpsuit pattern, I had the fabric (and the dye) ready to go before the pattern was in my hands. A 70s knit jumpsuit? Yes, please!

I love testing patterns for Heather but this one was a real treat. Both Sallie and Heather have been some of my favorite sewing bloggers. When they came along many sewing blogs were focused on technique tutorials and commercial pattern reviews. The sewing blog landscape has certainly changed but I loved how they mixed a storytelling voice with style and technique. It helps that they both inspire me with their bohemian chic and breezy way of putting things together!

Fandom aside, I have been dreaming of a tie-dye jumpsuit for three summers now. I’m not sure where I got that itch but I’m glad I finally scratched it.

Tie-dye Sallie jumpsuit from Closet Case Files | Cloth Habit

I really dig this pattern. It’s easy to make, such an easy-breezy style to wear in summer and the style reminds me of a couple of 70s Stretch-n-Sew Patterns I inherited from my grandmother.

Tie-dye Sallie jumpsuit from Closet Case Files | Cloth Habit

Derek had to force me to stop putting my hands in the pockets. What is it about pockets? I usually leave them out of knits but I really love having them in jumpsuits and these are the perfect hand length.

And not till I saw these pictures did I see how I managed to get some strong dye effects across the butt…

Tie-dye Sallie jumpsuit from Closet Case Files | Cloth Habit

For this project I wanted to play with simple tie-dyeing. I started with an undyed cotton spandex jersey, stitched the jumpsuit up with dark thread and played with some basic folding and tyeing.

Tie-dye Sallie jumpsuit from Closet Case Files | Cloth Habit

Then I prepared a dye bath with black fiber reactive dye and let the whole thing soak for about an hour. Some tie dyeing projects require 24 hours but you can still get great permanent tie-dye colors in an hour. And you’ll notice that the black dye largely turned out dark saturated blue which I love. Getting a good black in tie-dye will take some experimenting…

Pattern Notes

My version is close to the final pattern. during the testing process Heather made a few changes for better fit and construction. This jumpsuit is meant to fit quite slim around tummy and butt but after wearing it about my cotton jersey softened up quite a bit, so it falls more loosely from the waist than it did when I first put it on.

I also made a few changes simply for my personal wearing taste. Both versions of the top are lined, which provides a nice clean finish to the edges, a casing for the elastic and in the camisole version, a way to secure the straps. For most of my summer knits I like as few layers as possible in my climate so I had to change a few things to eliminate the lining. I finished the edges of the camisole and created the straps in one go with my coverstitch binder. For the elastic casing I stitched in a separate strip on top of the seam allowance.

Tie-dye Sallie jumpsuit from Closet Case Files | Cloth Habit

I love that this pattern includes two tops, one of which is more “bra-friendly”. But on that note, allow me to pause for a moment to talk bras (of course!). I am wearing my own custom strapless bra underneath this. I know that I am petite up top so you might be thinking, what does she have to worry about? Let me tell you that I do need one if I want to wear tops like this.

Fitting my own was so worth the extra work because I can barely feel this bra in comparison to all the others I have worn. I won’t lie; it was work from draft to fit but I can testify that a comfortable strapless does and can exist and is worth trying if you love bra-making!

I’m digging this pattern so much that I have two more planned. One is going to be a little more glam. (I basically want to copy Heather’s black version!) Jumpsuits are funky alternatives to dresses, which I wear a lot in summer, and in our heat I need all that insta-dressing I can get!

Are you a jumpsuit fan, too?

Details:
Pattern: Sallie by Closet Case Files
Size: 8, with a few adjustments
Dye: fiber reactive dye in “New Black” by Dharma Trading
Fabric: undyed cotton spandex jersey (bought at wholesale)
Waist elastic: Fashion Sewing Supply

Choosing a New Serger

It’s that time of year in Austin. It’s getting hotter and hotter and all I want to wear are knits! So this month I’ve been sewing up a bunch of knit projects, and decided it was about time to upgrade my serger.

Meet my new addition!

my new serger, a Juki MO 1000

I’ve been thinking about upgrading for awhile now. I bought my first serger, a Babylock Imagine, about 13 years ago. It is still a fantastic little machine. I bought it barely used on eBay for an absolute steal–I felt so lucky!

I loved how lightweight and easy it was to set up but over time a few specific things started driving me crazy. Two of them were fixable but others weren’t. I wanted a machine that had better lighting and wouldn’t bounce around my sewing table.

At first I thought it’d be natural to upgrade to another Babylock (you bet I love that jet air threading!). Then I started looking at Juki sergers. They get great reviews and I already own two awesome Juki sewing machines (an Exceed F600 and a TL-2010).

Testing the Juki MO 654DE

Over Christmas I bought and tried the Juki MO 654DE for about a week.

Juki MO-654DE

It’s a super quality serger for the low price, and I understand why the Juki portable series are so popular. It’s lightweight, easy to set up and makes great seams. Contrary to the horror stories I’d heard about threading sergers, I found manual threading to be quite a breeze! Juki machines are all very good about including thread guides with little guide dots so I never got confused about what went where.

However, the deal breaker was the lack of space around the foot and knife. There is a knife cover that goes right up to the edge of the foot and when you pull it away, the machine locks as a precaution.

Juki MO654DE knife cover

This made it impossible lift the presser foot and slip some materials just under the knife to give them a head start. This is a little trick I do for seams on some bulky or slippery knits. If I merely place some of these fabrics at the head of a serger foot and allow the feed dogs to pull them under, the top layer gets pushed back and the seam misaligns.

There were other things that bothered me, including how much I needed to tweak the presser foot pressure, thread tension and differential feed to get mesh knits to stop twisting. I sew these fabrics a lot. On my Imagine, I never had to adjust differential feed, and it also had automatic tension.

After this experience, I knew it might be a good idea to visit a dealer and do some test drives!

And the Winner is… Another Juki!

Before going into the dealer I researched a few machines, including a Babylock Enlighten and a Janome 1200D. I really liked the Janome, at least from what I read about it, but sadly the dealer did not have it in stock.

After looking at some Brother and Singer models I gravitated toward another Juki that I hadn’t heard about–the MO 1000. While pricier than the MO 654DE, it was less than the other two models I was considering.

What I brought with me to practice on: lightweight stretch mesh, sweatshirt knit, cotton jersey, rayon jersey, wool gabardine, and silk crepe. Even without changing needles it handled them all beautifully.

I loved this machine!

First, it is quiet, at least quieter than my Babylock and other machines I tried. It has a nice hum that purrs more than chops. And when it is going fast it does not move. The base is firm and stable.

It has push button threading! I think this is the first non-Babylock machine to offer this feature.

Juki MO-1000 push button threading

It has a nice removable waste catcher. I never thought about this as a feature but it will save me space. (I usually keep a plastic tub next to my serger.)

Juki MO-1000 waste catcher

It’s easy to clean on the front and the sides by swinging out the housing, and very important to me feature–a bright enough LED light.

Juki MO-1000 led light and insides

Overall I’ve been very pleased and more importantly I felt like I knew what I was doing as soon as I started sewing on it. That sort of thing is intangible but if you’ve been sewing for awhile, you know what I mean! I swear I’m not trying to stick with Jukis, but I keep gravitating toward them. They’re doing something right.

Final Thoughts on Machine Shopping

Those of you who are research fanatics like me, I can’t recommend highly enough visiting a dealer to try some machines if you want to upgrade. There’s a good chance you have favorite materials–bring a bag of those scraps with you. There’s no better test than sewing with your usual suspects.

Another plus for dealers–the price. Thankfully the dealer I often frequent is not a “hard seller” where I feel as if I’m being talked into something. I’m not a good haggler so I’ll usually take the price as given or ask to buy the floor model. But even with my meek ways, I got a better deal than the price that’s going on Amazon, for example.

In addition, the salesgirl who walked me through the machines also gave me some new priceless tips on serging I’d never tried before. I figured out a lot of things on my own over the last ten years but all through trial and error. Perhaps a course would have sped that process up!

What serger do you use? I’d love to hear!

The Magic of Edgestitching

Edgestitching bra seams | Cloth Habit

Do you press seams when making a bra?

I’ve been asked this question a few times. You may be surprised to know that iron pressing isn’t necessary in making bras. The only time I have pressed during the making of a bra is when I have made my own underwire channeling. That’s it!

But wait, you ask, how can you get smooth cup seams without pressing?

It’s easy to get into the habit of treating every seam the same way. After all, home sewing instructions place a lot of emphasis on pressing as the way to a truly flat or smooth seam. It’s the key to a professional look and all. And while that is true for many garments, there are other techniques that often get overlooked as being equally important.

Let me explain. Many home sewing patterns place too little emphasis on understitching and edgestitching. Both of these stitch techniques are common in industrial sewing and important to flat seams.

In bra manufacturing, irons rarely if ever touch a bra. One reason is that most bra materials don’t respond well to pressing. Nylon and polyester knits just don’t hold a crease. (Not to mention it’s easy to melt nylon with your iron if you’re not careful! Ask how I know that one.) Unless you are using a woven fabric from a natural fiber, most bra fabrics will flatten and fold with the aid of *stitching* more than the aid of heat.

Let’s call this “stitch pressing”–pressing with a stitch rather than with an iron.

Edgestitching bra seams | Cloth Habit

Edgestitching is a form of topstitching in that it shows on the right side of fabric. Instead of just being decorative, it actually serves to flatten a seam and is done very closely to the seam. To edgestitch, you want to stitch about a needle’s width away from the seam, and catch the seam allowance while doing so. A “needle’s width” is about 1/16” to 1/8” (2-3mm) but no more than that.

For bra cups with seams, you have two choices:

1. Turn both seam allowances to one side of the bra cup and edgestitch them down on one side of the seam. This is how I usually sew cups made from lightweight bra fabrics and laces.

Edgestitching bra seams | Cloth Habit

2. Open the seam allowance and edgestitch along each side of the seam. This works well if the bra fabric is denser and the seam needs less bulk. Normally, I edgestitch from the right side of the cup but if the seam allowances won’t stay open I often edgestitch from the wrong side of the bra with the seam allowances facing me. This helps to keep those bulkier seams open and truly flat:

Edgestitching bra seams | Cloth Habit

While you are edgestitching, use your hands to flatten the seam as it is going under foot. If you gently push the side that you are edgestitching away from the seam, your seam will be flatter than any amount of pressing would achieve—and will stay that way permanently!

And p.s. A happy happy spring sewing everyone! I’ve been gardening more than sewing the last couple of weeks but who can resist roses!

Fitting a Moulage

drafting a moulage | Cloth Habit

When I’m really craving a learning challenge I like to try out a new patternmaking method. It’s so much fun pulling out rulers (or in my case, Illustrator) and giving my analytical side something to circle around for a little while.

For my latest challenge I tackled a pattern fitting project I’ve been wanting to try for a few years–a moulage!

What’s a moulage, you ask? The term literally means “molding” or “casting”, and its use in garment making has origins in French couture. Sometimes “moulage” refers to an actual pattern, a skin-hugging hip length bodice that is fitted precisely to a person’s body. Often it refers to the whole process of manipulating fabric on a dress form as a method of developing women’s patterns and designs—aka draping or draping on the stand.

The art of moulage at Christian Dior:

Now you all want to go out and take draping courses, right?

So let’s turn back to the moulage as pattern. My favorite vintage patternmaking book, Dress Design: Flat Patternmaking & Draping, calls the moulage a “French lining pattern”. I suspect that it became known as a moulage precisely because it was connected with dress form draping. Couture houses have a long tradition of creating personalized dress forms that represent their wealthiest or most regular clients, and to get there, a form would be padded out to “map” a client’s body, thus quickening fitting times.

My goal in drafting one is exactly that–I’d like to pad out an older dress form to better replicate my body.

The Pattern

Kenneth King moulage book | Cloth Habit

For my draft I pulled from my shelves Kenneth King’s book, The Moulage. He has been publishing this for several years as a CD book. Thankfully I printed it back when I first bought it because Macbooks no longer have CD slots!

If you are interested in other sources of moulage drafting, Suzy Furrer’s Craftsy course and her patternmaking book are places to learn. Her drafting method is nearly identical to Kenneth King’s; they learned from the same teacher and couturier. (The vintage book I mention above has a drafting method for a similar pattern but is not as thorough.)

In both Kenneth and Suzy’s methods, the moulage becomes a foundation for drafting a less fitted “sloper”, a bodice with a bit of ease, which then becomes the foundation for other garments. I don’t have a need for a bodice sloper, and if I didn’t already have one, there are other (easier) ways of drafting one without having to start with a moulage.

The Fitting

So how did mine turn out?

Drafting the moulage was actually the easy part. I had fun with it! The part that needs the most attention is measuring as it relies on a few really accurate points. Thankfully I had most of these measurements recently taken and just had to double check a few more.

fitting a moulage | Cloth Habit

This is my 2nd fitting. In my first try-on everything was surprisingly close but it all needed to be taken in at various points. Adjusting it all is actually fairly easy since there are so many seams. My pattern has 16 pieces in all, 8 in the front and 8 in the back.

With all these seams and lines it’s been helpful in seeing imbalances on my body. For instance my right shoulder is lower, which causes that diagonal wrinkle near the armpit and pushes a bit of excess fabric into the neckline:

fitting a moulage | Cloth Habit

And my right hip is slightly higher. You can see in these photos that after moving around a bit fabric tends to get hung up on my right hip. (The pants back is a photo from a fitting I did in the fall but illustrates the point!)

fitting a moulage | Cloth Habit

For these fittings, I used an inexpensive cotton twill that I found at Joann Fabrics. It was a perfect test fabric! Twill has a tighter weave than cotton muslin, which gives it a bit more shape and substance. (Muslin has a tendency to squish into the flesh a bit.) Any kind of tighter cotton woven, such as cotton twill or cotton drill, would fit more smoothly.

So where will I go from here? I’m going to tweak some of the remaining issues (a little too much length in back, uneven shoulder and hip), which means I’ll end up with separate right and left patterns. Might sound crazy to some, I know! If you happen to take the Craftsy course, students are often encouraged to move on to their slopers when they achieve “good enough”, since the moulage is just a starting point.

However, I’m going for as perfect as possible for my dress form. For my final version I’m using cotton coutil, a traditional corset fabric. It’s a an unusual choice for a dress form cover, but coutil has a really tight weave with a gorgeous smooth surface. I want a cover that will last a long time!

Have you ever tried a moulage? I’ll admit it’s kinda freaky looking at myself in a body envelope but I’m having so much fun with it!