Polka Dotty Lingerie

dotted knit foam bra

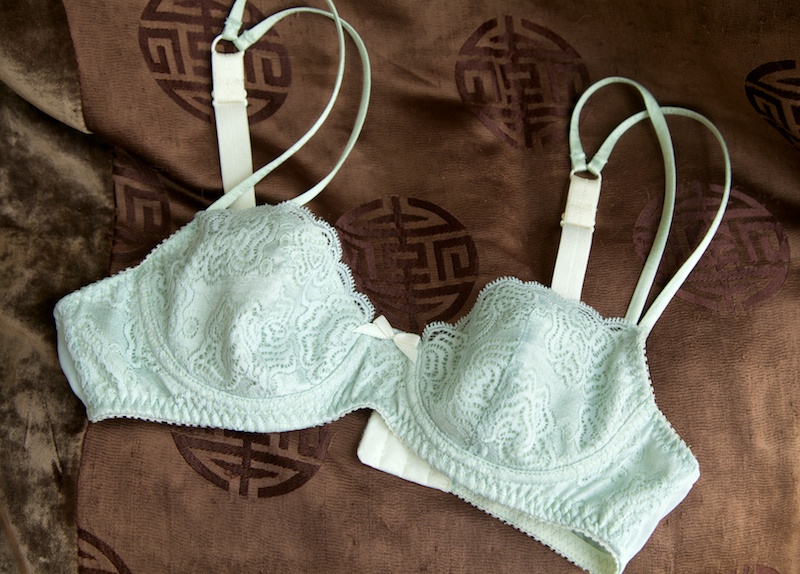
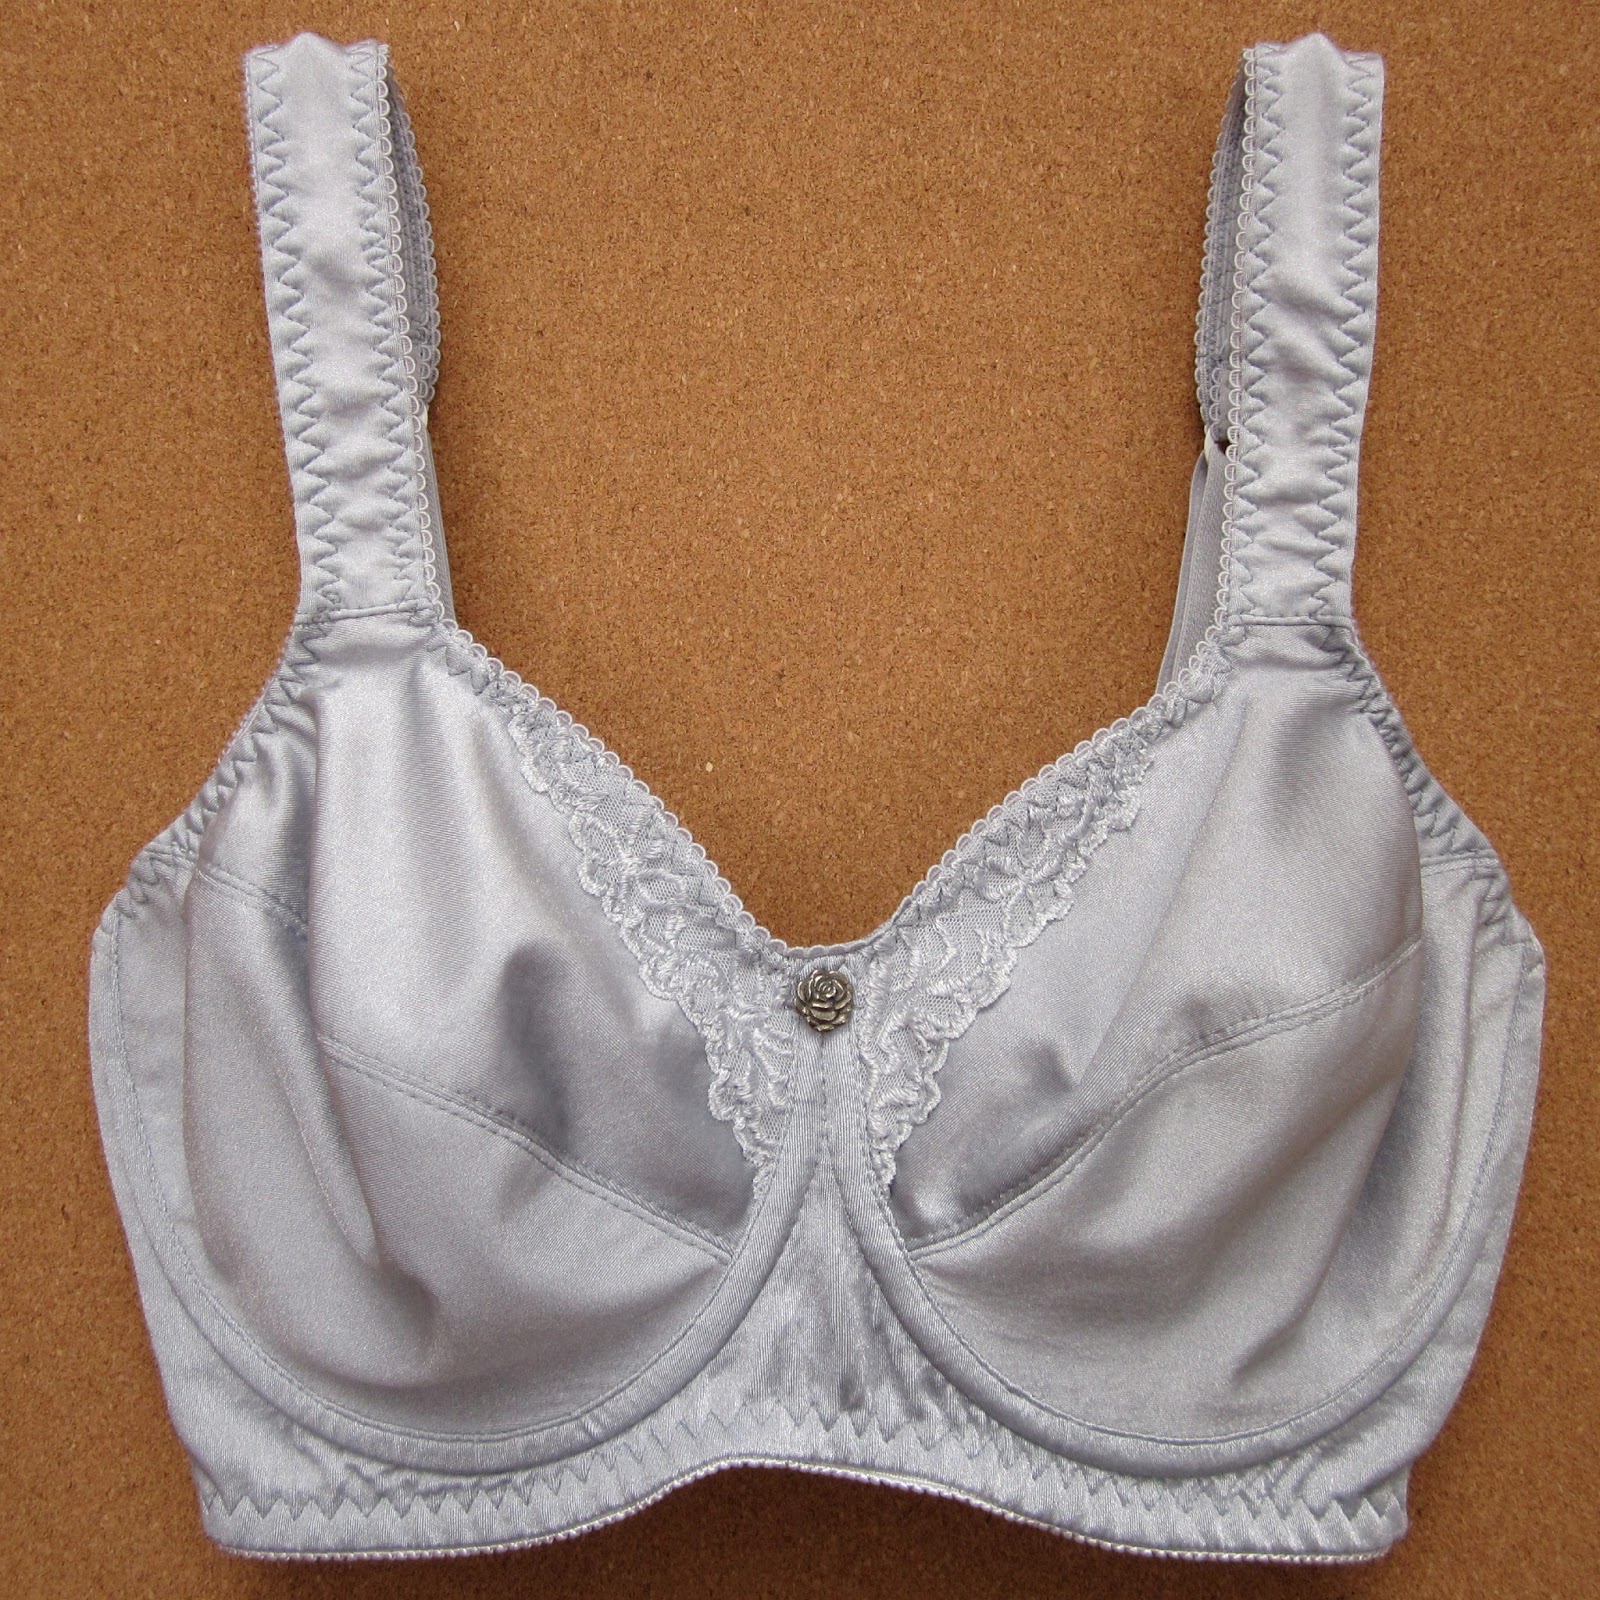
Over the summer, Katherine of Blooms Endless Summer and I exchanged a few lingerie patterns we had drafted. It’s been wonderful finding online sewing friends with whom to chat about patternmaking experiments, and we both share a genuine love of pattern analysis. She was gracious to share the pattern she drafted for her Daisy bra, which I had some time to finish over the weekend.

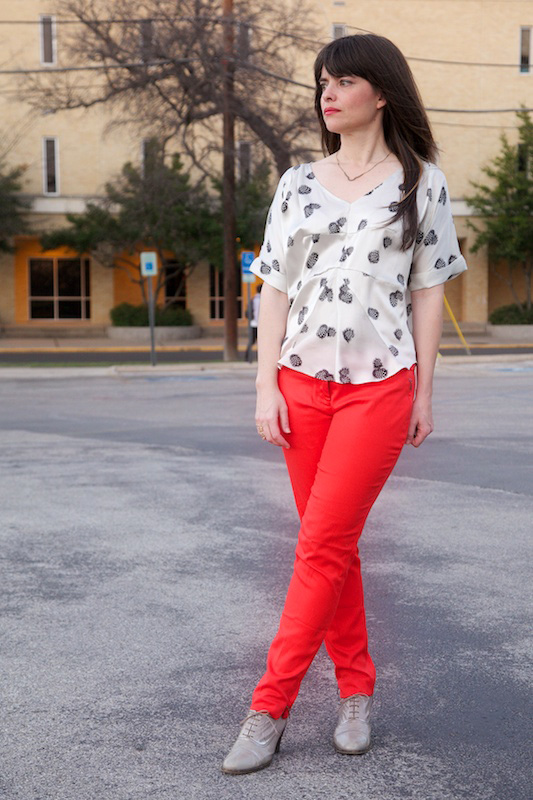
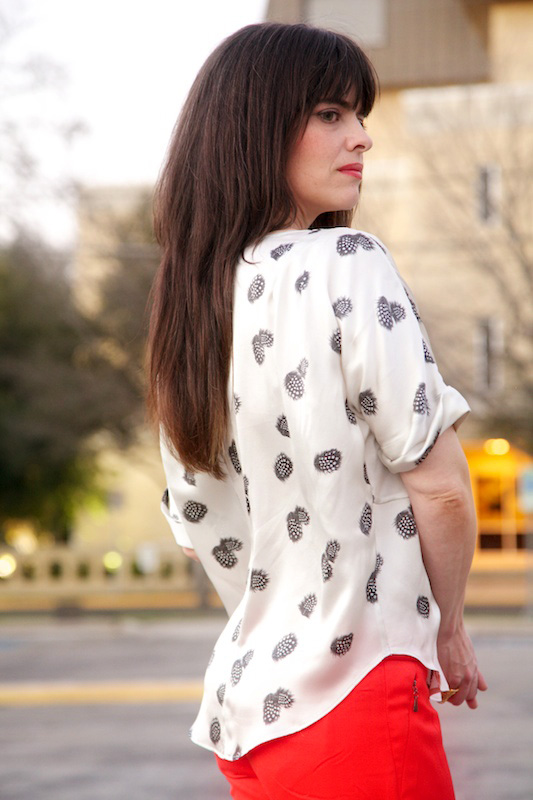
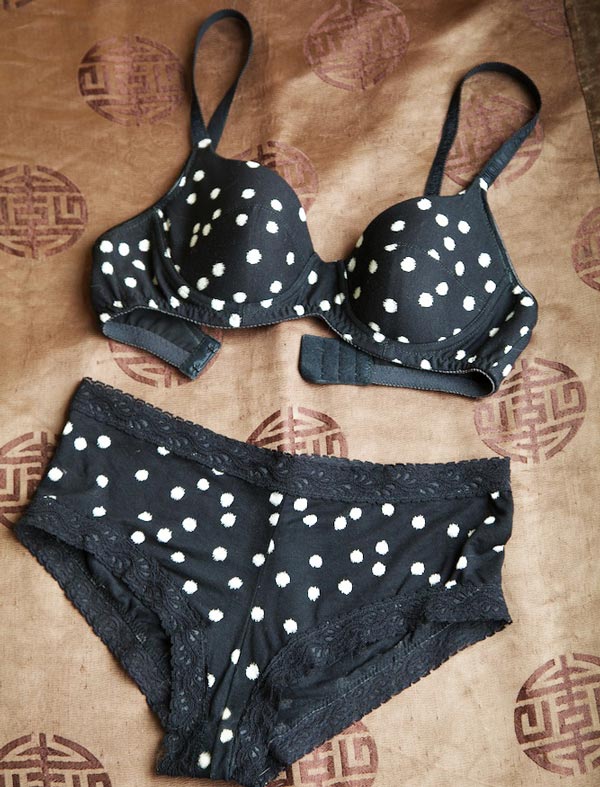
A few moons ago I bought this comfy soft dotted rayon jersey for some Ladyshorts and, well, a lady has to have a bra to match!

dotted lingerie set

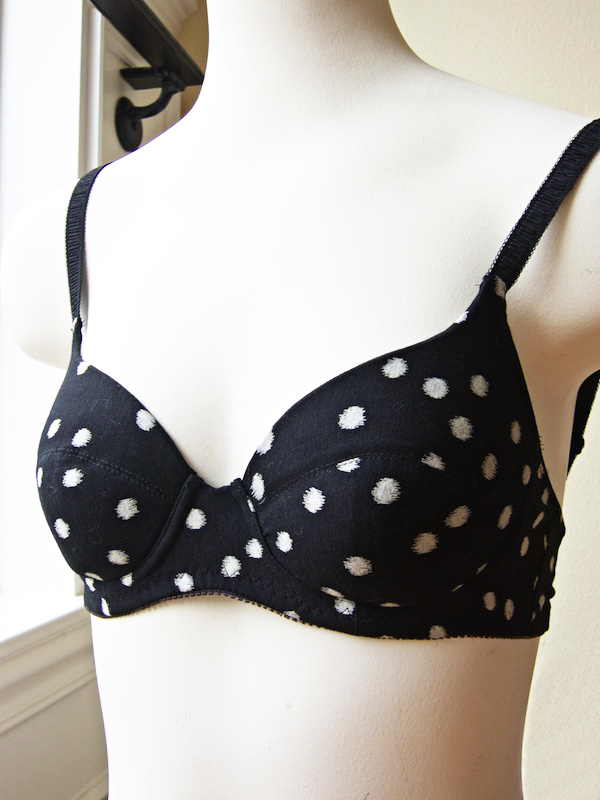
Katherine drafted her bra using Patternmaking for Underwear Design by Kristina Shin, a book I’ve since bought and used as a reference in some of my own drafting. Because Katherine’s a different size than me and the book does not demonstrate drafting in measurements other than a 34B, I used my own bra blocks to adjust and grade the size and fit. In her post about this bra (linked at the top), she also included an illustration showing how she adjusted the original draft to fit her particular shape. This may help some who have have less volume on top and need to visualize what cup pieces could look like. As so many of you have figured out in the sew-along, bra fit is such a subtle thing. We all have different shapes, or a shape we’d like to be!

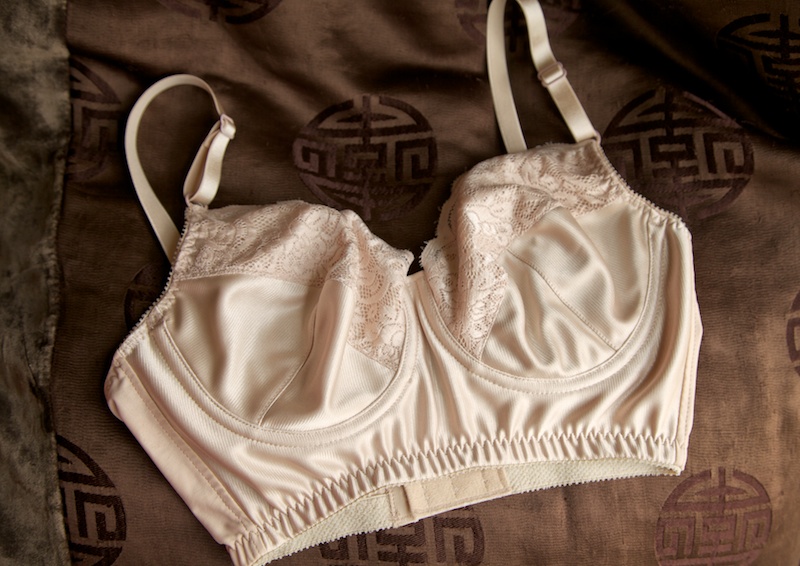
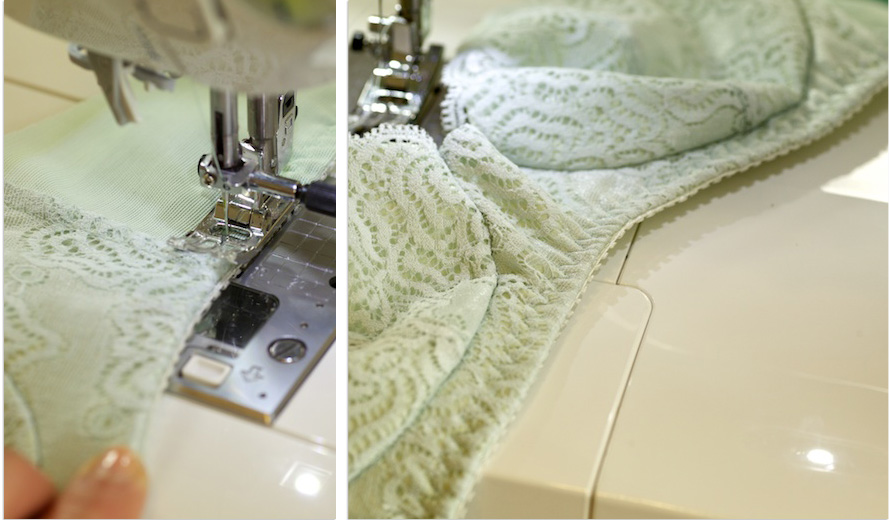
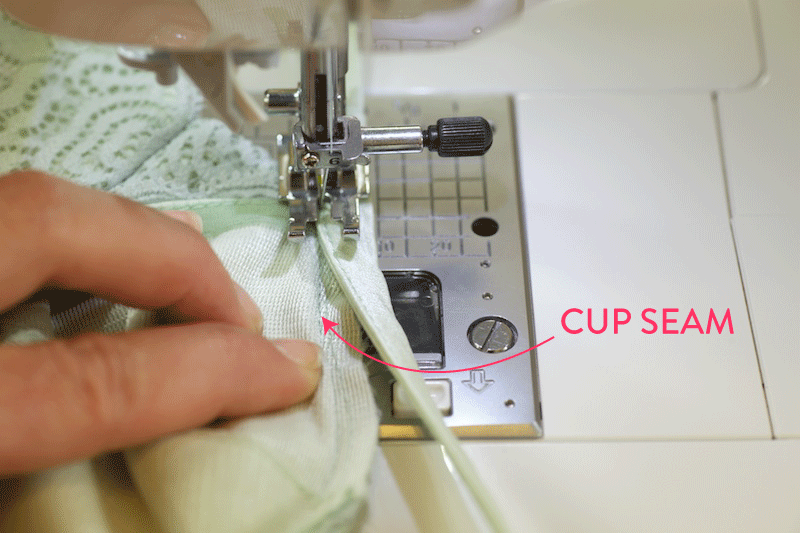
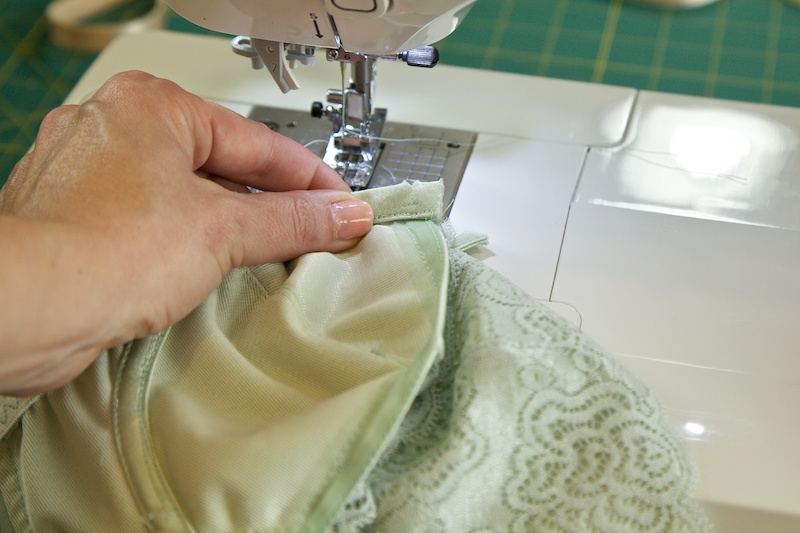
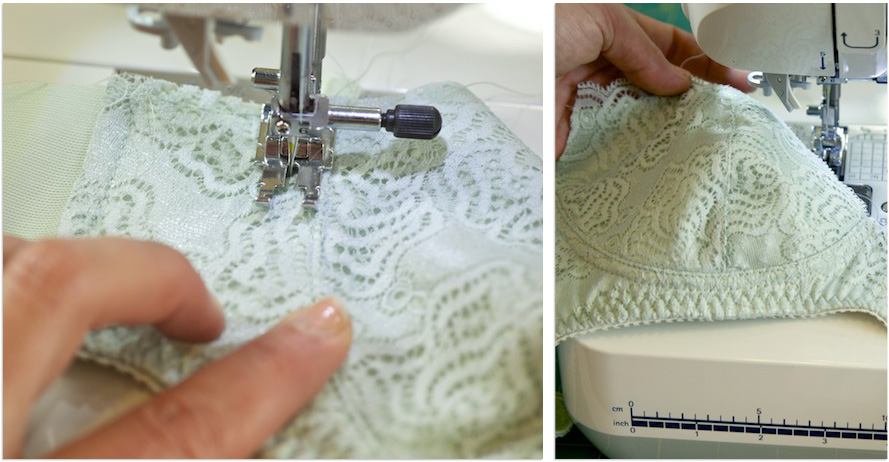
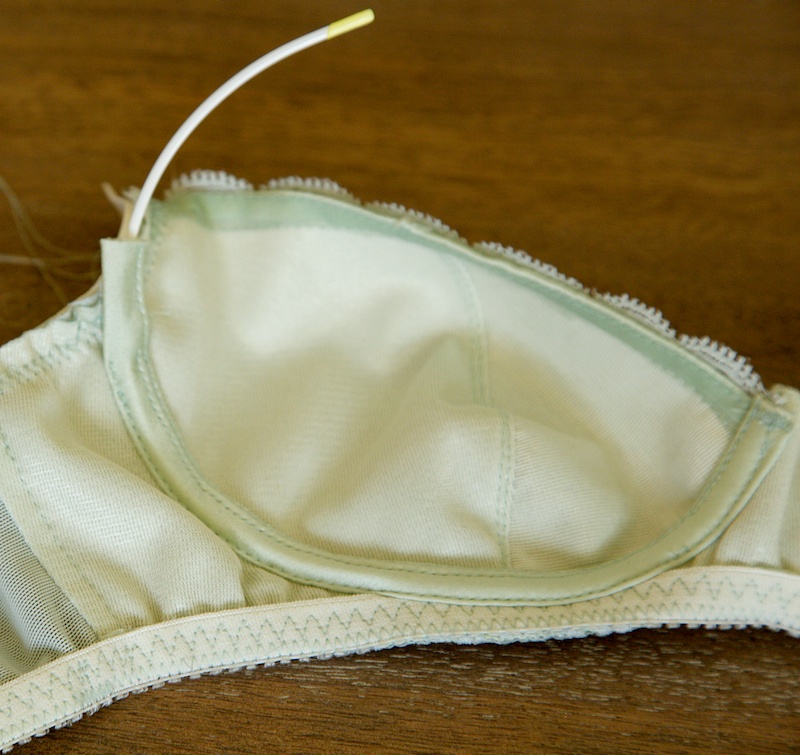
In this bra, the lining is the structural layer, a three-piece foam cup which allows for the shaping and support. The outside is only a two-piece cup meant to be made from lycra, or possibly a jersey as I used, to shape smoothly over the foam.

dotted knit foam bra

dotted knit bra, inside

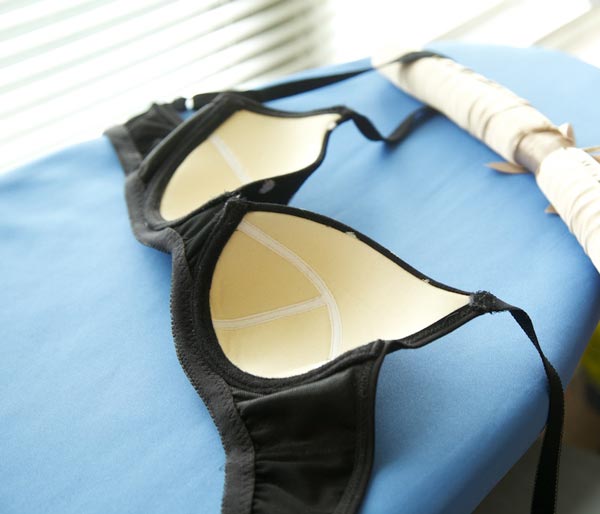
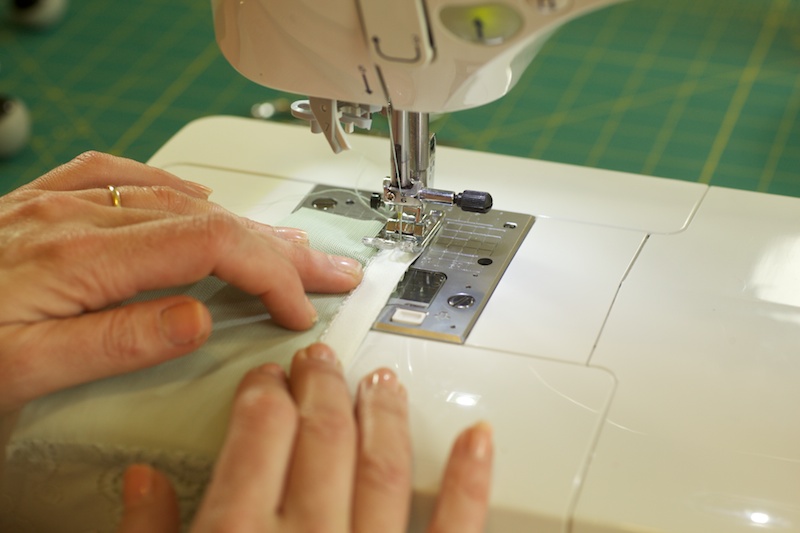
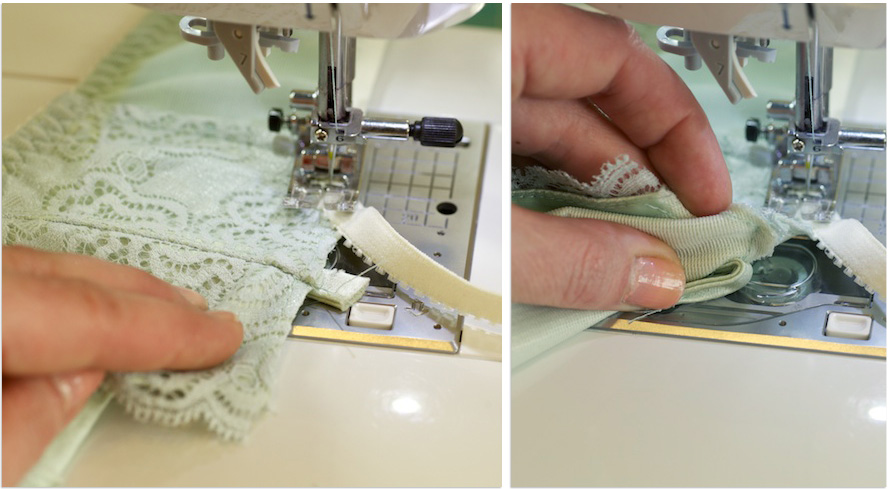
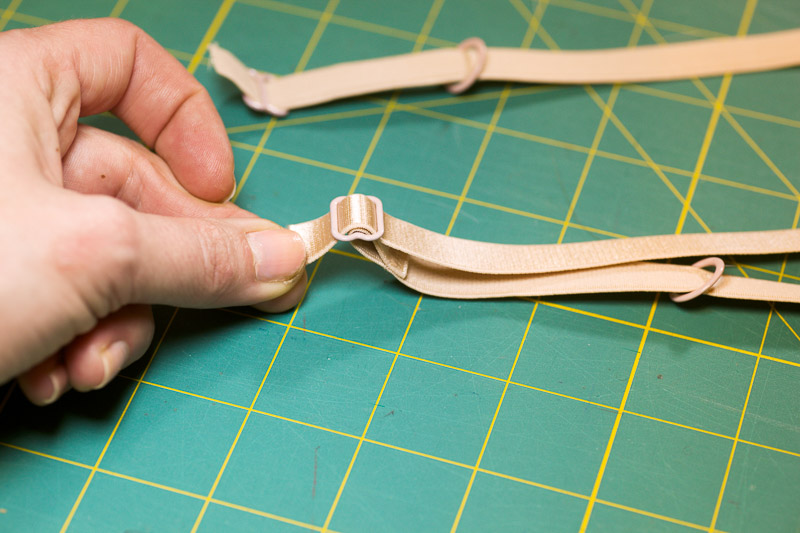
In these type of bras, the foam is usually joined by a zig-zag or triple zig-zag, then covered with seam tape. I have made them both with and without covering tape and it doesn’t seem to affect the feel or strength. But of course I like neat finishes! For this one I used a soft 1/4″ cotton twill tape and stitched a straight stitch on either side.

dotted knit bra, inside

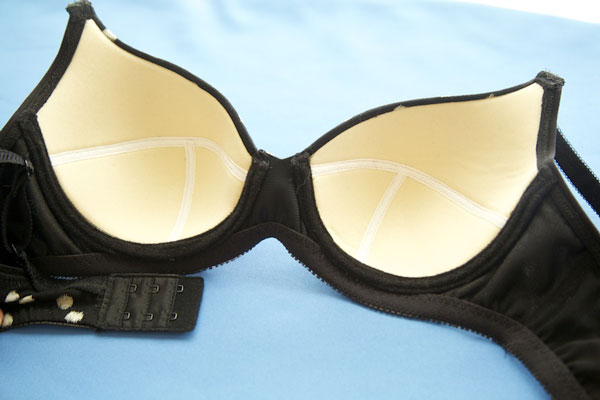
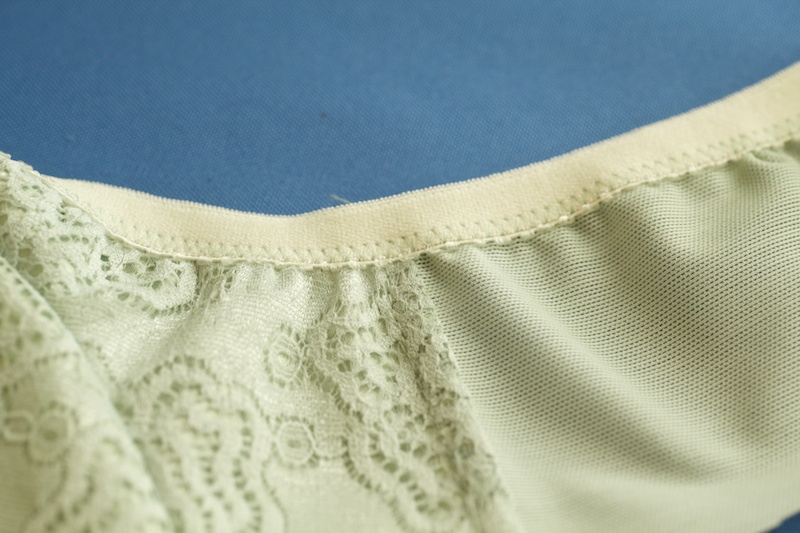
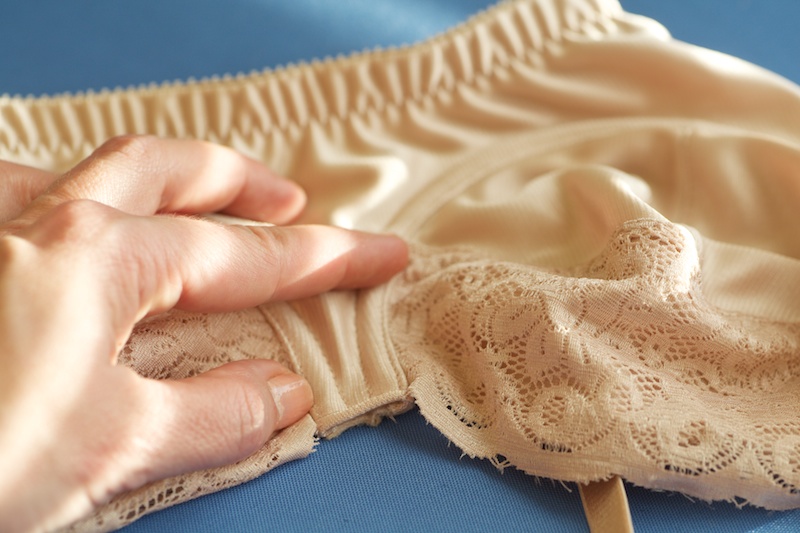
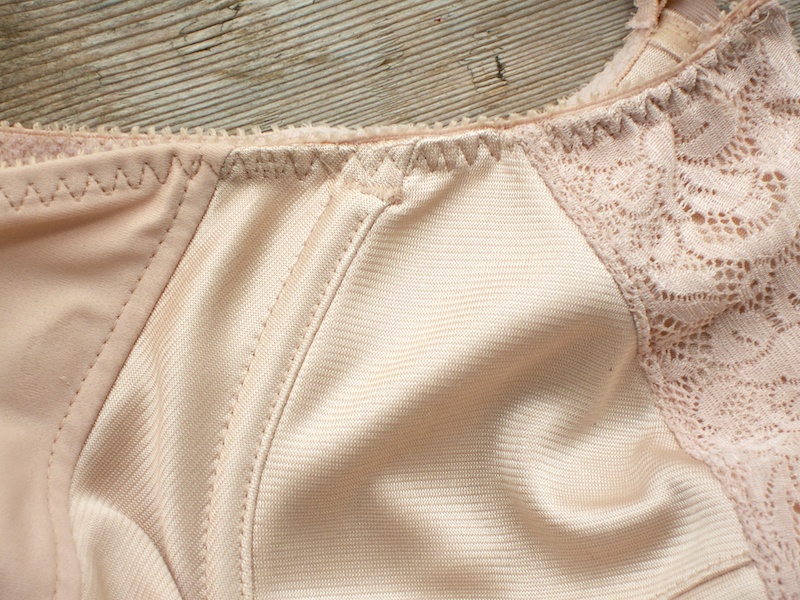
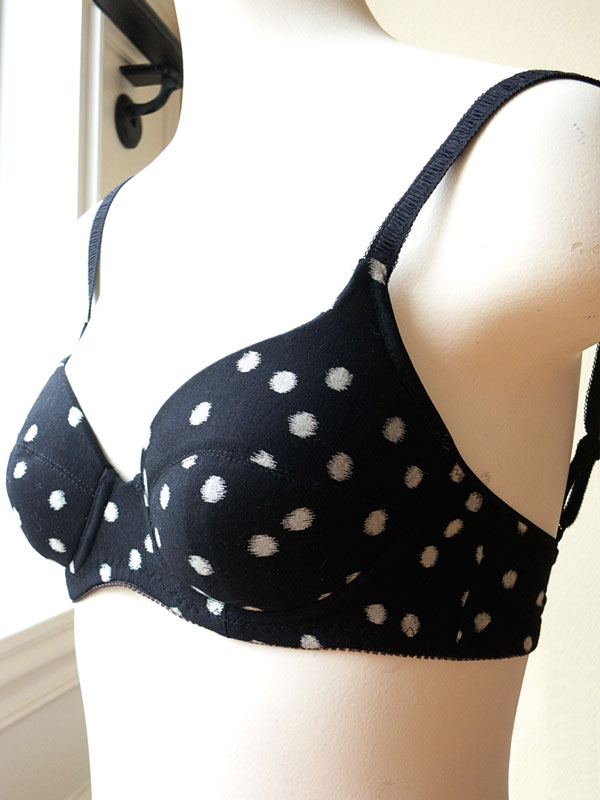
To stabilize the cradle and bridge I used a fusible knit interfacing. On top of that I stitched a lightweight tricot lining to the bridge so I could clean finish the clever little “v”. I like this part of the design, which follows the neckline of the cups to a point. I have some space to work with in my bridge so little style changes like this one are easy to incorporate.

You might be wondering, do I wear all these bras I make? Yes! Yes, all of them, and I’m nearly at the point where I have phased out store bras except for a couple of investment lingerie pieces which I splurge on for my own luxury. My first couple of handmade bras fit fairly well and while they may have not been my favorite fabrics, style or fit they still work when everything else is in the laundry! Another thing to remember is that no bra lasts forever. Elastic can age very quickly with two- or three-times-a-week wear. And it particularly does in a climate like mine, where sheer body heat breaks down highly elastic clothing. I have to replace my workout clothes once or twice a year! I’m very particular about handwashing my delicates. I lightly wash after two wears to rinse out body oils, I don’t wring, I use a very mild detergent made for lingerie in small doses. But even with that care, some bras don’t last more than a year. I too have been guilty of wearing bras way past their point of usefulness!

This is one of a few foam style bras I have made for some comfy whatever days and since I work from home I have more of those than I care to admit!

dotted knit bra

Golden Hour

feather print blouse, Vogue 1247

Time for something unrelated to lingerie projects! This past week was a gloriously lazy one. My better half was out of town for several days and told me to take some time off. I’m not the sort of person who gets nervous when there’s nothing to do, so I spent a massive part of those five days schlepping around in my bathrobe and keeping my laptop closed. No dogs no laundry no groceries and a lot of Netflix queue.

One of my few hikes out of the house was straight to Joann’s, precisely for this pattern, which I spent the weekend casually stitching here and there. This is the famous Rachel Comey “Navigator Top” that became a beloved sewing pattern, Vogue 1247. After seeing Sallie and Carolyn traipsing around in this beauty of a blouse I knew I had to have one myself. Wouldn’t you know it, I was in Joann’s the one time of year they weren’t having some mad coupon sale; I can’t remember the last time I bought one of these if ever at full price. But I just couldn’t wait…

And I was determined to finally cut into this beautiful feather print silk charmeuse I stashed away two years ago with no plans for it other than “billow-y summer top”.

feather-print-blouse2

And friends, we have not had a single day that’s felt like winter. The crickets are already singing. Today was 88, and the wind was perfect, the sun was perfect… so with just 45 minutes of light in the day to spare I leapt in the car to find the nearest open space to to take some photos–a neighborhood church parking lot. Nothing too exciting but it had a big wash of warm sunlight. Now I had 30 minutes left, and once I got out the tripod realized I forgot my remote!

So I called my husband. Honey? I have a huge favor to ask… could you pretty please bring my remote to me?

I should mention that he was out on his motorcycle during the riding equivalent of the golden hour. He was too sweet to do it but now I only had 10 minutes left. Which gave me about 30 photos, most of which turned into a slurry like this:

feather print blouse, Vogue 1247

(Ignore the unfolding cuffs. I like kind of loosey floppy blouses.)

Or this, which is what he often calls my “getting Detroit about it” face. (He was telling me I had an ugly truck in the background, making for “bad art”.)

feather print blouse, Vogue 1247

You get the picture. It’s going to be one of my favorite blouses! I love those radiating lines. This blouse is so loose that fit is sort of in the eye of the beholder, but I made a few adjustments to raise the bustline and take out some volume in that area. Sewing-wise, it was fairly easy going. Am I allowed to say I love sewing French seams? This pattern uses them for every seam, and even if it didn’t suggest them I would’ve gone for this finish–I can’t imagine any other seaming in such a lightweight silk. The hardest part is that tricksy intersection of four seams right below the waist. Or maybe the hardest part was that rolled hem. Sewing this one was akin to sewing on a roller coaster– a curvy shirttail hem in a slippery fabric. I’m half tempted to unpick and start all over. I just cannot abide crappy hems.

Oh, and I accidentally understitched the sleeve facing to the right side rather than the underside. Hmmm, all that lazy schlepping must have taken its toll. No one will notice but me. ♥

Bra-making Sew Along: Grand Finale!

Friends, it has been a wonderful ride and it’s time for a wrap-up. I love season finales. You know, the kind of plot ending where all the characters–even the ones who mysteriously morphed into into their evil twin two seasons ago–return to the screen for one final blow-out episode. Plot loopholes be darned, closure is good for the heart.

My finished bras!

pale green lace bra by Amy

This bra fits me like a dream. If you’ve been following along you’ve probably picked up on all my little (and not so little) alterations. I altered my cup to a vertical seam. I also used shorter underwires, lowered the neckline about 3/8″, and widened the straps in front–more of a demi style. My bra is made from mostly stash materials that I dyed to match the pale grey-green lace. (I’m really into blushing mints right now!)

pale peach longline bra by Amy

My friend’s bra is made from Elan 645 using a bra kit from Fabric Depot Co. I made some alterations to her cup seams to fit for a softer look and lengthened her band a bit–both around the body and lengthwise for a longline bra.

Some highlights from the Flickr group and beyond…

knit & lace set, Handmade by Carolyn

Carolyn made Kwik Sew 3300 in a lovely blue marled knit and cream lace. And she’s a fellow knicker-making fanatic. You can read about these lovely laceys on her blog Handmade By Carolyn. Thanks Carolyn, for your amazing participation and encouragement!

Sewy Rebecca by Michelle Sews

Michelle joins me in a passion for collecting bra patterns. She started out with Danglez DB3 but decided she’d be better off trying Sewy’s Rebecca bra (above). Rebecca is a fantastic pattern, especially for larger cups. Michelle also informed us that Bra-makers Supply was about to release a new pattern called Shelley–as of today it’s available here. For those Sewy Rebecca fans and others who need the option of a side cup piece and multi-seaming–this one’s gonna be a big hit. I just know it. Hop over to Michelle’s blog to see a she drafted a Shelley-type bra from her Pin-up Classic pattern.

black lace by, by Mirza of Let's Tweed Again

This is Mirza’s stunning black lace and red-trimmed bra from Pin-up Girls Classic pattern. You can see more gorgeous pics and read her review en le français on her blog Let’s Tweed Again. Oh Mirza, what a delicate beauty!

satin bra by Ginny

Ginny finished her first bra and isn’t it so beautifully made? This one uses a matching kit from Summerset on Etsy–more on her blog GinPins. I just love the ornament idea!

black lace set, Melissa of Fehr Trace

Melissa of Fehr Trade got the kick to revisit her bra patterns and made this decadent bra from Elan 330. In her post about this set, she also included a great tutorial about a way to finish off the top of a cup with multiple layers.

lace and satin set by KazztheSpazz

Kazz went on a bra-making spree, y’all. Here’s her post about this set. I think I’m going to have to pull out all my black lace now because wow. Wow. She took the “Hack Your Bra” idea to heart and is just killing her Elan 645 pattern with all kinds of styles–bustiers, longlines

Did you make a bra and would you like to share? Let us know in the comments! Understandably, I got behind on all my blog reading, so I may have missed you if you blogged about it. If you were a secret sew-alonger you can email me, too. I’d love to hear about your project and how it went.

Over at the Flickr group we had quite the fitting expedition. I’m even in the process of custom-drafting a bra for someone! I really want to thank Norma Loehr and her generosity in answering so many of our fitting questions. And there were many!

It was such an honor to host this sew-along, chat with many of you, and I hope it inspired y’all to keep on at it! You caught the lingerie bug, didn’t you…

Note: All photos here are © their owners.

Bra-making Sew-Along: Elastic, Channeling and Finish!

Time for all the finishing bits! Okay, so there are a lot of finishing bits, so get on your elastic because this post is going to be picture heavy.

Band Elastic

If you’ve made other lingerie goodies with picot elastic, you’re probably familiar with how this is done. The first side is sewn with the fuzzy side up and a regular zig-zag, getting very close to the picots.

sewing band elastic

band elastic zig-zag

If you want to cut your elastic to measure, a good general rule of thumb is to cut a length about 95% of the seamline of your hem. I like to “feel” it in as I am sewing–just something that happens from experience with sewing elastic. How much tension I put on the elastic depends on the elastic quality. (Update Jan 2015: See this post for some tips on sewing elastic and how how much tension to use. Since this sew along, I have reduced the amount of tension I use in elastics.)

I flip and on the reverse, stitch the elastic with a 3-step zig-zag. You could also stitch from the elastic side. I prefer doing it fabric side up so I can keep the puckers away:

band elastic 3-step zig-zag

I set my 3-step at 4.8 width and 1.2 length. (I wrote all my bra stitch lengths on a little post-it note on my machine so I don’t have to look it up every time I make a bra or panties!) The 3-step is just security to keep stitches from popping. But if your machine doesn’t have a 3-step, you can use a regular zig-zag and experiment with smaller stitch lengths.

Channeling

I know the channeling gets finicky. Readers have asked me about how I did this on previous bras so I thought I’d show in pictures!

I usually attach the channeling first, before putting in the band elastic. It’s easier to make that first pass without the elastic in the way but it adds another step and I wanted to make this simple visually.

First I lay down the channeling so its seam is right on top of the cup seam and start stitching right on that seam. To make sure I don’t accidentally stitch into the cup, I hold the channeling in my right hand, lift it up, re-arrange it as I go–while using my left hand to guide the cup seam. This has worked really well for me.

stitching channeling to seam

I stitch all the way to the top of the front but stop and backtack about 1/2″ before I get to the end of the underarm seam. It’s good to leave a little extra hanging off each end. This helps to finish the channel neatly later on.

After stitching the channeling I grade the seams if there are a lot of layers–and there’s quite a few here!

channeling seams

Before I do anything else, I close off the channeling in the front. Since the seams are still free and not topstitched down, I grab the top of the channeling with the cup seam allowances and fold everything else out of the way:

closing front of channeling

Then I stitch a really tight zigzag that almost looks like a bar-tack. Whatever it is, it needs to be secure!

closing top of channeling

The closure is invisible from the outside. (On my friend’s bra–I forgot to snap a pic of my mine!)

closed channeling bridge view

Time for the topstitching! I switch back to my straight stitch foot (ok, I just found out my machine calls this a “patchwork foot”). I turn the bra over and arrange the cup seams and channeling so they are folded under toward the band. If you’ve ever done an understitch on a facing, this first part is just like that. I hold the fabric on both sides a little bit taut, and start topstitching about 1/8″ away from the edge of the cup seam.

edgestitching channeling

I have to keep feeling to make sure this stitch is going into the channeling. If you sewed your first pass with the channeling seam on top of the cup seam, this shouldn’t be a problem.

Then I do another line of topstitching with the first line of stitching lined up right under my foot edge. This is about 6mm on my foot. Don’t forget to stop your topstitching 1/2″ away from the underarm so you can fold it out of the way for your elastic.

channeling outside topstitching

Underarm Elastic

Now’s the time to put in my underarm elastic. I do my first pass just like the band elastic with the fuzzy side up. I use a bit less tension in this elastic than I did with the band.

When sewing in the elastic I have to fold away the channeling–that’s why I stopped stitching it 1/2″ away:

applying underarm elastic

Before folding over the underarm elastic I put in my underwires, sliding them in from the open underarm sides toward the front.

inserting underwires

At this point you need to decide whether you want your channeling to be closed on top of the elastic or folded into it. I’ve done both and it really depends on how thick the channeling is!

Right below my thumb is where I’m going to close the channeling with another “bar-tack” again:

finishing channeling

I need enough room to fold down my elastic and stitch another 3-step–this is where that wire play I talked about comes in handy. I can’t tell you how many times my underwire has reached right to the fold of the elastic–a recipe for underwire and needle disaster!

After closing off the channel and stitching down the underarm elastic, this is what it looks from the outside:

channeling backtack

Almost there! Now I attach my straps and finish off with my hook and eye. Every pattern has a different width at the end of the band for a hook & eye attachment. You usually need to adjust that to fit your particular hook and eye width before you sew in your strap elastic:

attaching hook & eye

Update: Attaching Straps and Hook

For my detailed tutorial on sewing the straps and hook & eye, visit this page at the Watson Sew Along.

It covers 1. how to adjust the center back for the width of your closure, 2. how to sew in straps to a u-back style band, and 3. how to stitch in that funky hook & eye!

That’s it! My bras are done and I’ll be back Monday with photos and some roundup questions. Happy sewing weekend everyone!

How to Sew Bra Straps

How to sew bra straps | Cloth Habit

Sewing bra straps might seem ridiculously simple but when I first started out sewing bras, I could never figure out which end went where through the slider. Maybe it’s because I’m lefthanded–the visuals always look backwards. So today’s tutorial may be for the lefties out there!

A couple of notes before we begin:

Straps are constructed the same way whether the adjusters are in front or back of a bra. If putting them in the back of the bra, you’ll need to sew a strip of strap elastic to the back band and leave a little bit hanging off in order to create a loop around the ring. If putting the adjusters in the front of the bra, you’ll need to create a loop for the ring at the top of the cup. This is done in one of two ways:

  • If your cup design has a strap extension (examples of that here and in the Watson pattern), you can loop this around the ring and stitch to secure.
  • If your cup design does not have a strap extension, you will secure the ring using extra underarm elastic. Here is an example of how I did that, while using a bit of firm ribbon inside the elastic to stabilize the loop.

Step 1: Cut Your Strap Elastic

I like to cut my straps about 18 inches for insurance. How long each strap needs to be depends on two things: the length of your shoulder to bust and the design of your bra. Most women need about 15-18″ for a full elastic strap.

Step 2: Attach the Slider

Thread one end of your elastic through the slider. Fold it over so that the wrong (plush) sides are facing each other and stitch a secure seam. I use a small straight stitch (about 1.0-1.5 length), and stitch back and forth.

How to sew bra straps | Cloth Habit

Step 3: Finish Threading The Elastic

Slide a ring over the unstitched end of the elastic (which you can see in the above photo). Then bring the unstitched end up toward the slider, so that the plush sides are facing each other.

Now thread your elastic up and through the slider like so:

How to sew bra straps | Cloth Habit

Keep pulling the unstitched end until you end up with a loop.

How to sew bra straps | Cloth Habit

The finished loop should be about 1-2 inches but no more than that. Remember that you will be tightening your bra straps as the elastic ages, which creates a longer loop.

The straps are sewn at the end but it’s always nice to have them pre-assembled.

As you can see from the top photo I’m making my straps using half elastic and half spaghetti straps using silk charmeuse. I had to come up with this fun design since I forgot to take my own advice and buy extra strap elastic! The Bra-makers notions kit I used includes about 10 inches of strap elastic per strap (since their patterns are designed for a half-fabric strap). I’ve assembled the elastic portion of my straps identically to the nude straps, but the ring and the adjusters will be in the back. The spaghetti straps will go up and over my shoulder meeting the ring at the top of my back.

How do you like to do your straps? Do you favor the adjustment in the front or back?

(p.s. For rouleau/spaghetti ties like mine, here is a very clever tutorial at 3 Hours Past.)