In Process: Jeans Fitting

I spent a good rainy indoorsy Sunday sewing up and fitting my jeans.

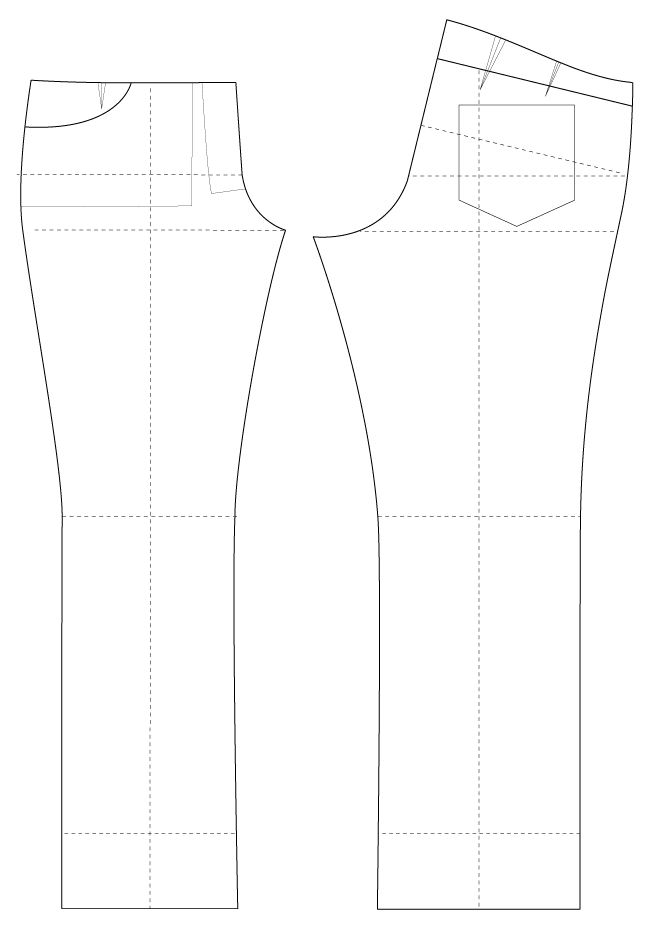
Just for a good laugh, here’s version 1.0:

first-jeans-muslin

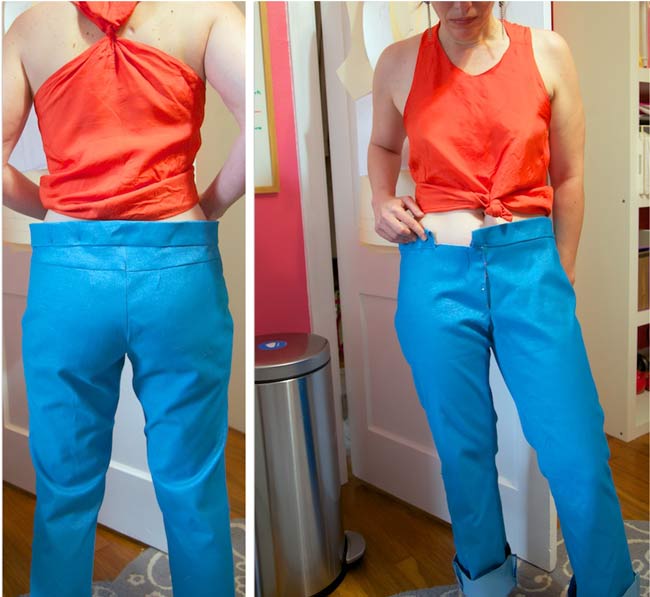
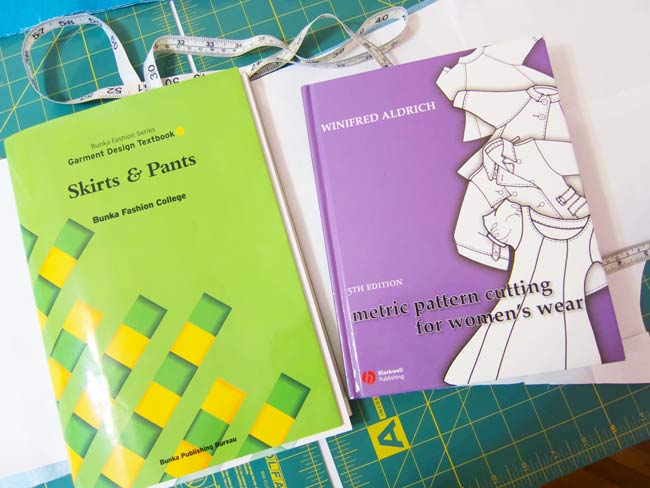
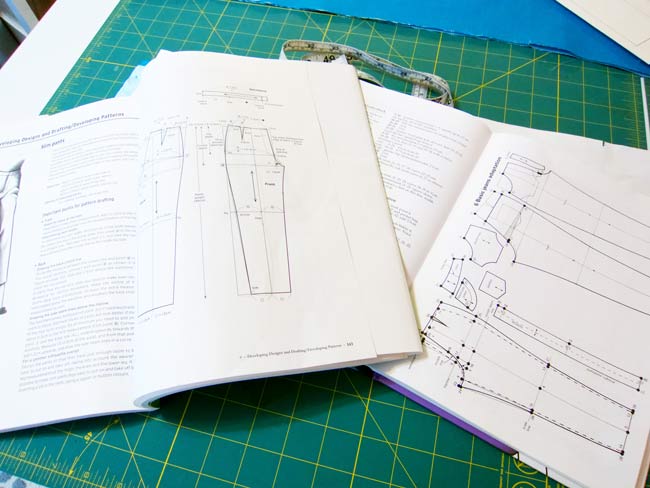
What is going on with that waistband? you might wonder. It’s a cautionary tale about pattern drafting. I know that I should always measure twice, double-check my calculations. In this case, I drafted the waistline in metric but accidentally added ease in imperial, about three inches too much! Oops. I like to draft in metric as it’s more precise–it’s also what my pattern book used–but I think in imperial. It’s sort of like learning a language; I’m not quite at the point where I dream in metric, so I switch back and forth with my rulers to “translate”.

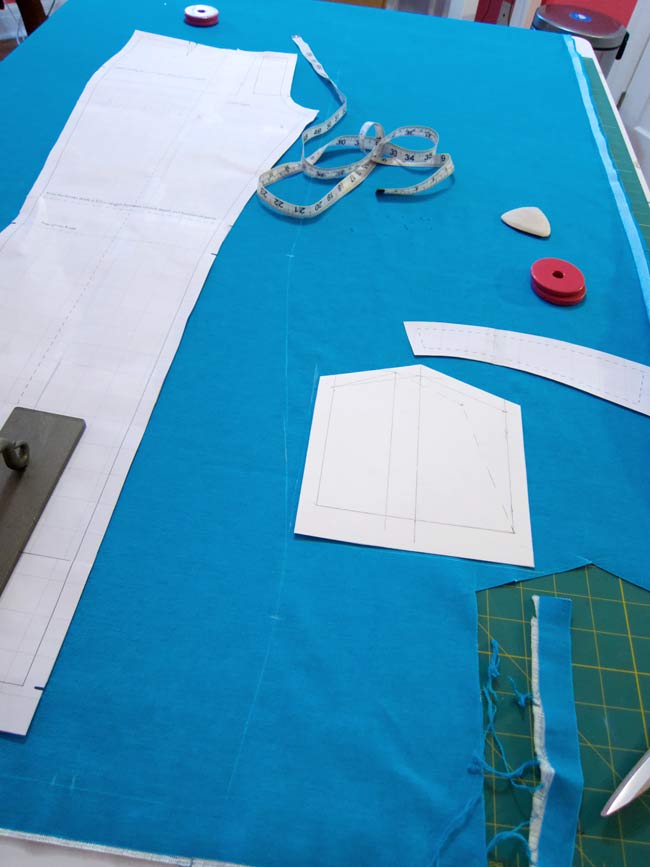
I took apart my pieces and cut out a version 2.0 with a completely new pattern adjusted to zero ease with a little bit of negative ease in some parts, including the waist. On my first pattern I drafted the hip and thighs with about 2.5cm total ease, which is a really small amount for a non-stretch woven, but this denim has 35% stretch–and it fit like it had almost 10cm of ease. So rather than take in adjustments willy-nilly here and there and everywhere, I figured it was easier to recut.

On version 2.0, some things improved and others seemed to get worse…

2nd-jeans-fitting

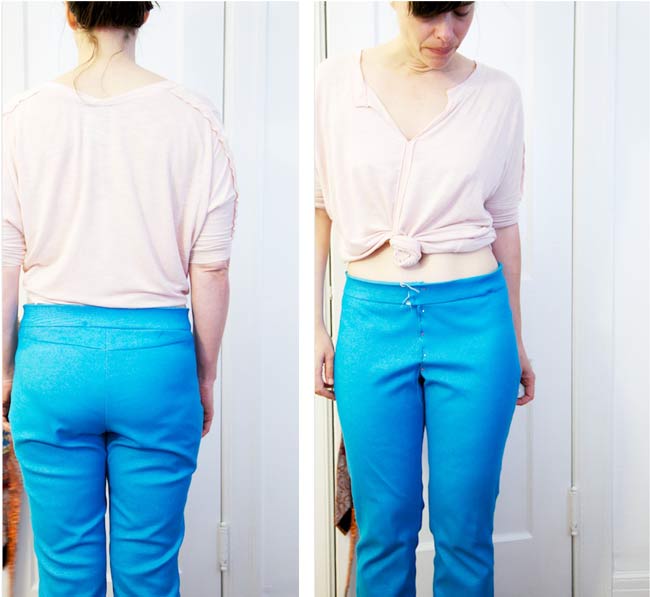
There’s some excess here and there, especially around the seat and the front crotch length. Ahh, that dreaded crotch fit. I have fit this area before with success in pants and shorts, but working with stretch fabric is a different beast. And jeans curves are shaped very differently than other pants. If you have ever examined your RTW jeans you might have noticed that the front fork is often much shorter and the curve is flatter than you think it’s going to be. Really slim stretch jeans and pants often have the inseams and outseams closer to the front around the seat/crotch area than trousers. This could have been my first problem–I used a slim trouser draft that wasn’t specifically for jeans.

But thinking about the differences gave me an idea I want to try but it will have to wait until next weekend.
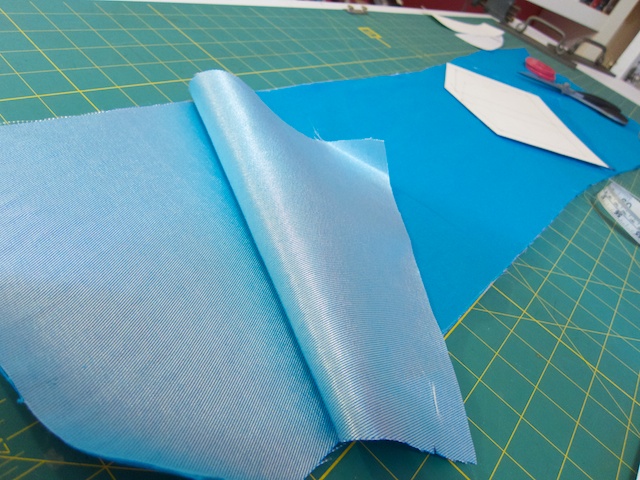
The glorious mess…

jeans-mess

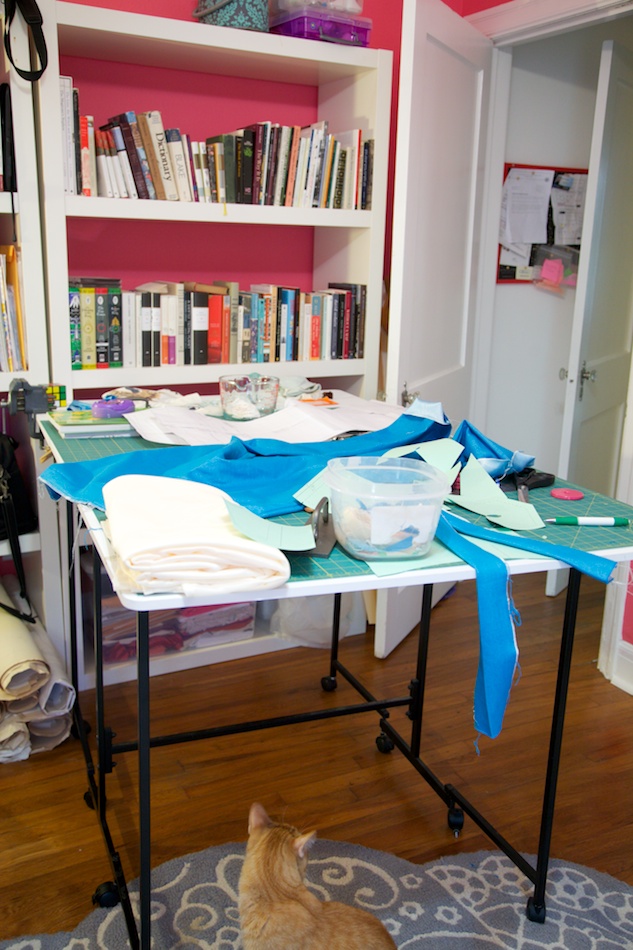
At the bottom is Leo. He snuck in this room overnight and did some kind of happy claw dance on my fabric, which left snags I had to cut around. I think he’s plotting his next move.

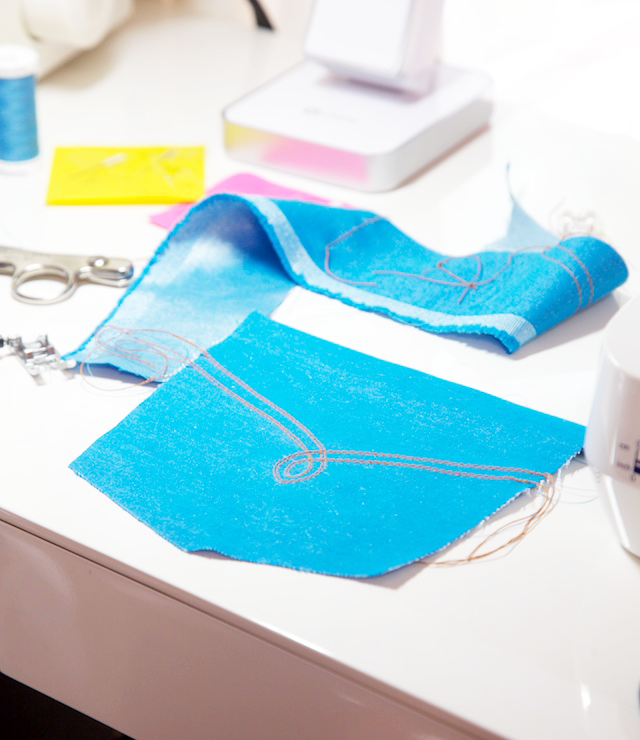
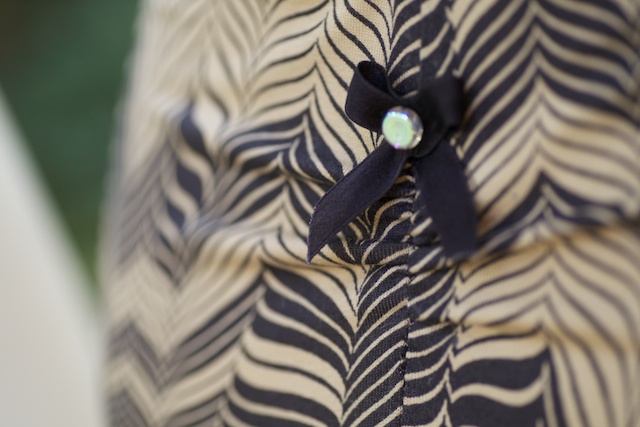
So jeans 3.0 will have to wait but at least I got to play with topstitching! (Thanks to readers who suggested that I use regular thread in the bobbin. That really helped.)

topstitching-pockets

The J Word

Look ma, I’m making jeans!

jeans cutting

It’s taken me awhile to jump into jeans sewing. Now and then I’d see a cute pair on a sewing blog and get the warm fuzzies. They’d send me hunting for some dream denim, of which I have now accumulated a few yards. And I blame those fuzzies for seducing me into buying Colette’s Clover (to transform into slim fits–I blame Sallie!) and the famous Jalie jeans pattern (I blame the rest of the sewing universe!). I even signed up for Kenneth King’s jeans knock-off course on Craftsy. Inevitably the warm fuzzies wear off, and I swear up and down that jeans are just not something I want to make. I still like to buy them and love trying out different styles and cuts. High waisted, yes please. High waisted and wide-legged, double yes. Straight and slim, colored, waxed and trouser-style jeans are all in my wardrobe.

So obviously I’m having a change of heart again. Here’s what really sealed the deal: We just got back from a week in San Francisco, during which I landed on a massive denim sale at Discount Fabrics in the Mission. $3.50 PER YARD. That’s insane for beautiful Japanese selvage, designer stretch denim, in every weight and color of blue and black. Thank goodness I didn’t have an extra suitcase.

And honestly, drafting my own jeans, rather than using an existing pattern, would keep me interested, plus teach me a thing or two about fit and style lines. I had a couple of options for that:

jeans-drafting-books

One was a “classic jeans” draft from Aldrich’s Metric Pattern Cutting. The other was a close-fitting trouser from Bunka’s Skirts & Pants. They’re fairly similar but I liked some of the finer points of the Bunka draft. It also includes better explanations of ease and shaping, and how they relate to different pants styles. All the Aldrich books tend toward a “just the facts, ma’am” sort of drafting style.

jeans-drafts

Skirts & Pants is a part of a 5-book pattern drafting series published by Bunka Fashion College in Tokyo. You might recognize the name as the original publisher of the Pattern Magic books, and it seems like most of the Japanese sewing authors (Drape Drape, etc.) teach or were educated there. A veritable hotbed of pattern drafting goodness! I bought the whole series a couple of years ago but have never gotten around to using them till now. They’re unique books in that they are more than just drafting books. Each drafting section includes actual sewing instruction (great illustrations) and fitting ideas. They’re really holistic for a self-taught drafter.

So I spent a weekend in and out of the patternmaking zone and came up with this:

my-jeans-draft

I played around till I came up with a basic slim-cut jean, narrowish around the thighs but straight to the floor from the knee. This is one of my favorite styles for every day. Just as a side note, one of my biggest frustrations with just about every pants draft I’ve come across–and I have a serious patternmaking book addiction–is the drafting of the center back, and how to angle it depending on style. The Bunka method is better about this, although I still like the backs of pants even higher, so I fudged around till I got the back length I wanted.

I already know I’m going to have to tweak the yoke shaping but I’m looking forward to sewing them up this weekend! I’m going to make a trial pair, sans pockets, out of this space ranger denim I bought about five years ago. It’s really shiny and metallic on the reverse, and not my favoritest color in the universe. I don’t know what I was thinking at the time–I blame half my fabric stash on the warm fuzzies!

shiny-denim

White to Ivory: Dyeing with Tea

bridal-bra

Hello to first-time visitors! If you came here via Google searching for help with dyeing your white garments/curtains/anything, please read the note at the bottom of this post.

I am working on a design idea for a bridal lingerie set, but had the hardest time finding ivory elastic to match my chosen lace. White just looks like an eyesore next to ivory, and I didn’t want a contrasting color.

white-ivory-nylon

I’ve learned through my elastic dyeing experiments that pale colors don’t always turn out as well as darker ones. And ivory has been the hardest color to get. It doesn’t matter what color or how little dye I use, there’s no in between white and a mottled greige that looks just plain wrong.

Tea dyeing turned out to be a perfect solution. I could have also tried coffee, which is far more common in this house! Tea is a really low-commitment, no mess dye, with no need for separate pots or gloves.

I’m just starting to read about natural dyes, especially those that don’t need any mordants or additional chemicals to assist in helping the dye bonding process. These are called “substantive dyes” and include stuff like tea, coffee, onion skins, tumeric and ooh, pecan shells, which are overrunning my garden right now. (We have eight mature pecan trees.) I see a dyeing experiment coming up this fall! But, and a big but, from everything I read, these dyes are the most permanent on wool, and a little less so on cotton. And there isn’t much information about using them on nylon.

But really, all I wanted to do was just “off-color” my notions. I tried a few different teas–PG Tips, chamomile and Lady Grey. The first elastic came out kind of icky gray-ish tan. The chamomile didn’t add much color. The Lady Grey seemed to have more red or warm colored tea leaves in it and that gave me my best results.

tea-dyeing-nylon

First I made the tea by steeping one teabag in a pot for about 1 minute. Just one teabag, because I really just wanted to dim a white color, not go any shade of pale brown. I let things cool down a bit before dunking my notions. In my experience, anything with spandex starts to curl above 140°. When it was ready, I immersed my wet and elastic and notions and stirred them about until they looked like it had just taken on a slight stain.

IMG_1396

I think this will work just beautifully. For all I know, I may have just stained (rather than actually dyed) these elastics, which is just fine. I’m pretty sure they will never fade back to blinding white. If you know the secret to that without using bleach or high heat, pass it on to me, because a few of my white t-shirts would thank you!

Have you ever dyed with tea?

Good Dye Reading

*Dyeing with Tea

*About Natural Dyes and *some interesting science about mordants

*Handbook of Natural Dyes by Sasha Duerr

Update for first-time visitors

This post was written several years ago, while I was experimenting with tea-dyeing. A lot of folks find it while searching for advice to dye a white color off-white or ivory. As a result I’ve received many emails asking me for advice in dyeing all sorts of things–suitcoats, jeans, communion dresses, bridal gowns, home dec curtains, you name it.

Unfortunately I won’t be able to respond to emails asking for advice on a tea-dyeing project, mainly because I get so many and my answer is always the same: I can’t predict for you what will happen or what color will result. It’ll always be an off-white to beige color of some sort if you are using black tea. You are basically staining your fabric.

I don’t have a recipe or a specific tea to recommend. It’s really just as simple as dunking something in hot water steeped with tea and letting it sit for awhile. I used the tea I had in my cupboard, and I had to experiment. That is what you’ll need to do, too. And please read through the comments as they may give you some more tips!

Are You a WordPress Blogger?

I’ve tried to avoid throwing up a random public service announcement, but it seems I have nowhere else to go. I’ve got to hit the streets (my blog) to solve this funny problem: WordPress peoples, I’m having trouble commenting on your blogs!

I’ll craft a comment and it just disappears into the inter-ether. This has been happening for over two months. Eventually, I just stopped commenting, and now watch some of my favorite blogs as a silent bystander! Would you help me? If you are a wordpress.com blogger, and I’ve ever left a comment on your blog, it’s highly possible you have one of my comments in your spam.

The same thing happens on those blogs which run their own wordpress software (wordpress.org) and which have Akismet turned on. I think Akismet flagged my IP. Has this happened to anyone else? It’s the only explanation I can think of and I’ve tried everything else on my end.

If you don’t know how to check, try looking in your comment spam and use the search tool to get past the hundreds of spammers trying to sell you counterfeit Louis Vuitton bags. (Am I the only one who gets those?)

I’ve also written WordPress and Akismet to try and solve my dilemma but I’m a month into trying to contact them and still no responses. Hence the PSI.

*If you use Disqus without activating Akismet to block spam, then I don’t usually have a problem.

Sorry to bother up the blog space with this. Now back to sewing blogging goodness…

UPDATE: Just found out that Akismet has definitely flagged my IP as spam, which bans me as a true commenter. Good to know I wasn’t going crazy. Stinks because now I know my comments have ended up in many a junk folder and will continue to end up in WordPress purgatory until they resolve it.

Lingerie Friday: Art Deco Lingerie (and Foam!)

a lingerie set with seamless foam cups, inspired by geometric shapes and organic shapes of art deco!

Maybe it was all the Gatsby craze in the air. Or the Krypton set designs in Man of Steel. Blink and you’ll miss it, but I think there was an homage to the Spirit of Detroit statue–one of my favorite hometown attractions–in the “history of Krypton” scene. The rest of the movie bored me to pieces, but at least those set designs were cool. Neo-futuristic art deco. I can just hear the design team storyboarding: steel, industry, pittsburgh, steel, crumbling, detroit in the 20s…

Don’t you love how I manage to pitch Detroit hallmarks in some of my posts? It’s a part of my childhood.

Anyway, I love art deco and its mix of strong geometric symmetry with organic forms. Back in the spring, I scored some groovy rayon jersey with gold and black organic lines with no particular thought as to what it would be, but eventually it kept screaming art deco.

So I drew out an idea for a bra.

a lingerie set with seamless foam cups, inspired by geometric shapes and organic shapes of art deco!

It’s been a long time since I’ve drawn or sketched figures or fashion ideas, but there was a time I really enjoyed it. I took a few semesters of fashion illustration many years ago, but I’ve just never gotten that fast at it, and really get frustrated with colored pencils. If only I was better at watercolor…

Jersey doesn’t always work so well as an underwired cup fabric so I decided it was time to pull out foam cups. I’ve had these in my stash since I bought my very first bra-making kit.

a lingerie set with seamless foam cups, inspired by geometric shapes and organic shapes of art deco!

They are an unusual shape from what I’m accustomed to wearing, but I thought it was time I played around with them. For the cups, I wanted a two-piece cup cover with silk banding along the neckline. It is possible to drape a four-way stretch fabric completely over a cup without any darts or seams, but not only did I want to use two fabrics, both of them had limited two-way stretch. So I needed to make shaped cup pieces:

a lingerie set with seamless foam cups, inspired by geometric shapes and organic shapes of art deco!

To come with these pieces, I did a little draping experiment with some scraps of my fabric. Starting from the bottom of the cup, I pinned and smoothed the fabric, going upward until it wouldn’t lay flat anymore. Once pinned in place, I used a thin marker to draw around the cup edge and the line where the cup fabric stopped being smooth. This gave me the bottom piece. Then I did the same for the top piece, pinning from the neckline down. Once I had these two pieces, I traced the cut fabric shapes to paper and smoothed the lines out a bit till the seamlines matched. In words that probably sounds complicated but it really wasn’t! It’s just like draping, except on a really small and easy scale.

I started with my own frame and band and then figured out how to rotate the cups into the cradle. That part can be a bit of a puzzle at first. I pinned and repinned until I found the center bottom.

a lingerie set with seamless foam cups, inspired by geometric shapes and organic shapes of art deco!

I took lots of construction photos because I thought some would be curious about the process. But I think it’s a bit more fun to look at finished! I went for a little bit of bling in the form of gold hardware and silk accents…

a lingerie set with seamless foam cups, inspired by geometric shapes and organic shapes of art deco!

The bottoms are a simple high-waisted shorty that I’ve made a few times now, but for this one I’ve added a ruching detail with to the back. I think I was a bit conservative in the ruching–I might go for even more in the next pair.

a lingerie set with seamless foam cups, inspired by geometric shapes and organic shapes of art deco!

a lingerie set with seamless foam cups, inspired by geometric shapes and organic shapes of art deco!

Speaking of foam cup bras, many moons ago I promised a tutorial on how to use cut foam with a bra pattern. (And now it’s here!) And some of you have kindly written me and asked, whatever happened to that?. I promise, I haven’t forgotten! I learned so much from running the sew-along about what steps to cover, what I actually have time to do, what I still don’t know about bra-making (because there is always more to know!) and so on, that I had to scrap my original tutorial. And guess what? I’ve just finished writing up a new one with lots of photos of the process. This time I got a friend to help me photograph because it’s really hard to sew and stop and shoot, over and over, by myself. (I end up unpicking a lot of seams when I do.)

UPDATE: Check out the tutorial series How to Make a Foam Cup Bra.

Details:
Patterns: self-drafted
Main fabrics: Rayon jersey (Stitched Austin), stretch silk charmeuse (Dharma Trading)
Powermesh: local Joann’s
Foam cups: Bra-makers Supply
Dye for silk ribbon and charmeuse: Jacquard Acid Dye, Jet Black
Trims, tricot lining and other notions: mostly Fabric Depot Co.