Making a Foam Cup Bra: Part 1

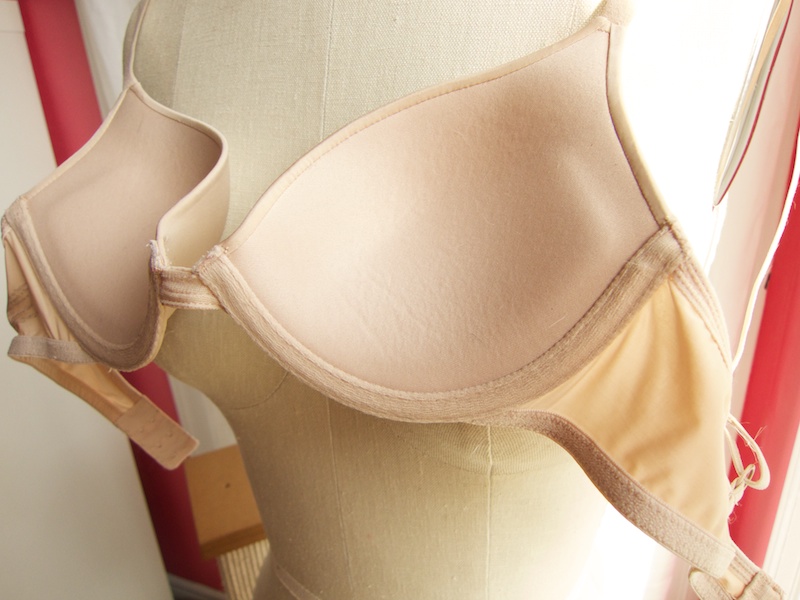
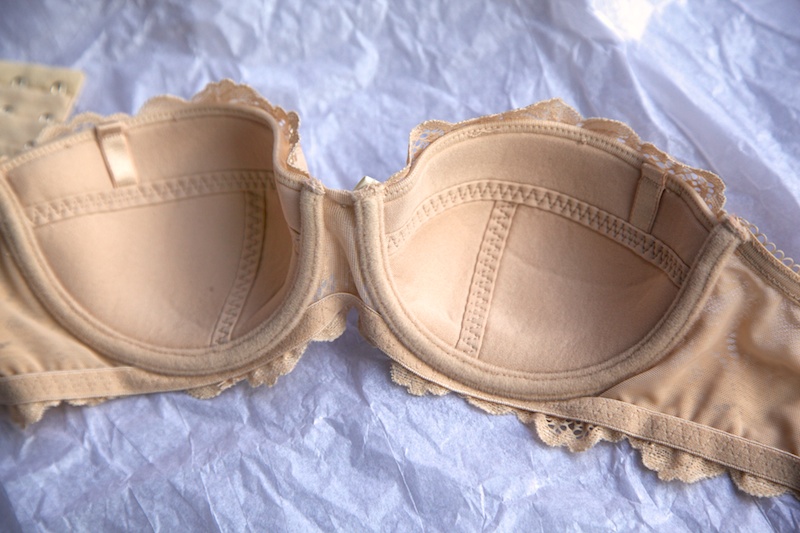
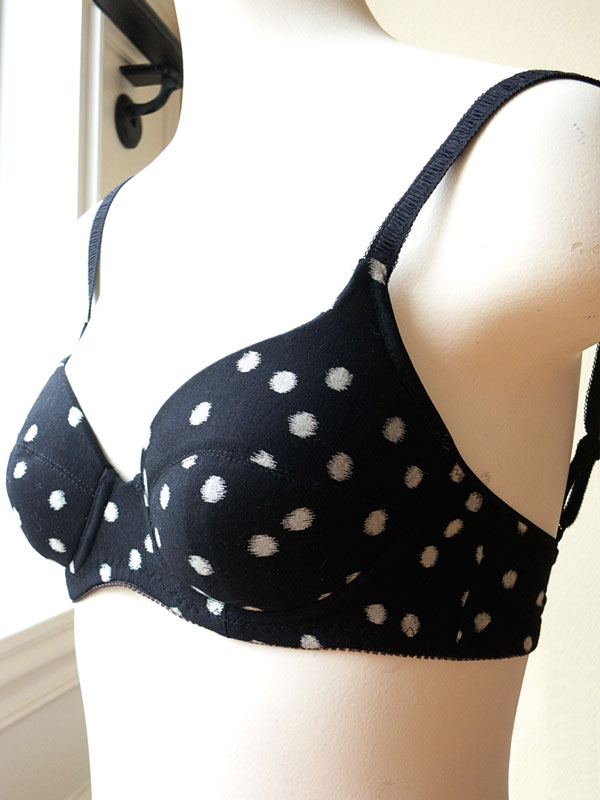
This summer I have planned a few foam-lined bras for my wardrobe. One of these is going to be strapless style I can wear comfortably underneath my low-backed tops and dresses. Comfort being a key word, because I have never found a strapless that doesn’t make me squeam.

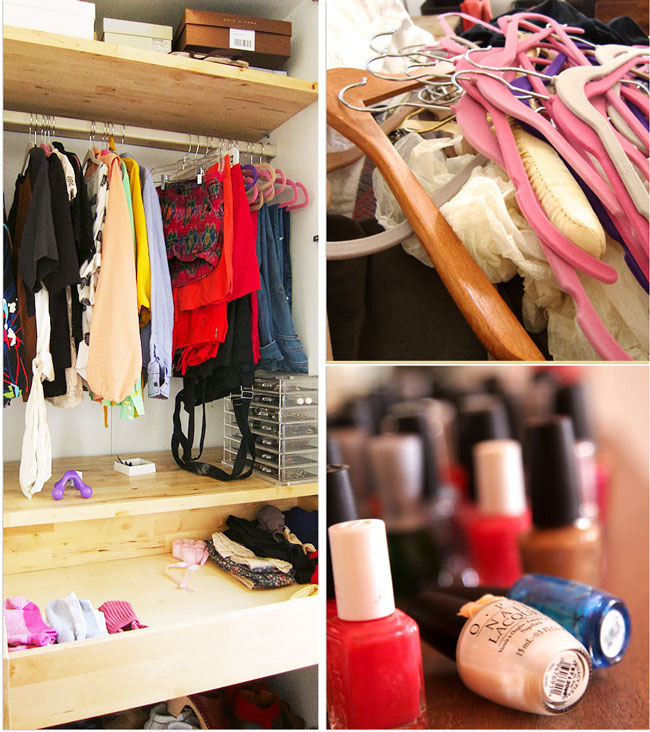
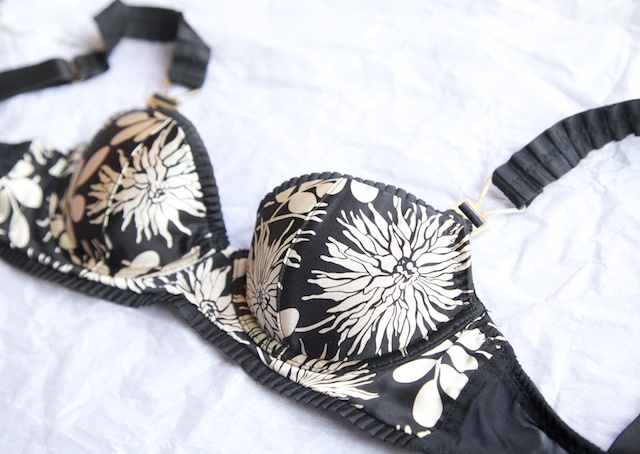
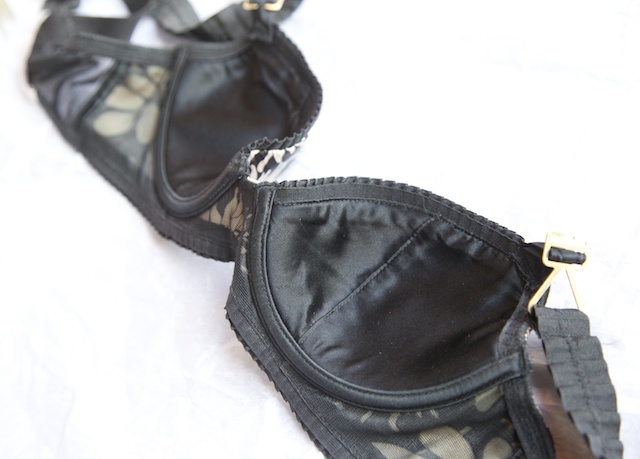
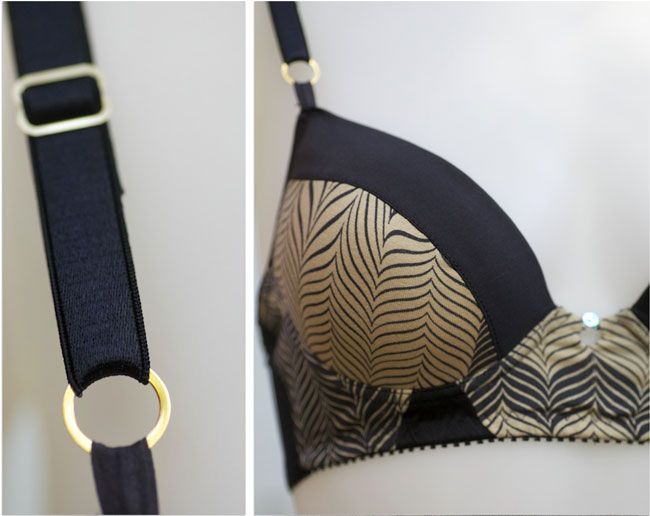
I like using foam linings when I want a supporting bra but also want to use an outside cup fabric that’s really light or stretchy. For example, I made these bras from rayon jersey scraps because I loved the print, and the foam gives them shape and support.

Making a Foam Cup Bra | Cloth Habit

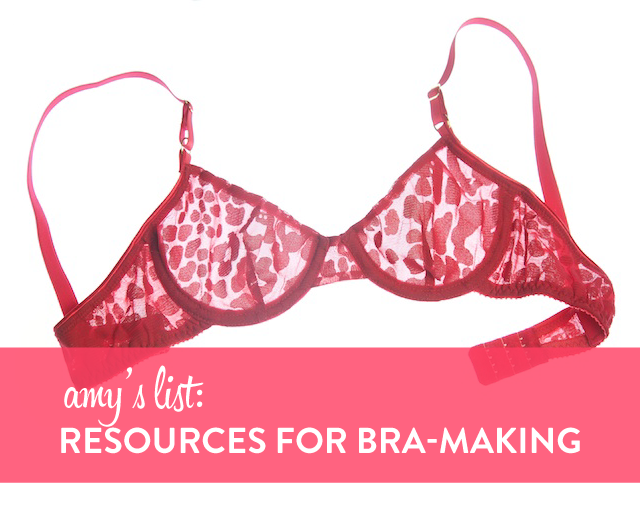
I’ve been promising a tutorial on these forever, so here we go! Over the next three posts, I’ll be sharing how I adapted a bra pattern for a foam lining, along with a few construction tips. Some of these techniques can also be used for making foam cups to insert into a swimsuit or bodysuit, too!

Today I’m going to cover materials…

Materials You Need

  • bra pattern
  • sheet foam, approximately 1/8 yard
  • materials and notions for making one bra
  • sheer or light tricot lining (optional, for making seam tape)
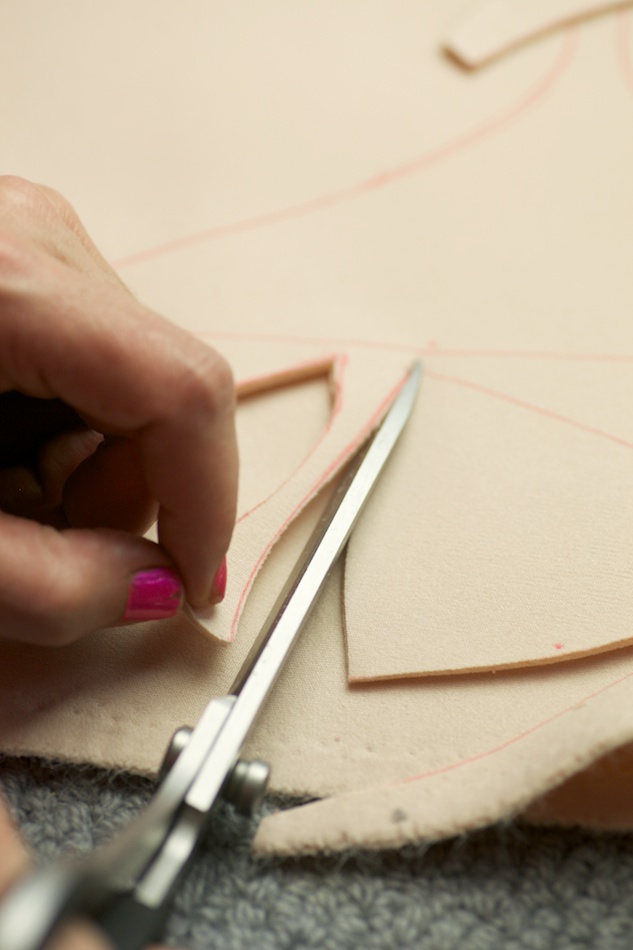
  • manila folder, cardstock, or sturdy paper on which to re-trace some of your pattern pieces (avoid tissue–it is impossible on foam!)

Patterns: To follow along with these tutorials, you can use any underwired bra pattern that fits, provided the cups fit in non-stretch fabric and the bra is a full frame (aka full band) style. Frameless bras require slightly different pattern adaptations.

For cup fabrics, the world is your oyster. You can try a lycra/spandex type fabric, lace, any knit, or even something like a satin woven! For this tutorial I chose a blush stretch silk charmeuse, scraps of which were in my stash.

Making a Foam Cup Bra | Cloth Habit

Where to Buy Foam

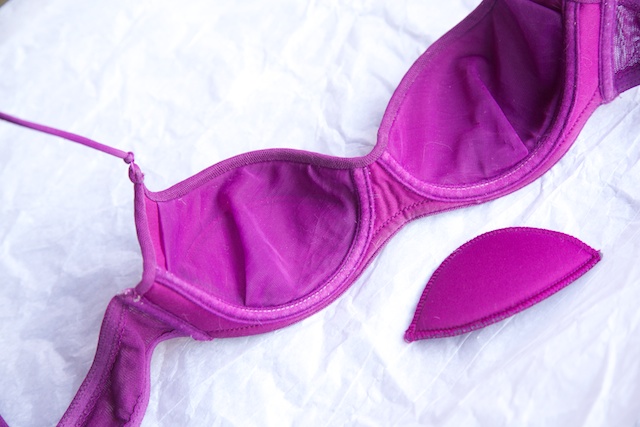
Sheet foam suitable for bra-making goes by a few different terms. These foams can have either a brushed or satin tricot finish on the outside. Sometimes they have some spandex/lycra content for a little bit of “give”. They can be anywhere from 2-5mm thick (usually around 1/8″), and some are spongier than others. I’ve sampled foams from four different retailers, and in my experience most of these them adapt to the body and eventually flatten a bit with wear.

Here’s where you can find them (links go to the page with sheet foam products):

Note: Both Spandex House and Spandex World sell several weights of spacer foam, not all of which may be suitable for a bra. I recommend getting a sample first (both are happy to send those).

Sew Sassy and Fabric Depot also sell a poly fiberfill fabric. These are a wadding bonded to a satin-y tricot, and offer many of the same benefits as sheet foam.

*Interesting factoid: Spacer foam is a distinct type of foam that looks and behaves a lot like laminate foam, but the foam is not heat laminated to tricot. The foam core and outer layer are knitted together on the same tricot machine, which allows for a more “breathable” foam. Some lingerie brands even market this technology in their bras.

Consider the Silhouette

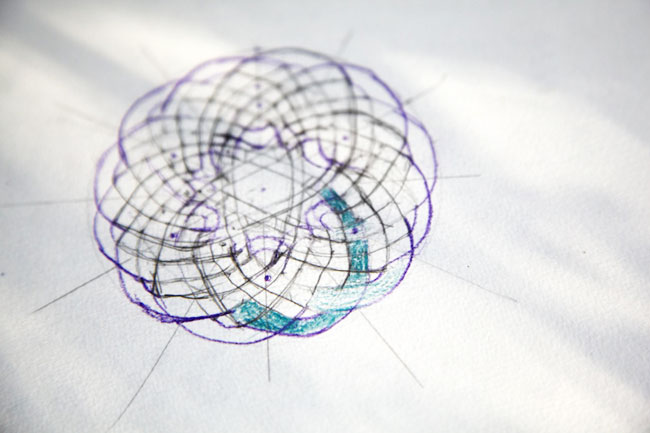
If you have a bit of extra foam to play with, might want to sew up a trial cup in foam to see what shape it takes. I find this kind of fun, actually. The pattern may have a good fit and shape in softer fabrics but in foam the shape will be slightly different. Sometimes I even tape together a printer paper version of my cups to get a rough idea of the silhouette:

Making a Foam Cup Bra | Cloth Habit

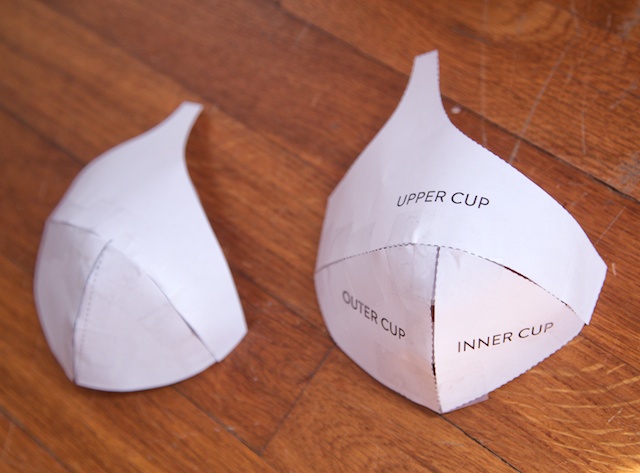
I added a second seam to the bottom piece of a two-piece cup for a rounder cup. Adding this seam is actually very easy!

Of course paper isn’t going to tell you everything but it’s still a good way to visualize in 3D. I also tape up a paper cup and hold it up to myself so I can see if my strap attachment point is located in a comfy place.

Tomorrow I’ll share my pattern adaptations and get started on the sewing!

p.s. Just in case anyone asks–this tutorial is not for a seamless bra or a push-up bra. There are many styles and techniques to foam bras so hopefully this tutorial will give you ideas you can experiment with!

See more posts in the series Make a Foam Cup Bra.

Spring Cleaning

Last week I started to catch up on my blog reading and was completely sidetracked by the wonderful Wardrobe Architect series on the Coletterie blog. I’ve been reading others’ experiences in following along and I just knew I’d get sucked into it! Since January, Sarai has been writing on a number of topics on personal style and wardrobe curating.

Over Christmas, I was already thinking it was time to do major wardrobe (and fabric stash) overhaul, so this series couldn’t have come at a better time. At first I wanted to overhaul my closet just to conserve space, but then it became an itch to gesso the entire canvas. I had a free Saturday last weekend, so I went into Spring Cleaning Overdrive and spent a good six hours taking apart my closets from top to bottom.* I even went after my makeup, accessories, and lingerie.

Spring Cleaning | Cloth Habit

Before: It’s not that messy, but I really can’t find my scarves in there…. it’s all a jumble.

I purged my closets one other time in my life, before I was married and right before I moved to Europe in my early 30s, but there was no rhyme or reason to it other than that I needed to fit all my belongings into two suitcases. I lost some treasures in the process like my favorite 70s rust color suede jacket with the huge pointy collar and brass snaps.

Spring Cleaning | Cloth Habit

AFTER (left): I can see!

I like how Sarai began the series with some very thoughtful and introspective exercises before moving into more practical ones. I’ve always been a big believer that style is a very personal thing, and expresses so much in self image, lifestyle, social dress codes, and cultural and spiritual values, whether intentionally or not. Or it reacts to those things. Digging a little deeper into the “why of you” is such a great place to start.

I’m sort of a 10,000 leagues-under-the-sea personality so I’ve always loved exploring the deeper matters of what fashion expresses. Over 10 years ago I kept a journal about clothing and its meanings, and loved writing into my own style personality, invariably quoting social theorists, Yeats or the Bible as I went along. I wrote about why I was drawn to certain colors and fragrances and what they meant to me philosophically, or how certain landscapes, my religious upbringing, or interest in Celtic history were naturally expressed in my clothes.

Spring Cleaning | Cloth Habit

Celtic knotwork from my old journal. It’s as addictive as Tetris.

So I love to experiment with fashion but I don’t always know what I’m doing. When I first started this blog, I had just read through some personal style books in an attempt to get better at making conscious wardrobe choices. I think it was all connected to turning 40. What I really wished for was a French godmother to teach me all those French dressing tricks–or as I would put it, the non-tricks–to being a woman of a certain age. I pretty much have the non-tricks down with my hair–I don’t fuss with it–but would love to have more of that knowing with my clothes. One of my favorite books was Nina Garcia’s The One Hundred, which inspired me to start the blog with a goal of sewing ten classic pieces.** I ended up making six of them but it also got me thinking–just because I’m turning 40, do I need to start thinking classic? I tried ballet flats and just don’t like them. Am I getting old with the Chucks high tops? (My favorites now are Supergas.)

And then there was climate confusion. My first full summer in Austin was quite a shock. I didn’t know how to dress or groom in this climate, at all. I missed sweaters, coats, layering–and drapey layering is one thing that has always been a part of my personal style. I couldn’t quite bring myself to wear flip flops. It took a lot of confidence and practice to adjust to bearing skin all the time, wearing strappy shoulder dresses, shorts and sandals eight months of the year–and feeling good in those things.

Although my wardrobe has fleshed out with more summer clothes and in the process I’ve discovered my love of billowy, drapey silk blouses and tanks, it’s still top-heavy with the impractical–too nightlife for my lifestyle, too hot for summer, or just plain ill-fitting.

I look forward to re-thinking some of this with my newly blank canvas. Well, it’s not entirely blank. But I managed to whittle down the party dresses to three. And I left myself with no white tee-shirts or tanks. There is a time a t-shirt must come to an end and transform into one of my husband’s motorcycle rags. I’m excited to plan out a thoughtful wardrobe that starts with a few needed basics and then builds into a little capsule collection for summer.

Have you ever done a major wardrobe purge?

*I used this Wardrobe Detox advice as I was picking through everything. Good stuff!

**Wait, I just realized I passed my three-year blogiversary! I’d totally forgotten about my first post.

Lingerie Friday: The Foam Cup

For most of my early adult life, my knowledge of bra styles began and ended with seamless t-shirt bras. Truth be told, I didn’t like spending money on bras but living in Europe had an effect on my tastes. Now and then I’d get sucked into a candy-colored lingerie boutique or an old-world department store like KaDeWe in Berlin and splurge on something I thought was a bit more exotic. A pretty French lace bra. Back then, even Nordstroms in the U.S. was mostly a sea of seamless bras, except for the occasional lace number by Elle Macpherson–one of the lingerie brands that I think changed the game of somewhat affordable, la-la lingerie.

One thing I learned in my lingerie explorations that “foam bra” didn’t necessarily equal push-up or seamless bra.

Molded Foam Bras

There are bras in which foam is simply a support or modesty lining, and then there are those which use foam as a shaper or extra padding.

You are probably familiar with the Wonderbra-style pushup bras, which are a molded foam-cup bra in which the foam has more thickness in the bottom. I call that a “plumper bump” (totally non-technical name I just made up!) The bump is there to push the breast volume upward, and it can sometimes be quite extreme. I recently saw a Wonderbra that had what I swear was a 1″ thick plumper bump in the bottom of the foam cup, and this was a 36G.

This is one of my bras, a Calvin Klein push-up with a plumper bump.

Lingerie Friday: The Foam Cup | Cloth Habit

Hopefully you can see the plumping part by its shadow.

A bra can also add push-up effects with a floating foam cookie. These bras usually have a sheer lining pocket into which you can insert the cookie if you want to add volume to the cup or take it out if you don’t.

This is an example of a Cosabella seamless foam bra with a removable foam cookie.

Lingerie Friday: The Foam Cup | Cloth Habit

I should mention that without the cookie, this particular bra doesn’t really add much “size” or volume. The molded cup is fairly thin.

Cut and Sewn Foam

The previous two examples are bras made with a molded foam cup, but there is yet another type of foam bra. In the bra industry, any kind of bra with a seamed cup is normally called “cut-and-sew” style, and that also includes designs which have a seamed foam lining. Seamed foam bras were popular before the Wonderbra trend of the 90s made molded bras ubiquitous, but they are still quite common especially among mid-range and luxury brands. Are they more expensive to produce than molded bras? I don’t know.

An example of an Elle Macpherson strapless bra with cut-and-sew foam:

Lingerie Friday: The Foam Cup | Cloth Habit

The outside of a Stella McCartney bra with cut foam.

Lingerie Friday: The Foam Cup | Cloth Habit

You can’t even see the foam on the inside, which is completely lined with silk charmeuse. So luxurious!

Lingerie Friday: The Foam Cup | Cloth Habit

If you were take apart any of the above bras, you’d find that the foam thickness and flexibility really vary. My personal favorite seamless t-shirt bra is made from what Chantelle markets as “memory foam” (which I think is probably a lightweight spacer foam with a bit of spandex). I like it because it does feel light and invisible under t-shirts (that and it really fits me well).

One of the common misconceptions about “foam bras” is that they are all push-up or volume-adding bras. Most of the time, foam is really just an extra layer of support, or the entire layer of support. A true push-up bra has a lot of little tricks in it, not just in the thickness of the foam–wire shape, bridge and the mold over which the cup is formed all play a part in pushing your volume around. Bra-makers have been trying to patent these ideas since bras were bras!

Where to Find It

On the bottom of my Bra-making Supplies page, I included a list of stores that offer sheet foam for bras. My favorite comes from Sew Sassy–it’s light, flexible and very soft. Many bra-making suppliers also sell molded cups.

Aside from my one experiment with a molded cup bra, I much prefer making seamed bras. In my experience they have more potential for a totally custom fit. But as you can see from my (worn) examples, there is a place and reason for all sorts of bras in my lingerie drawers.

Next week I’m (finally!) going to share a seamed foam cup tutorial. I think I’ll be breaking this down into three posts, as I wanted to include as many photos as possible. See you then!

♥Amy

Lingerie Friday: Where Do You Find Your Fabrics?

Over the last year I’ve gotten many great emails with all sorts of questions about bra and lingerie making. Some readers have asked about techniques, and others about patterns and fitting. I love getting these kinds of emails and if I don’t know the answer, I hunt for it. So I thought it was about time I started to dedicate some regular posts to your questions.

Your #1 question, by leaps and bounds: Where do you find your bra and lingerie fabrics? To which I often reply, all over the place! There are some tips in this post of the Bra-making Sew Along, and I often include my sources at the bottom of my sewing projects, but I have never centralized it all in one place. So today I published a new page on my site to make your research a bit easier.

Lingerie Friday: Where to Find Bra Supplies | Cloth Habit

Click above to visit the new page! For the rest of today’s post I’ll share a few shopping tips along with some of my personal favorites.

Where Do I Start?

If you are brand new to bra-making, I highly recommend starting out with a bra-making kit. You may not like the colors or the fabrics in a particular kit, but it’s a very good way to get used to all the little tidbits you need, especially while you experiment with construction and fitting. After a bra or two you will get a feel for the fabrics and notions you prefer and need. On the supplies page, I noted all the stores which sell bra-making kits. Some of these kits are specifically designed for making a company’s particular patterns. I’m able to use most of a kit in my own self-drafted bras and what I don’t like I stash away for “bra muslins”.

Annnd, because I’m a rather small size, I’m often able to get two or even three bras out of one kit.

My Personal Favorites For Basics

I buy most of my basic bra supplies from Fabric Depot Co. in Texas and Merckwaerdigh in Netherlands. I stash several basics in white and dye them. This practice works for me because I love to dye and I’m a bit of a perfectionist with color!

From Fabric Depot Co.: strap elastic, plush band elastic, tricot linings, medium weight powernet for firmer bands. All of these things are top quality but in limited colors. Most of her elastics are nylon-based and not polyester so I am able to dye them. For strong, supportive bra cups, I buy the “opaque stabilized tricot”. This is very much like the Duoplex that Bra-makers Supply uses in their kits, and it takes nylon dye beautifully!

From Merckwaerdigh: hook & eyes, neckline elastic (for the stabilizing the top of a lace cup), underwire channeling. I love her channeling. She sells a ton of colors of these products but I usually buy white!

Underwires: I buy my personal bra wires from Sew Sassy, as I like their wider shape. For larger cup bras, my favorites come from Sewing Chest UK. Most of their wires are very firm gauge steel, which means they hold their shape well, and come in a great range of shapes and lengths.

Laces: I’ve turned into a bonafide lace huntress. These days I trawl Etsy and Ebay for both stretch laces and non-stretch “tulle” laces for for more supportive cups. On my resources page I mentioned some of my favorite shops and some search tips.

Gold and silver hardware: Sewing Chest UK and Bra-makers Supply. As some of you have discovered, dyeing the nylon-coated rings and sliders isn’t the easiest thing in the world–some dye colors take to them better than others. While you can find pre-colored nylon rings, I just pass in favor of silver and gold. They are a bit more expensive but such a lovely extra touch on a bra. Clear plastic is always a neutral option but I just don’t like plastic. I also rescue the hardware from old bras.

Lingerie Friday: Where to Find Bra Supplies | Cloth Habit

It never hurts to ask: Many of the shops that specialize in bra, lingerie or corsetmaking are one-woman run businesses. And they often have product in their inventory that they don’t list online or in their catalogs. If you are having trouble finding something close to your favorite underwire, or want a different color of something, or more or less of a certain fabric, call or email them. I have found some great products this way, and all of the women behind these shops are super friendly.

Swatches are My Best Friends

When I was first learning about bra fabrics, I collected swatches. This was a great way to get a feel for a fabric before committing to yardage. I recommend swatches before purchasing just about any type of tricot or powernet/stretch mesh. The quality, weight, stretch and drape of these fabrics vary wildly, and oh, how I wish sellers would include gram or ounce weights in their descriptions. (Hint, hint–I know you’re reading!)

But I’d love to help you navigate. I look forward to doing just that in an upcoming series of posts that will help demystify lingerie fabrics. Next week, I’m going to talk foam, foam, foam.

Is there a fabric or notion you have had trouble finding? Or is there a fabric in one of your favorite store bras you wish you could find?

Spring Fever & Studio Visit

Hola!

Patternmaking Rulers | Cloth Habit

Where does March go? It often feels like such a river of activity. Some of you may know that our fair city turns into almost two cities during South by Southwest (in numbers of people, traffic jams, and restaurant openings). And it is always the same week as my man’s birthday, which also happens to be St. Patrick’s Day. Then there is the nonstop everything-is-greening up and I become obsessed my wildflower garden and keeping the weeds out, which seem to be on steroids this year.

The last couple of weeks I have been trying to catch little snippets of time to sew, for the most part I’ve been using my sewing time deep in the hidey hole of drafting and grading bra patterns (I’m really working on large cup sizes–which has been a huge learning curve but I have the assistance of a very helpful fit model). So I thought I’d share some snippets from my new studio! Wanna see?

Studio Visit | Cloth Habit

On the left are fabrics I’ve dyed for lingerie samples. My friend sold me some bonafide store racks so I could hang and see all the fabrics that were normally squished into a closet.

After a month of begging my husband let me buy this amazing vintage hardware store cabinet. We’ve always wanted an old library card catalog to store “little bits”, and this is the next best thing!

Studio Visit | Cloth Habit

I was torn about whether to put this at home or in my studio but now I have a place to store all my elastics, findings… or old bras that I keep to either investigate and salvage findings…

And the icing on the cake: a new machine!

Studio Visit | Cloth Habit

You may remember that a month or so ago, I busted my Juki F600 topstitching a pair of jeans. It is still in the process of repair so Derek gave me his blessing to hunt for a new one. At first I was looking for a rental to tide me over, but after spending an afternoon at Austin’s Northwest Sewing Center trying out the Juki TL-2010, I was sold and bought the floor model right off their hands (better price).

Studio Visit | Cloth Habit

This is a straight-stitch only machine. It is traditionally marketed as a quilter’s machine, but I think it makes an amazing dedicated dressmaking machine if you already have another for zig-zag stitching. I have always wanted an industrial machine and could certainly fit one in this space, but I think this machine makes a great substitute. It doesn’t go as fast as an industrial but at 2000 stitches per minute is much faster than most home machines, which do about 800 stitches per minute. It also takes industrial machine feet and attachments, which is a big bonus for me as I’ve collected quite a few.

I started moving into this space two months ago but it has taken me some time getting used to organizing sewing and project time outside the house. The positives: It’s HUGE. Way more space than I needed, actually, but it’s so great to spread everything out. And it makes the possibility of hosting open studios or lingerie sewing workshops (a goal of mine) much more imminent. And when I’m home I don’t obsess (as much) on sewing and get important stuff done (taxes. laundry. see how easy it is to sew instead?). I spend more time in my garden. The negatives: I can’t just get some wild idea and run over to my sewing machine or cutting table with my pjs on. And I still would rather work on fitting projects in the privacy of my home.

But… if you have tried to start a business or art practice from home, I’m sure you know how difficult it is to separate the personal household work from business work or “studio time”. My hobbies, creative work and my household keeping are all blended so I have always struggled with time management, and having a separate physical space is helping me organize.

My other big issue is light–there are no windows with natural light. But I love taking pictures in the privacy of my own space so much more than “location shooting”. I was kind of shocked at how cool my iPhone photos turned out, even at their usual jacked up ISO, which inspired me to join Instagram. Maybe it will force me to practice impromptu photography a bit more. Anyone have tips for a newbie Instagrammer?

Happy spring!